Works
Blog
-
Ceramic ashtray
![]()
-
Shoes Rack
-
Jean Wallet
-
The Emotional Utilitarian
-
Design Museum
-
Christo early works Exhibition
-
Numeric Skate Demo
-
The British Museum
-
Pitt rivers Museum
- Flax craft central
- Kate lecture
- LCC stiching tutorial
-
BOX by Max Lamb
-
Sheila Hicks: infinite potential
- Instagram viewing 1
- V&A Museum
- CCW MA graduation exhibition
- Scarf knitting
- Natural History Museum
- Tate Morden Museum
- The British Museum 2
- The Egyptian Museum
- Banksy Exhibition
- Tea table
- Cap making
- Unit 1 exhibition
- Remake shoes
- Antony Gormley Exhibition
- Tate Britain
-
Newspaper Ceramic
![]()
- Aromatherapy tray
- Kettle’s Yard
-
Paper samples for unit 2
![]()
- The Fitzwilliam Museum
- How to analyze the case
-
Woodcuts
![]()
- Collect 2024
-
Ceramic extrusion
![]()
- Tony’s cardboard space
- Tony’s tour London
- Ceramic London 2024
-
Wheel-throw learning
![]()
![]()
- CSM shows 2024
- Tony’s tour East London
- Portland Carving tour
- FUMI Casa al mare
![]()
- Silicone Molding in summer break
- London Transportation Museum
- Dongyang Chinese furniture market
- Prototype redoing for previous work
- Jingdezhen visiting
![]()
- London Design Festival 2024
- Hang for Fun lamp
![]()
![]()
- Emotion Breaker stool
![]()
- Reverse Grind table
![]()
Yusen
Info
Previous works by Yusen have delved deeply into themes of functionality, sustainability, and humanization. Yusen’s practice highlights a curiosity about cultural influences and their potential to inform modern design approaches, blending cultural resonance with innovative environmental solutions.
38. Ceramic extrusion


07/03/2024
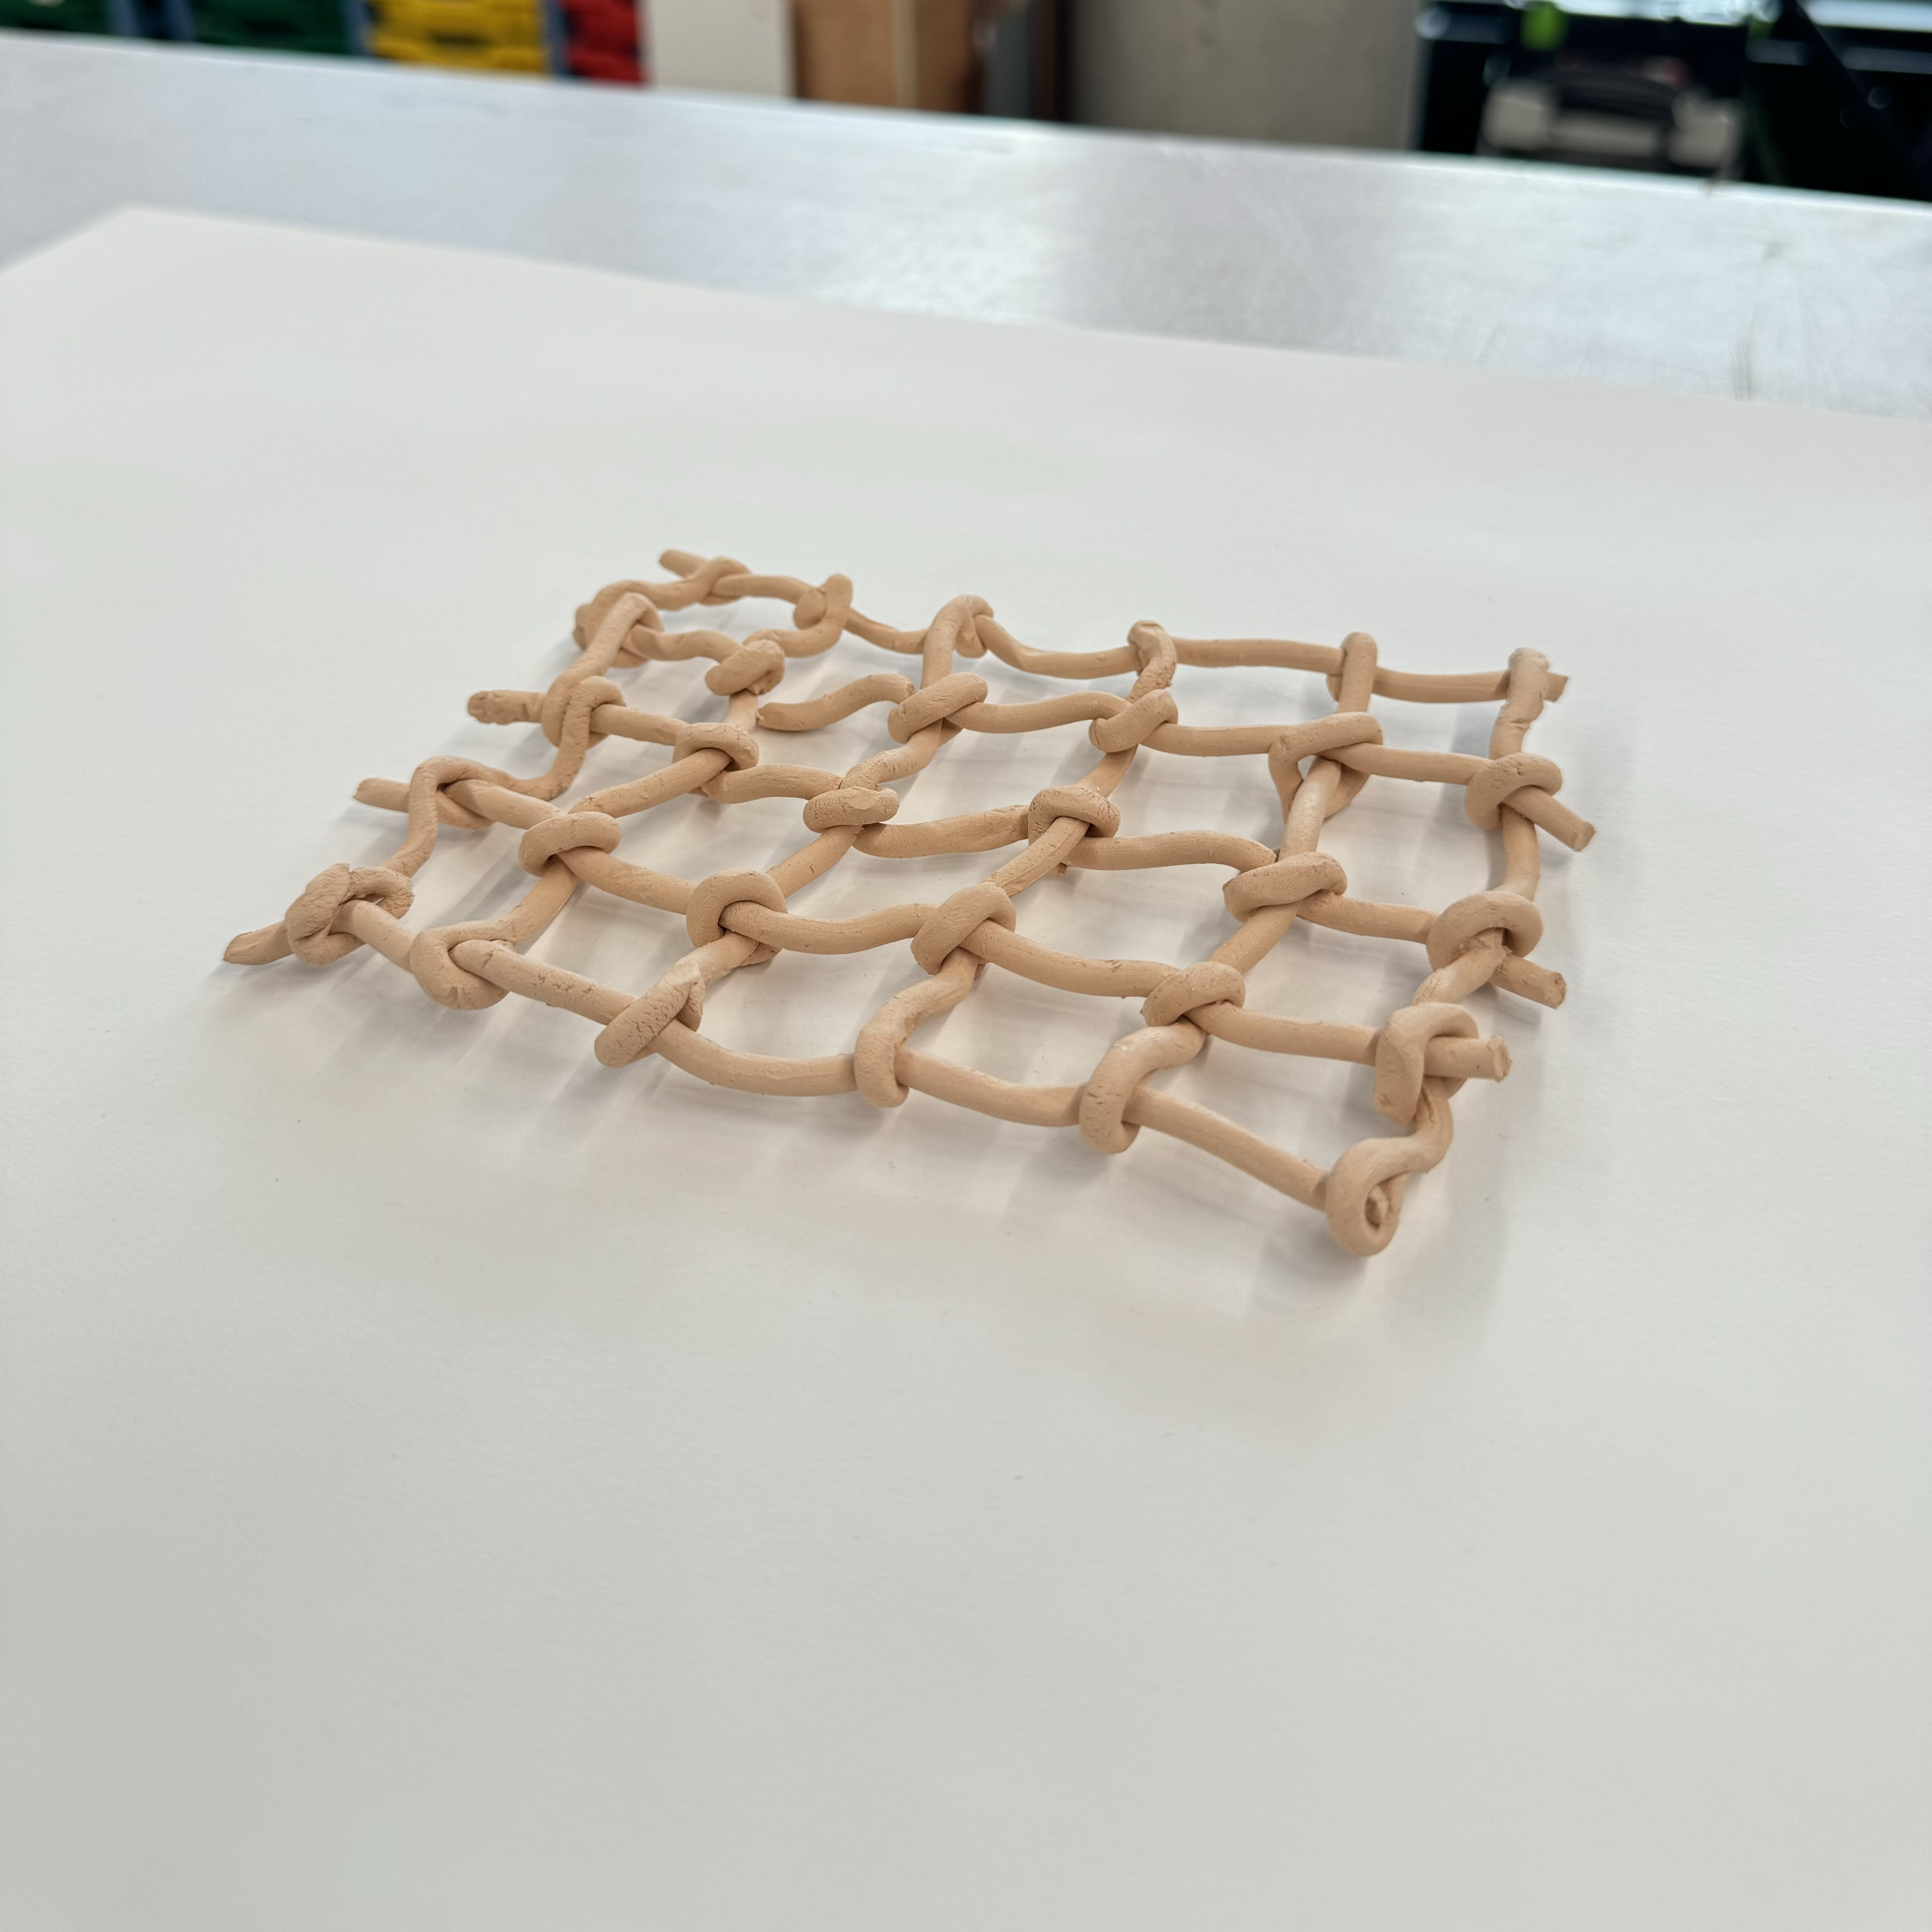
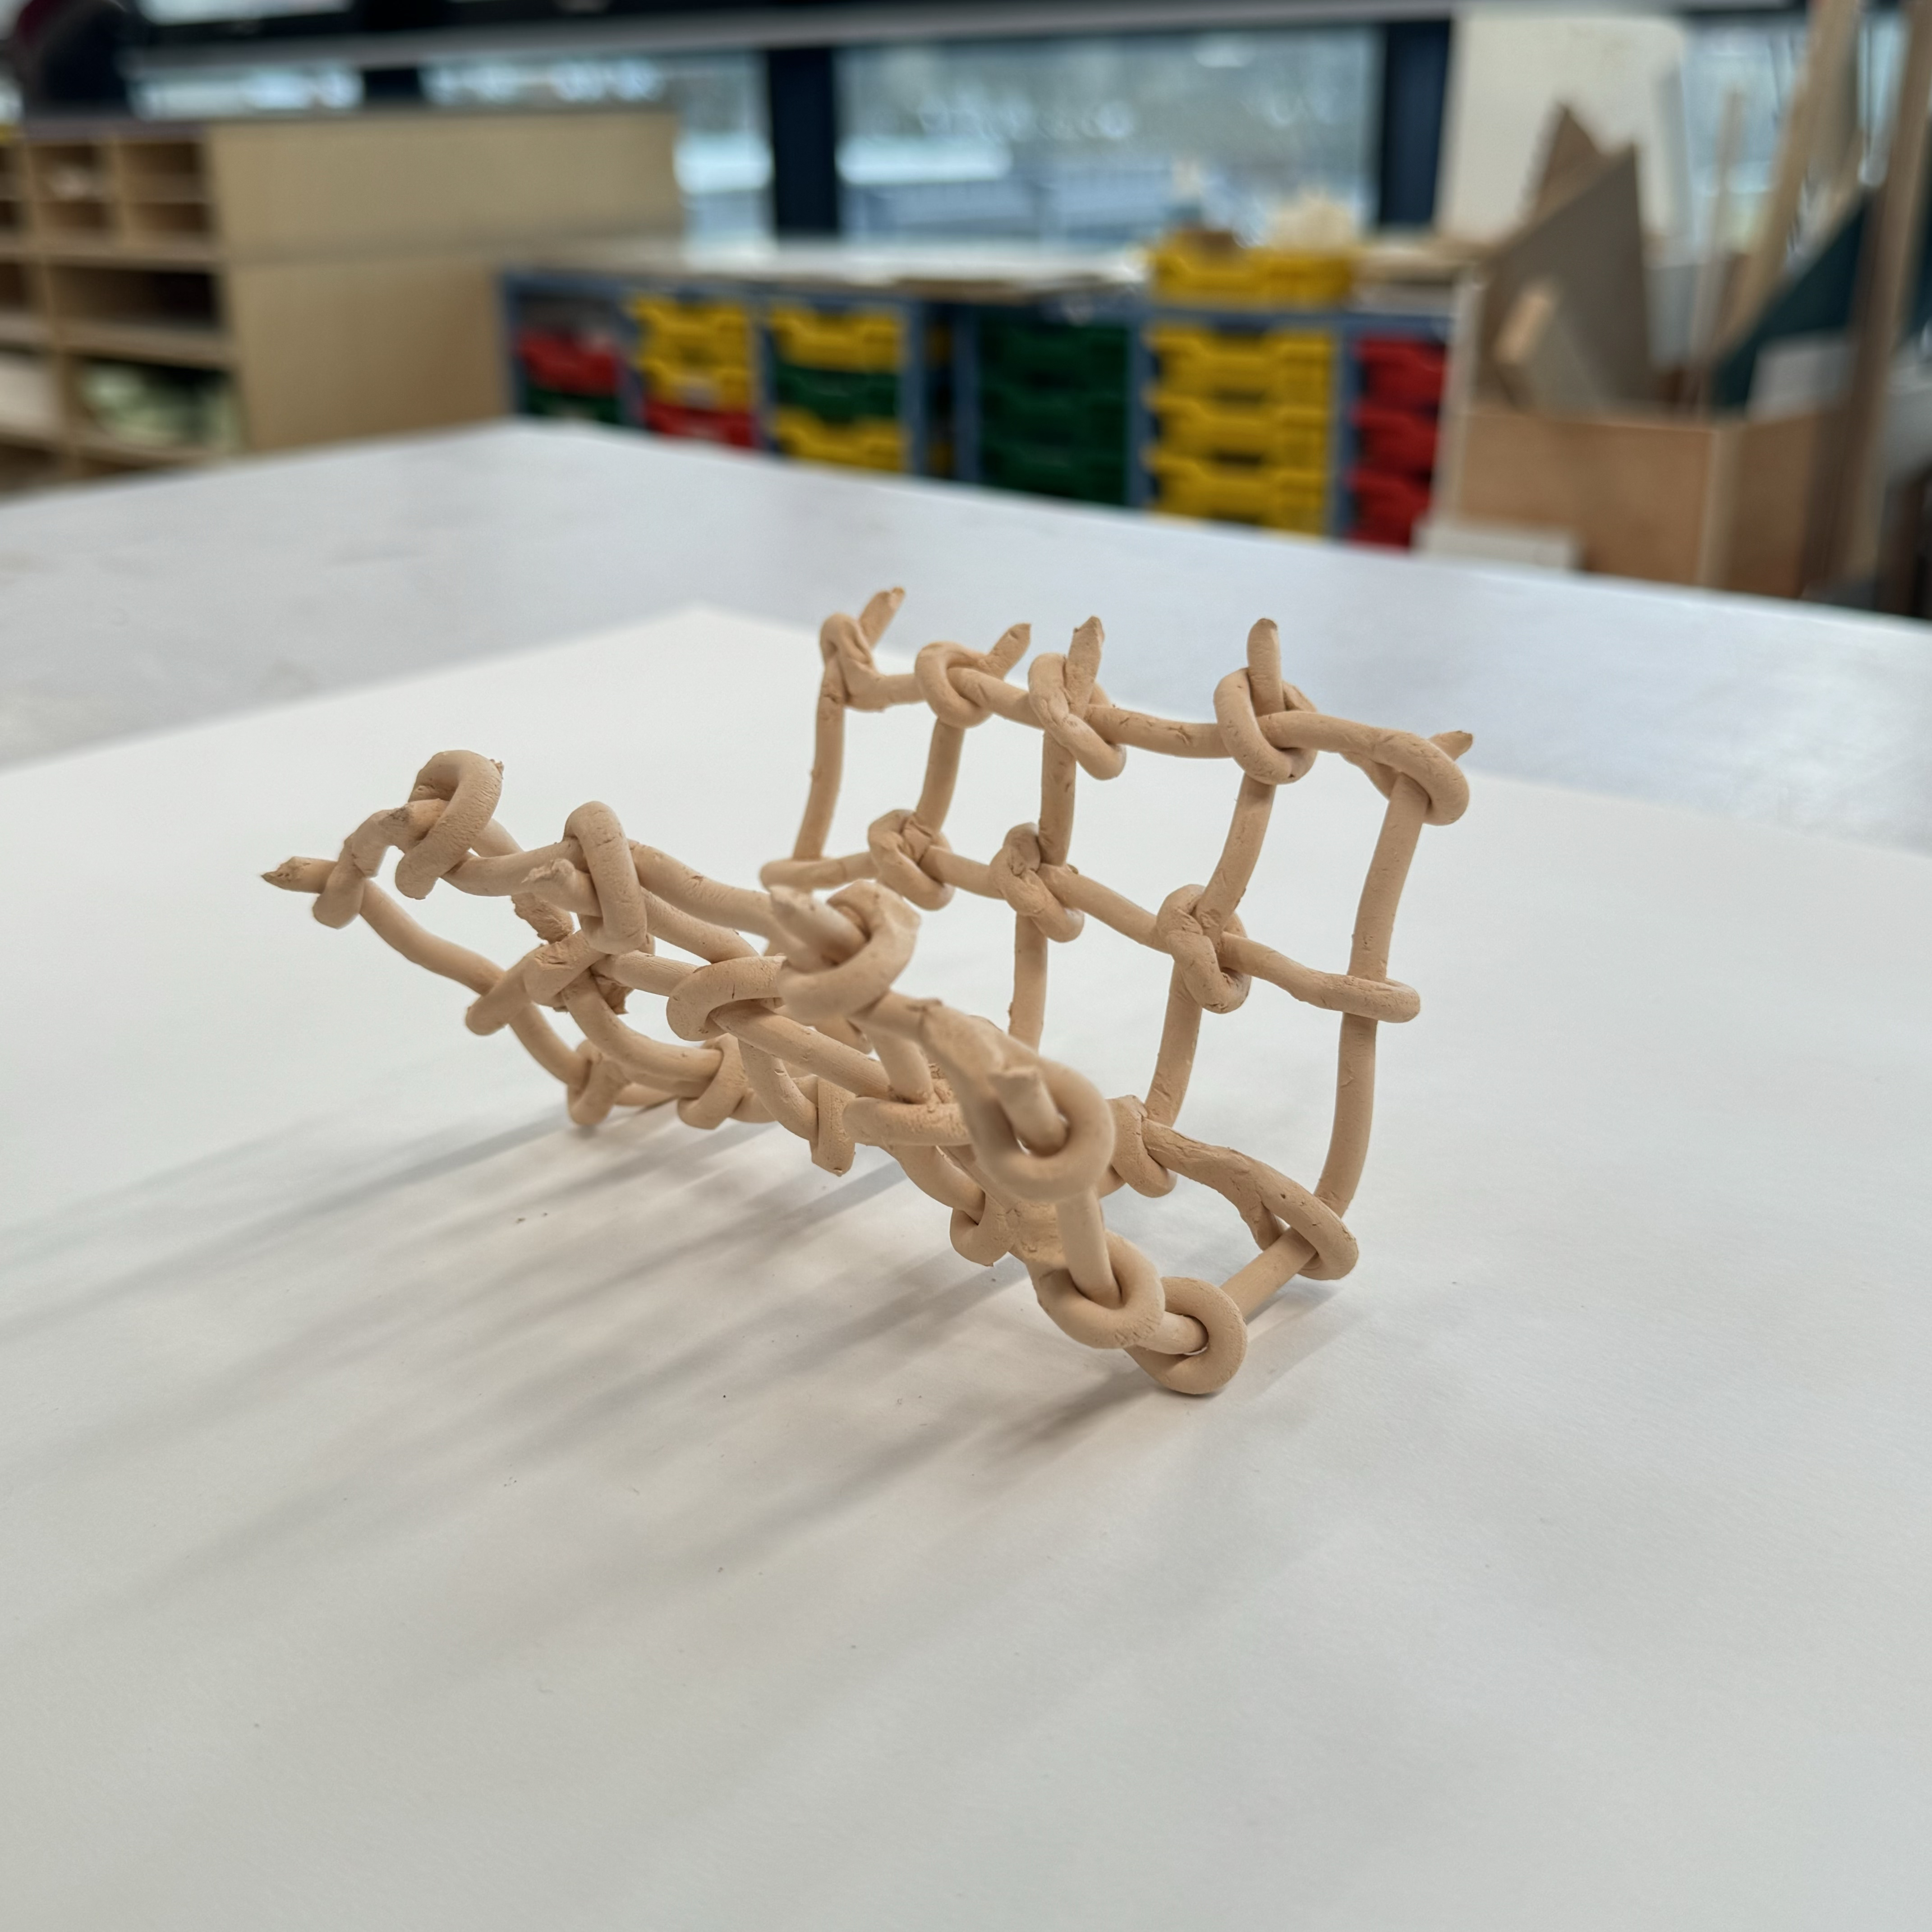
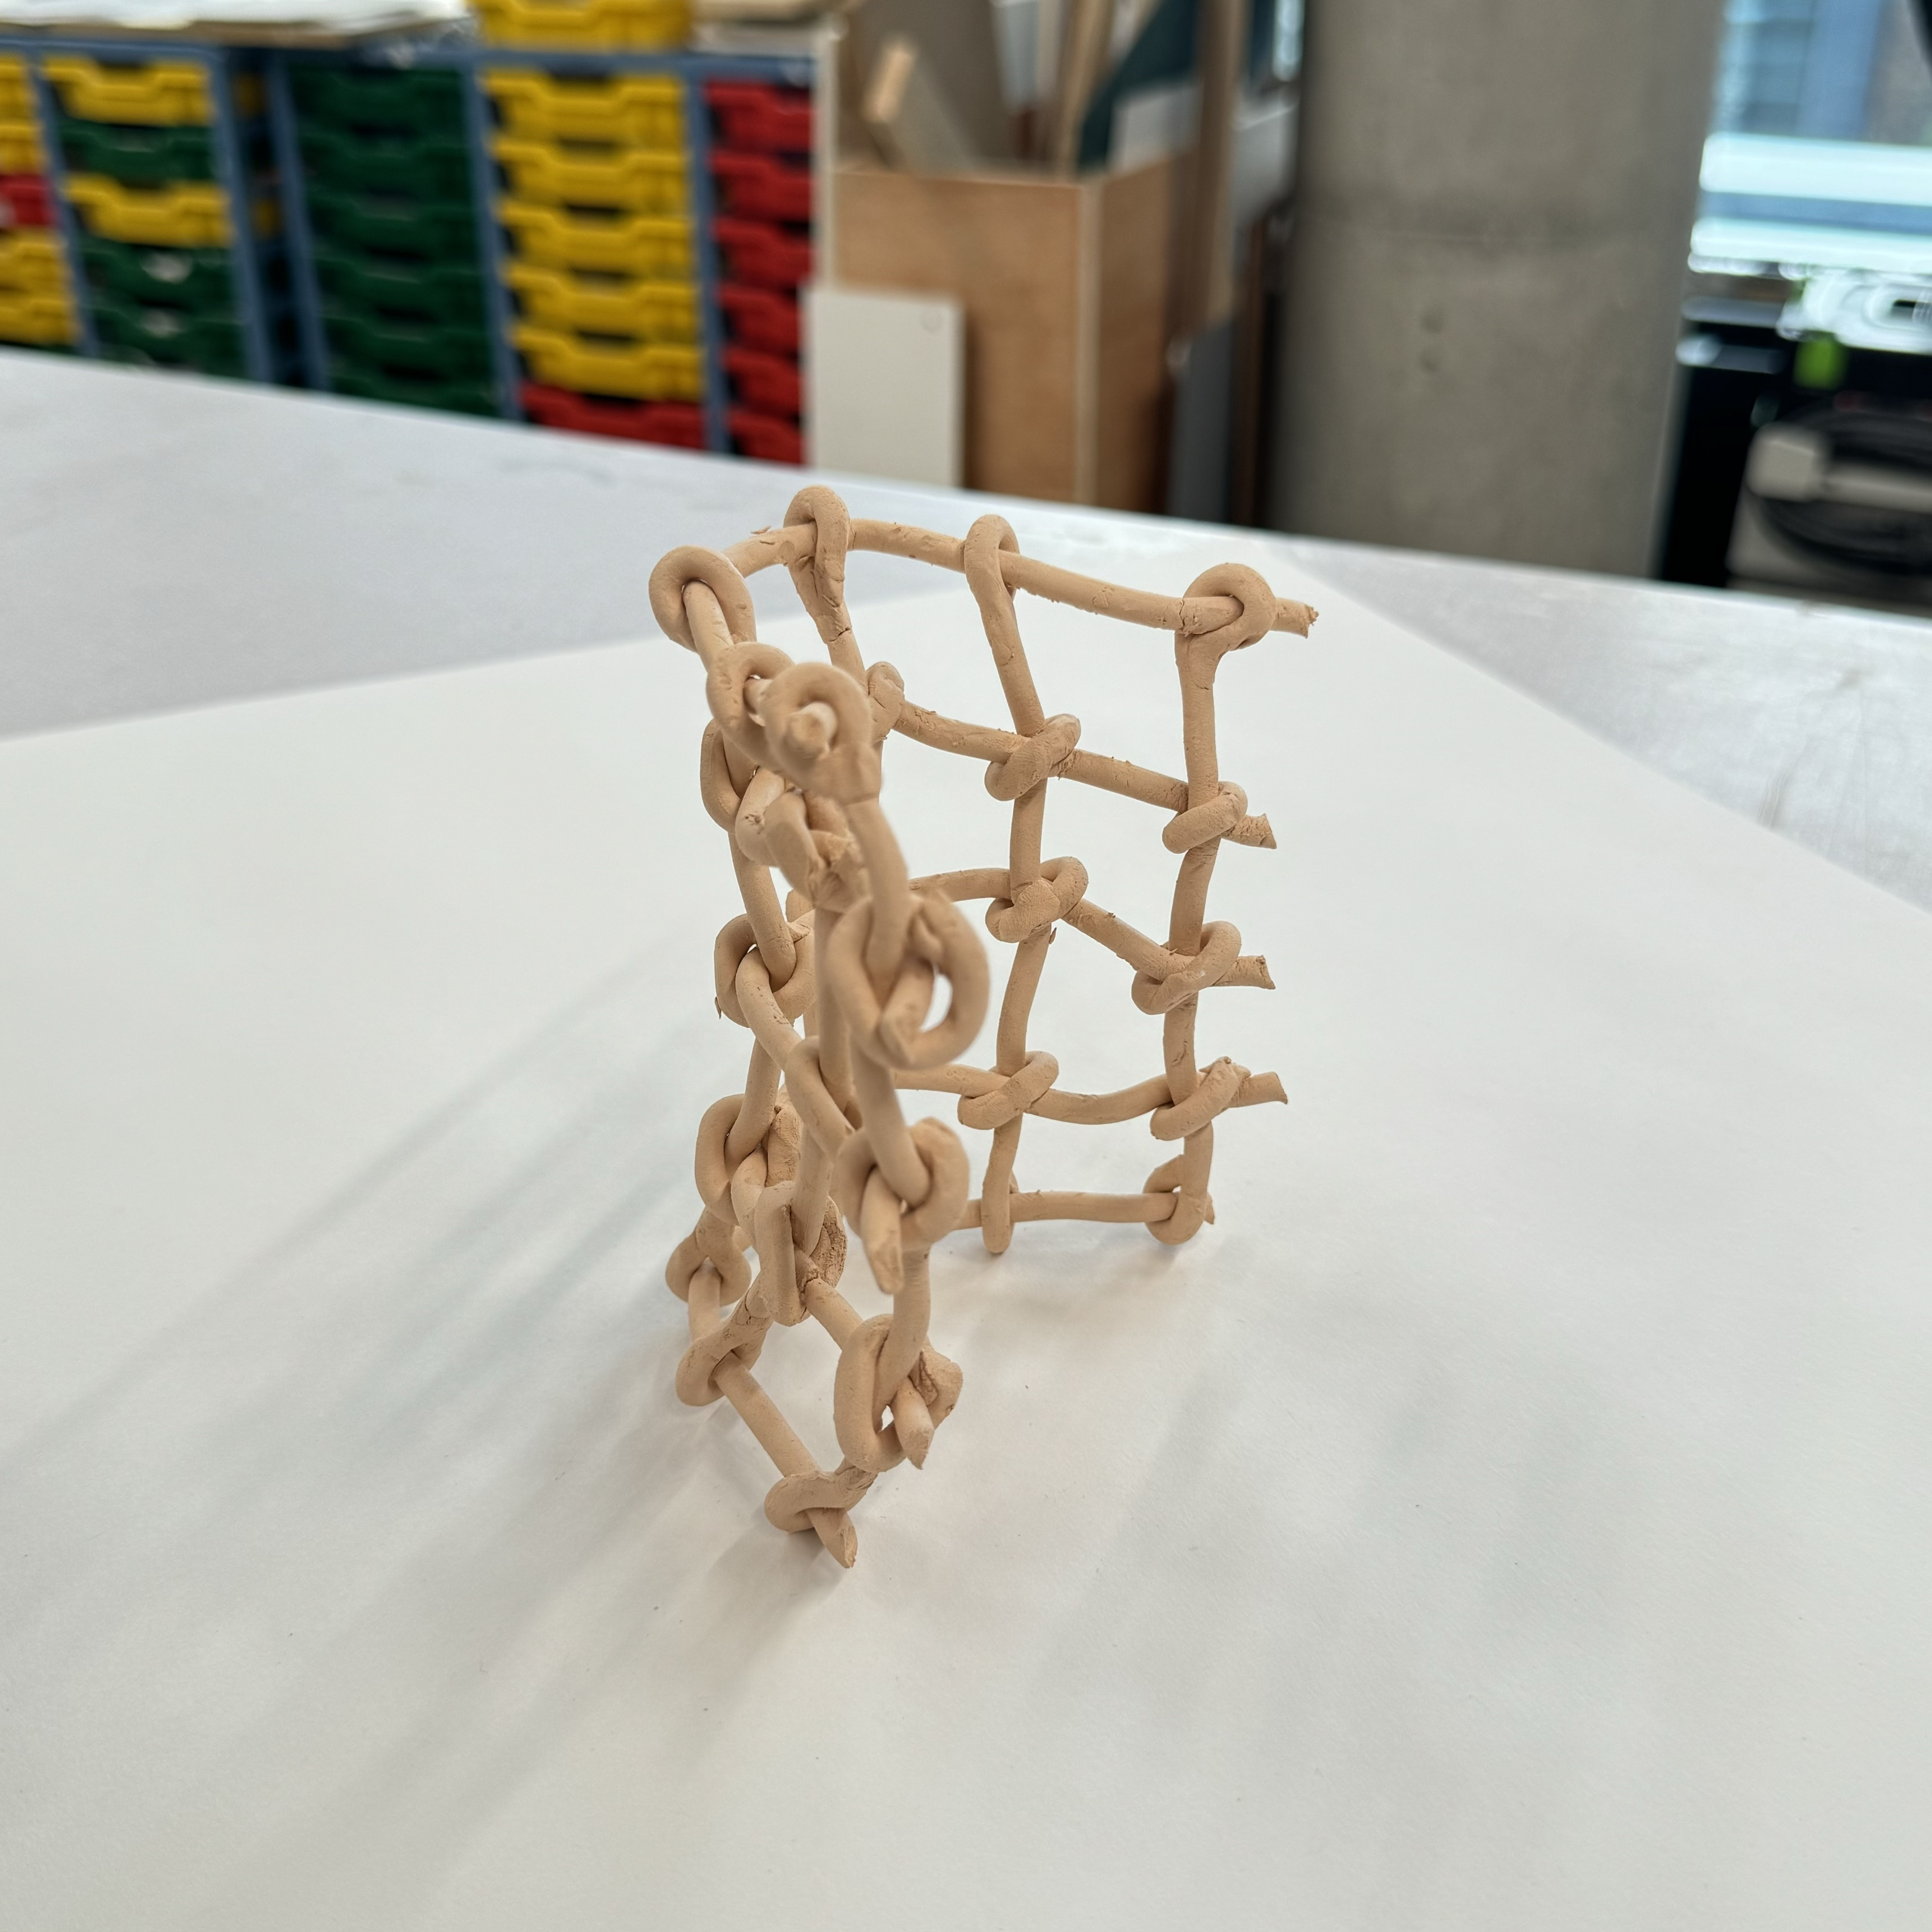
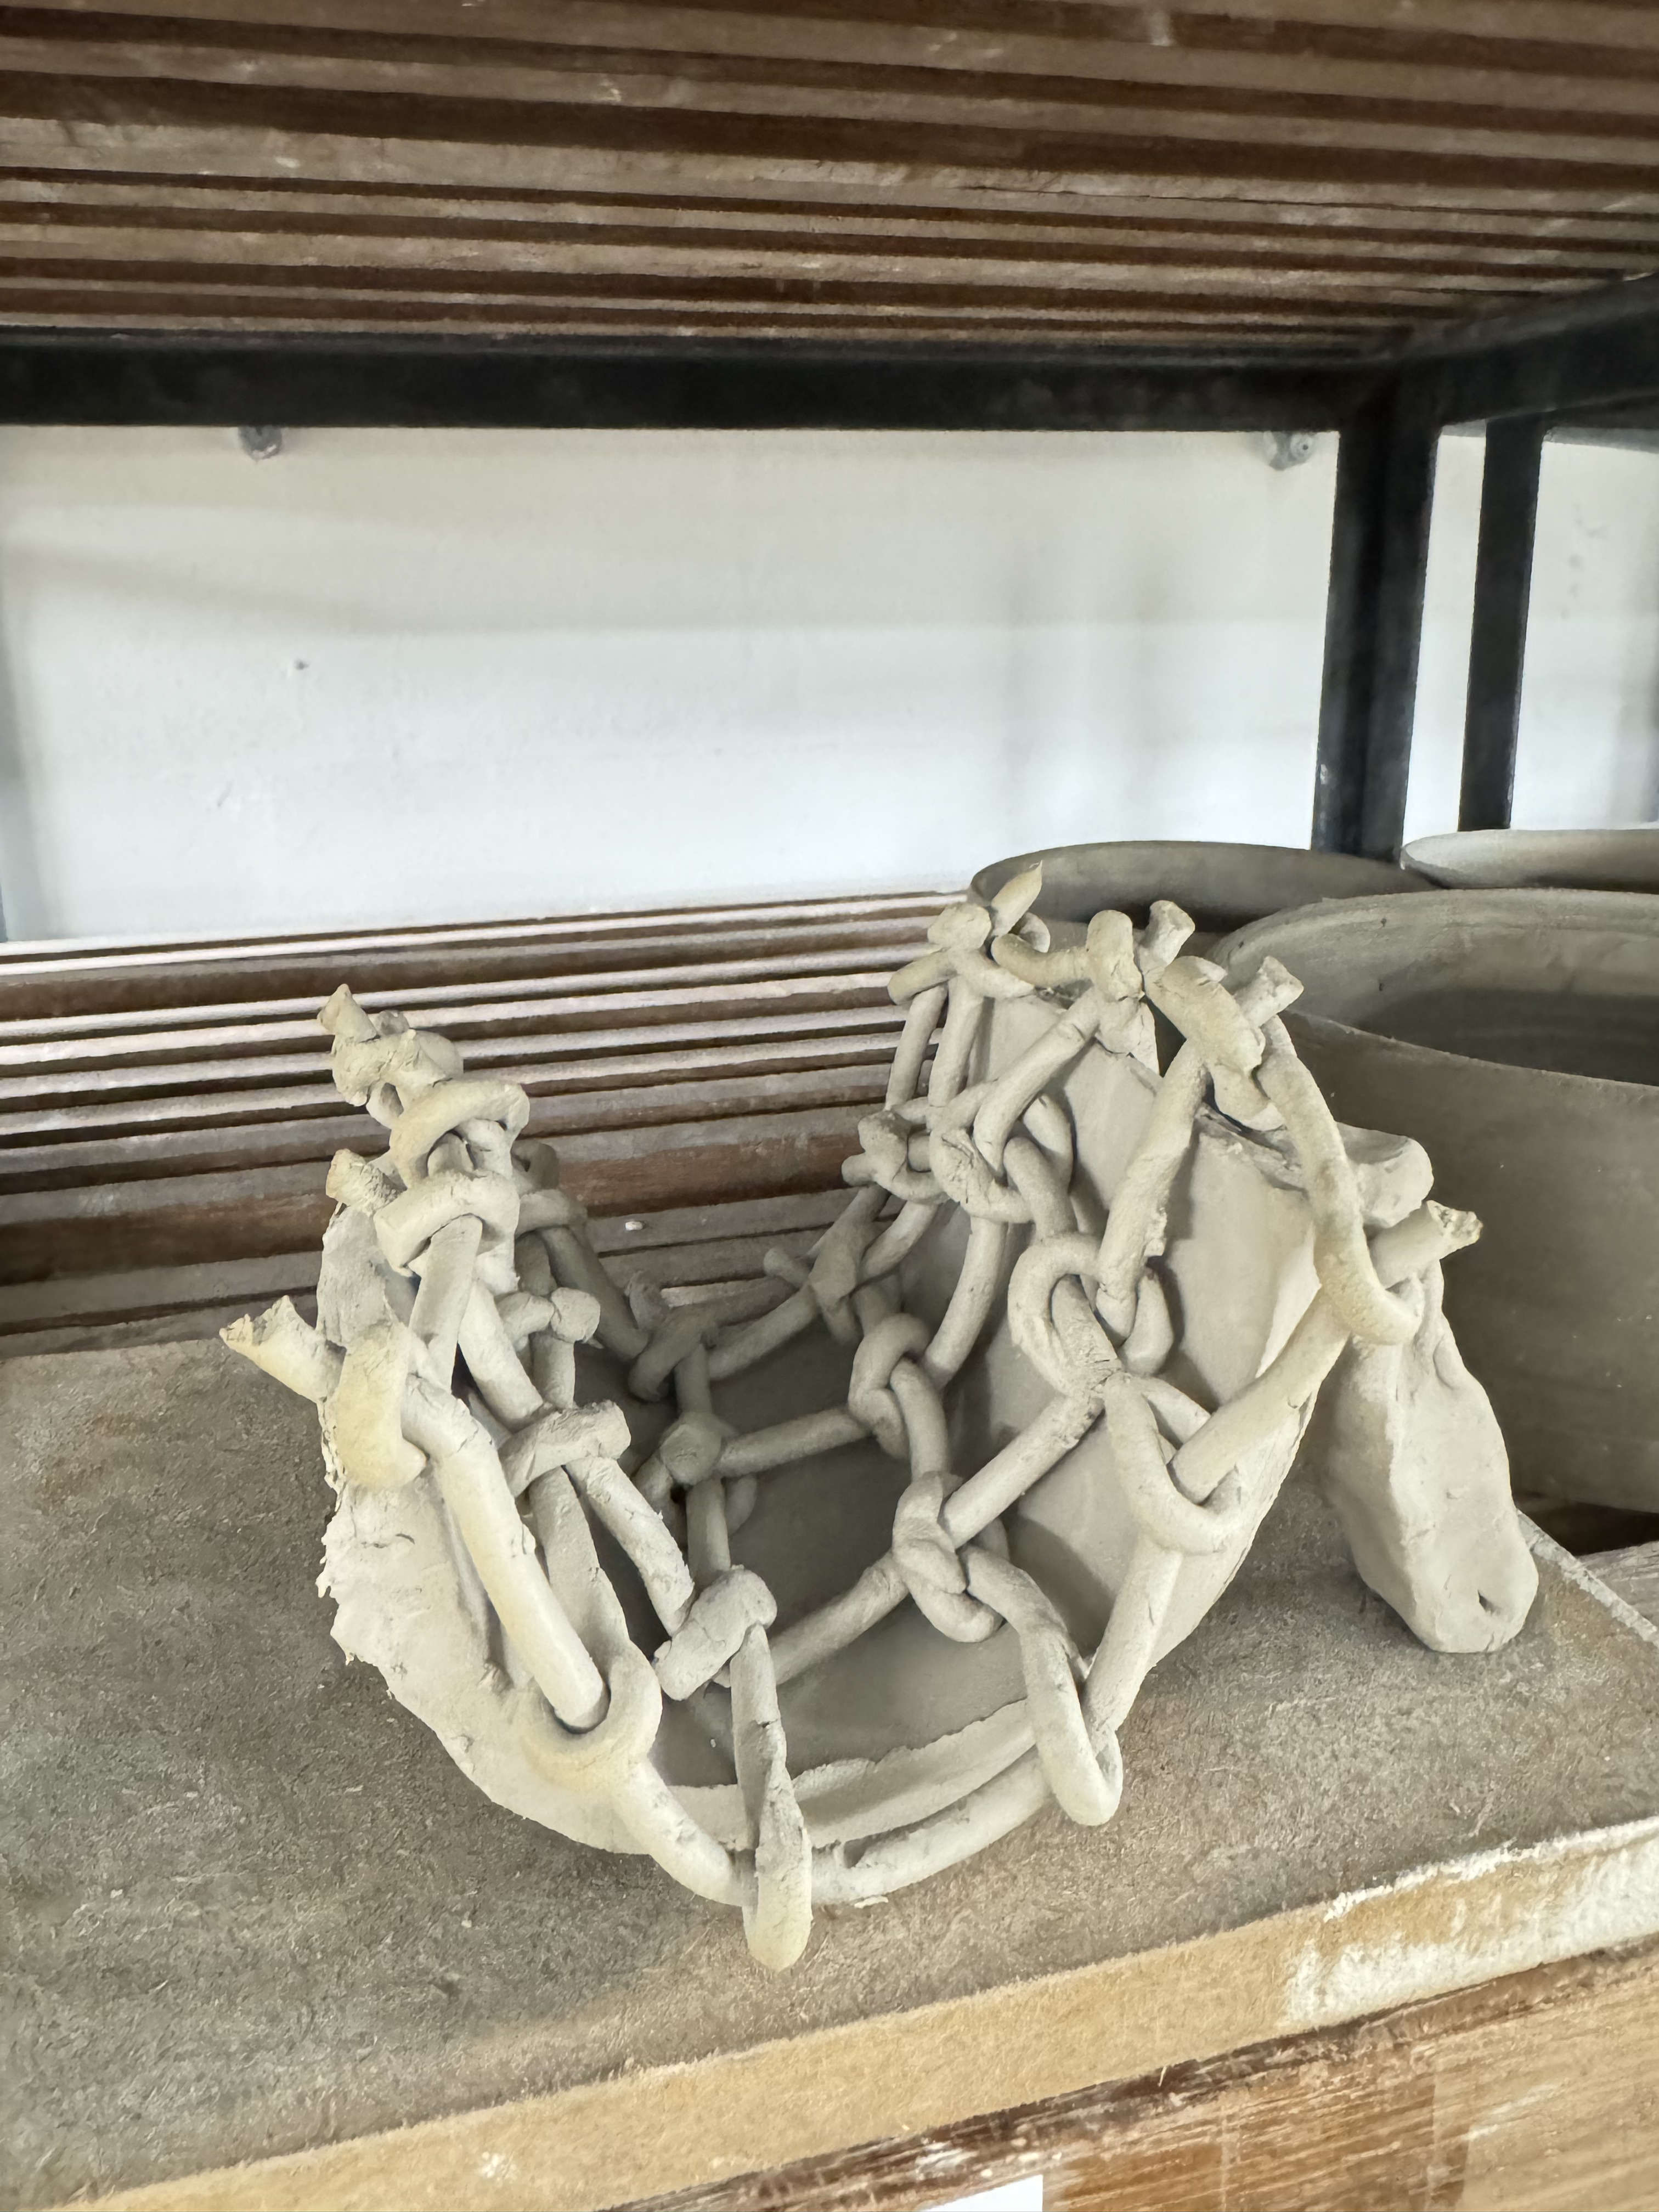
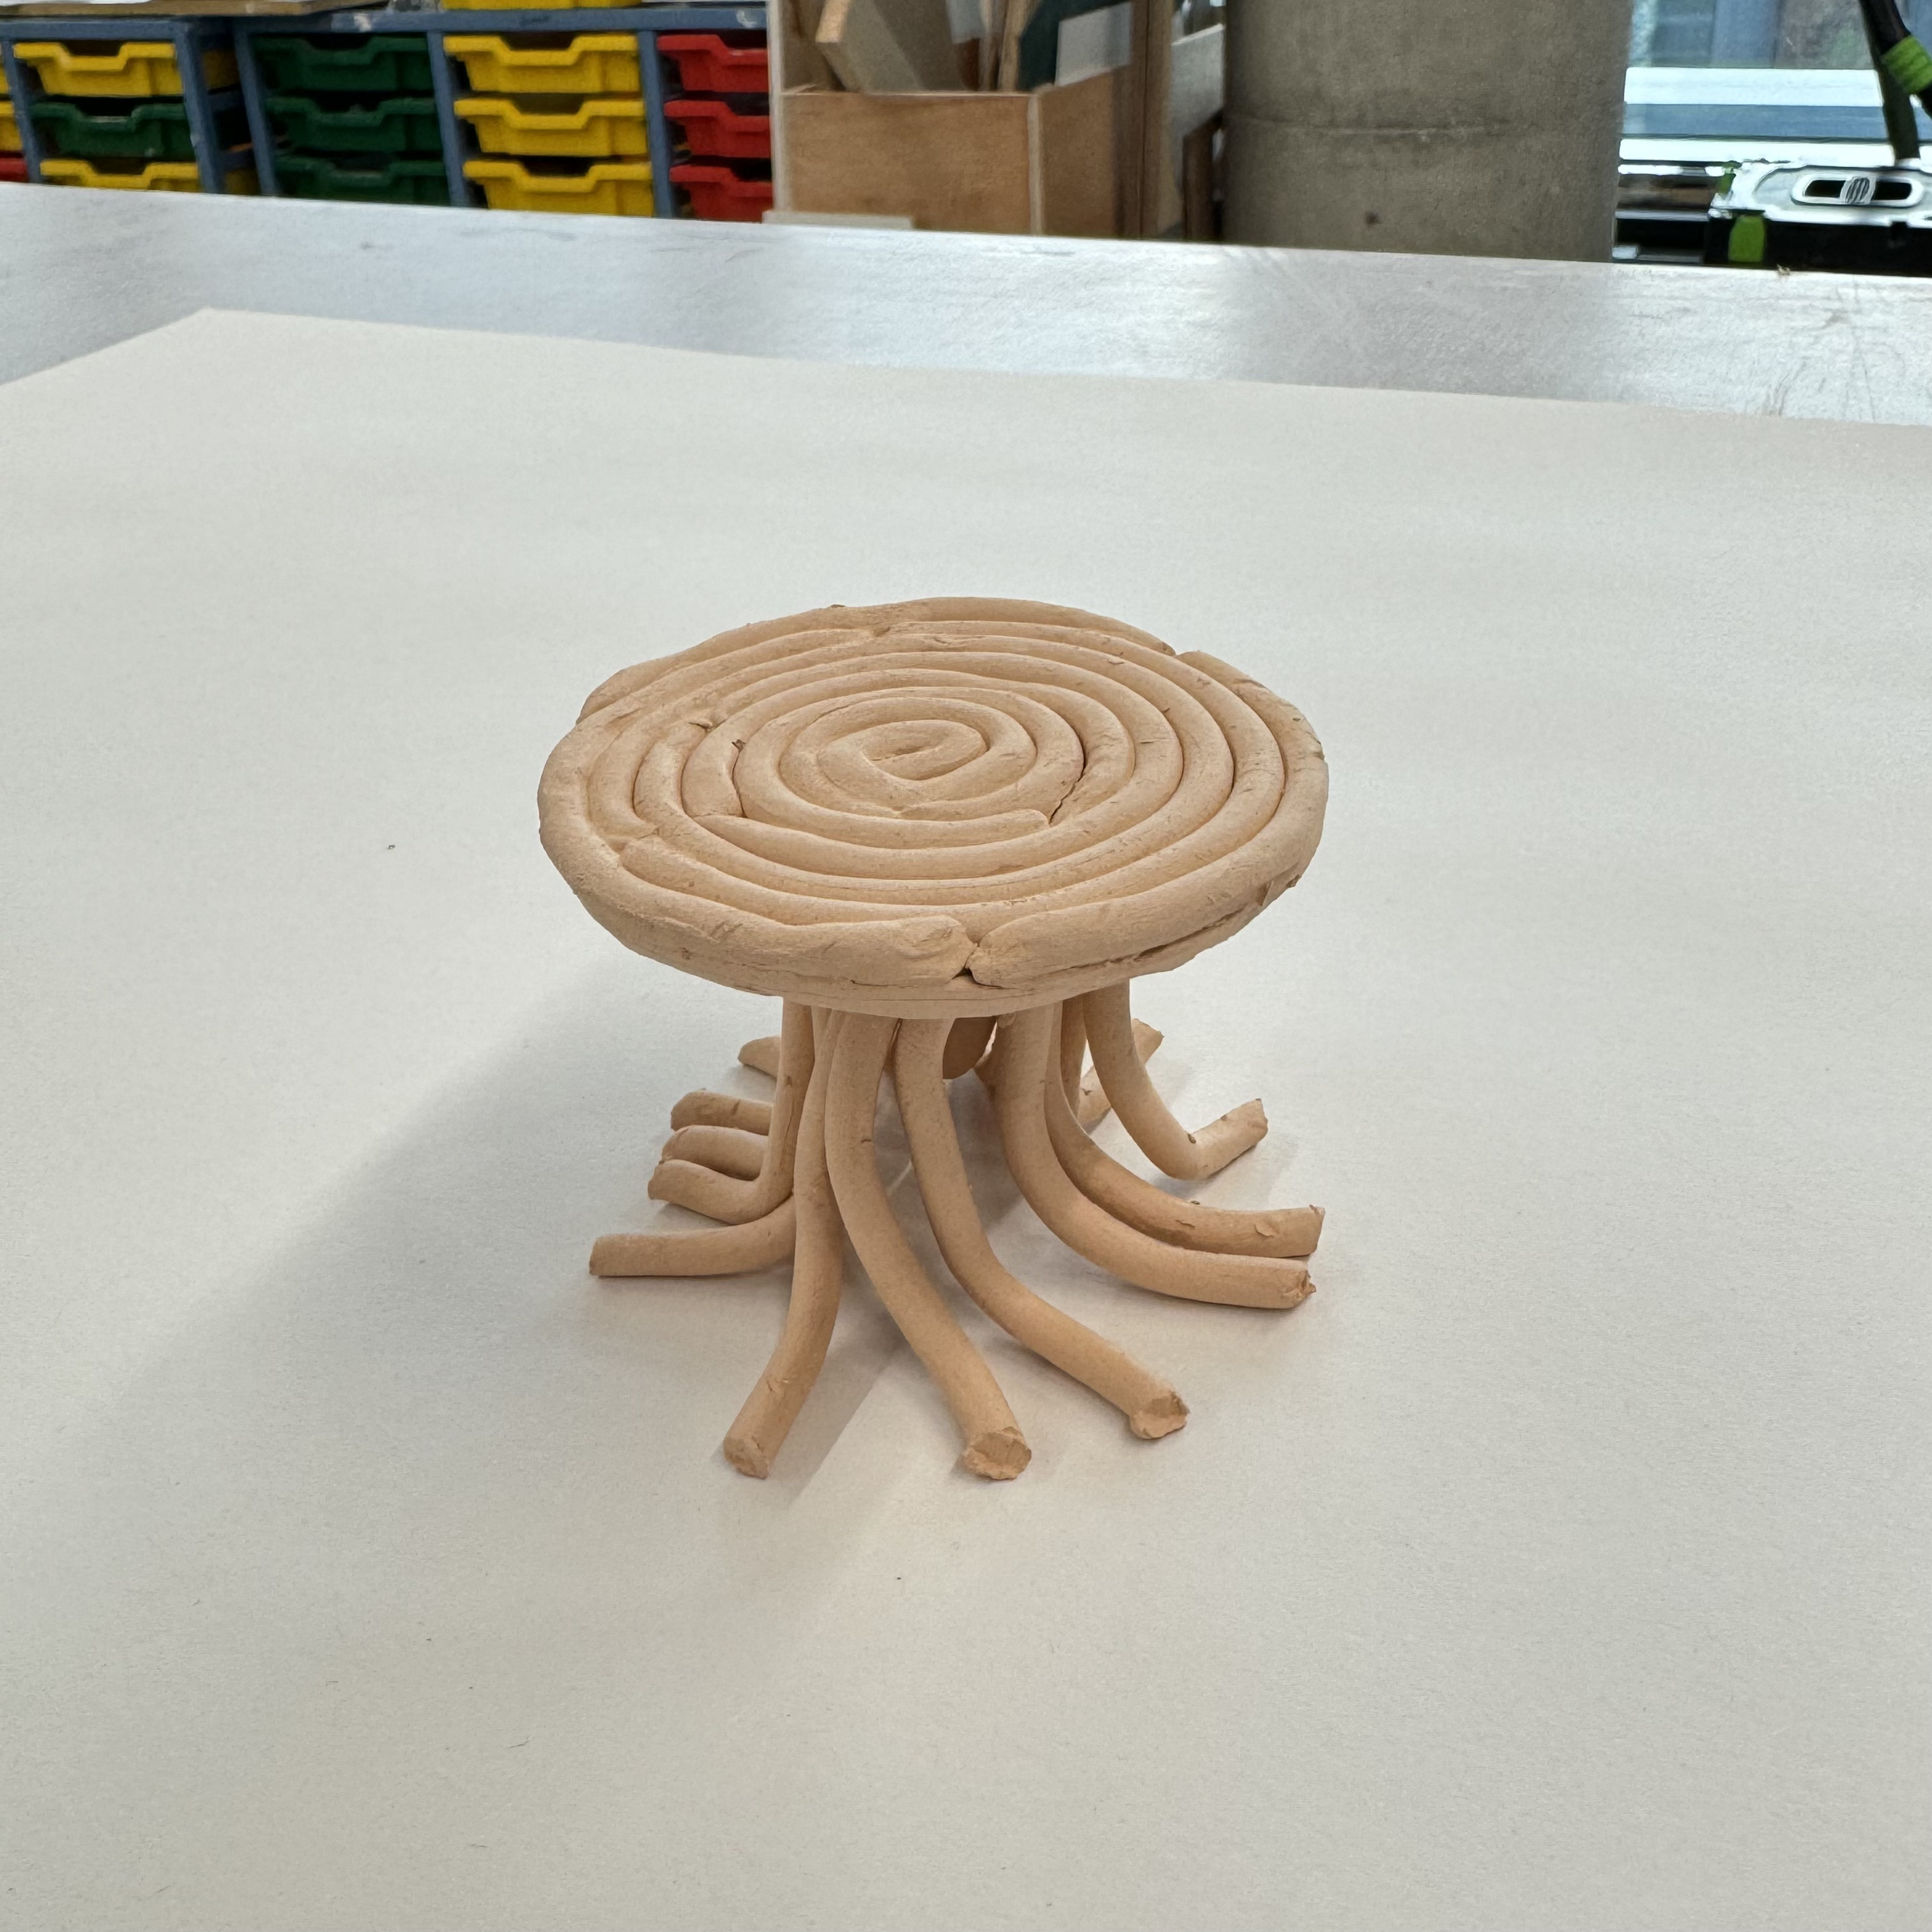
After paper testing, I did the small samples for my idea and tested the making techniques. As for the string table, if I want to make the real scale one I need to consider how to support the upper frame because it tends to droop. As for net, when I extruding the clay, I need to care if it gets the cracks because the cracks will lead to the breaking of net. When I making the ceramic net, I learnt that I should make a support or mould if i want it to be a specific form.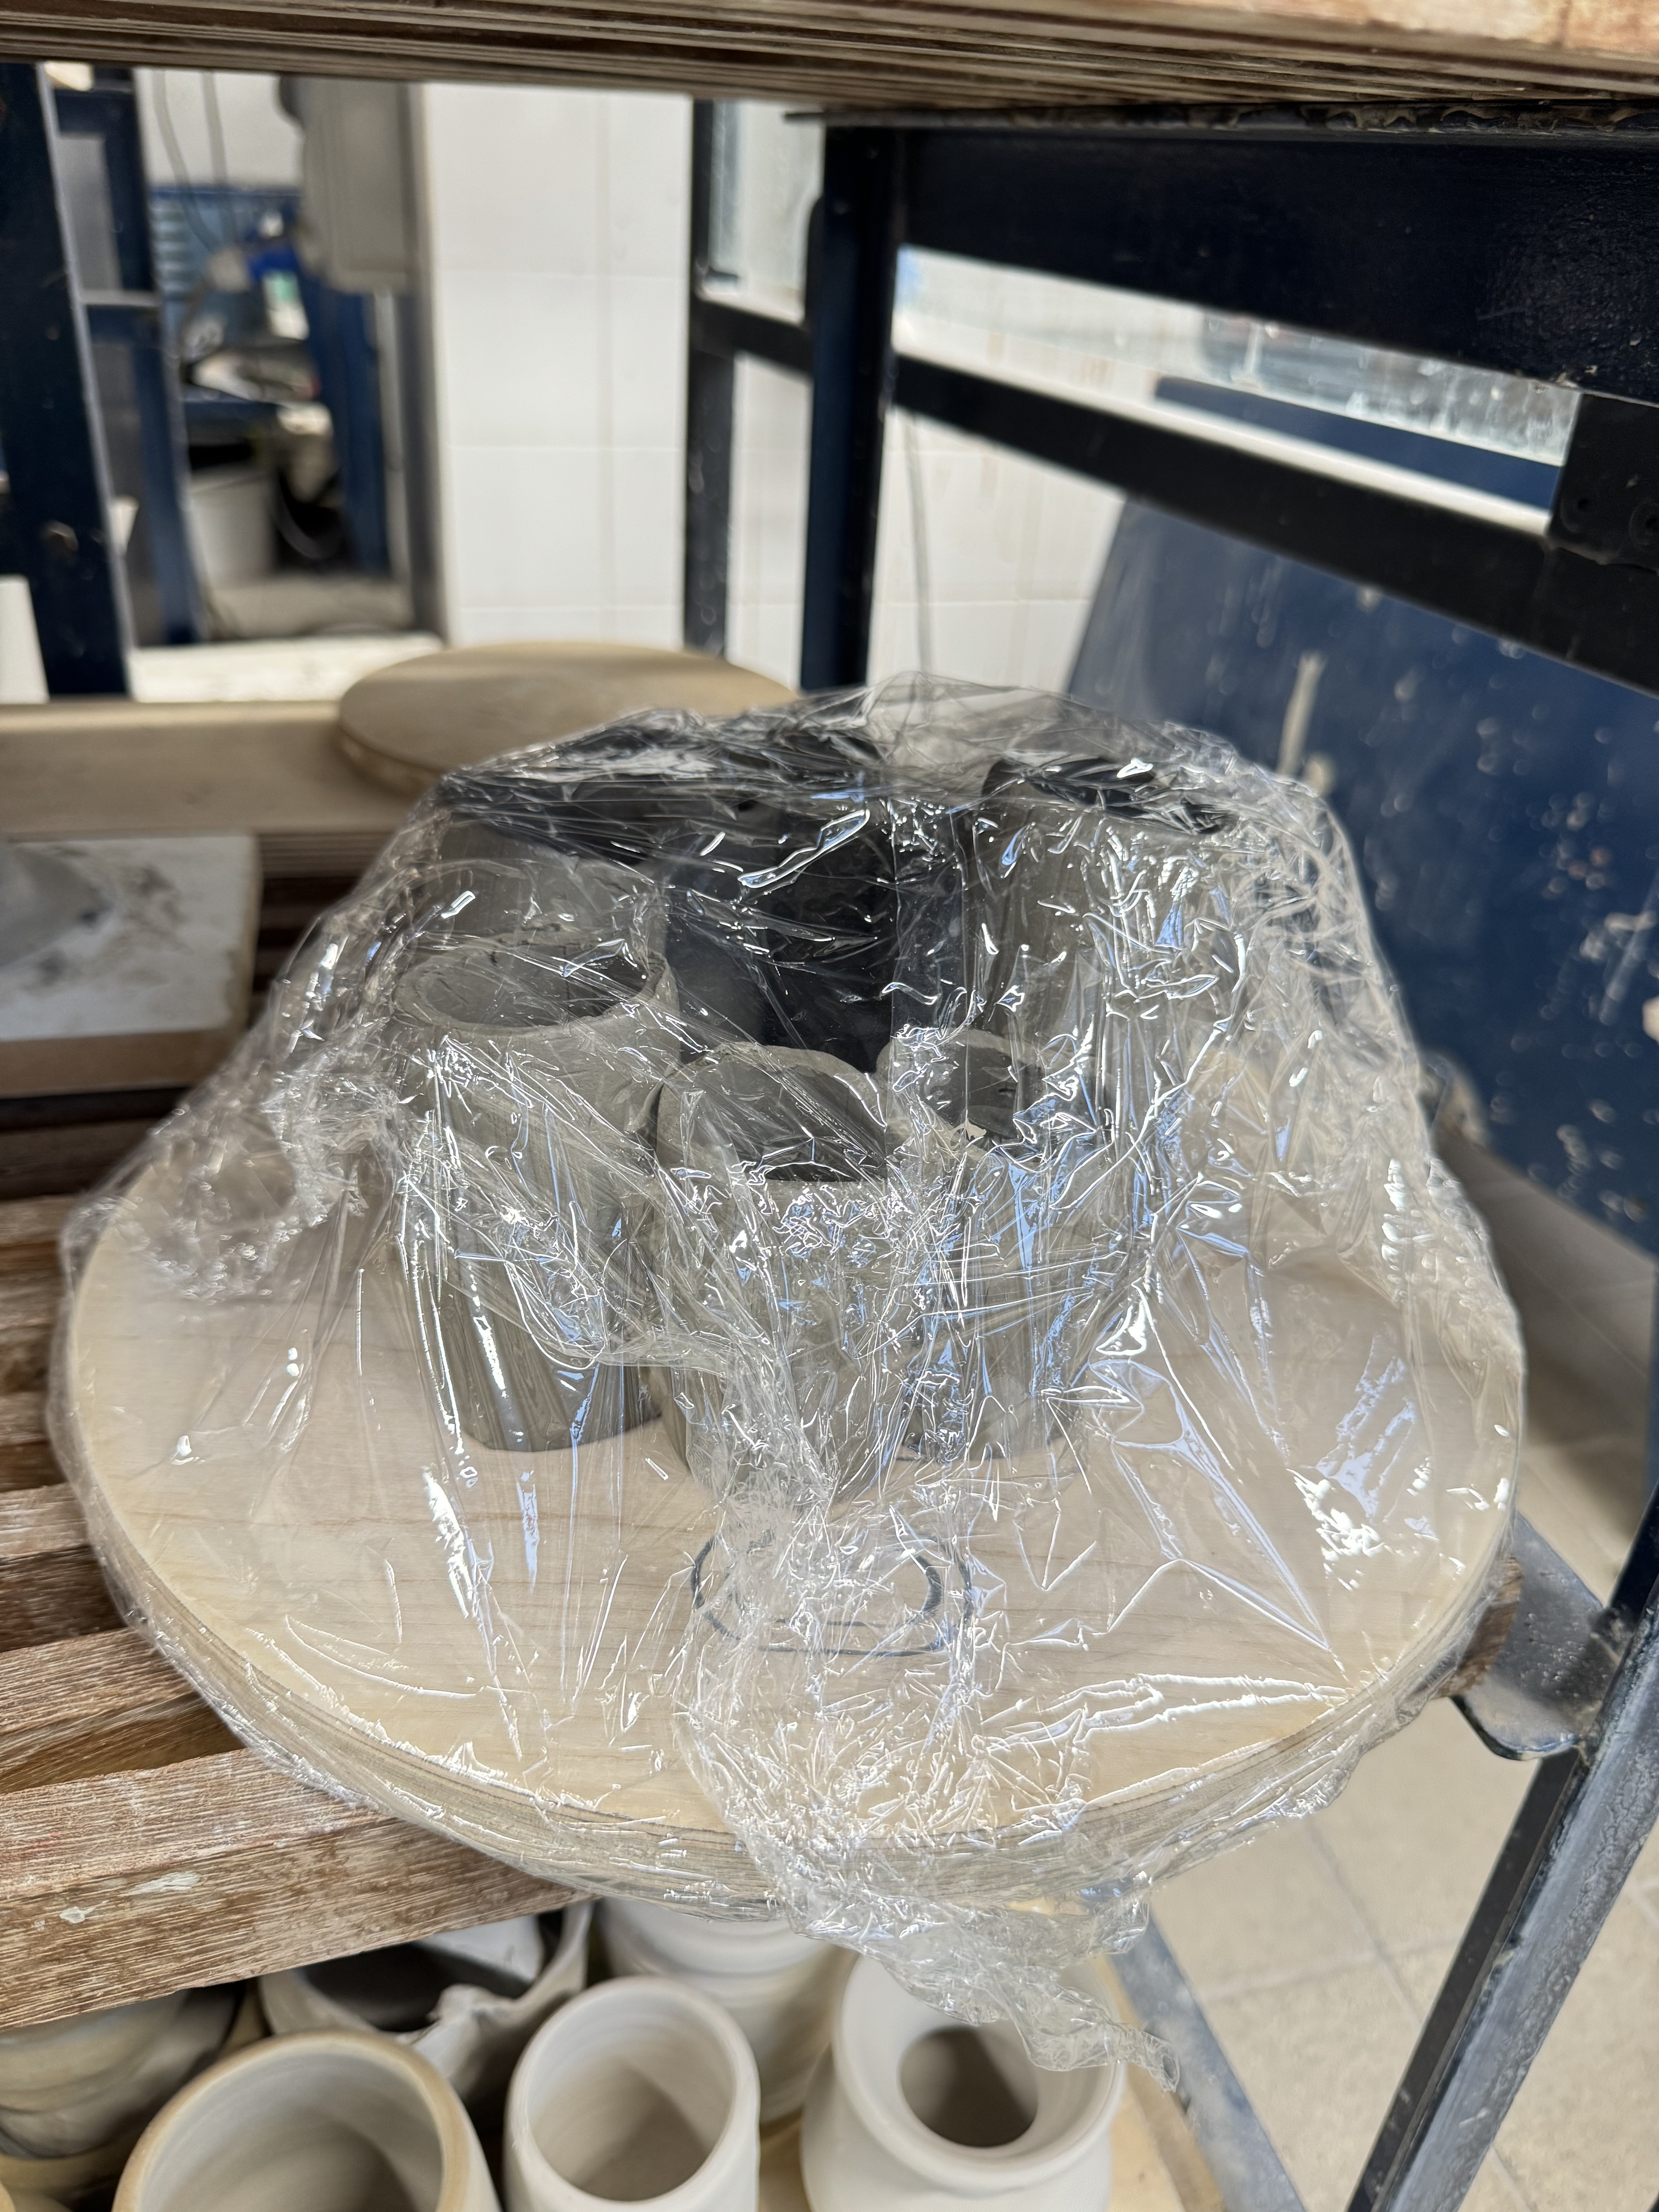


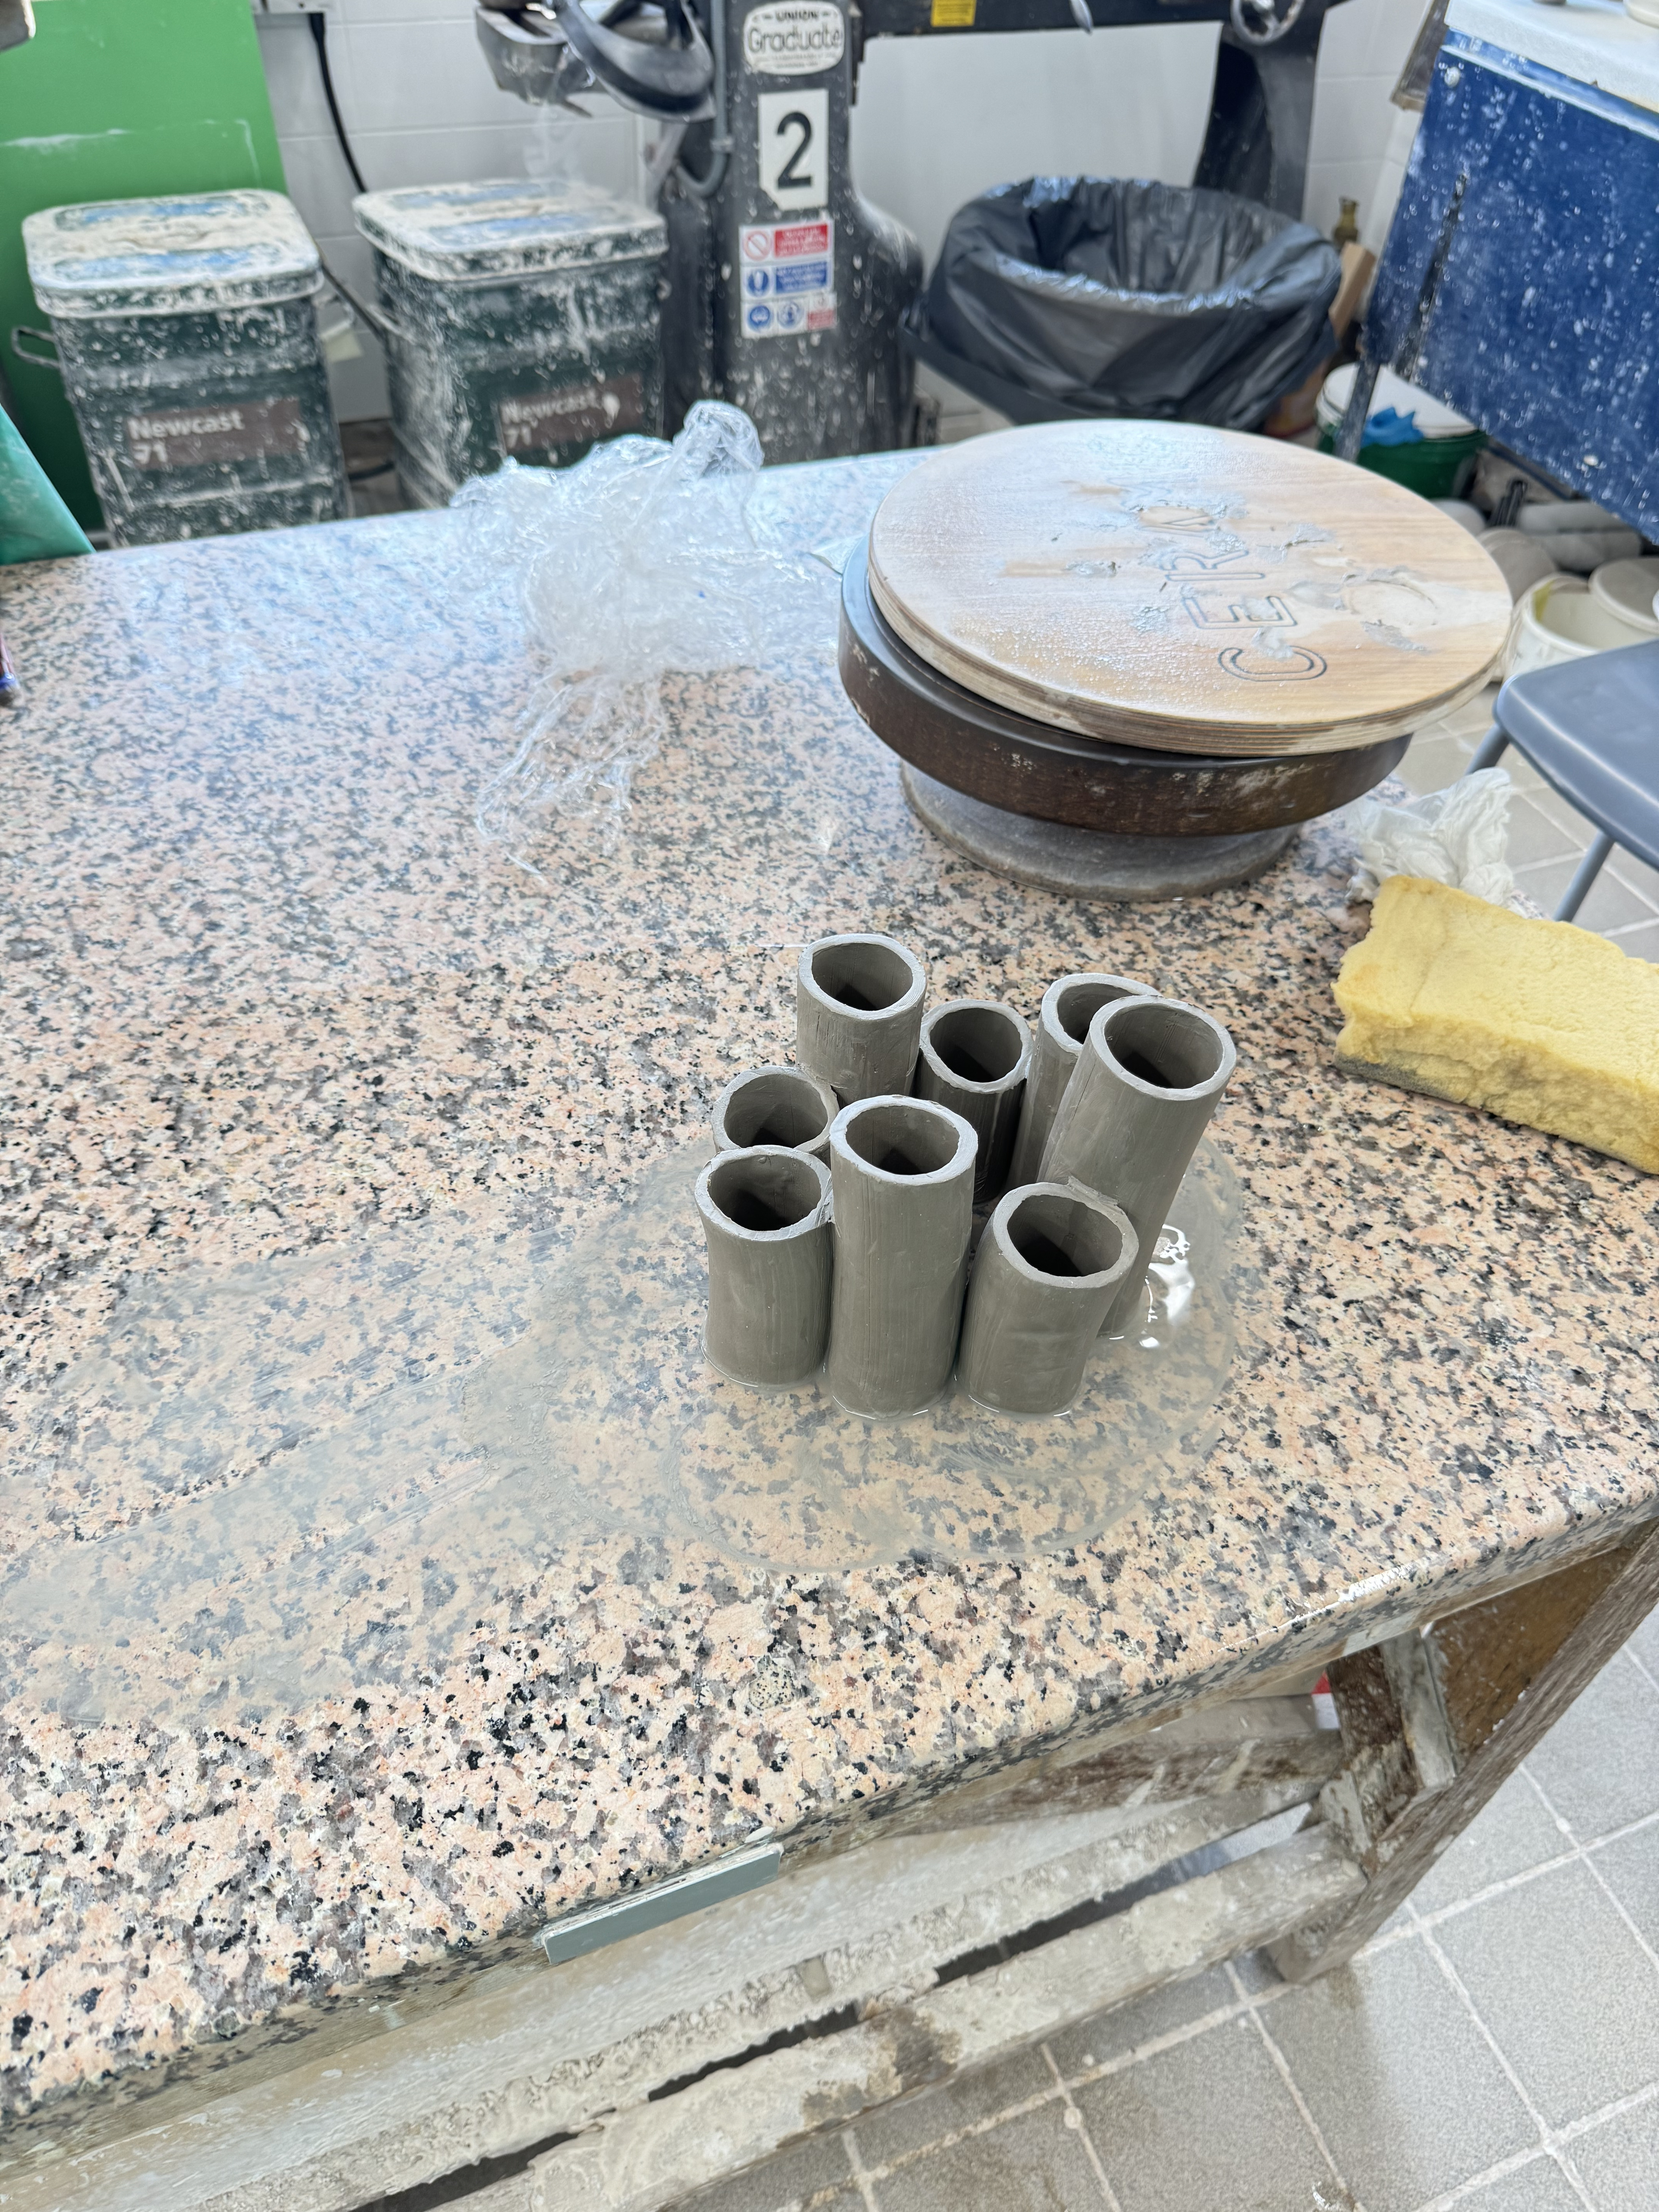


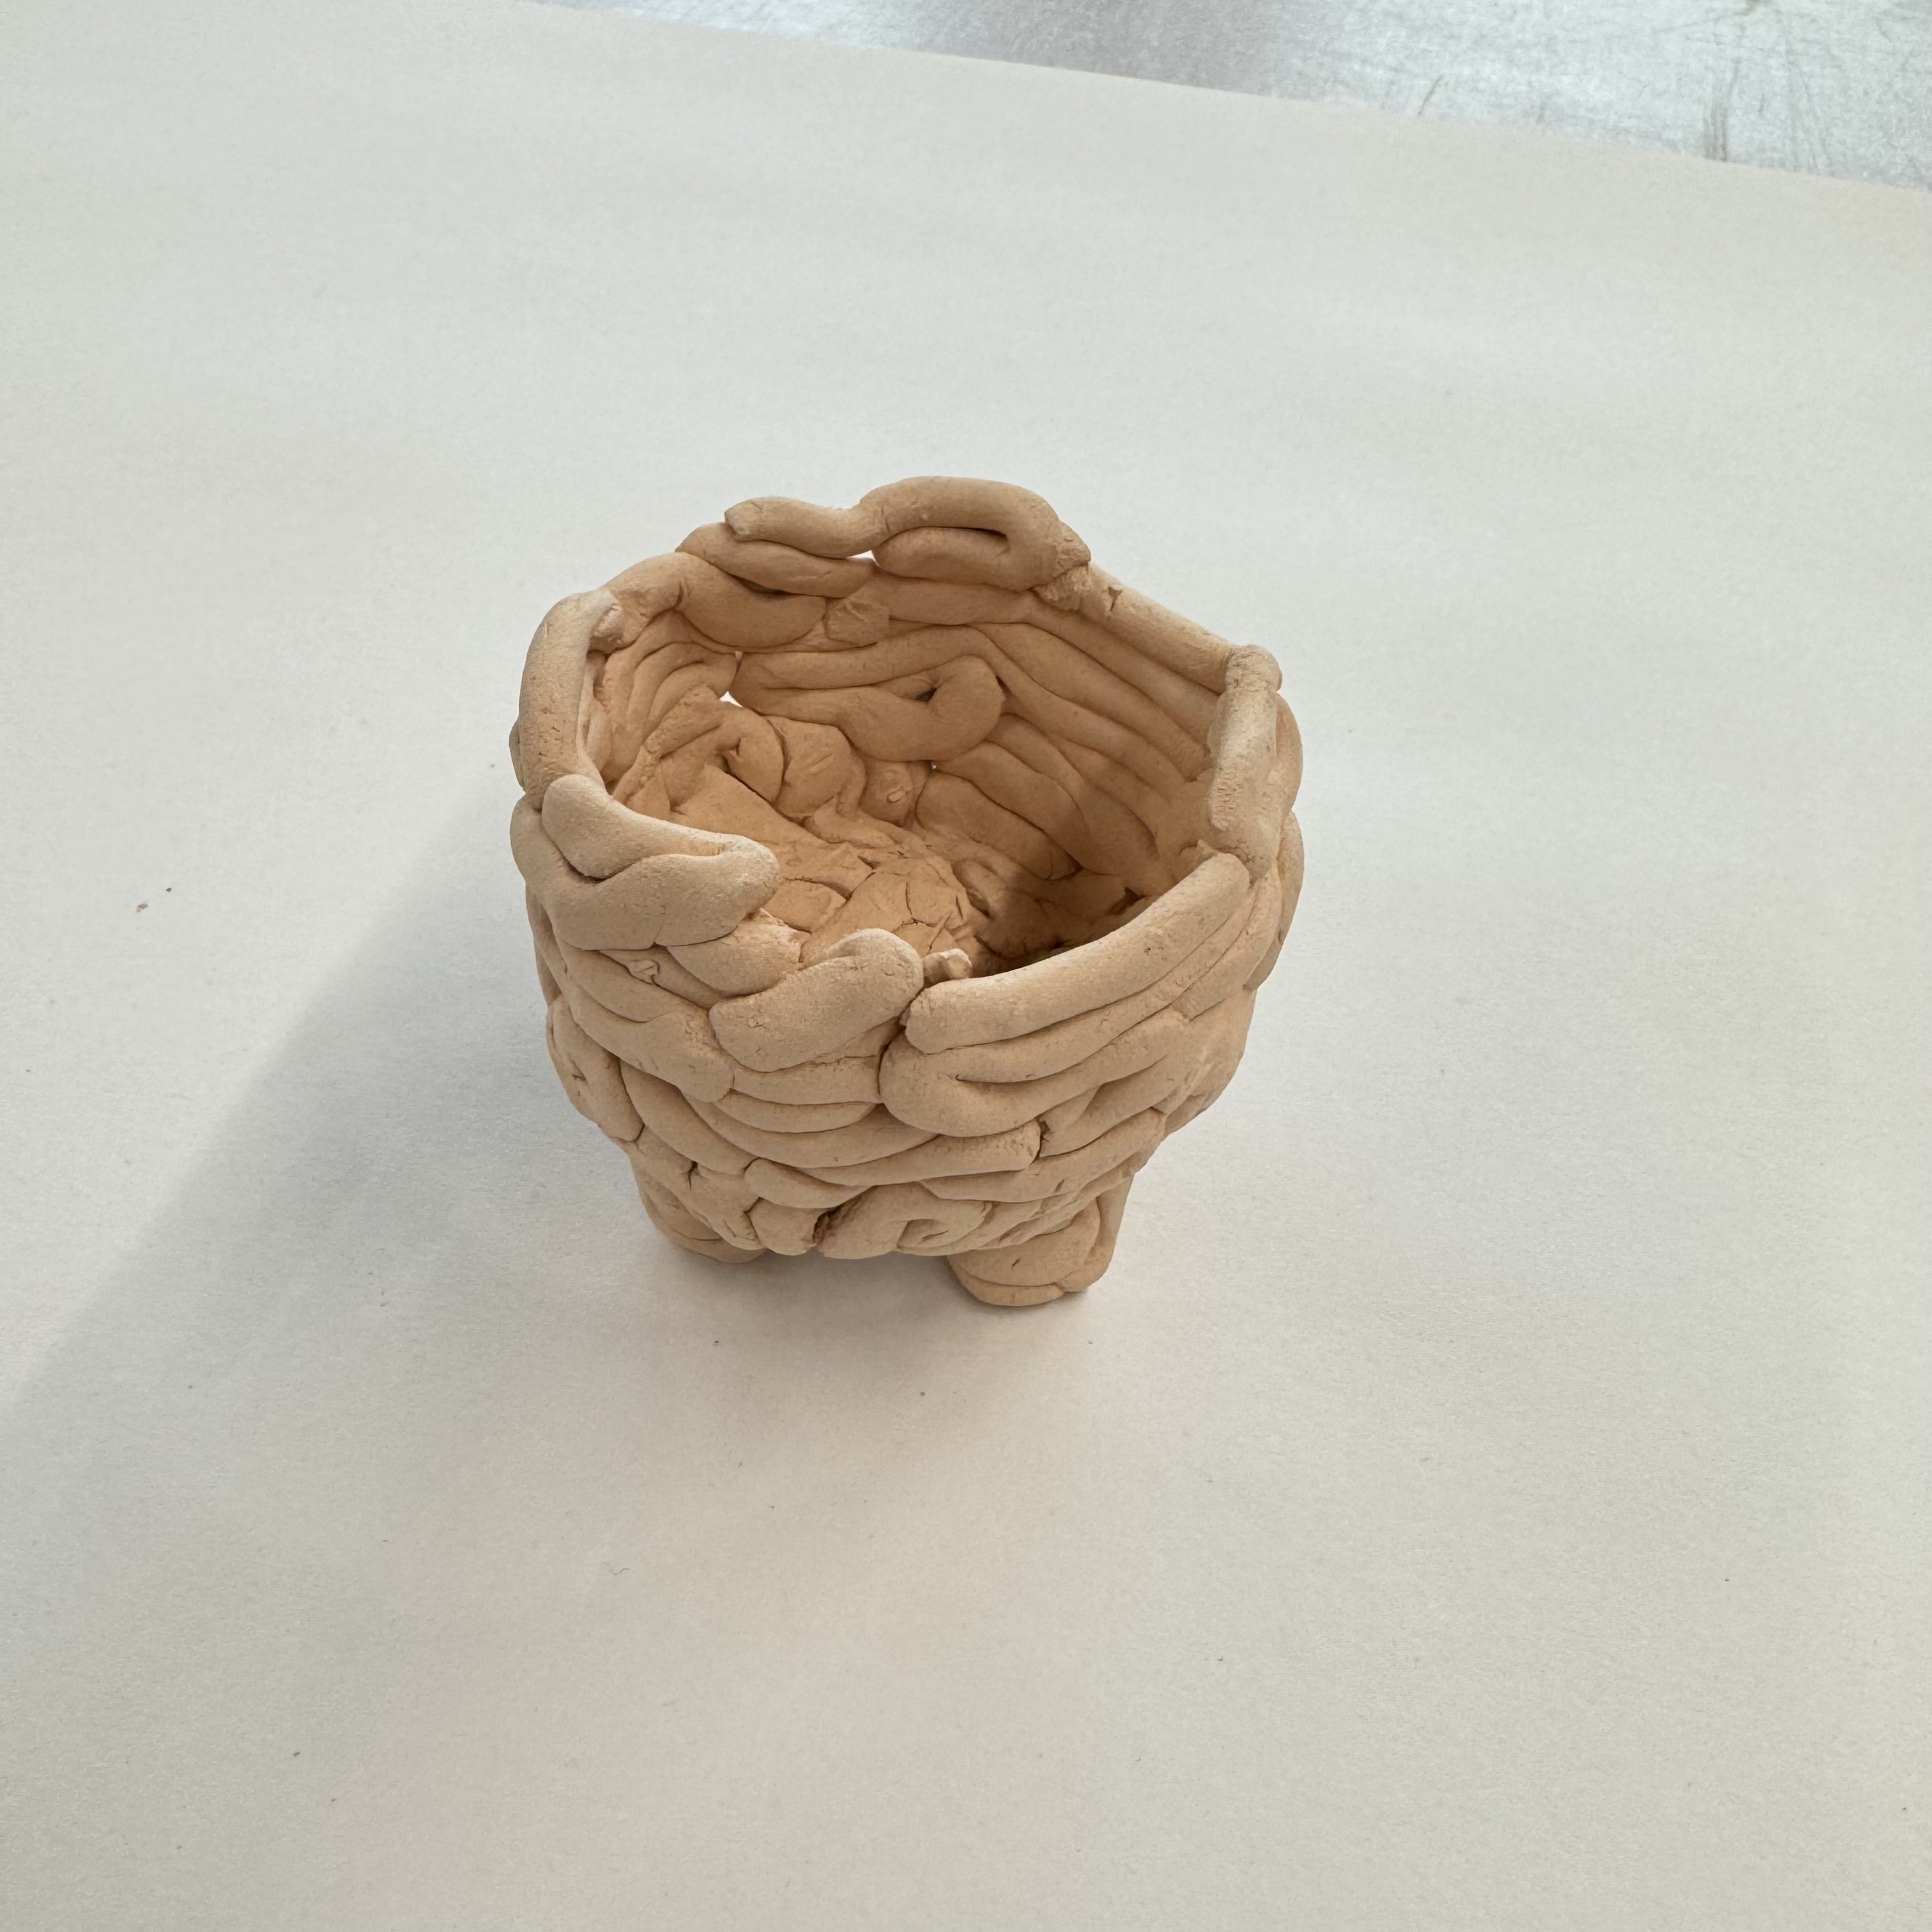
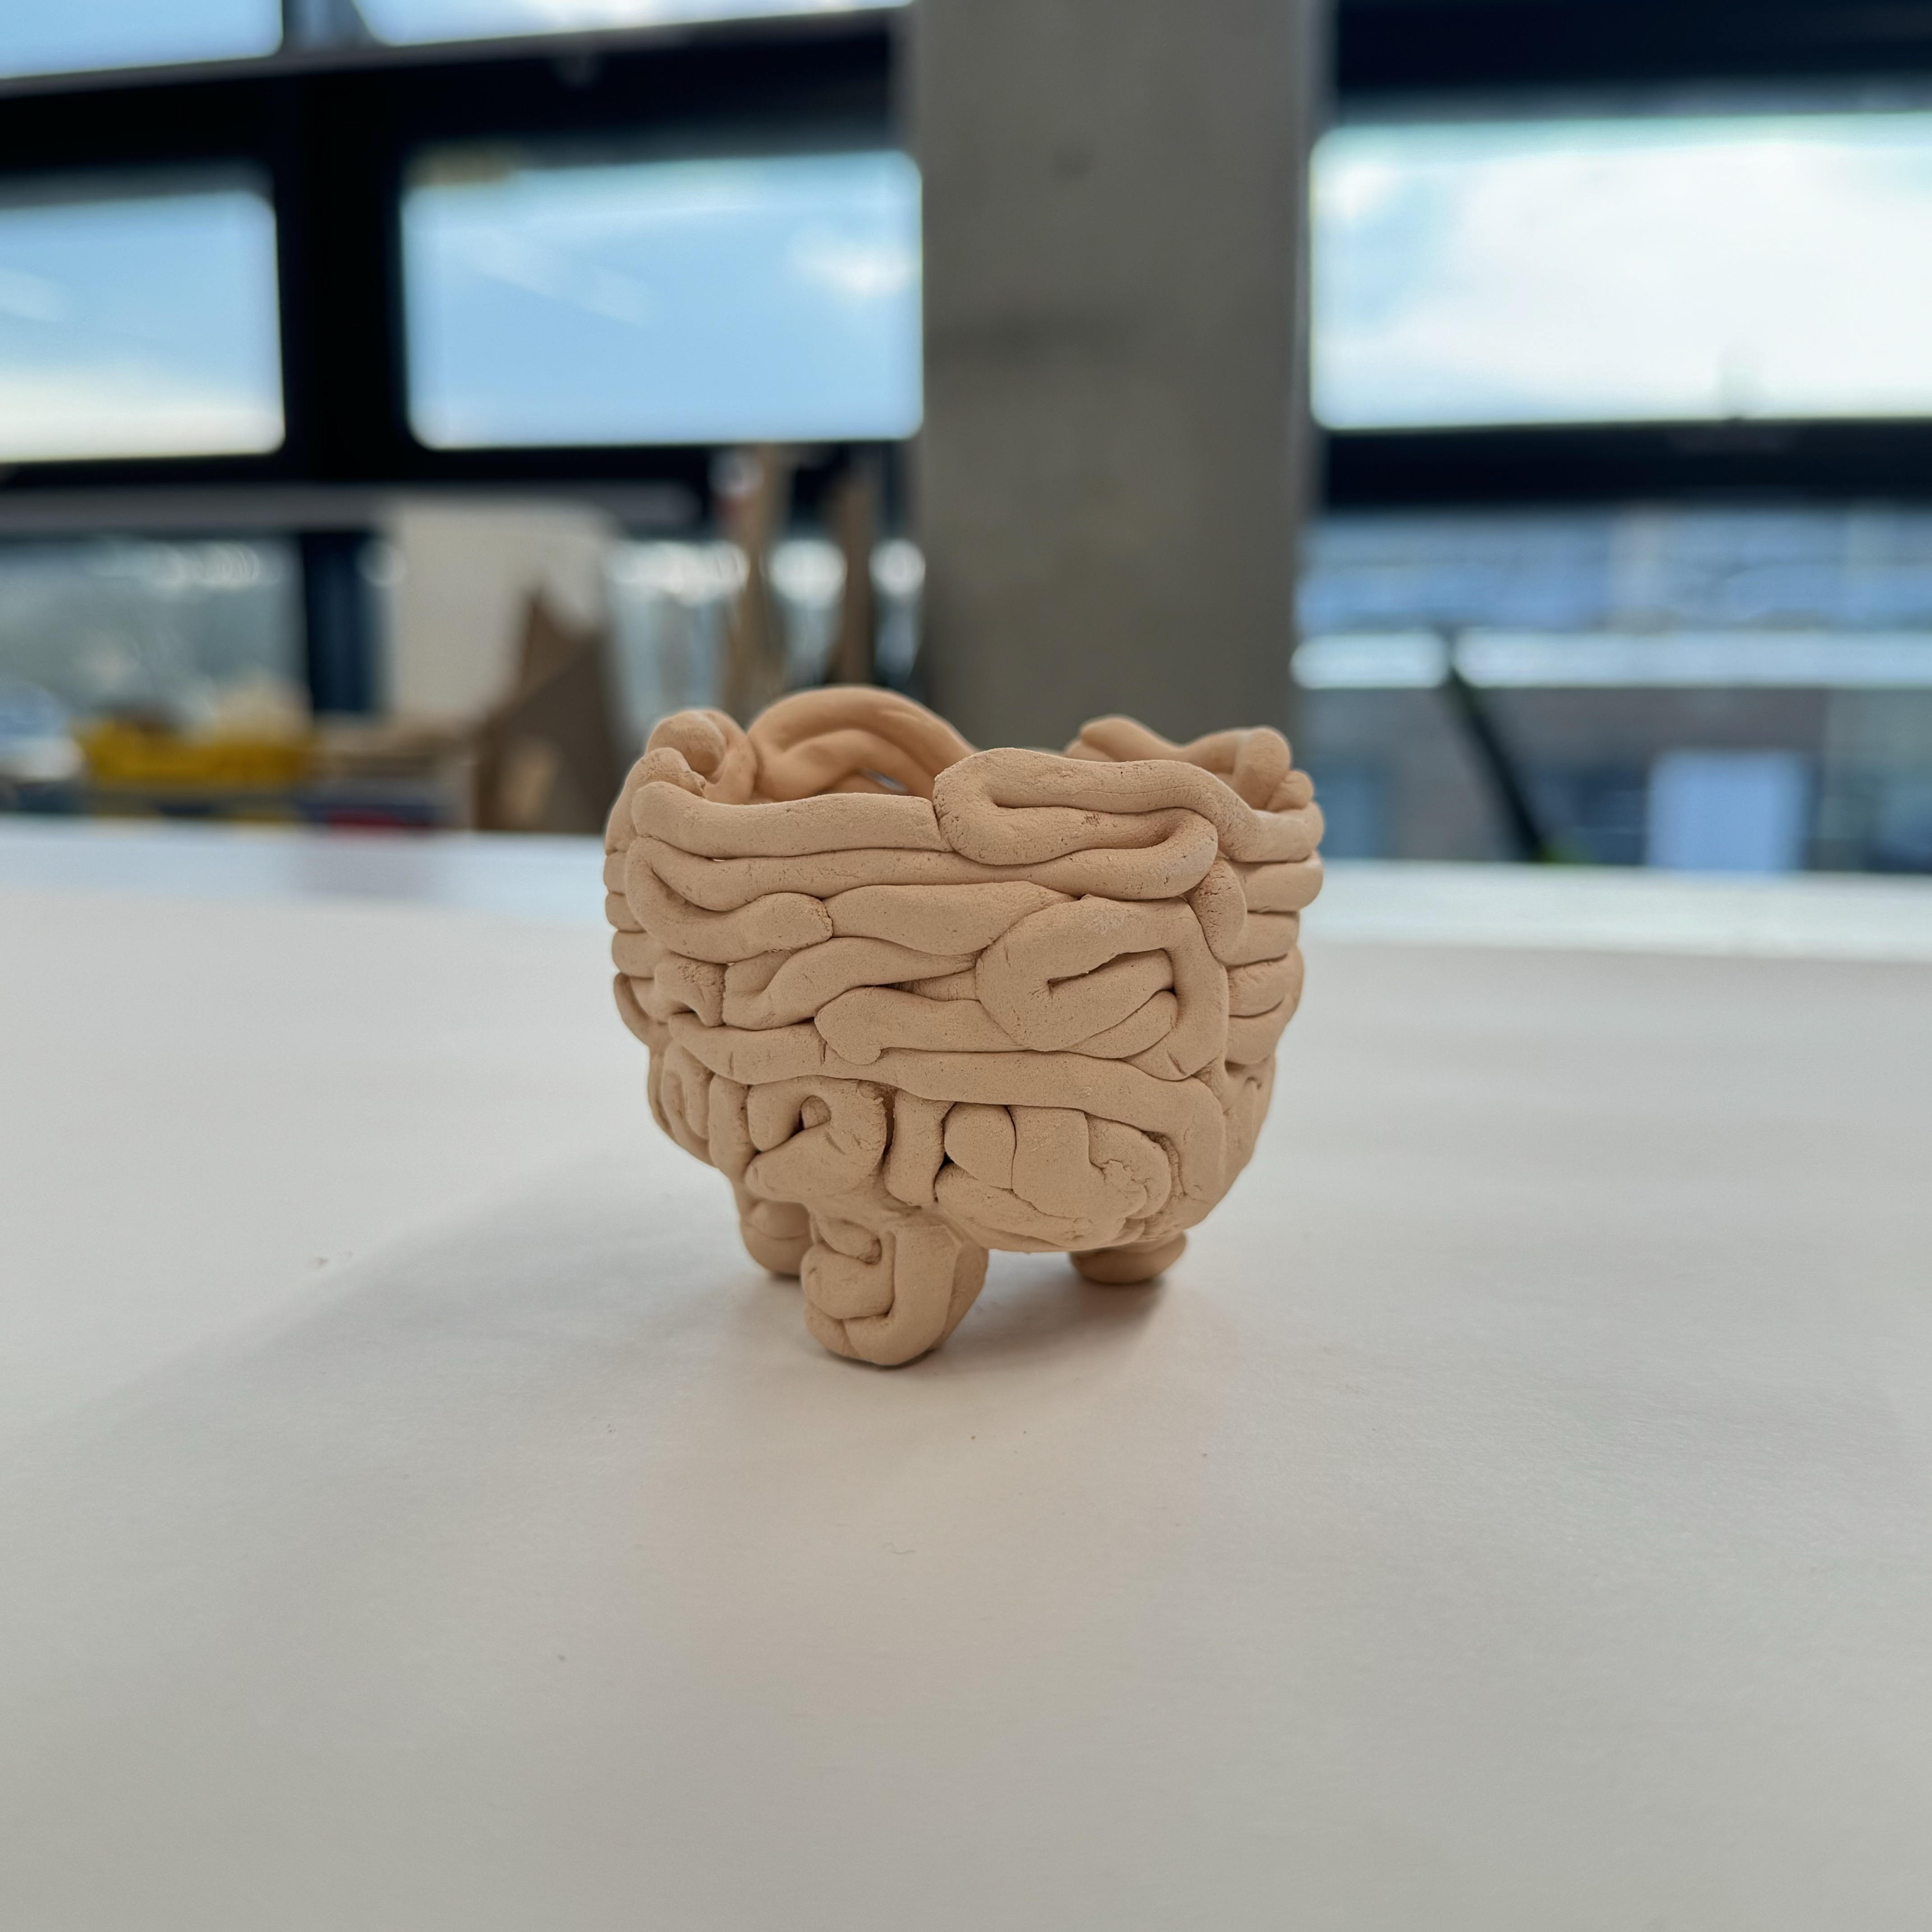
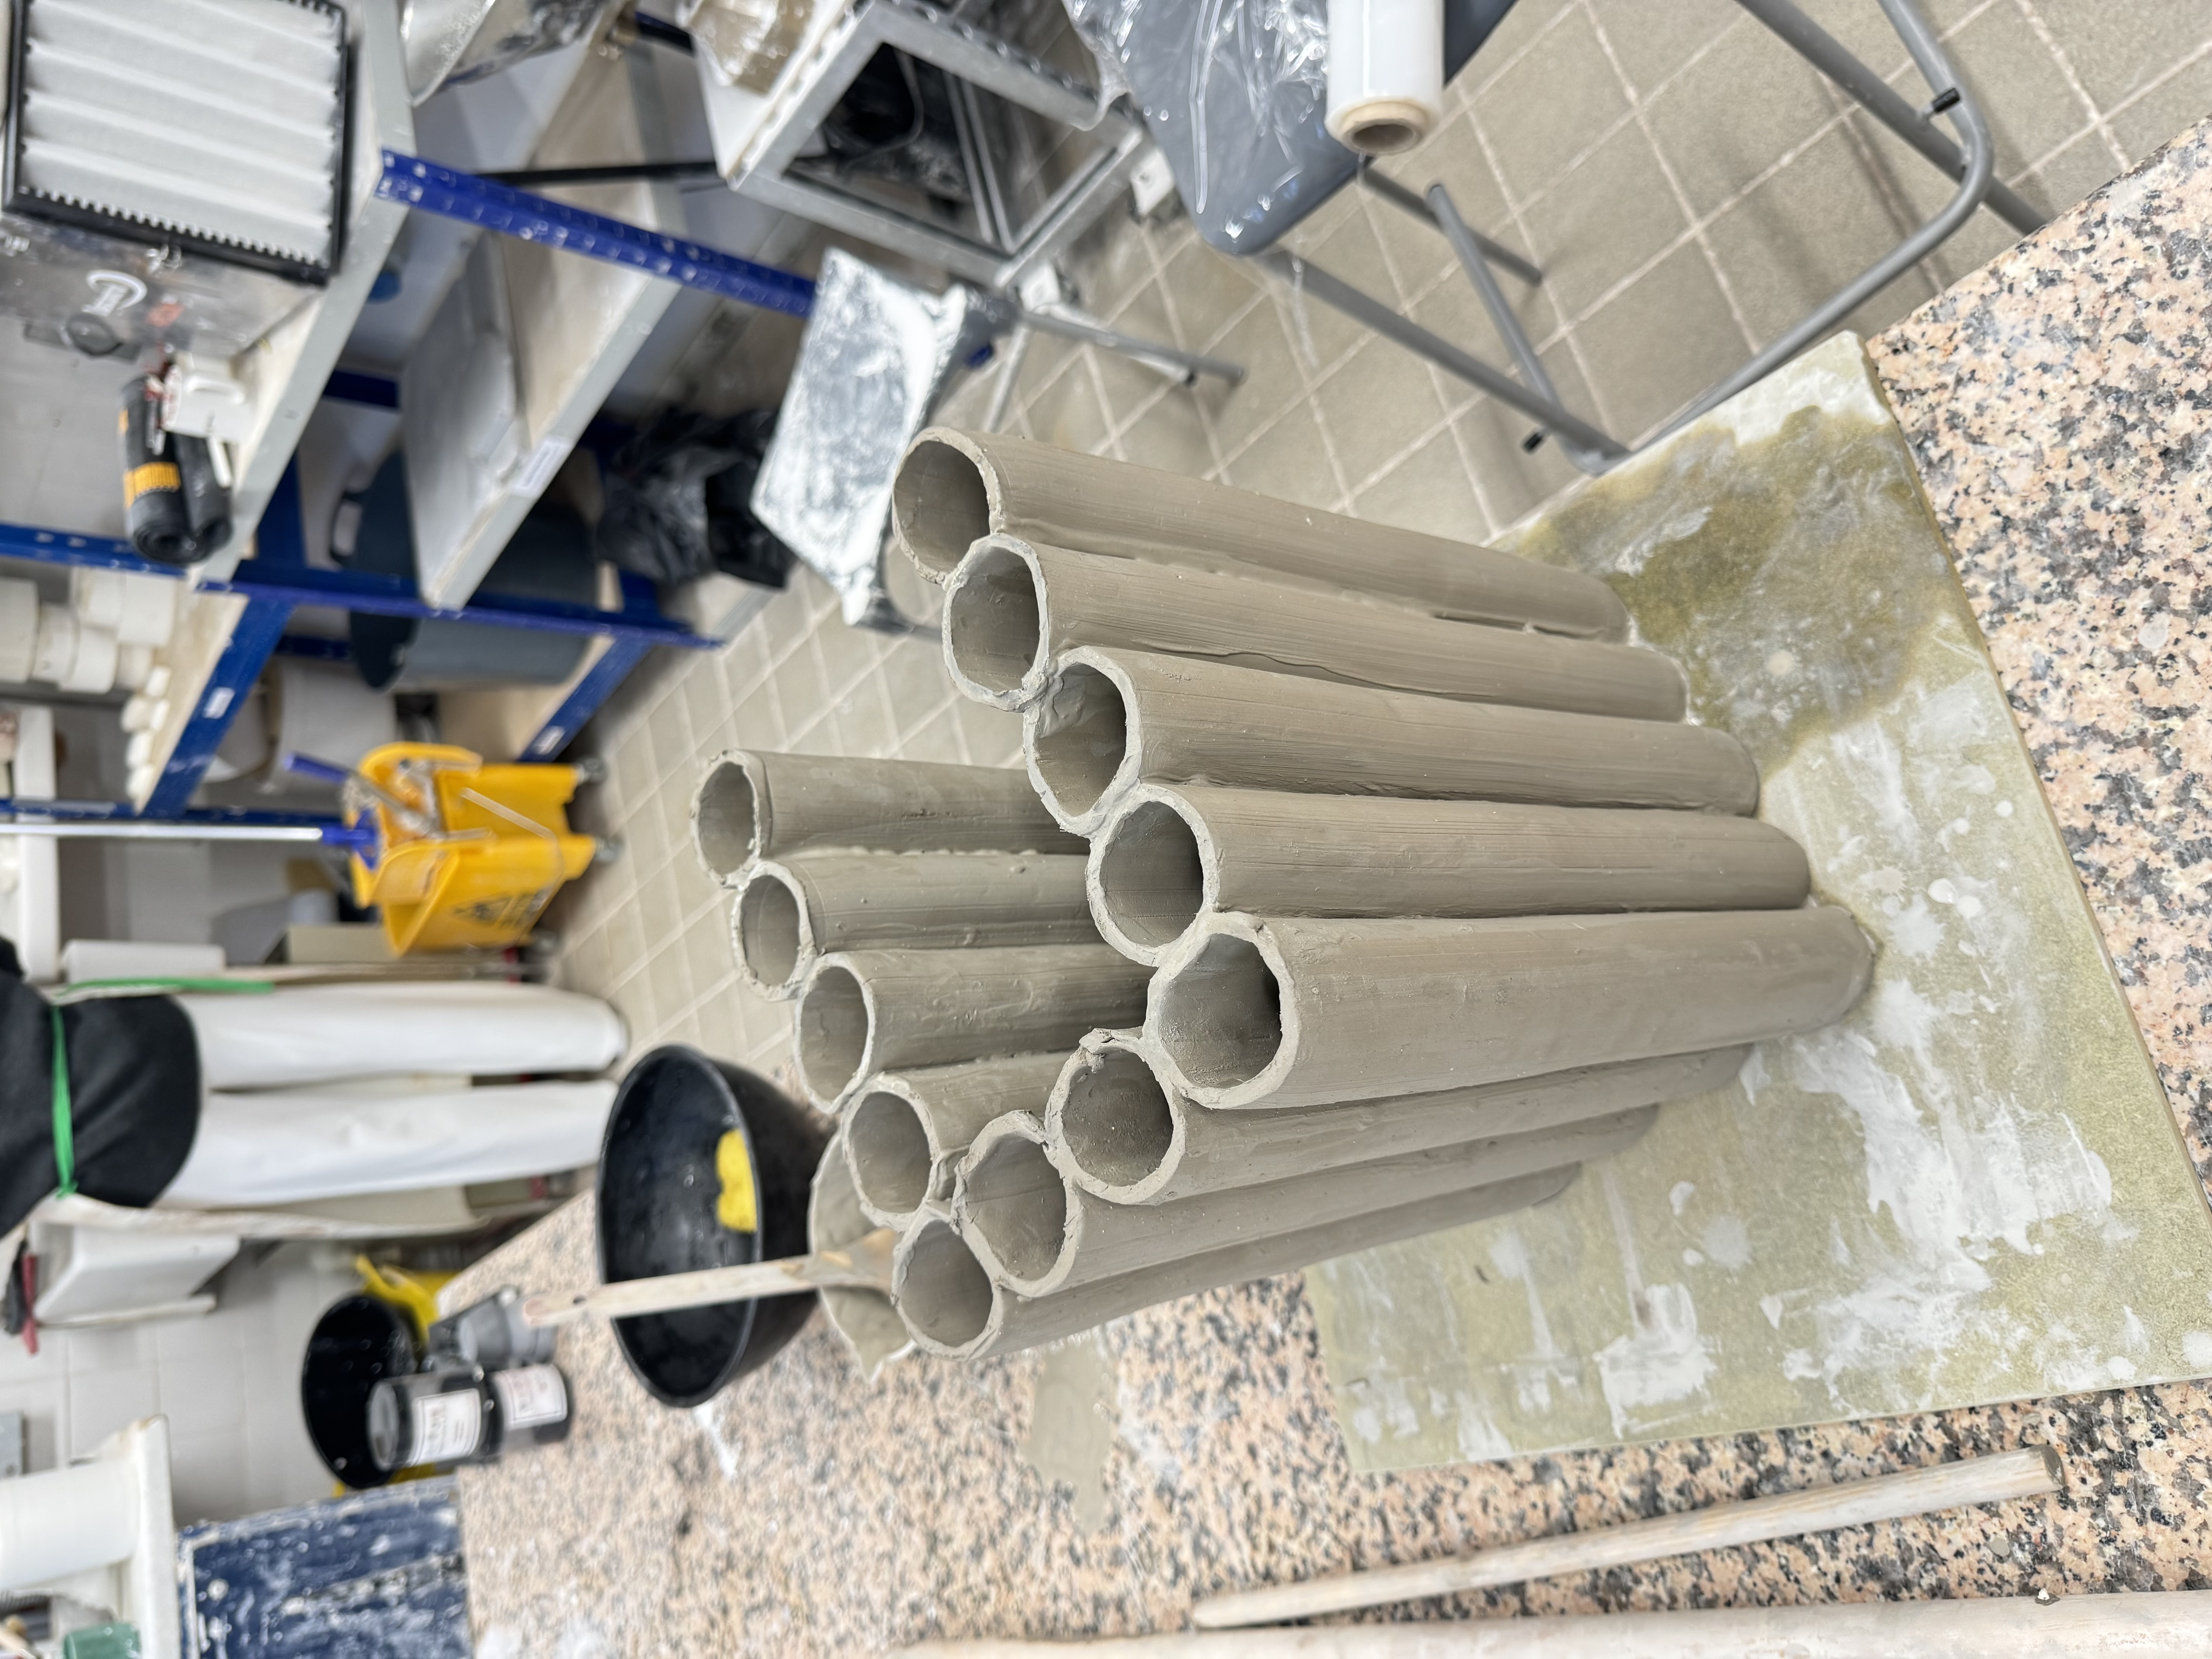
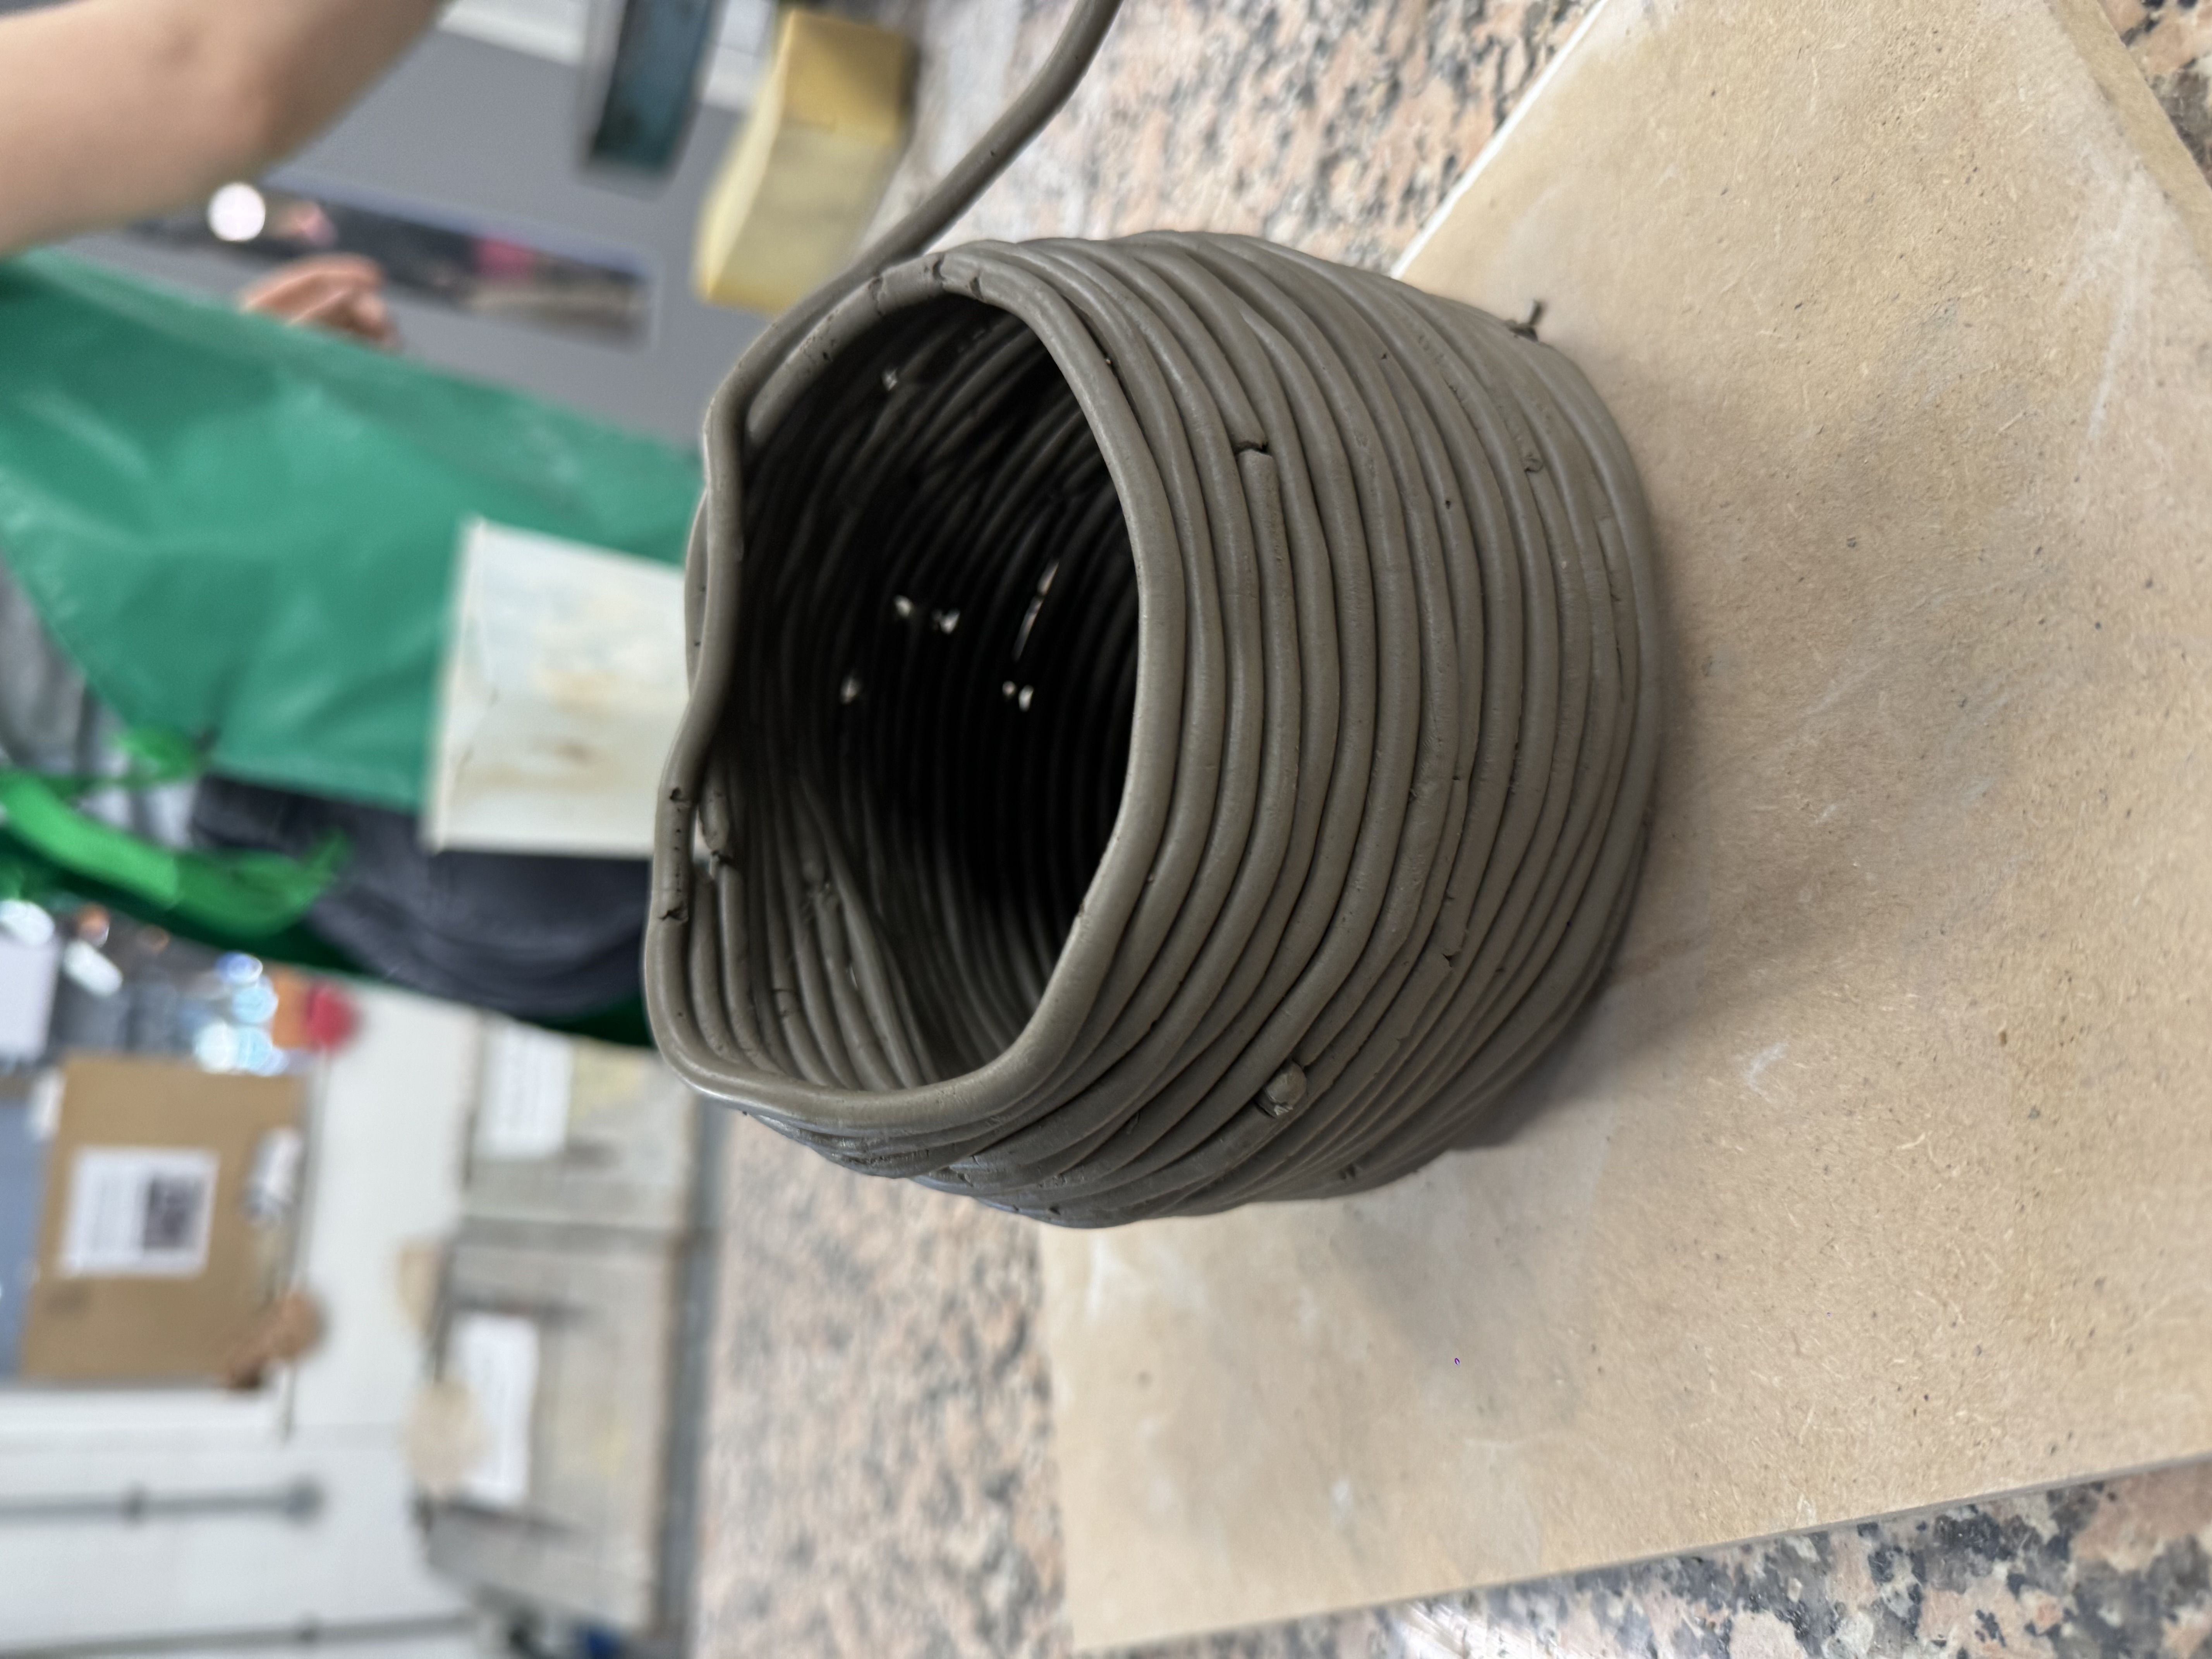
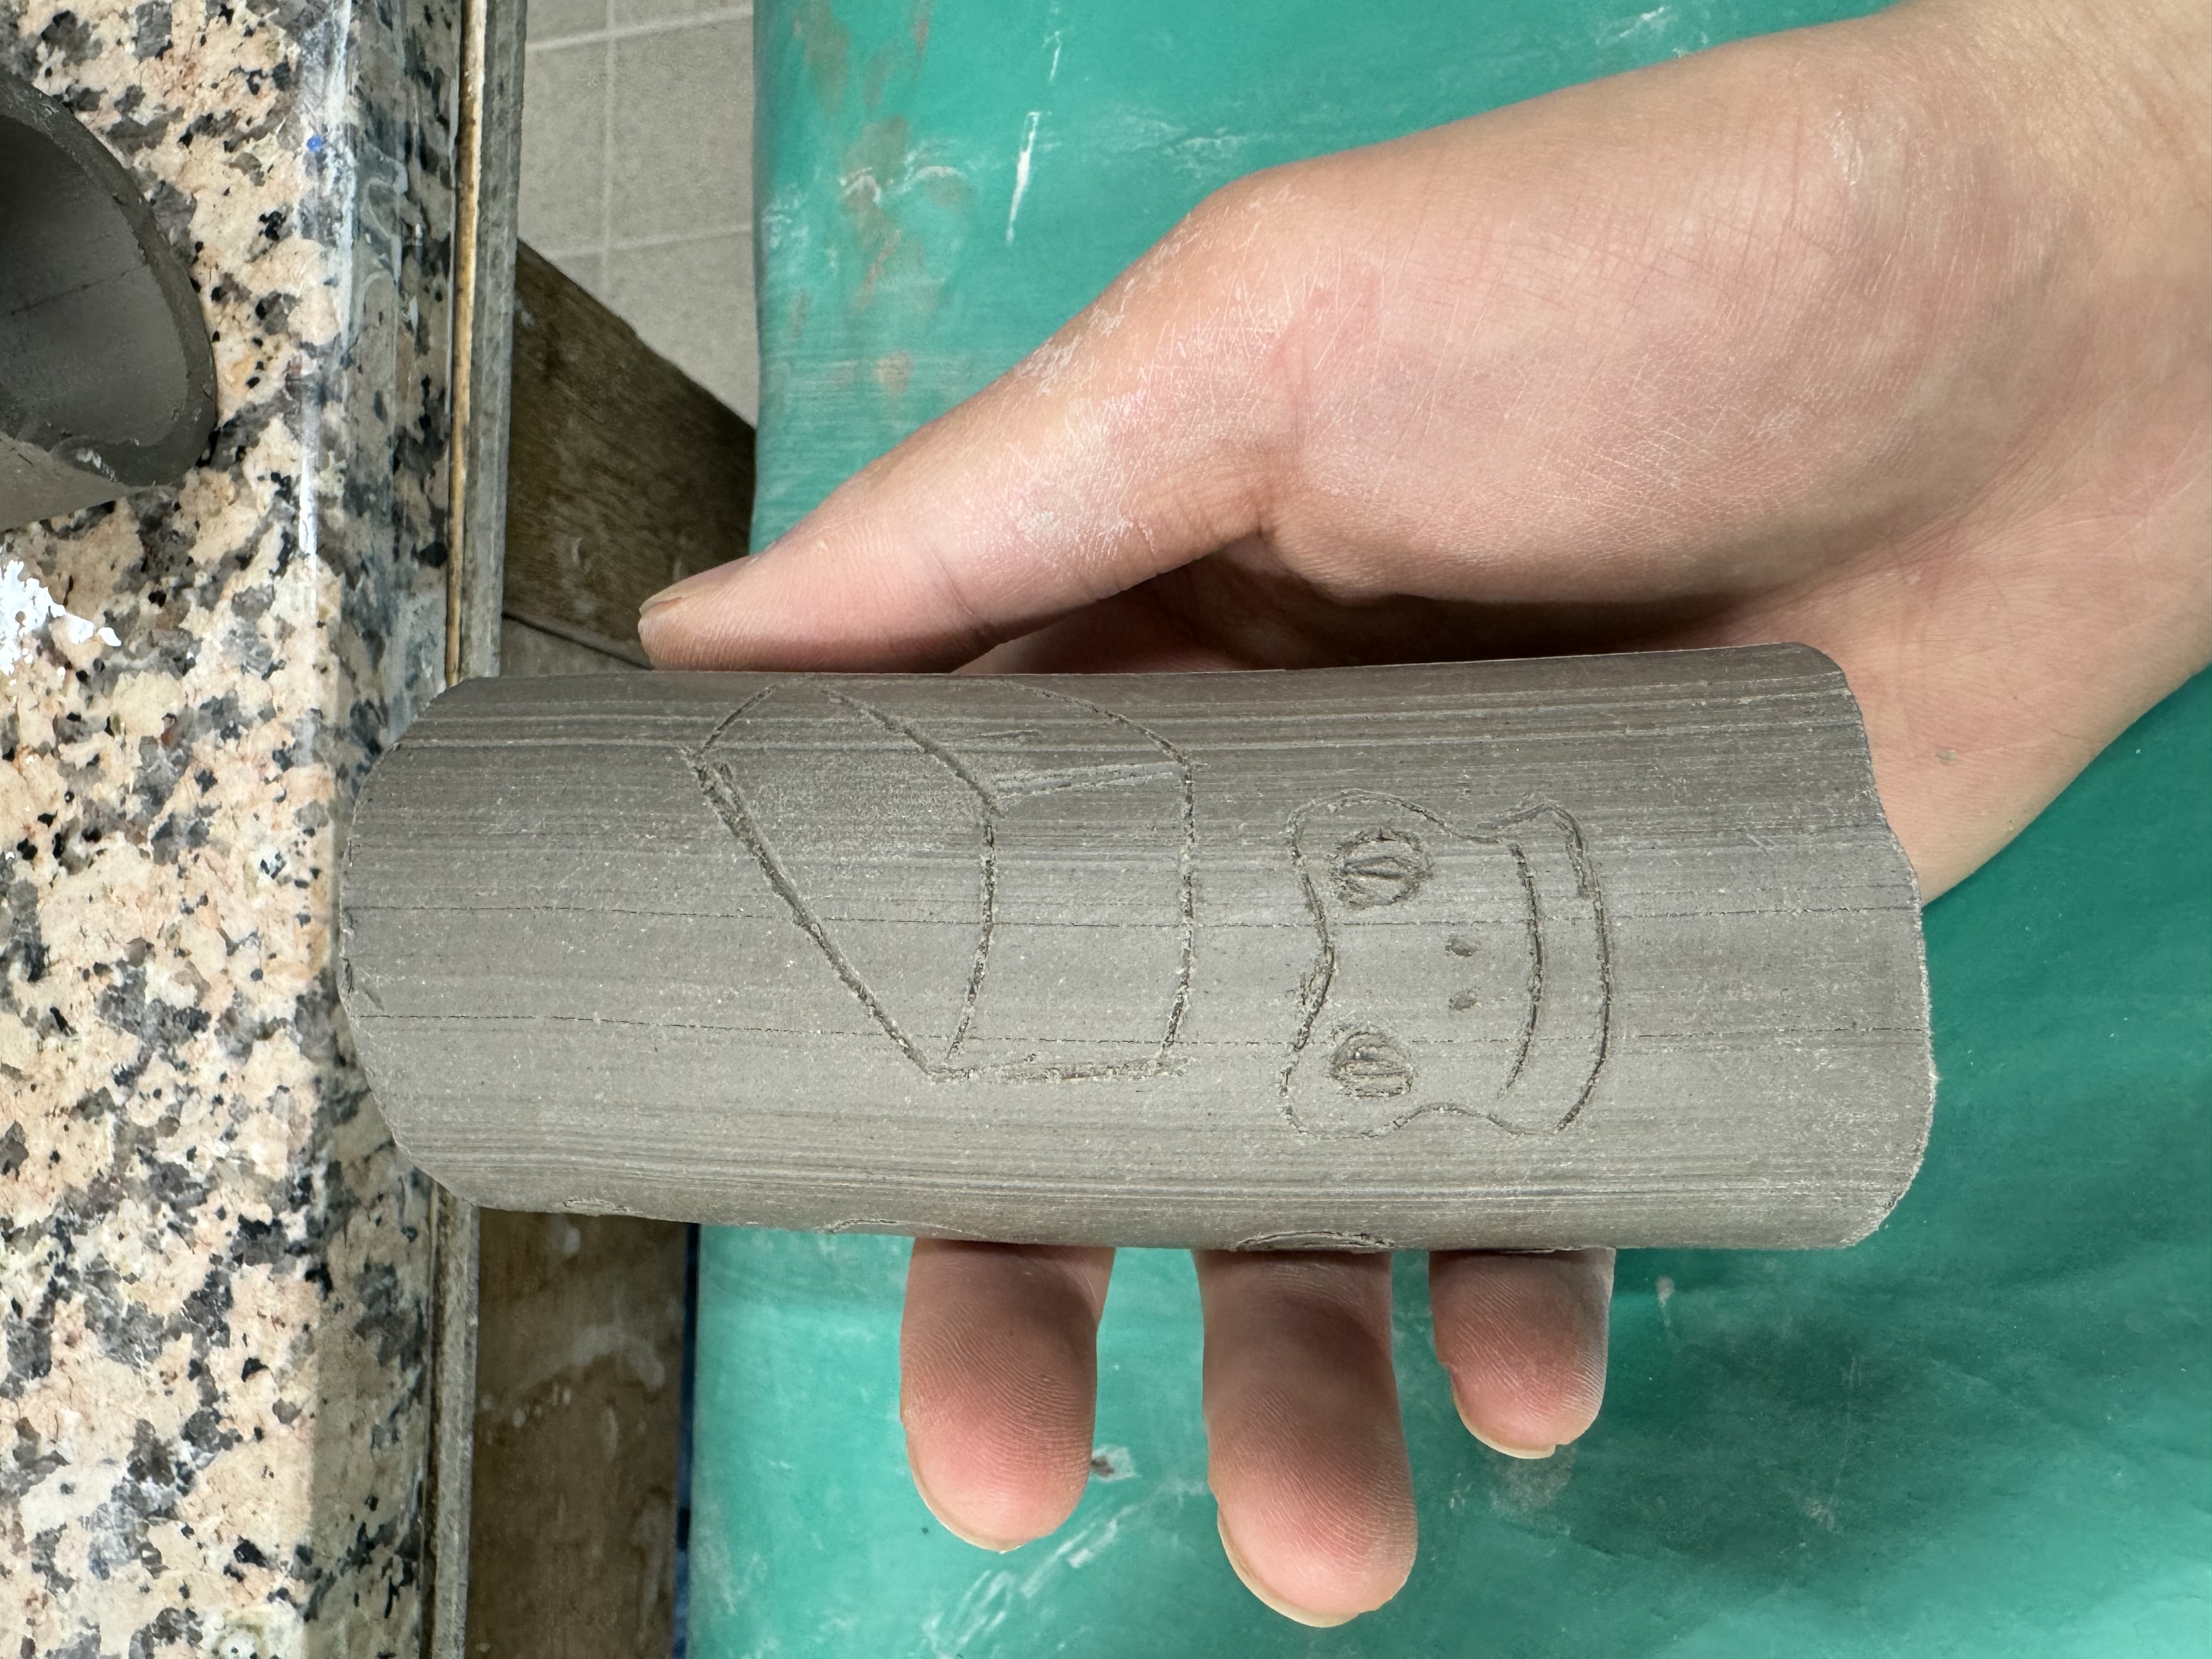
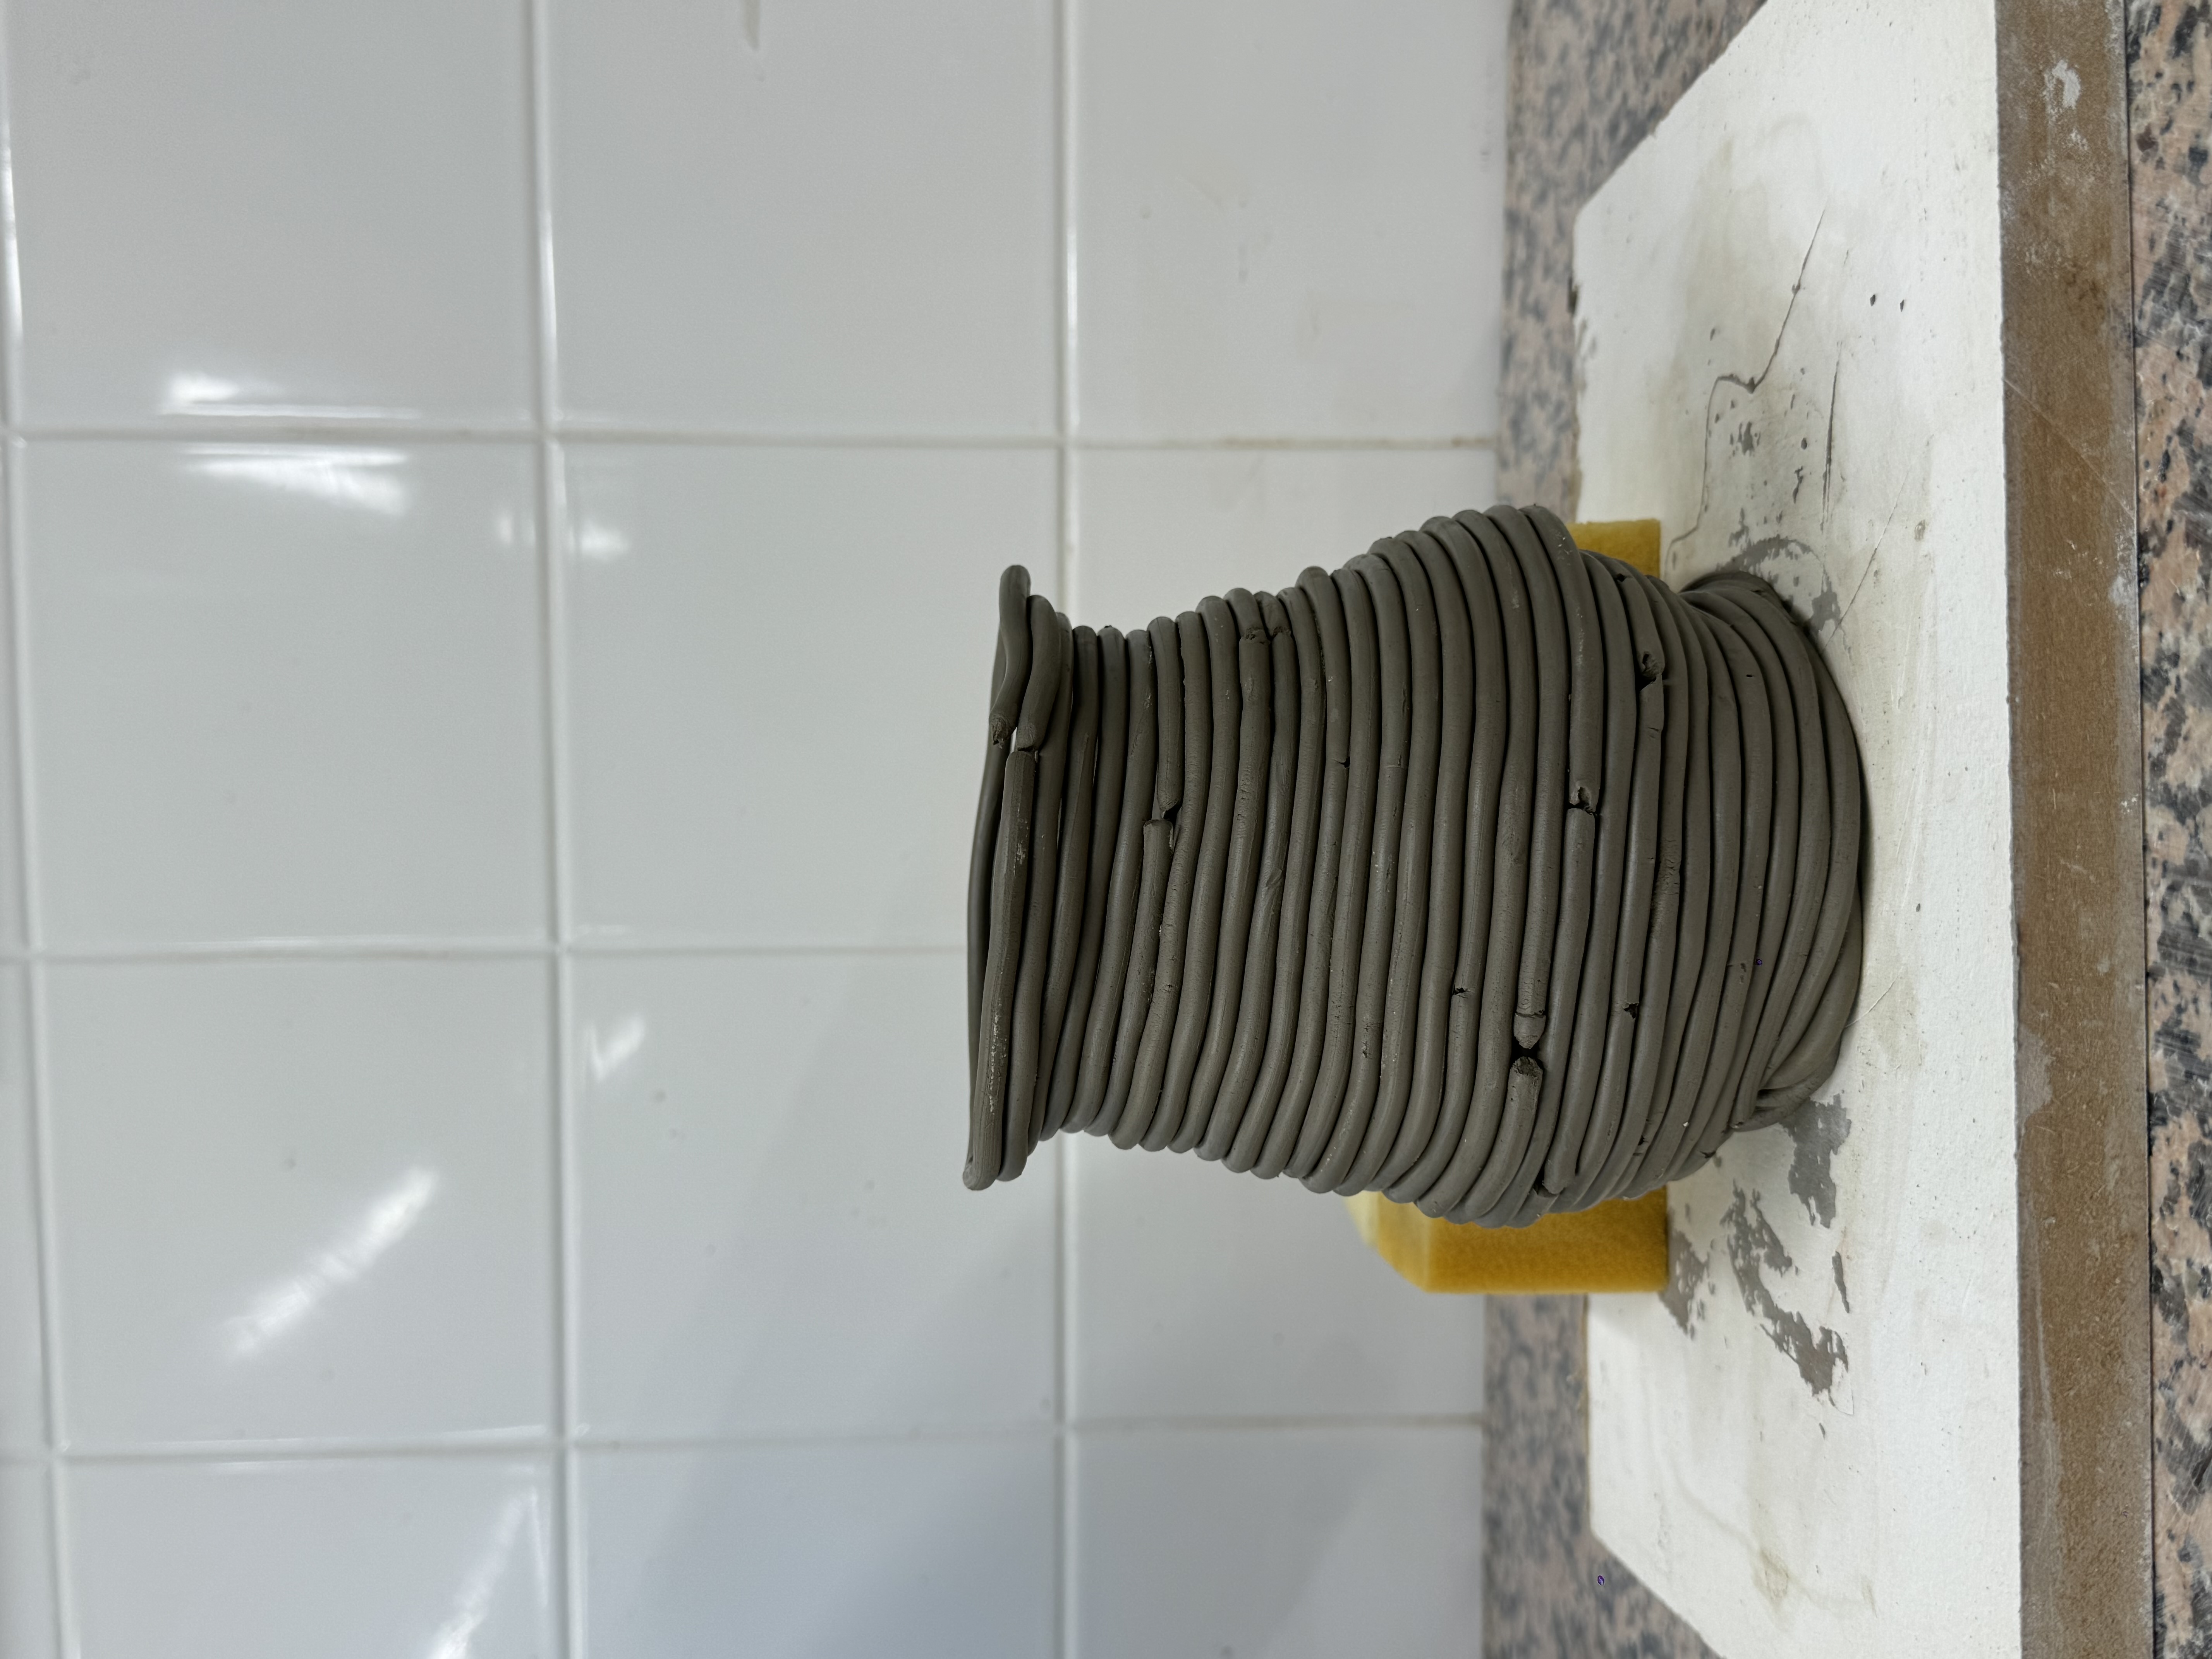
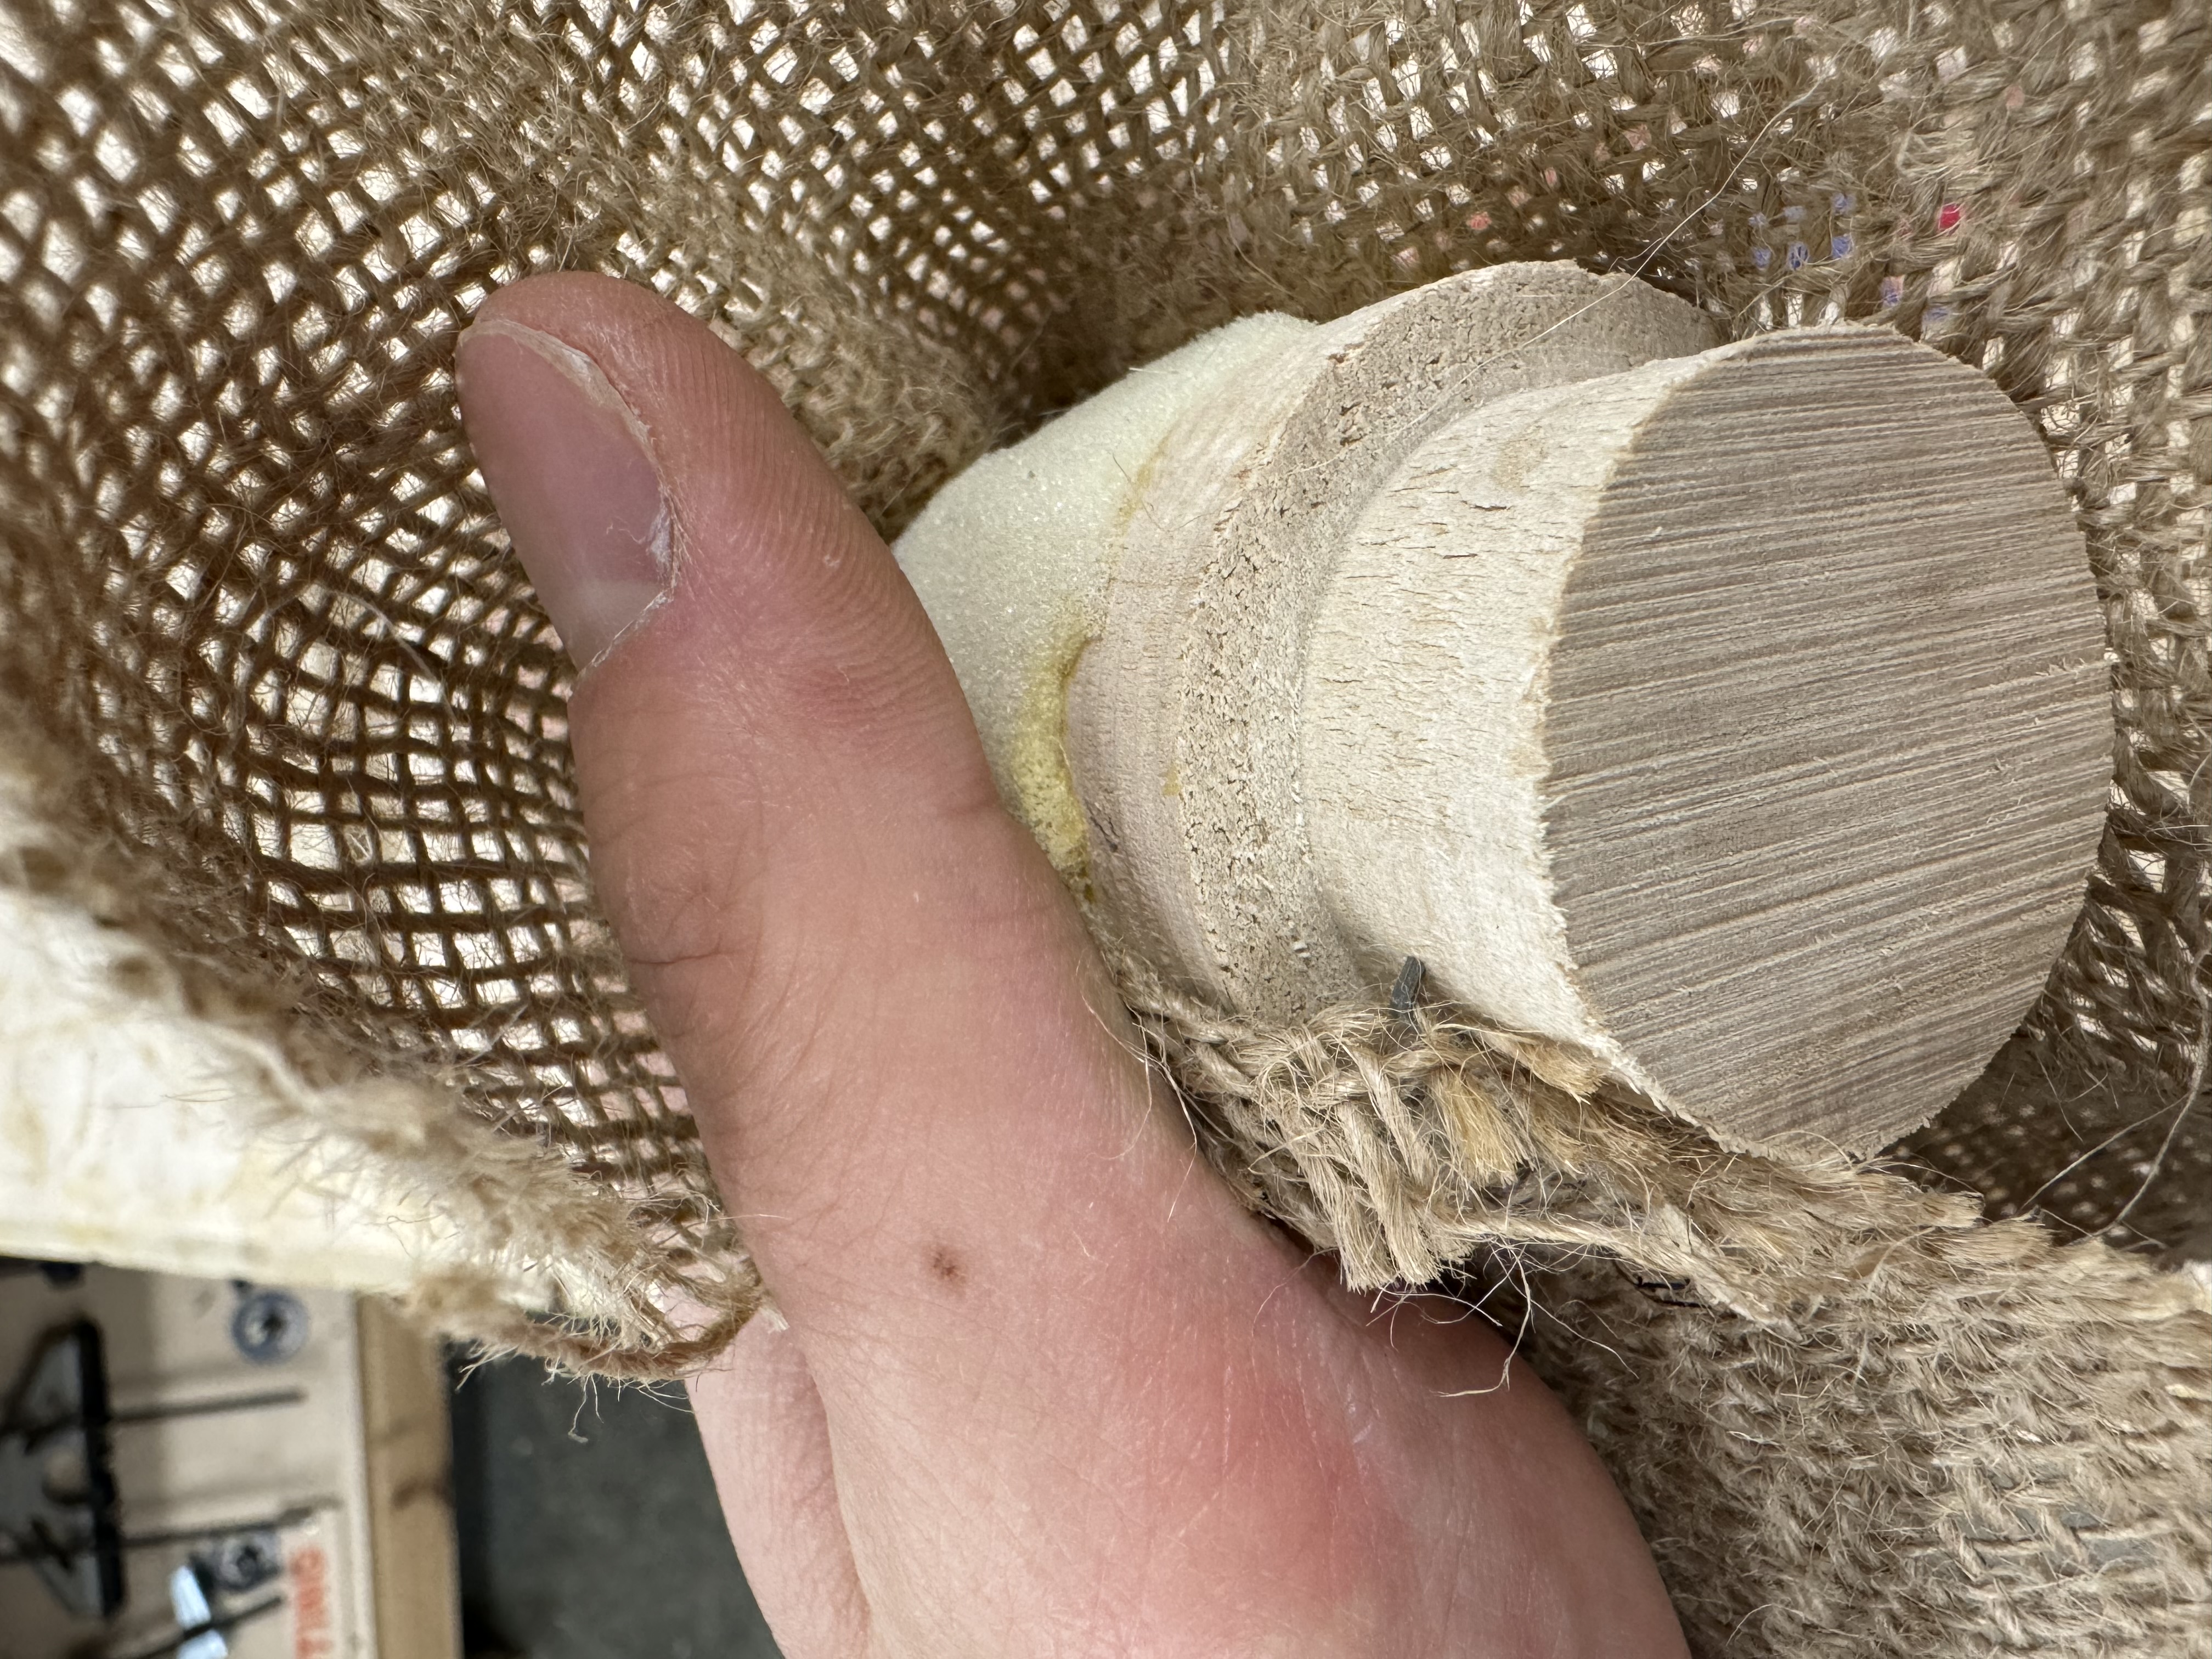
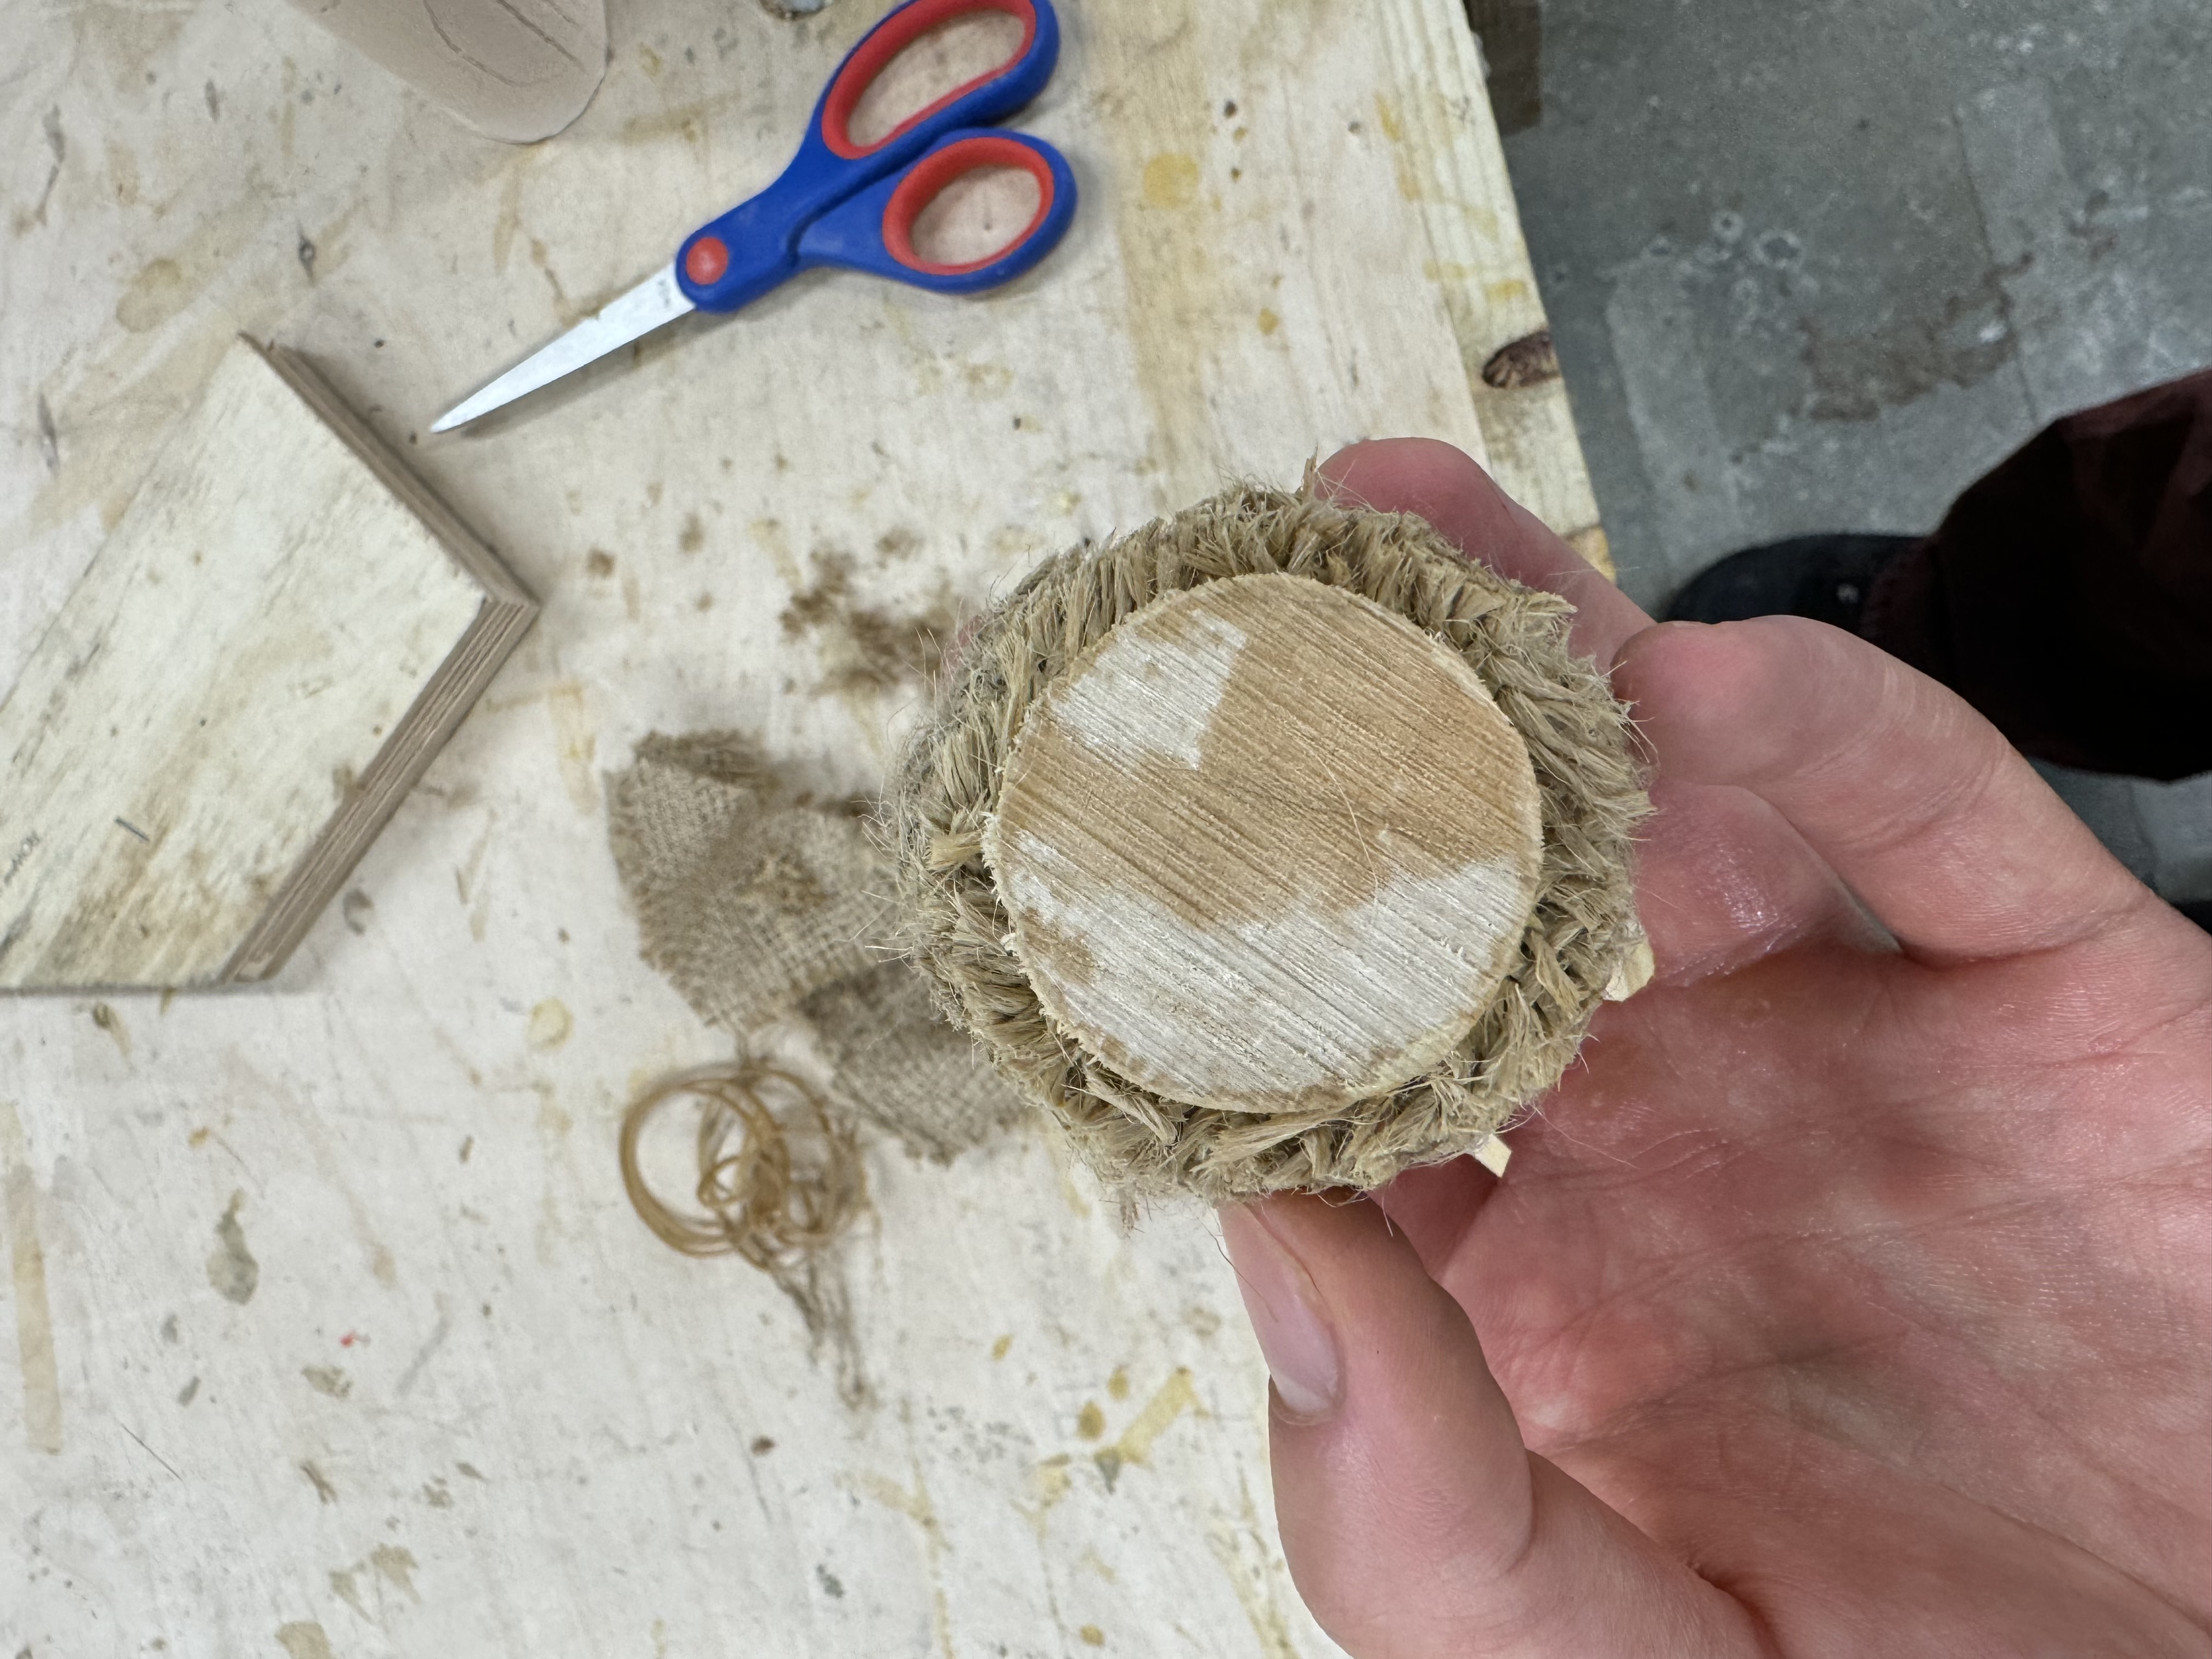
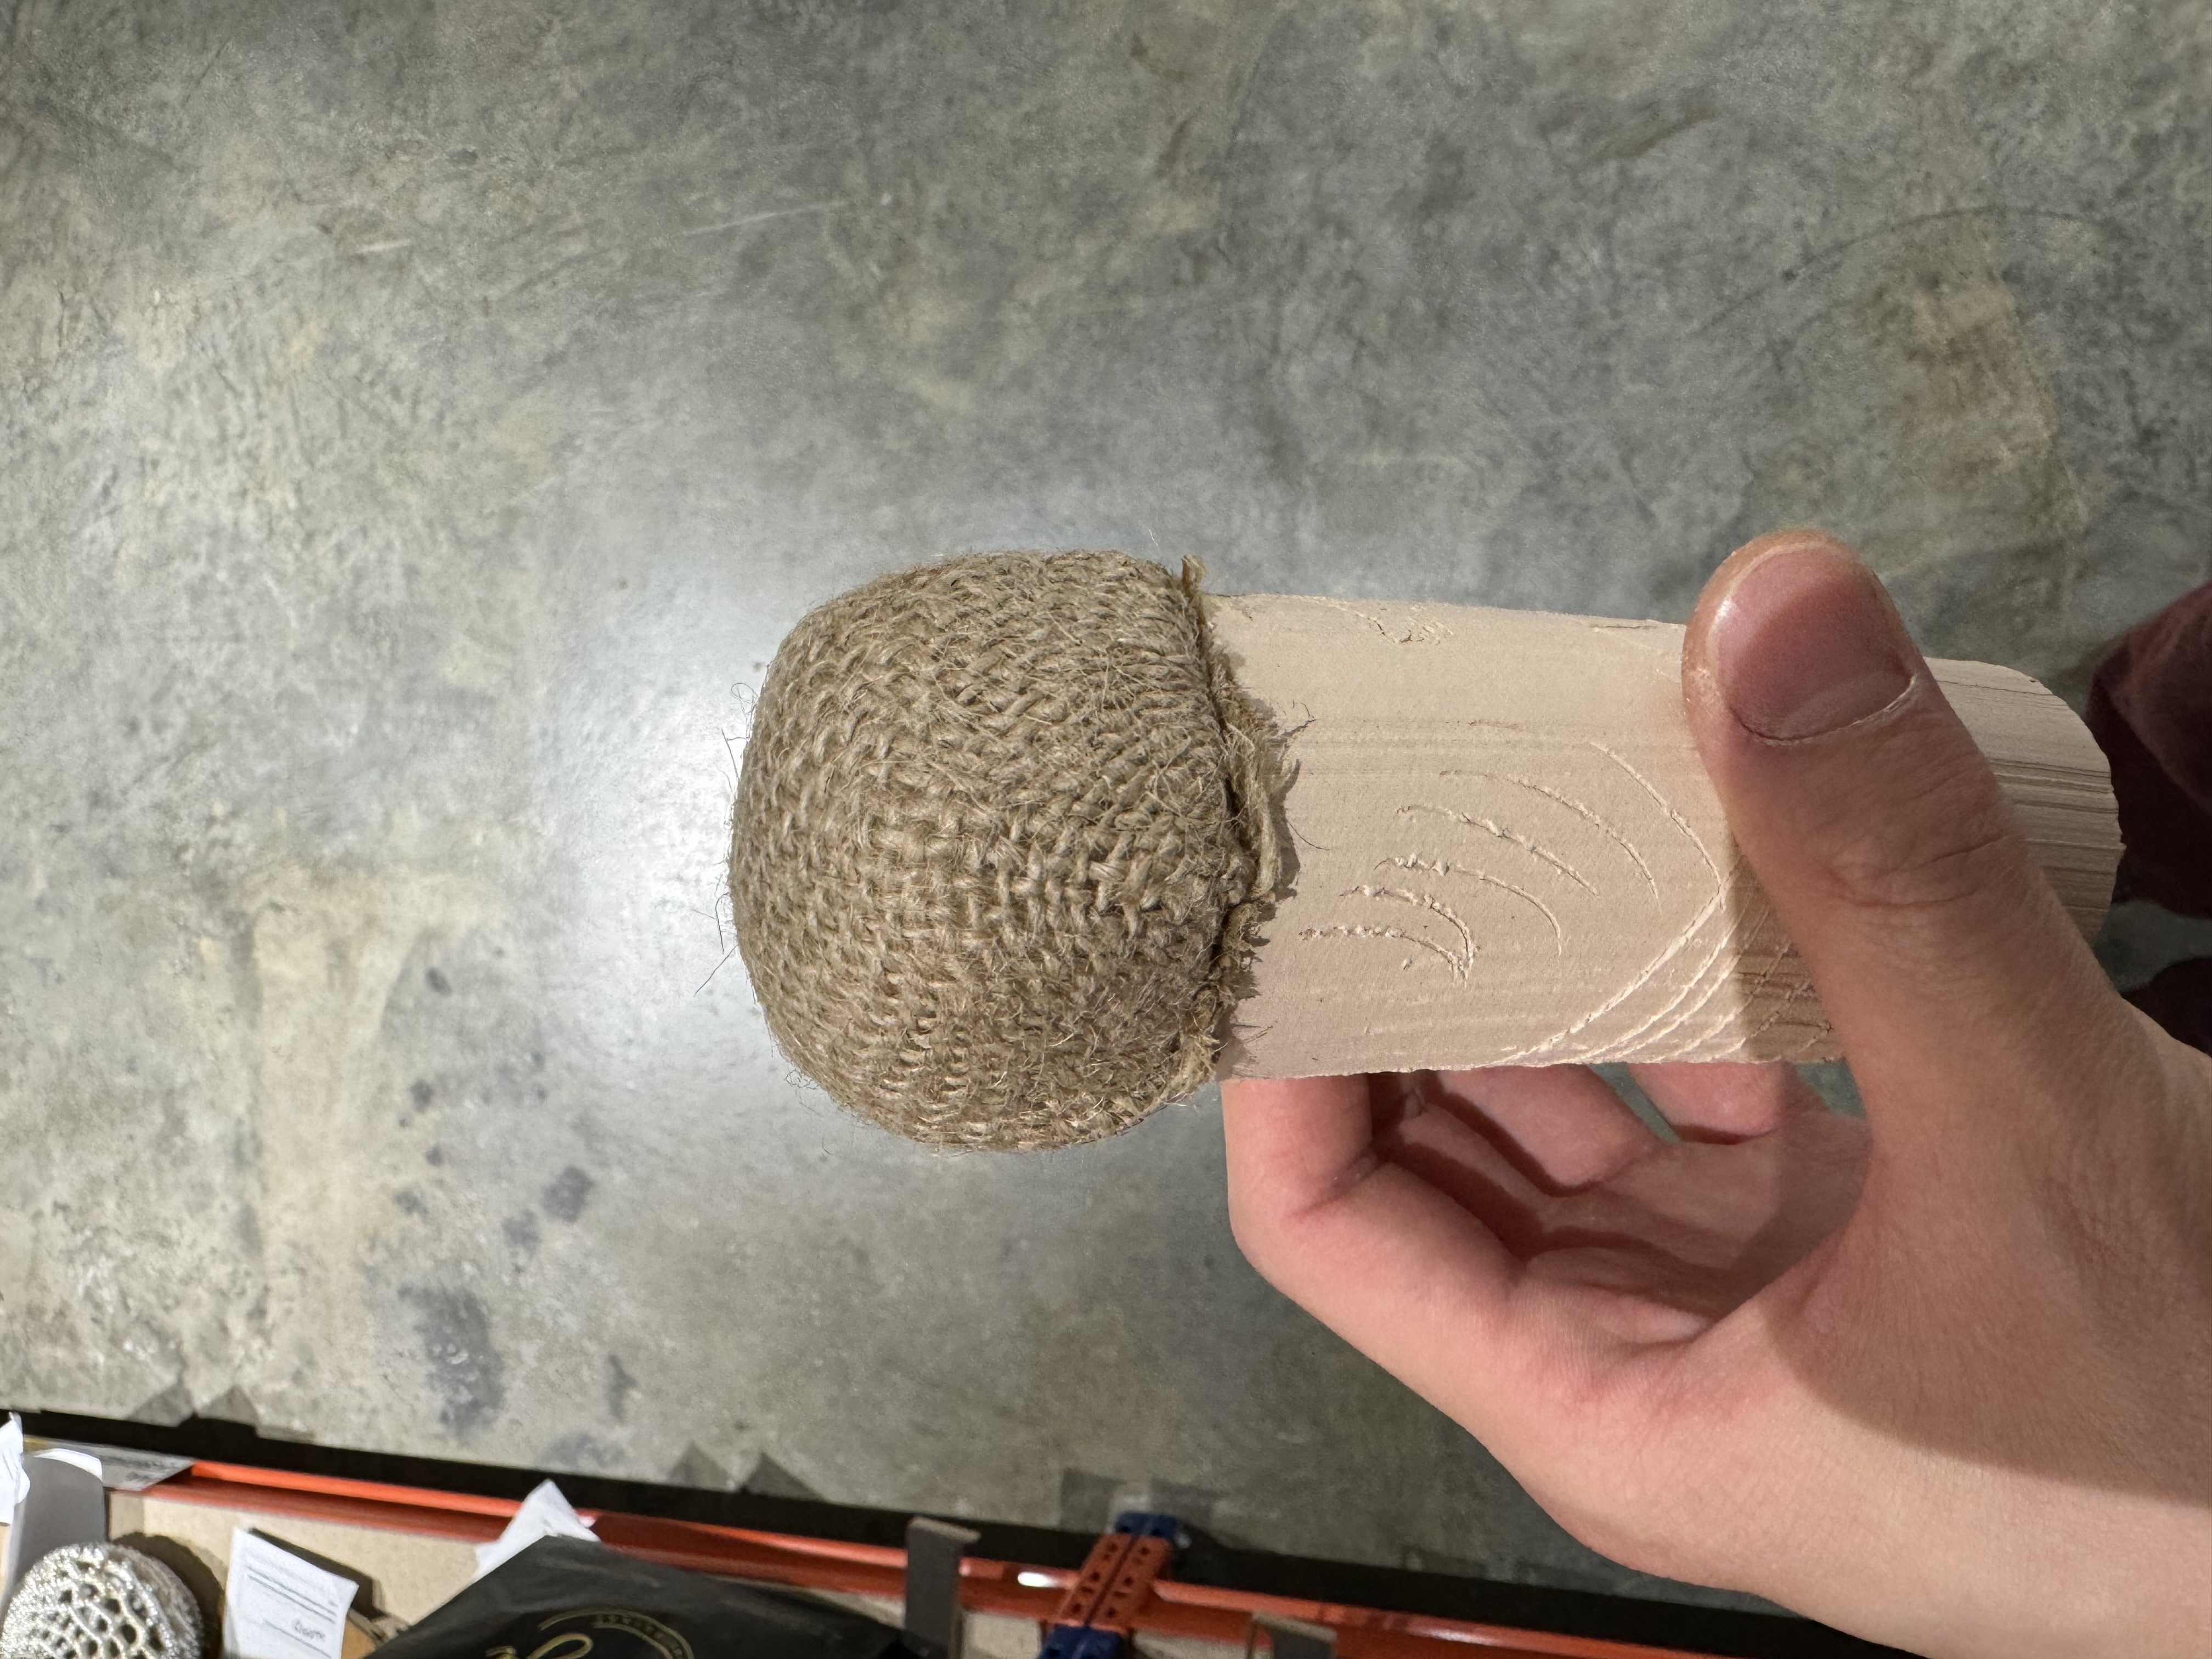
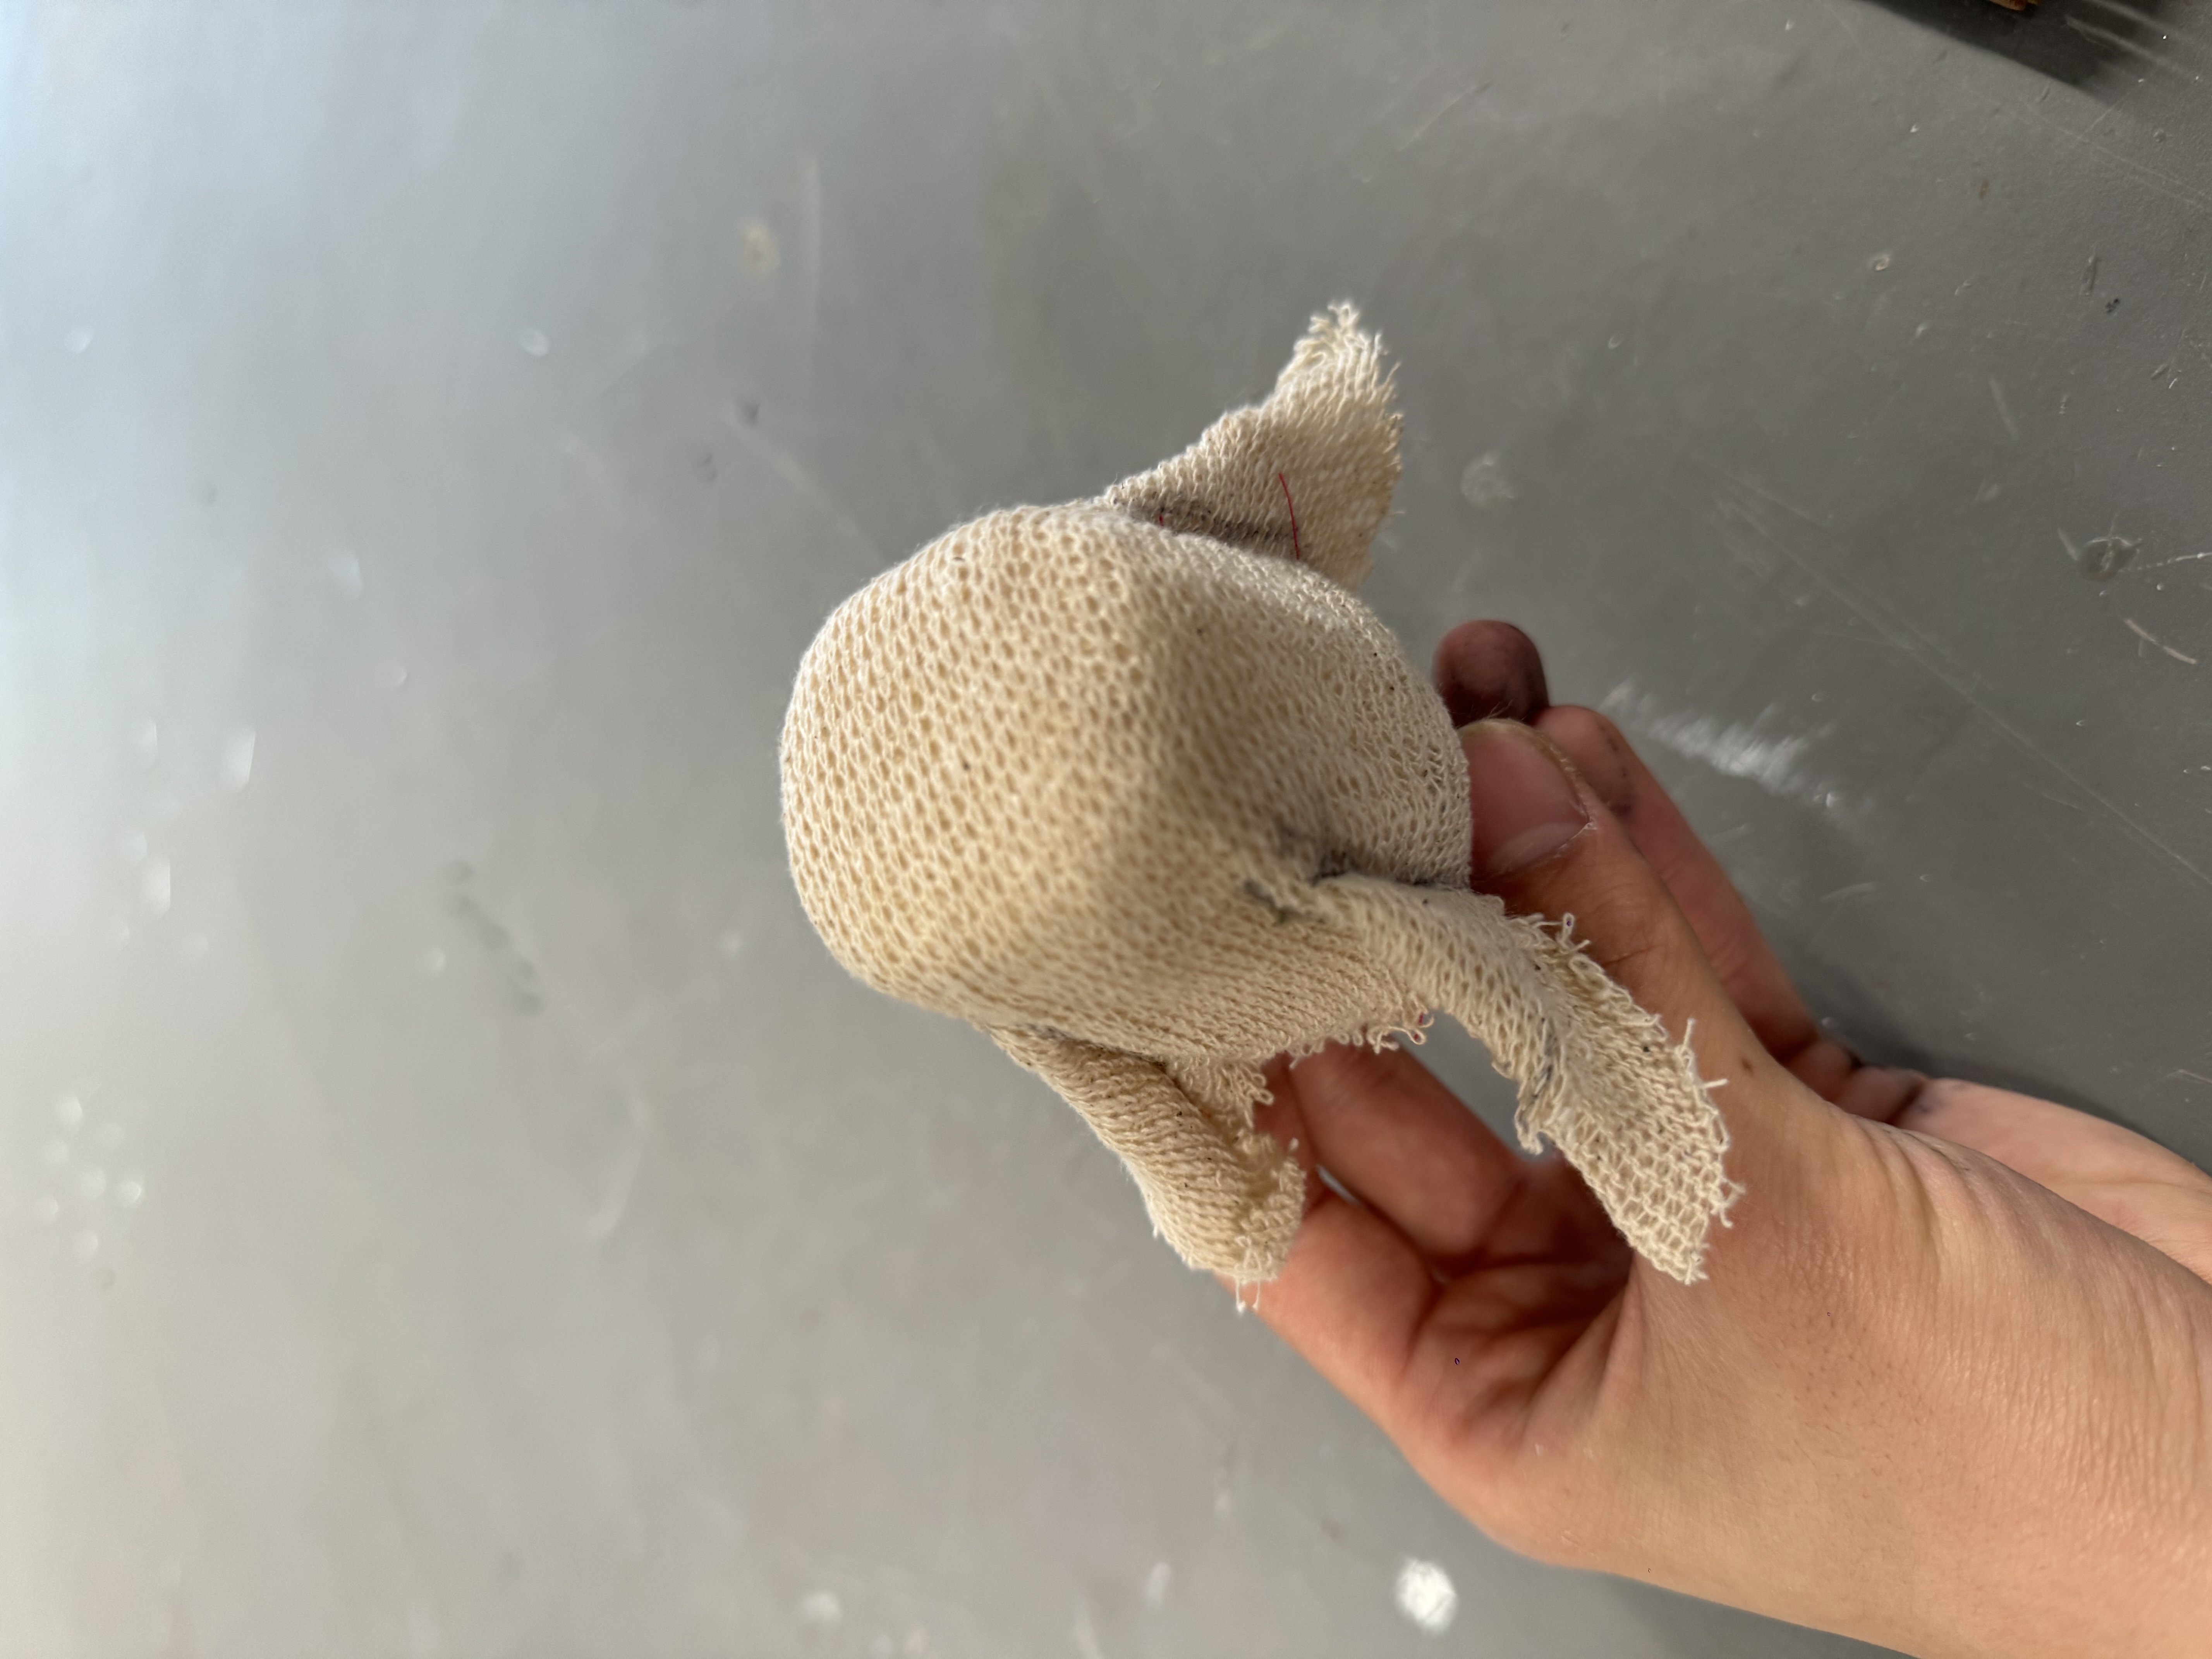
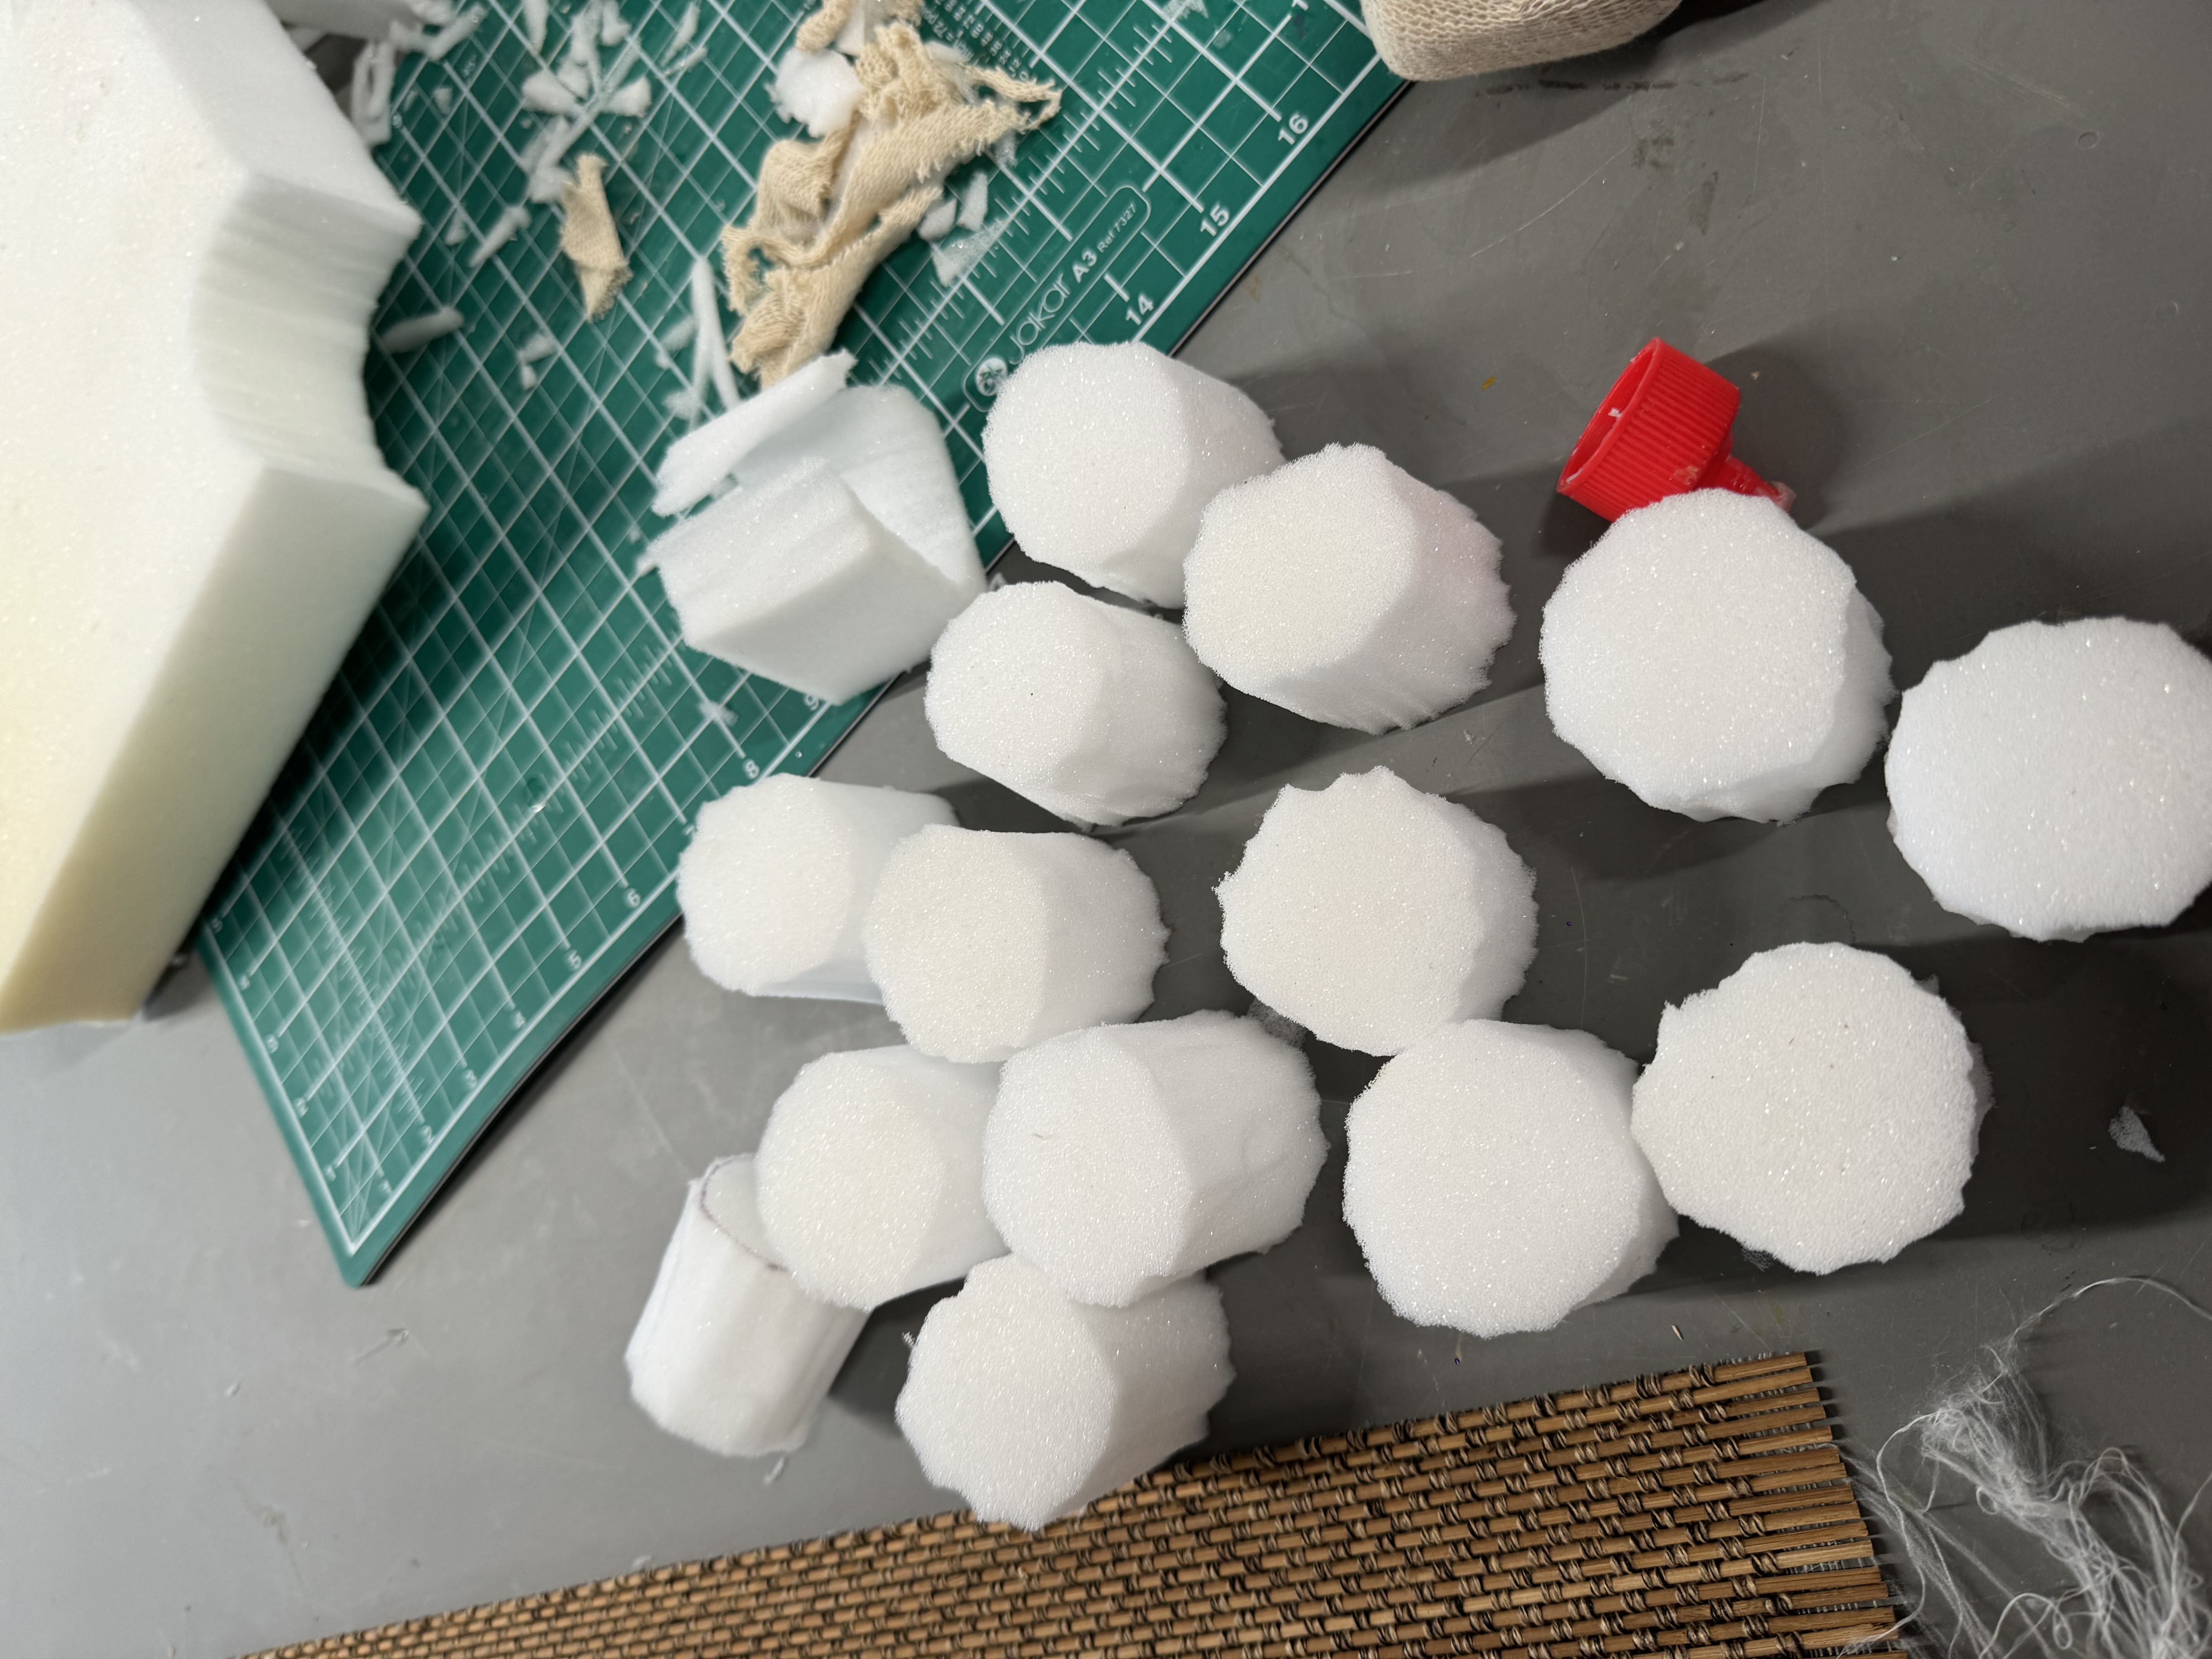
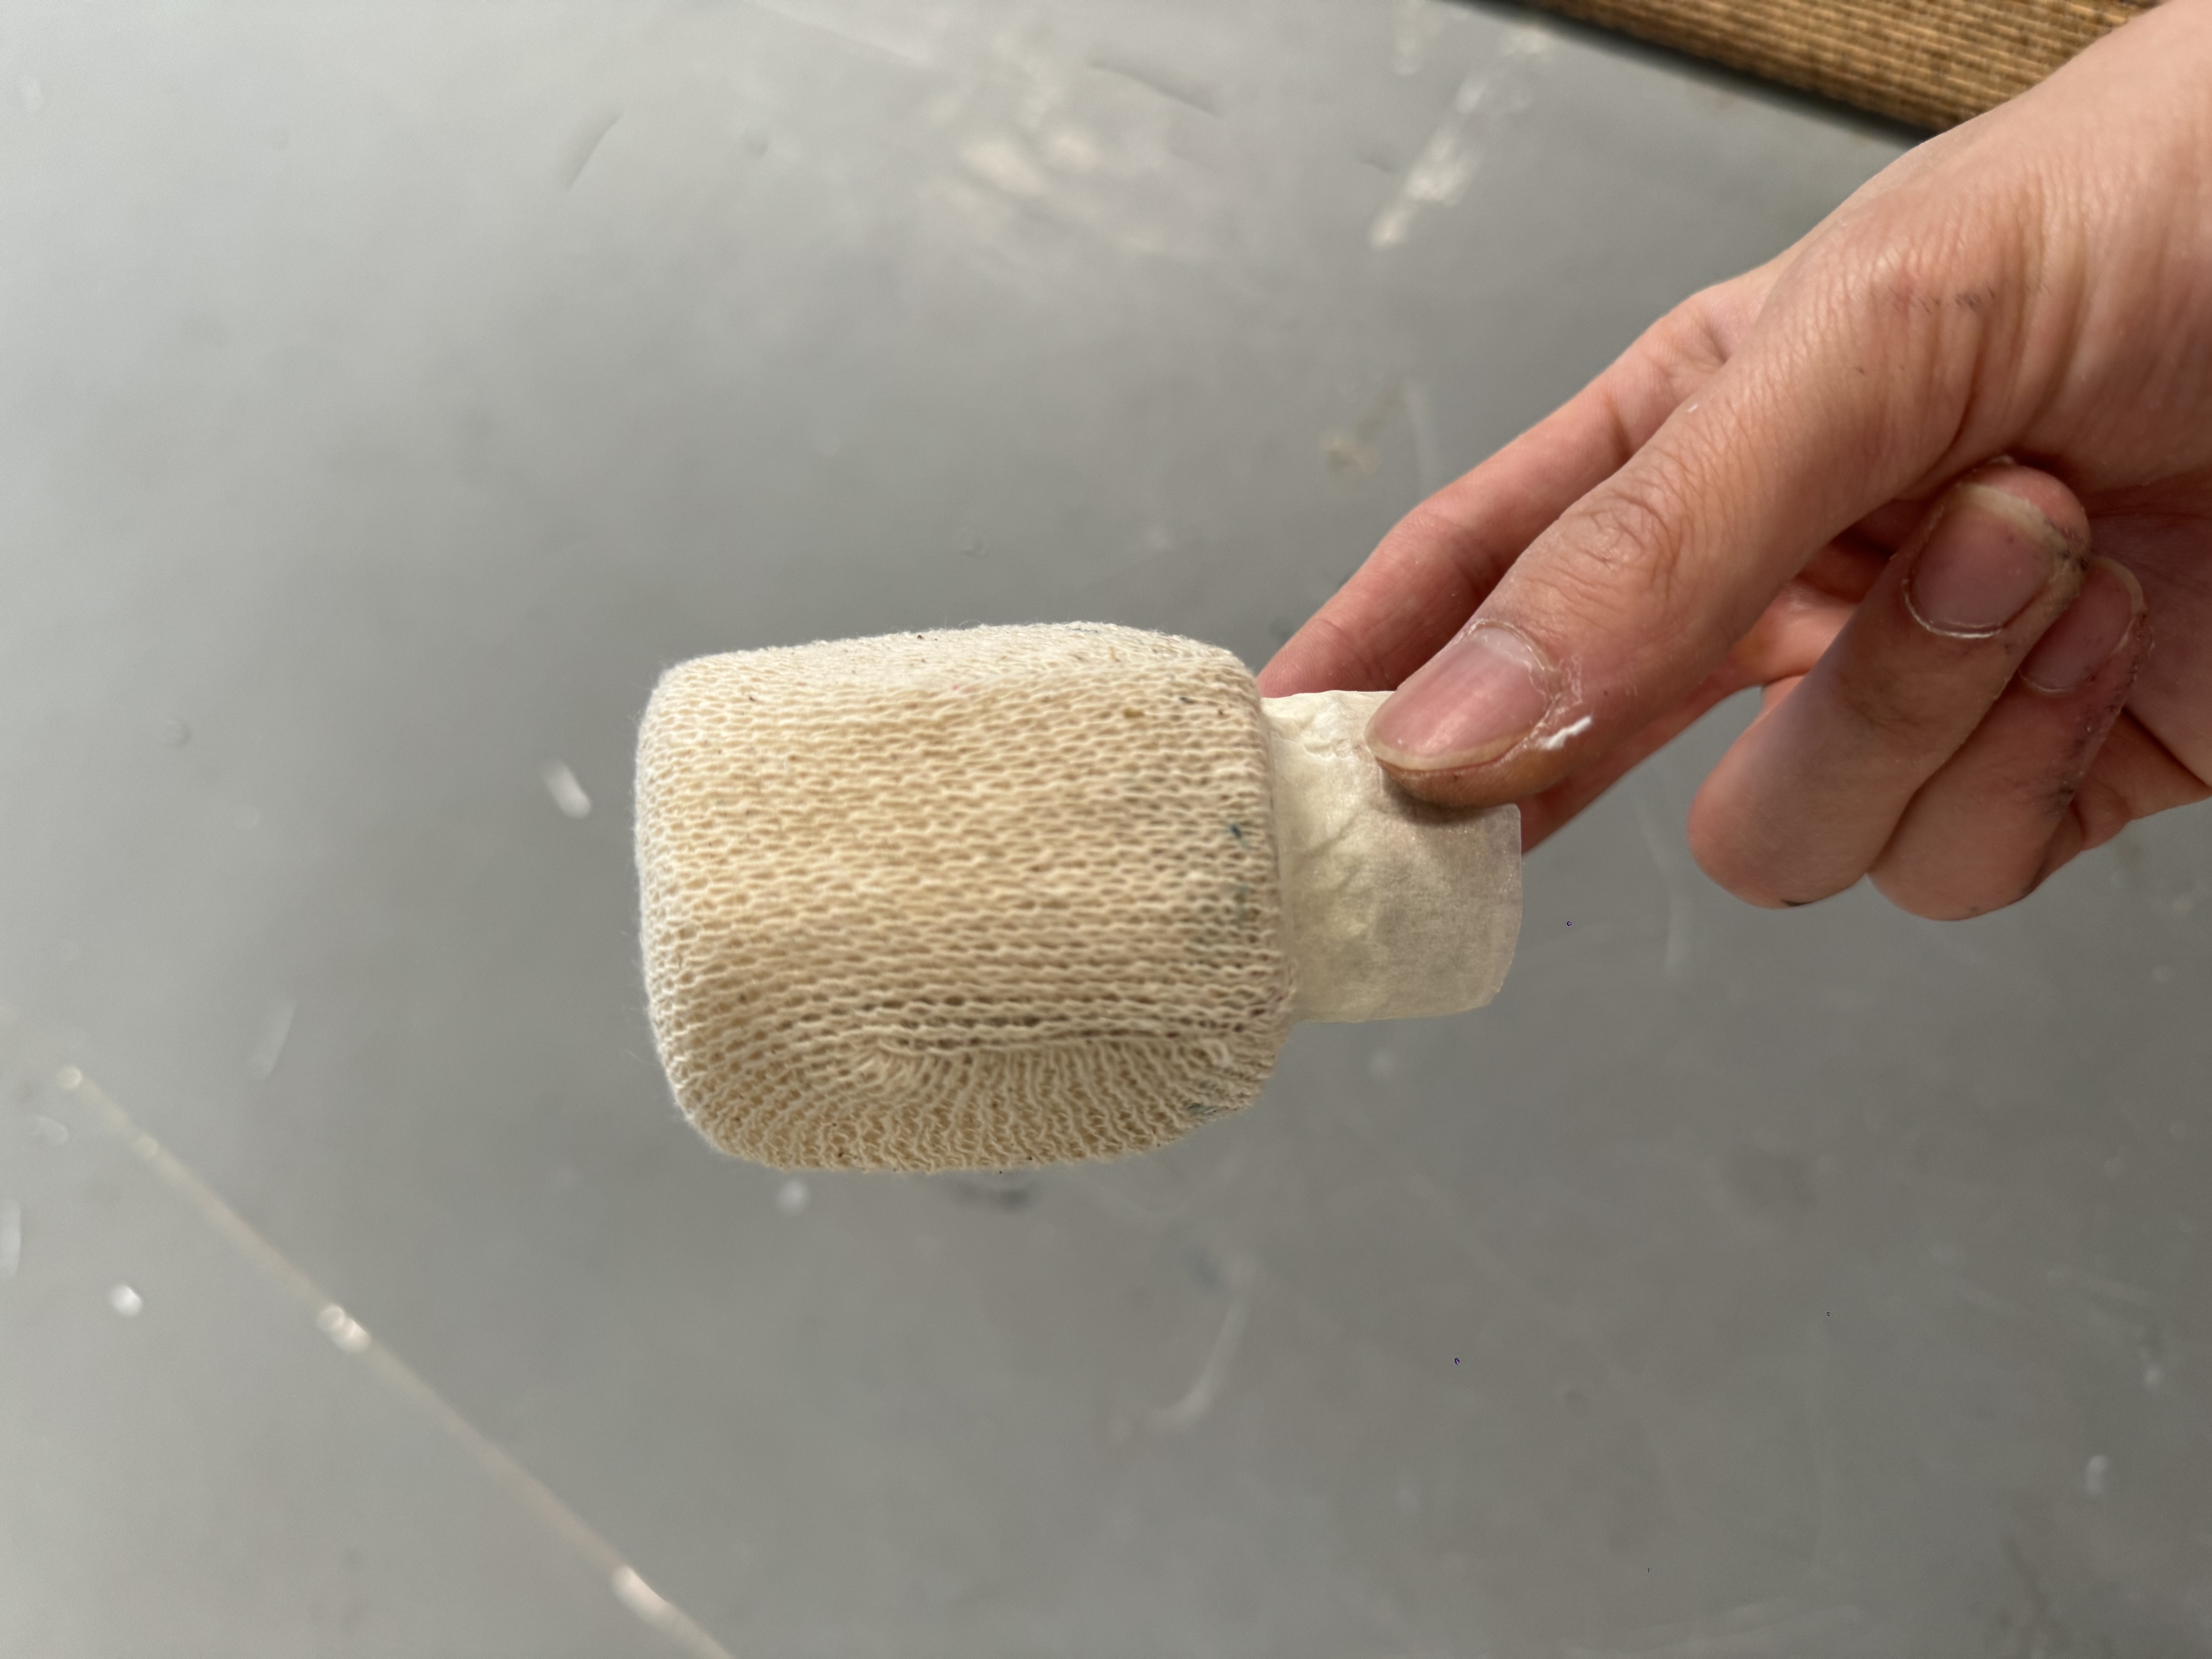
For this project, finally I want to make a ceramic furniture. Firstly, I want to try with the hollow cylinders. Before I make a furniture, I also need to make another object to test the making techniques. That is why I made a vase. I failed once because when I tried to cut the bottom to be more like a plane, it cracked from the bottom and gradually all deformed. So, when doing this step, it really needs to be slowly and the knife should be wet so that it will be smooth enough to cut. To further polish the bottom, I can rub it on the table with water. To polish the inner wall, I created a “stick sponge”, which is really convenient. If I cannot do it in a day, I can wrap it with cling film to lock the moisture and do it after days. Finally, the vase is firm enough so that I can do the next step to make a ceramic stool. For the vase, I generated an idea to glaze it like bamboo and mimic the atmosphere of bamboo forest.

22/04/2024
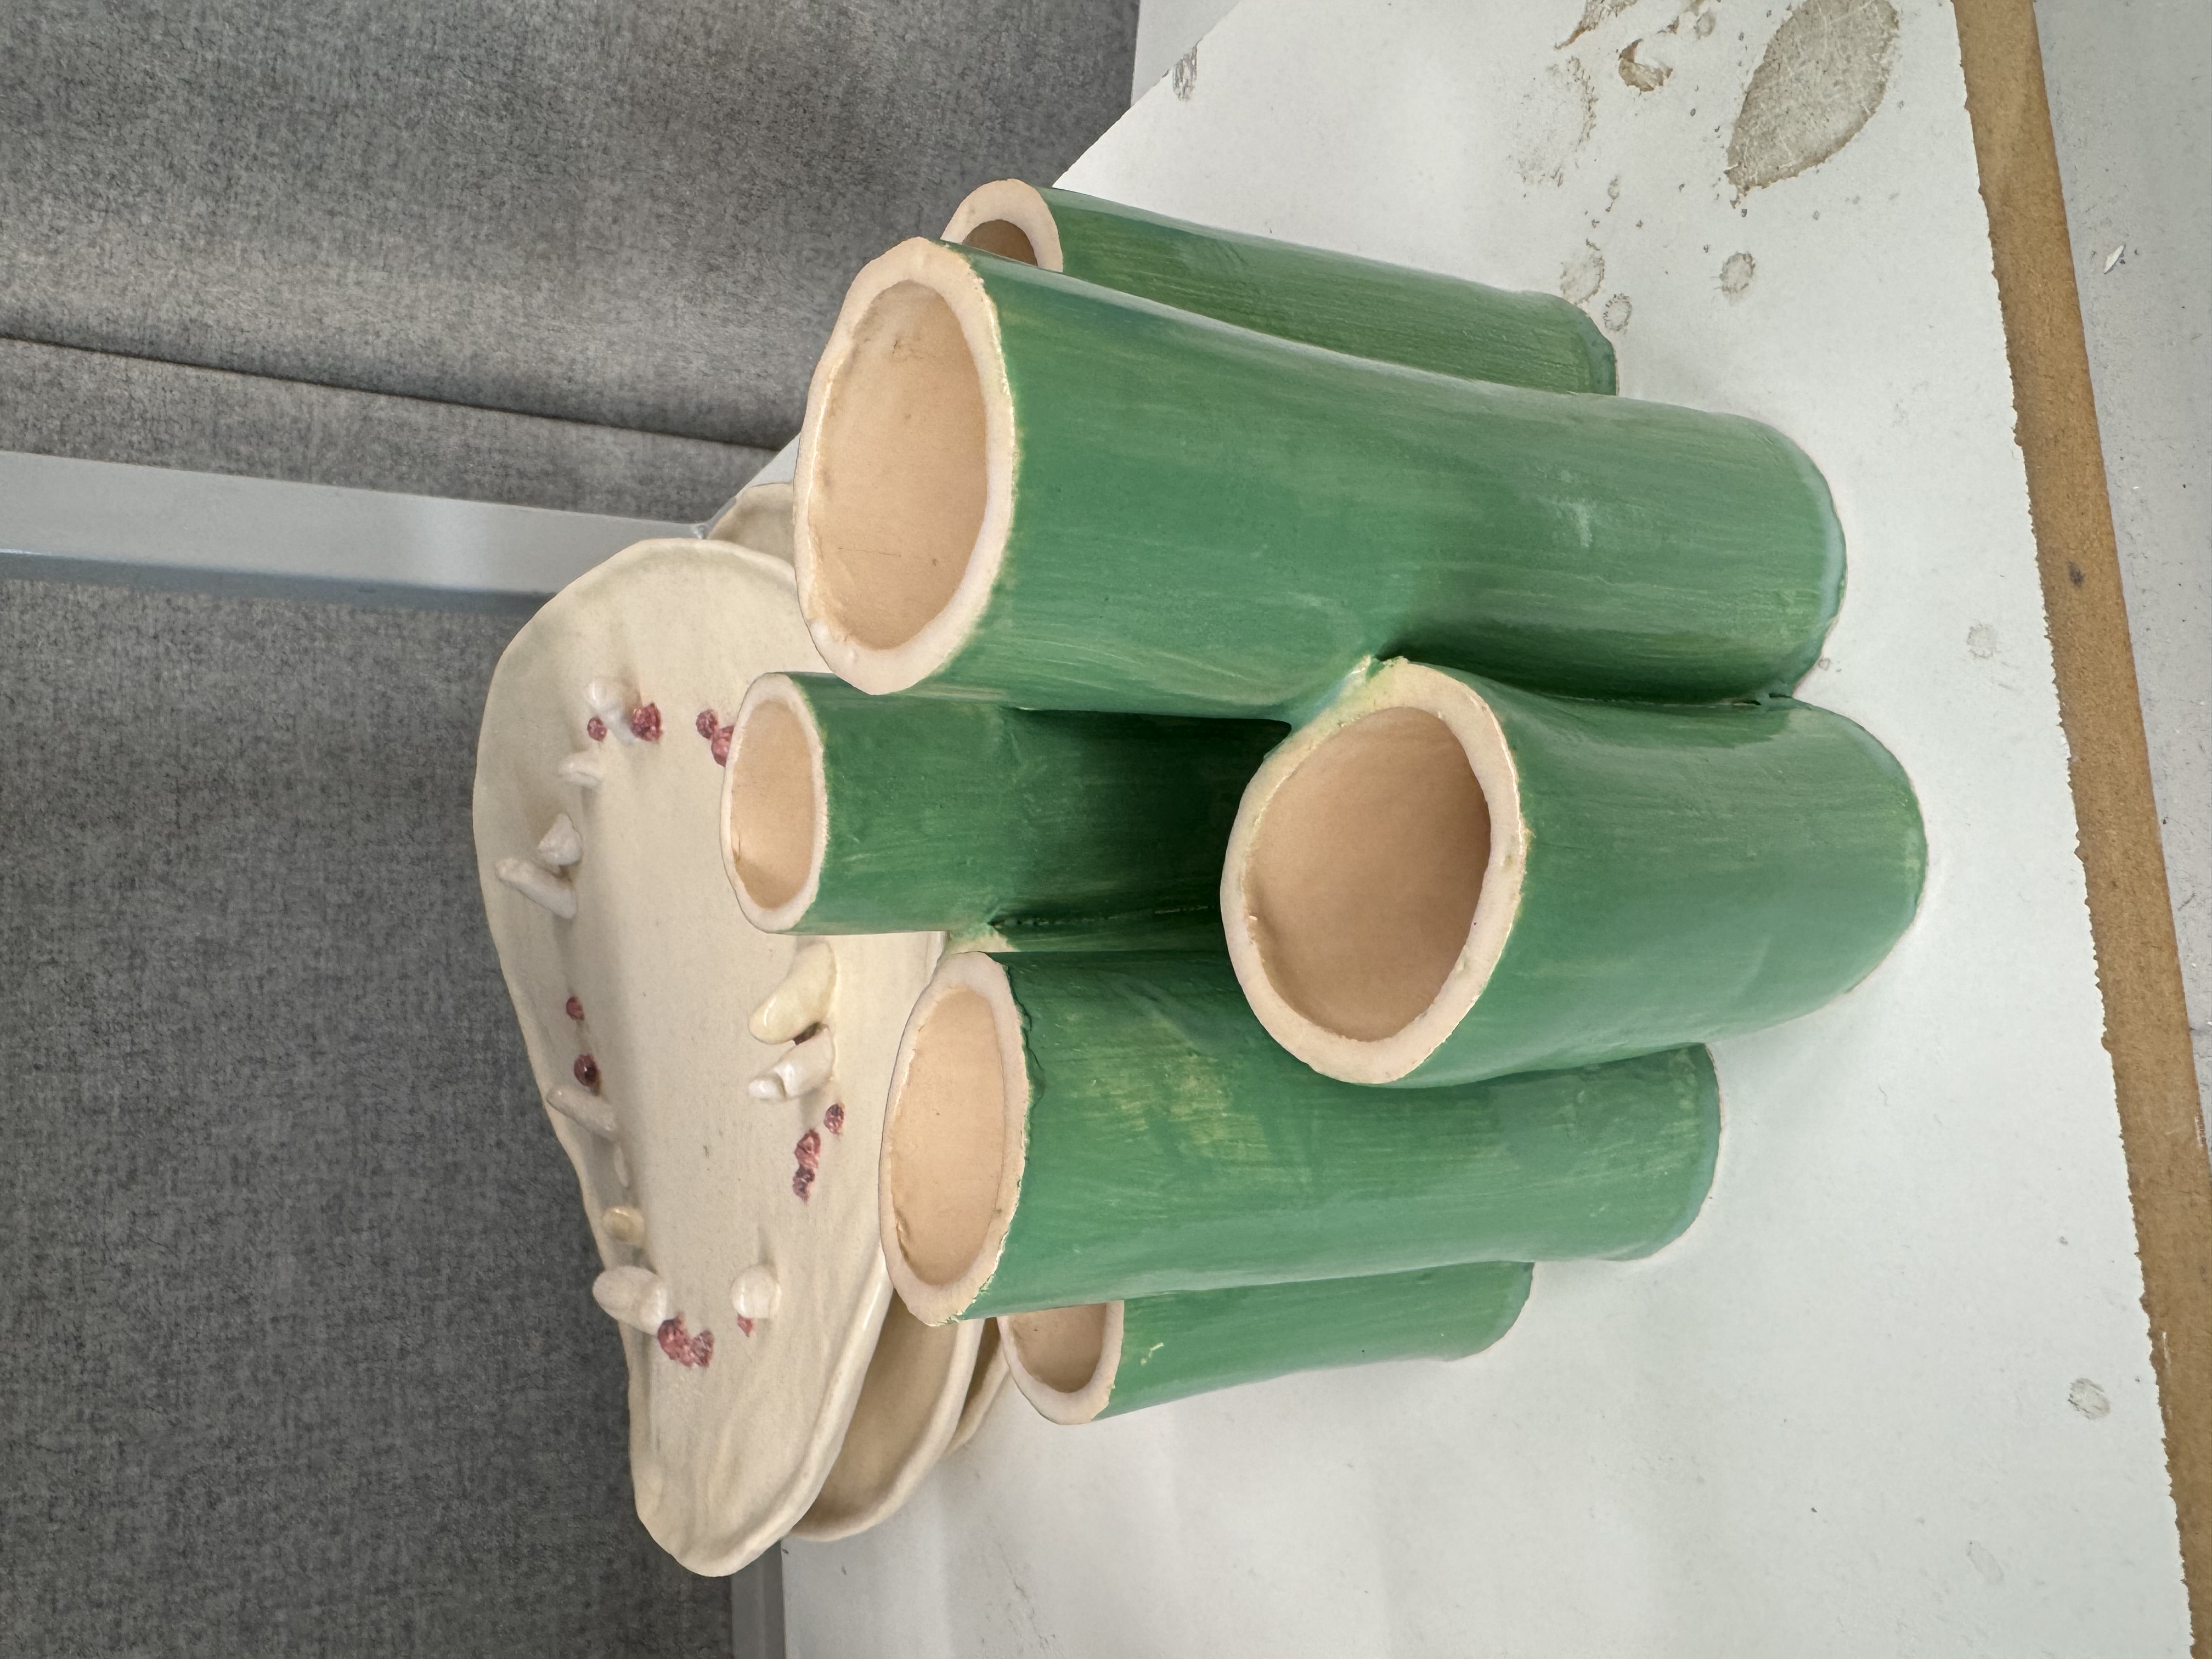
During my glazing process, I failed once. Because there was too little glaze in the bucket when applying the transparent glaze, I soaked it for too long and the transparent glaze was too thick. So I had to wash it off and re-glaze it. But on the day of the second glazing, I washed it again, and James told me that it was best to dry it for 24 hours, so that it would be easier to glaze. I waited a few hours until the afternoon and applied the glaze, and the effect was still good. Later, I learned that when applying glaze, the ceramic must be completely dry, and when applying transparent glaze, it must be soaked quickly at once to ensure uniformity. I really like the vertical texture at the end that looks like bamboo. Although there are many imperfections, I really like the creativity and finish of this piece. After the bottom plate is finished, I will take a photo of the finished product after inserting the flowers.

22/04/2024
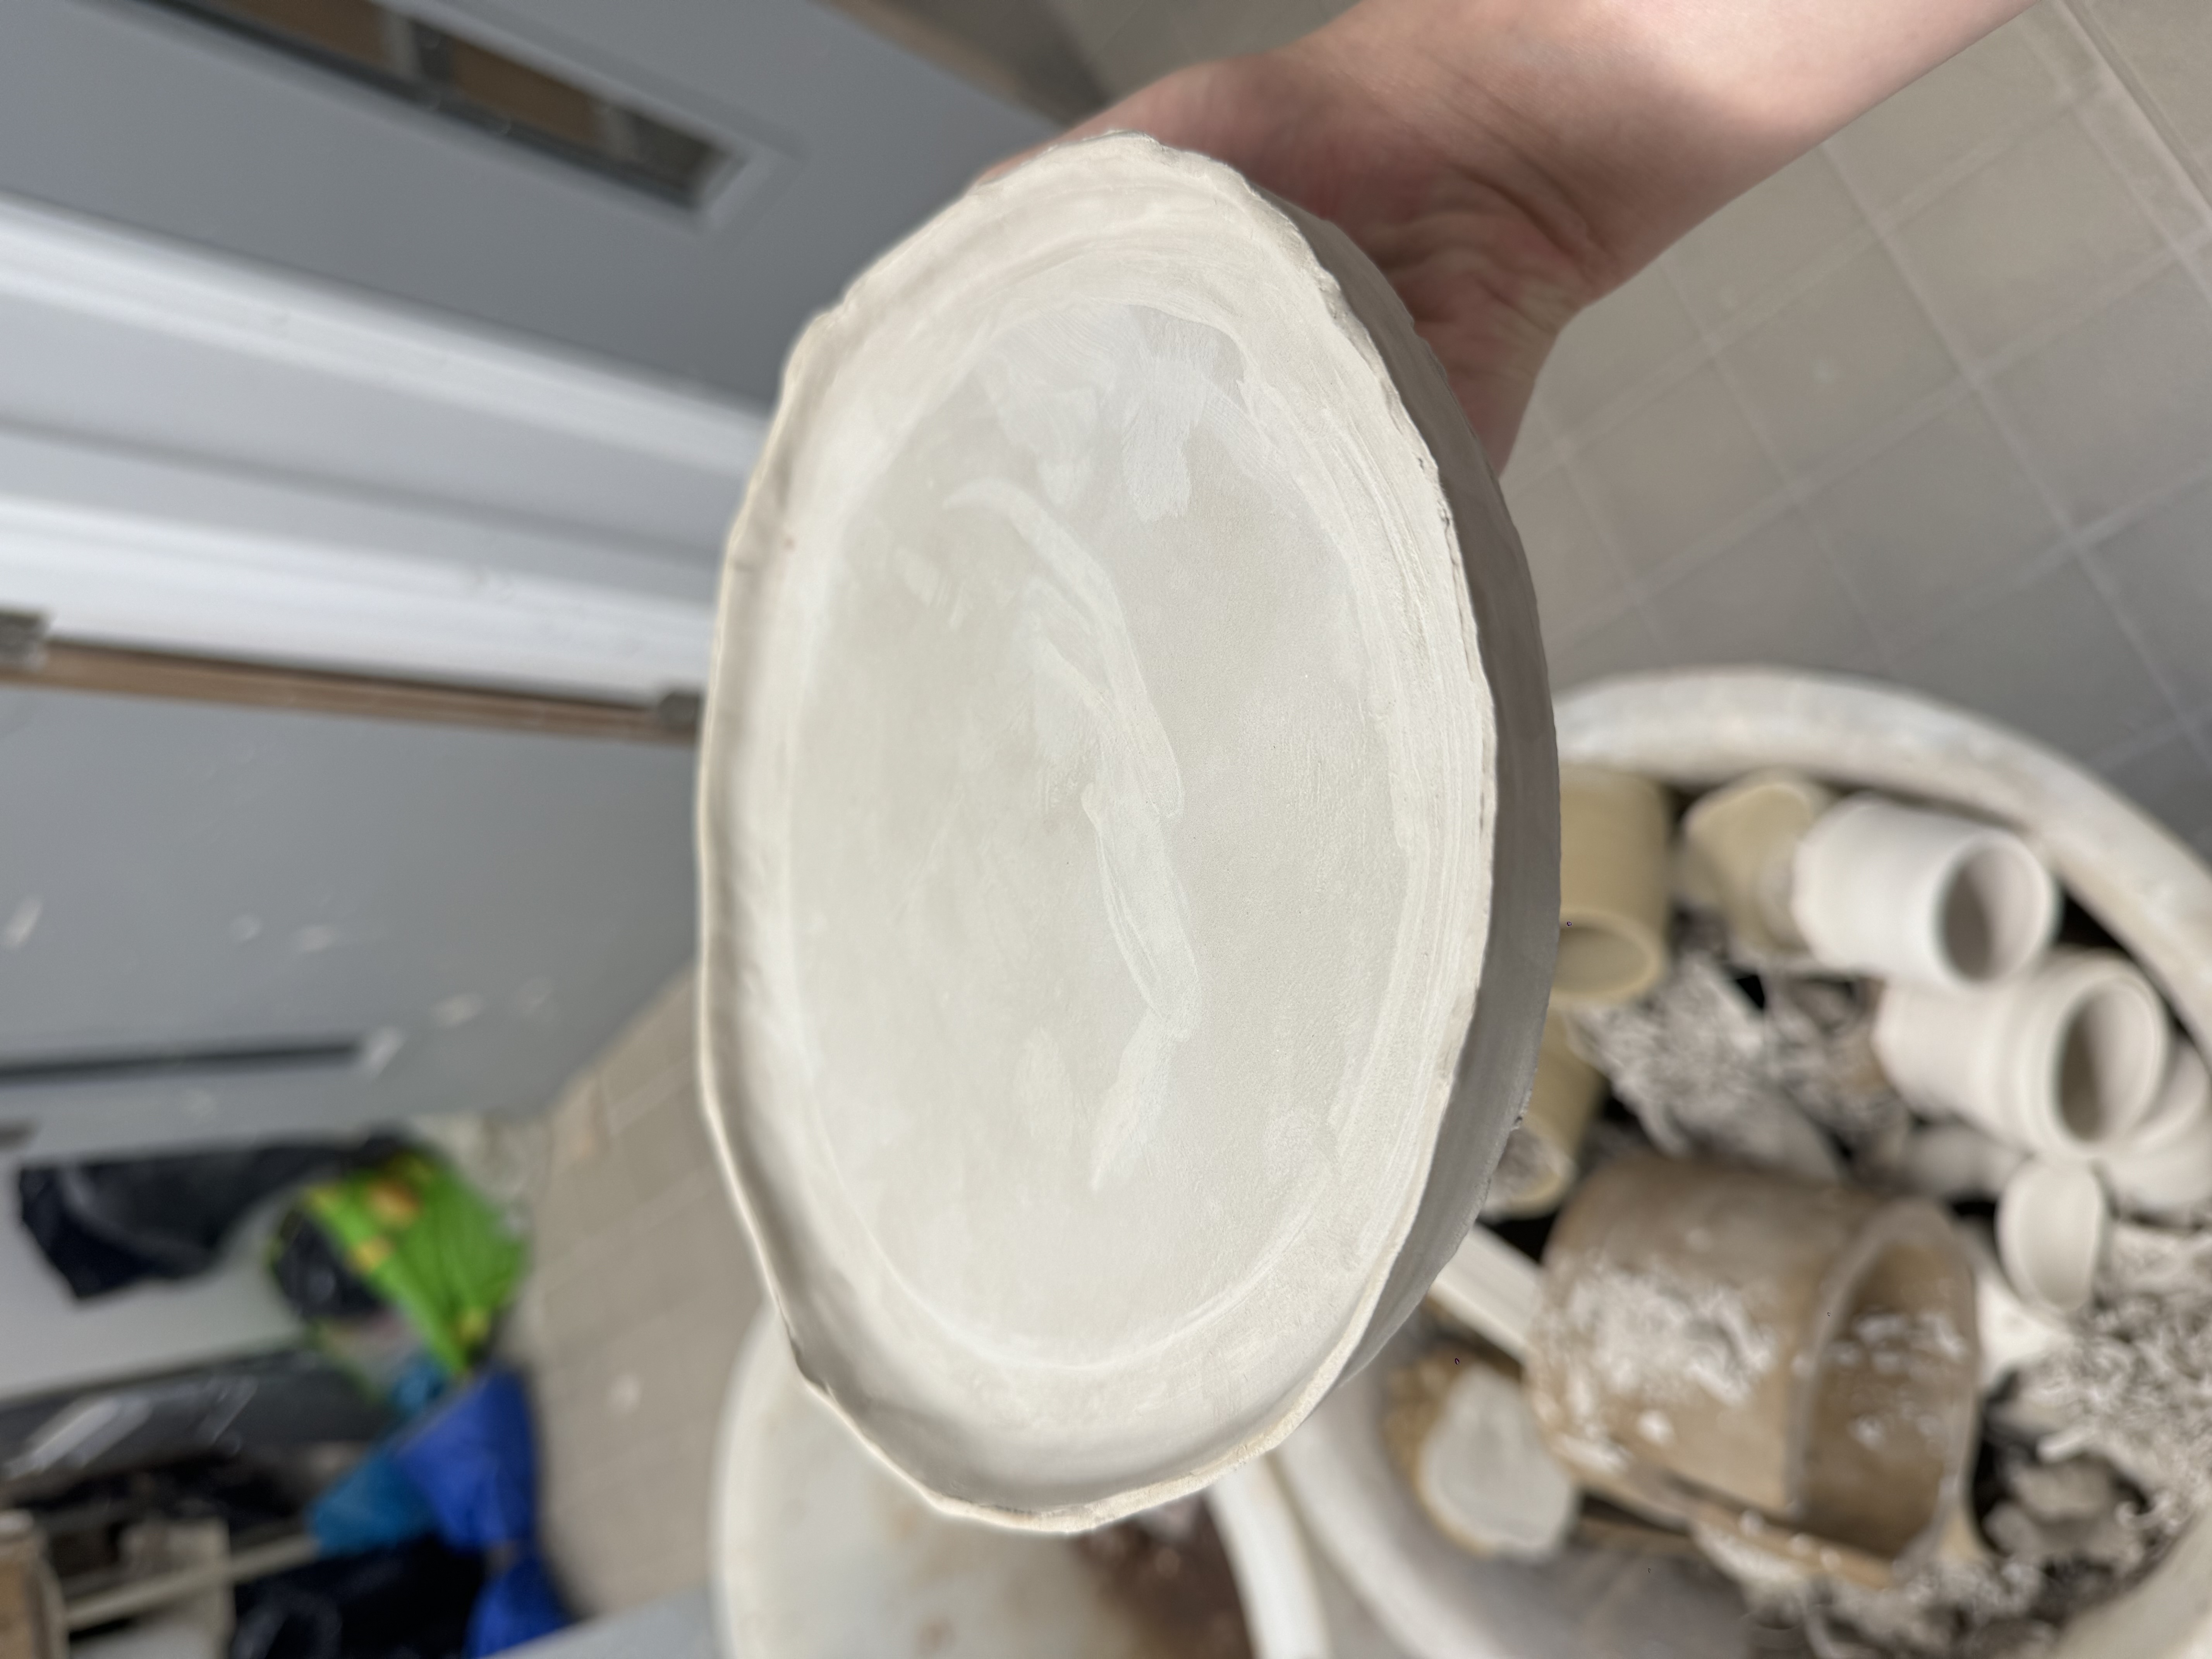
When making the plate for the base of the vase, I found it very difficult to work with and keep the top and bottom of the plate flat. There were wrinkles on the bottom when I made it this time, I think it's because I cut it with wire, I should be patient next time. Also, today I tried casting. It is very difficult to keep the object cetered when casting. The opponent's strength and direction control requirements are very high. If I want to master this skill, I have to give up my time for woodcutting. I think maybe I can go back to China to study during the summer or work as an apprentice in some ceramics studio.


22/04/2024
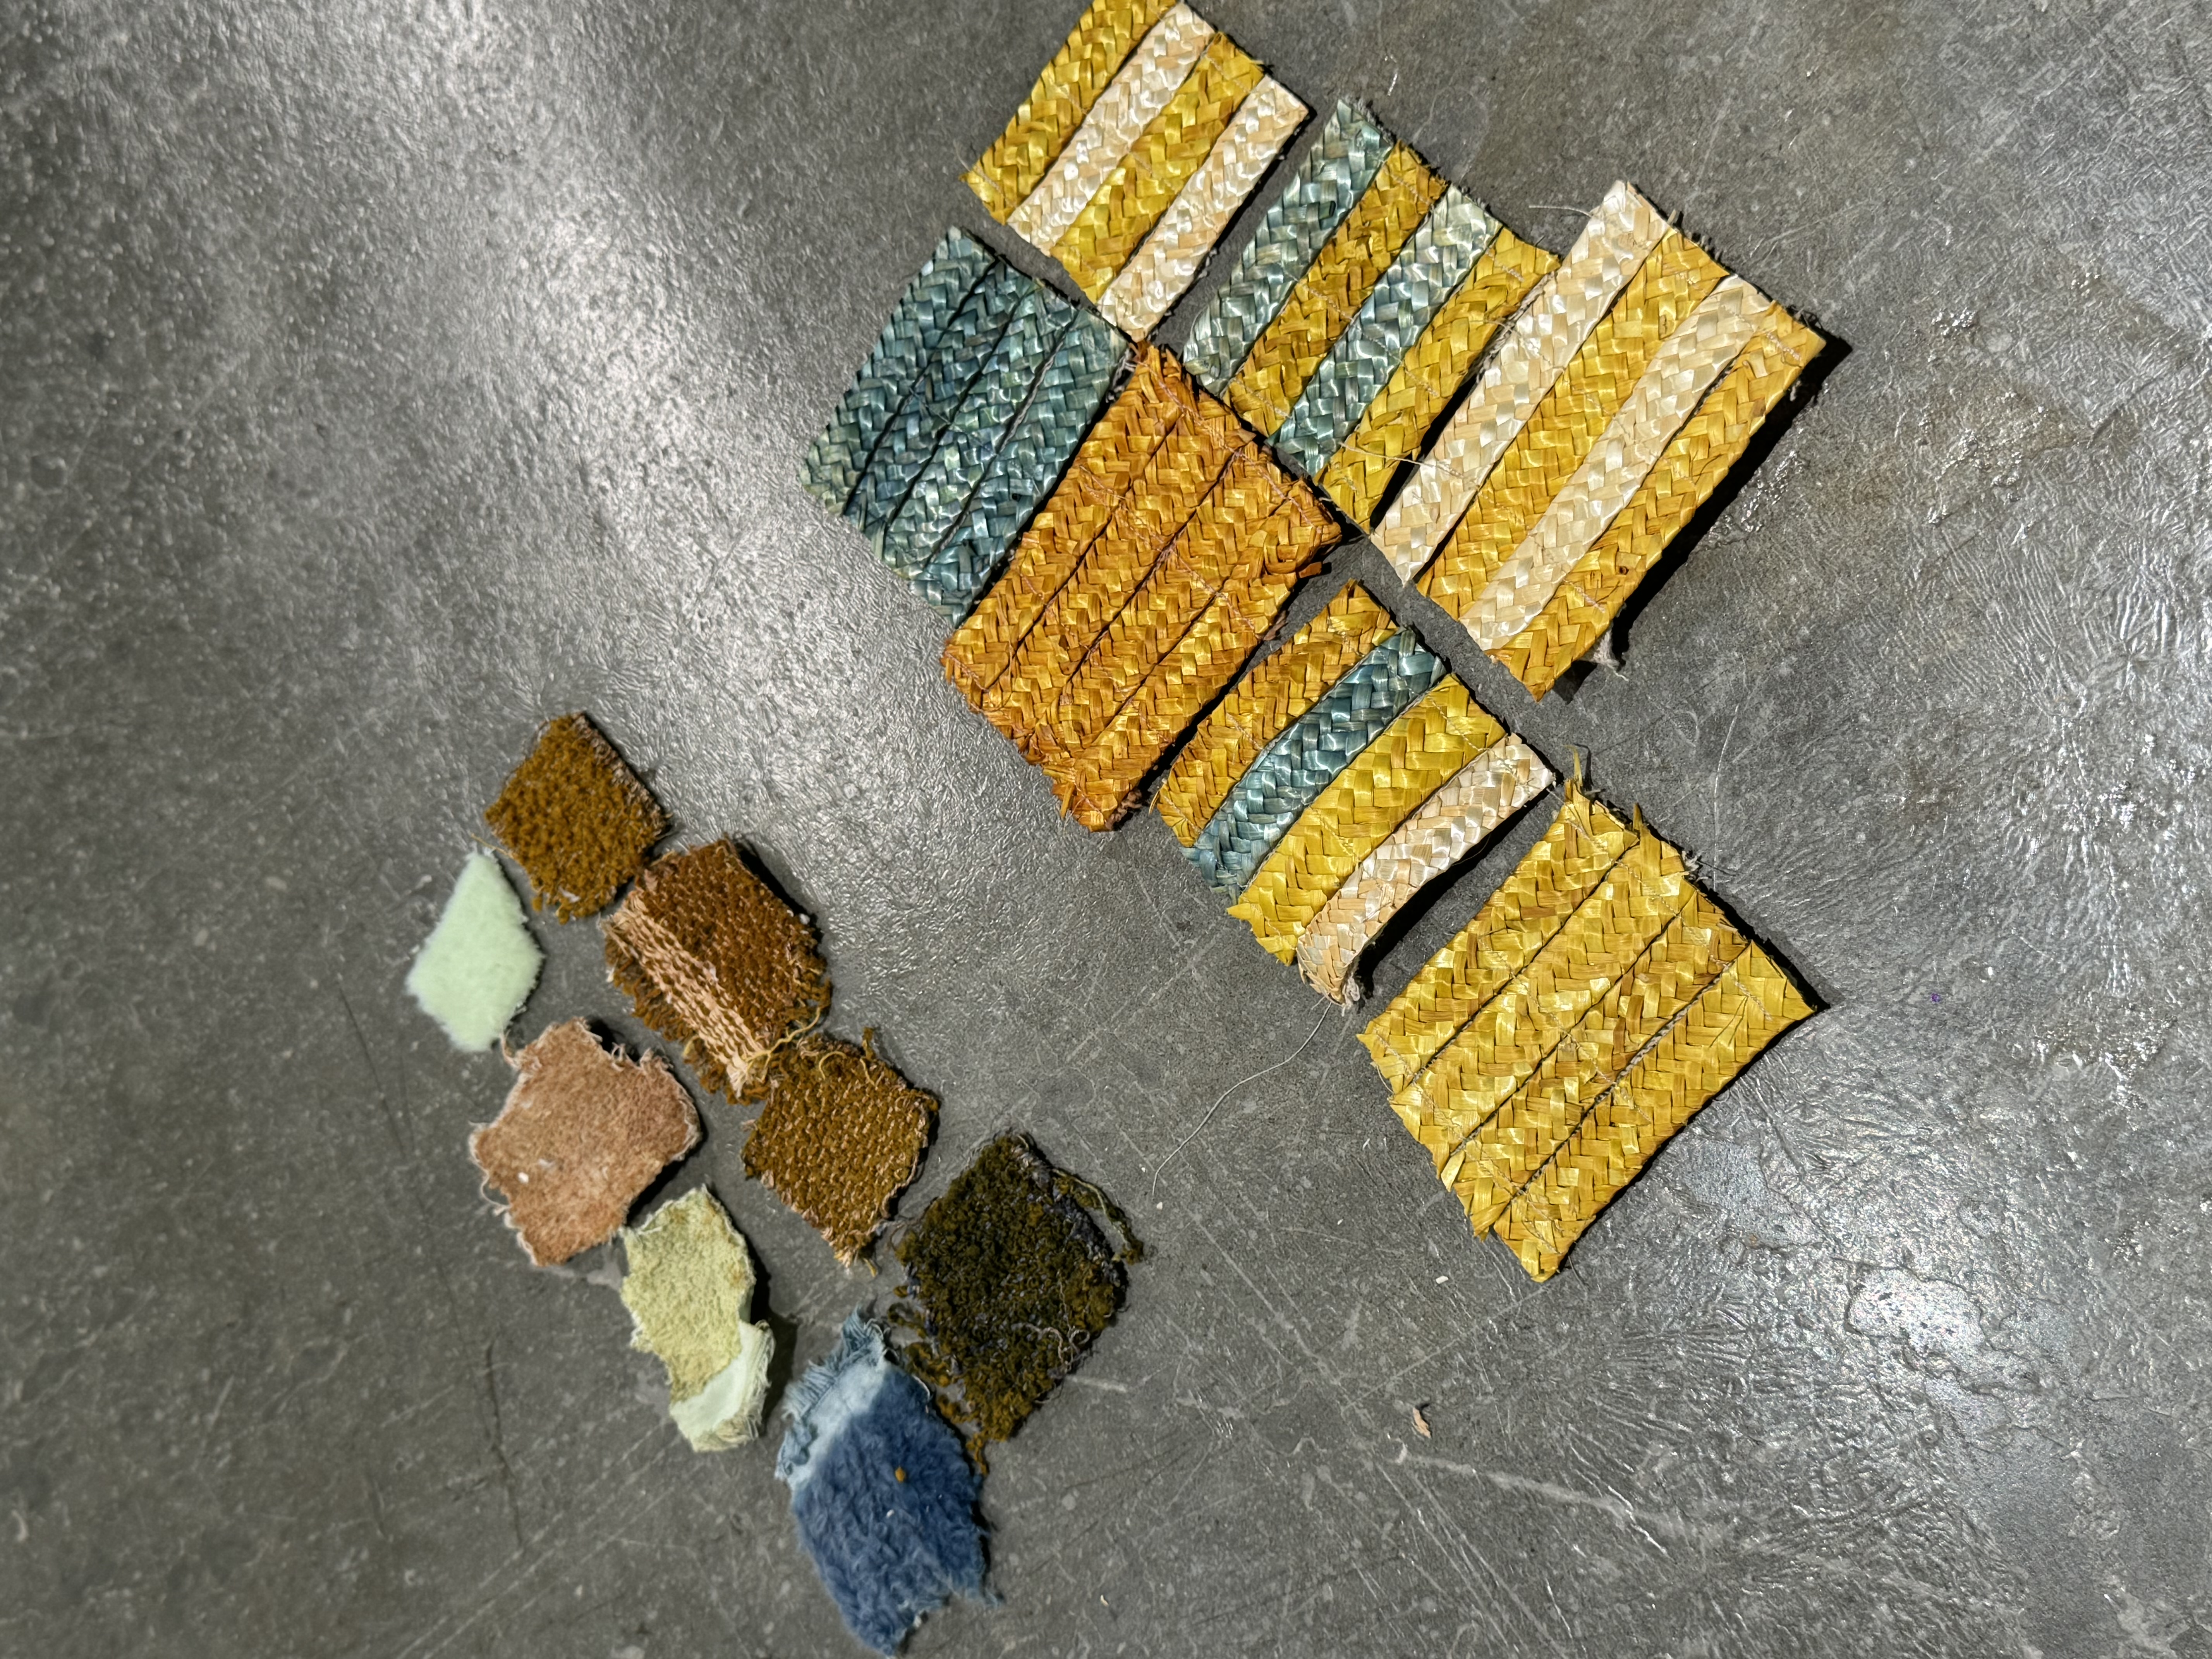
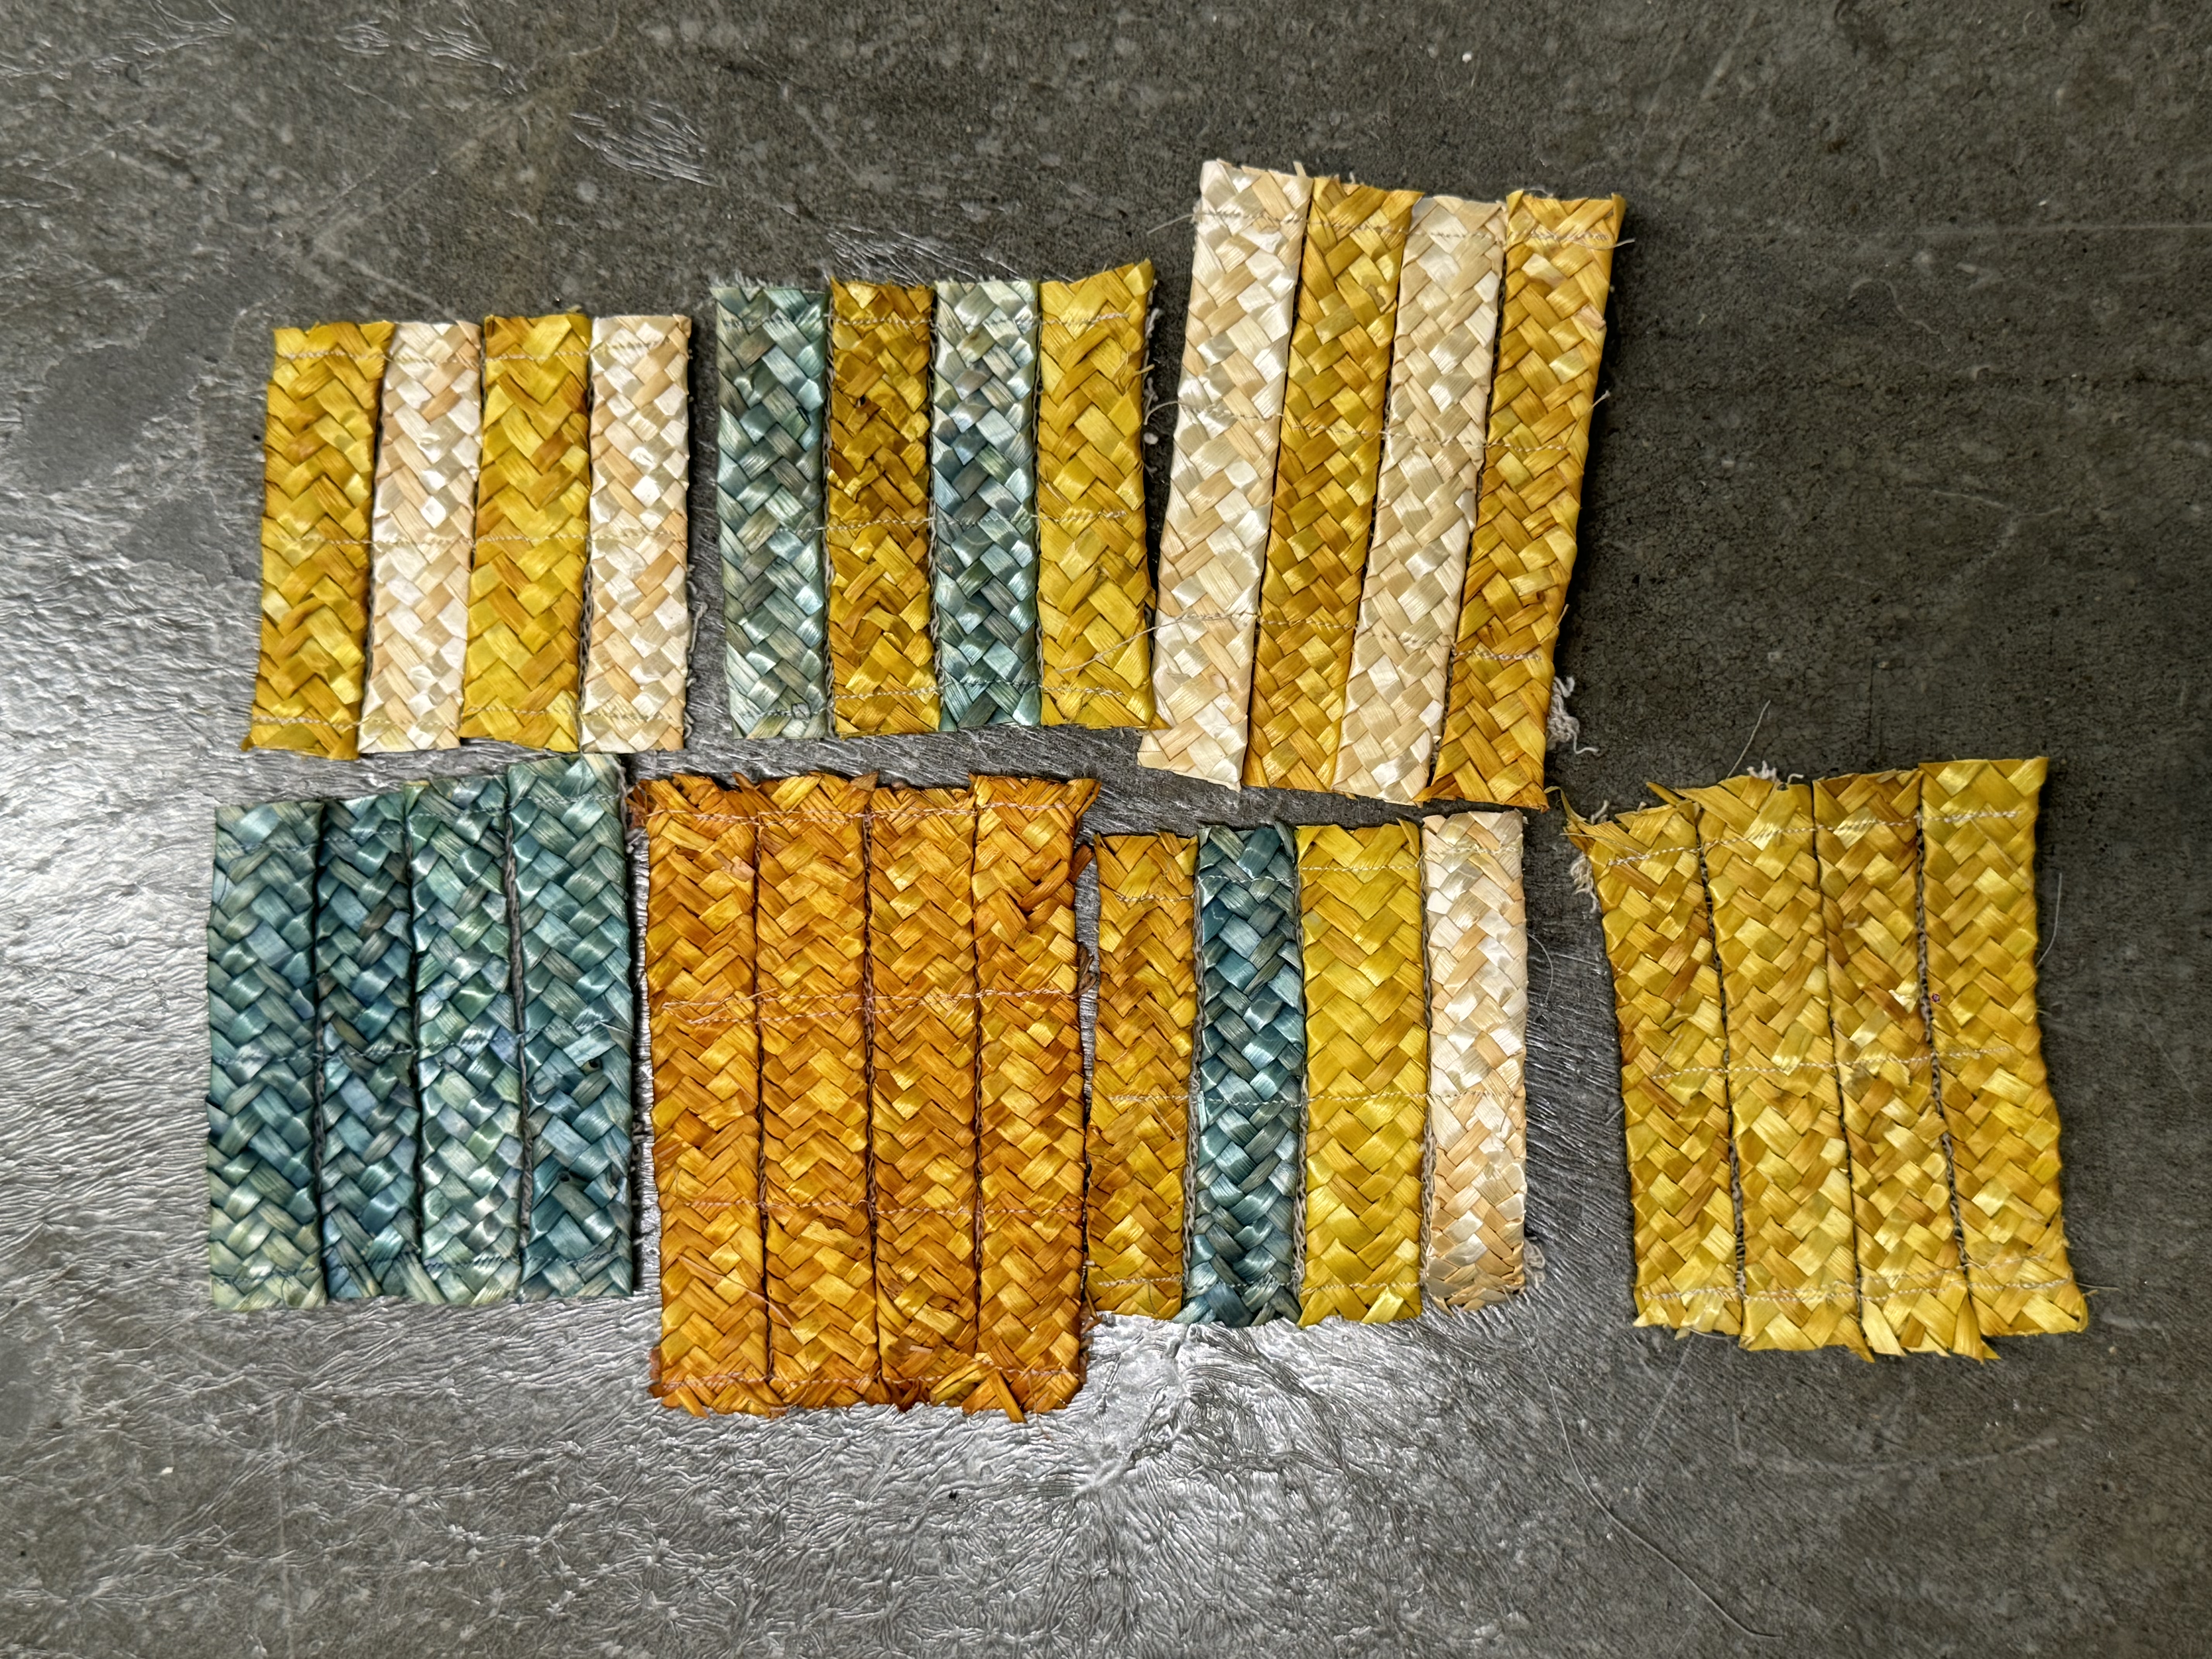
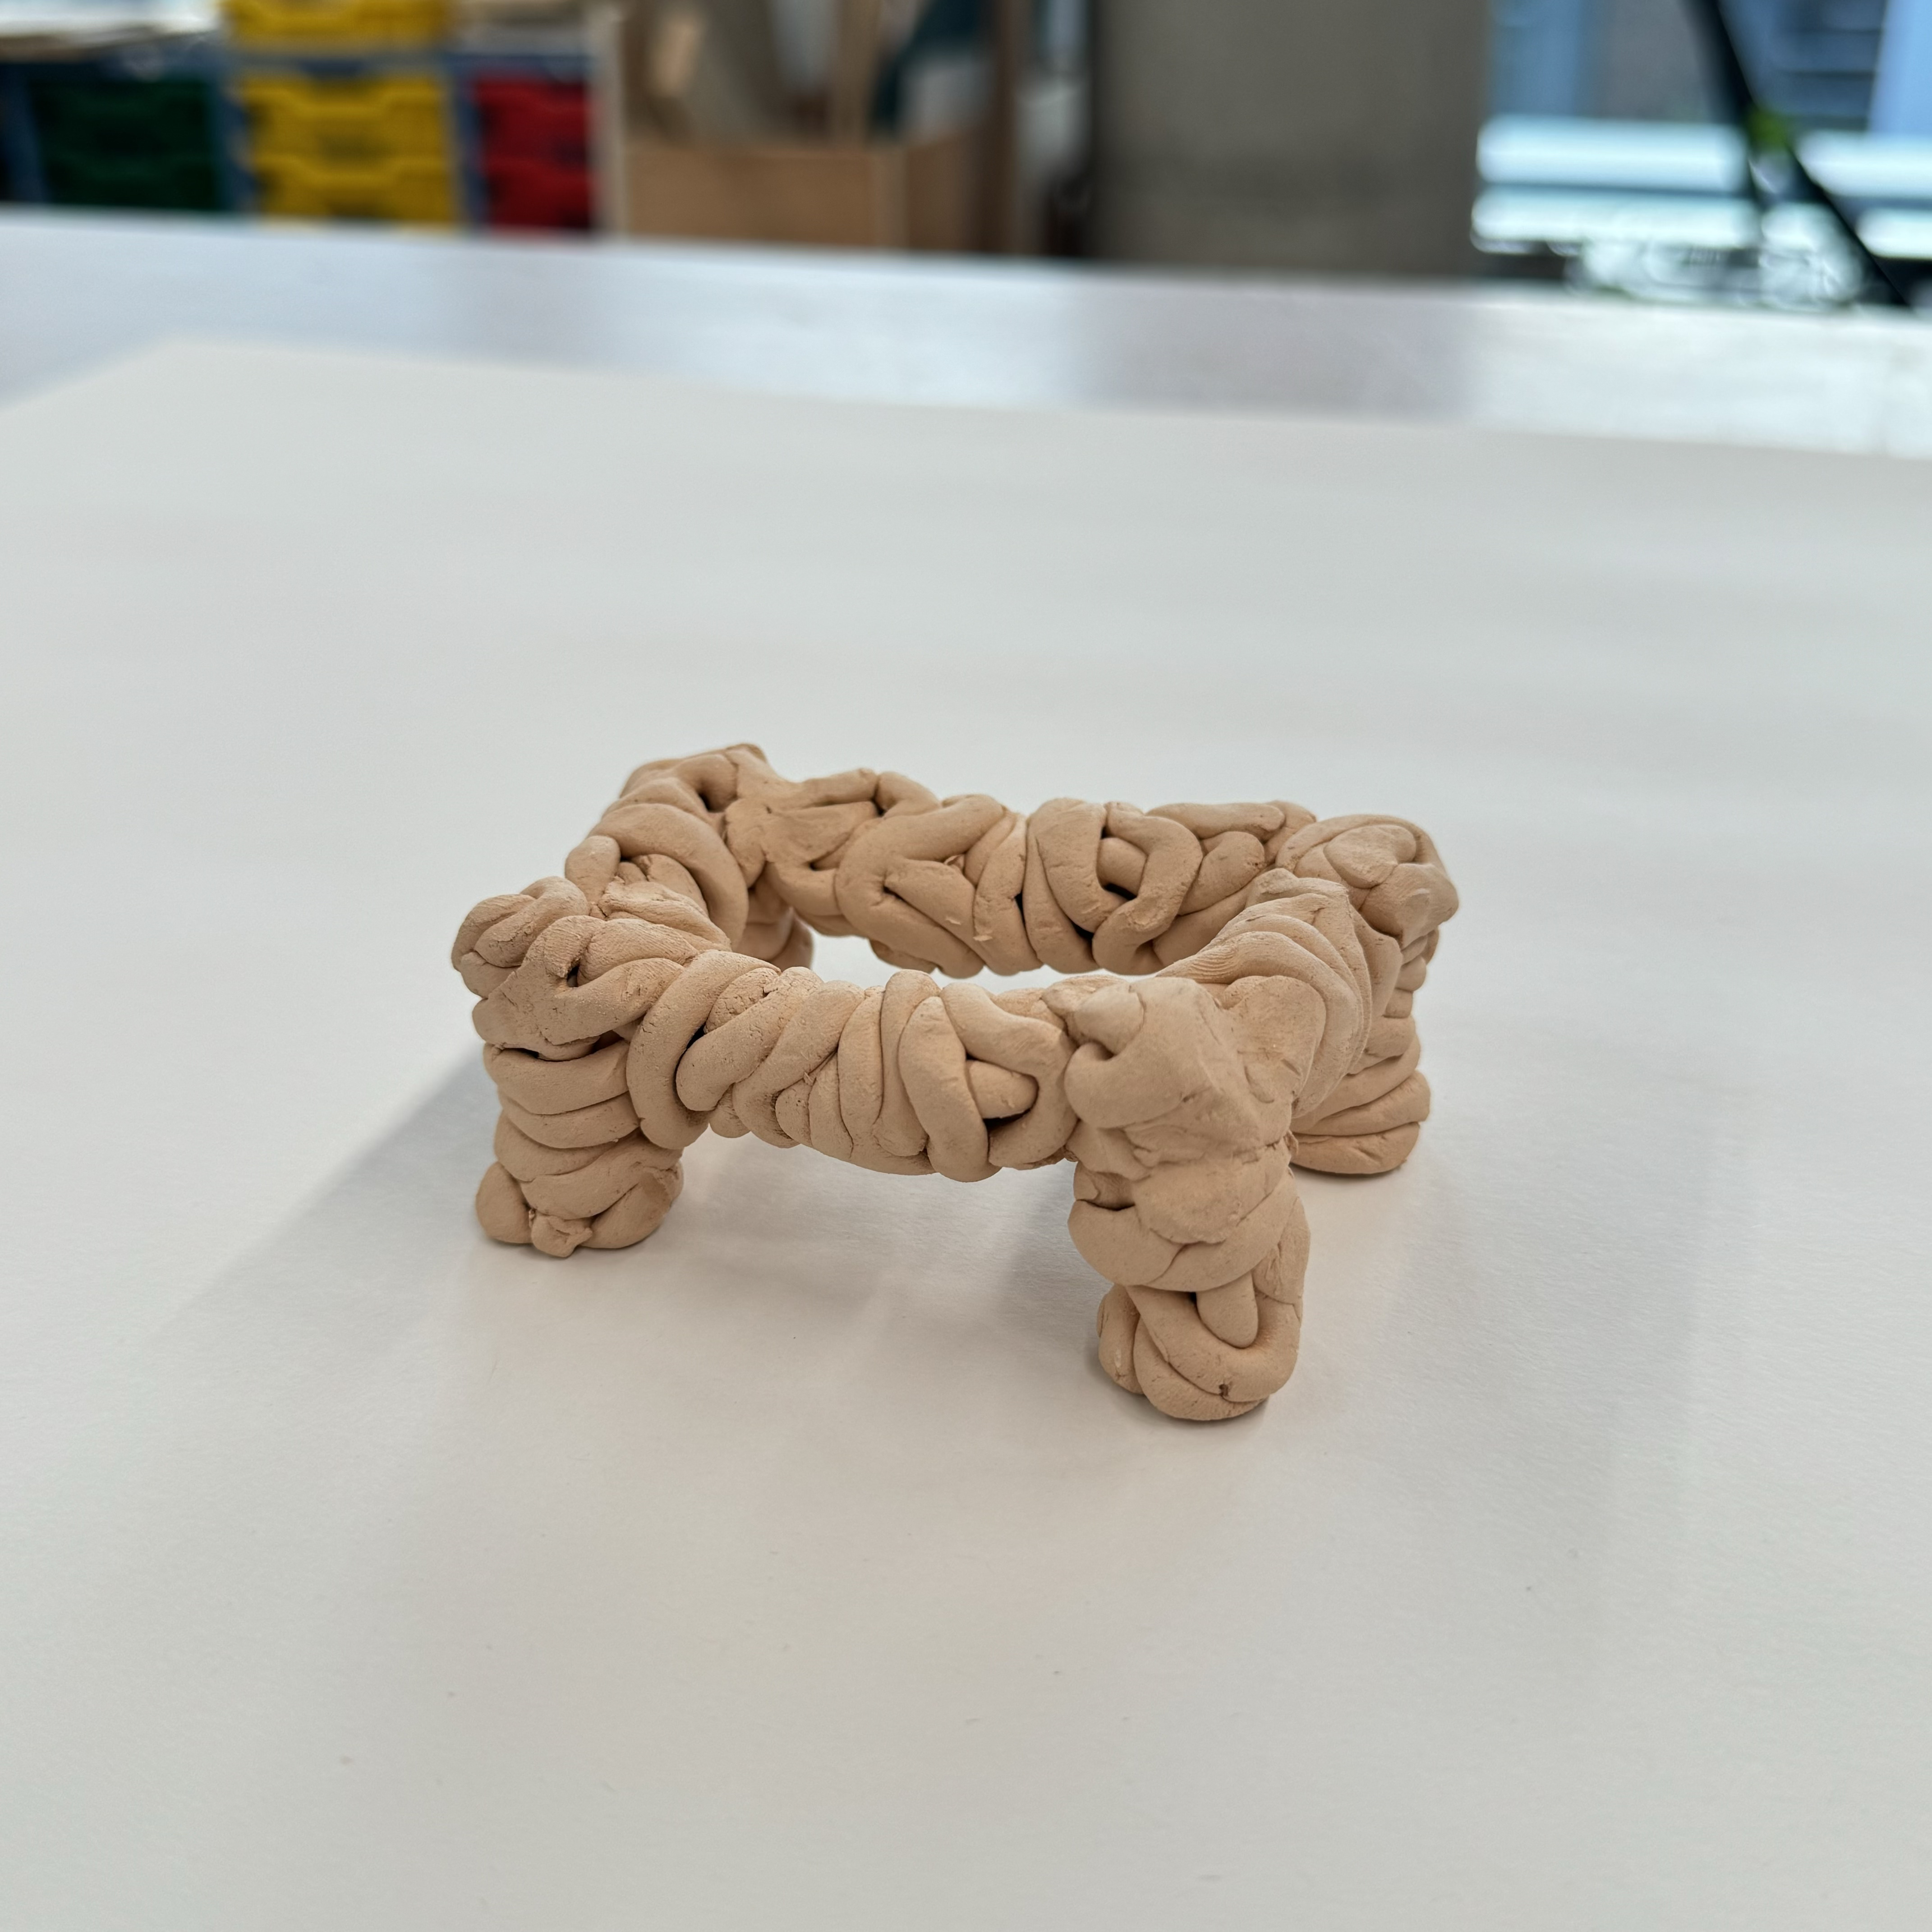
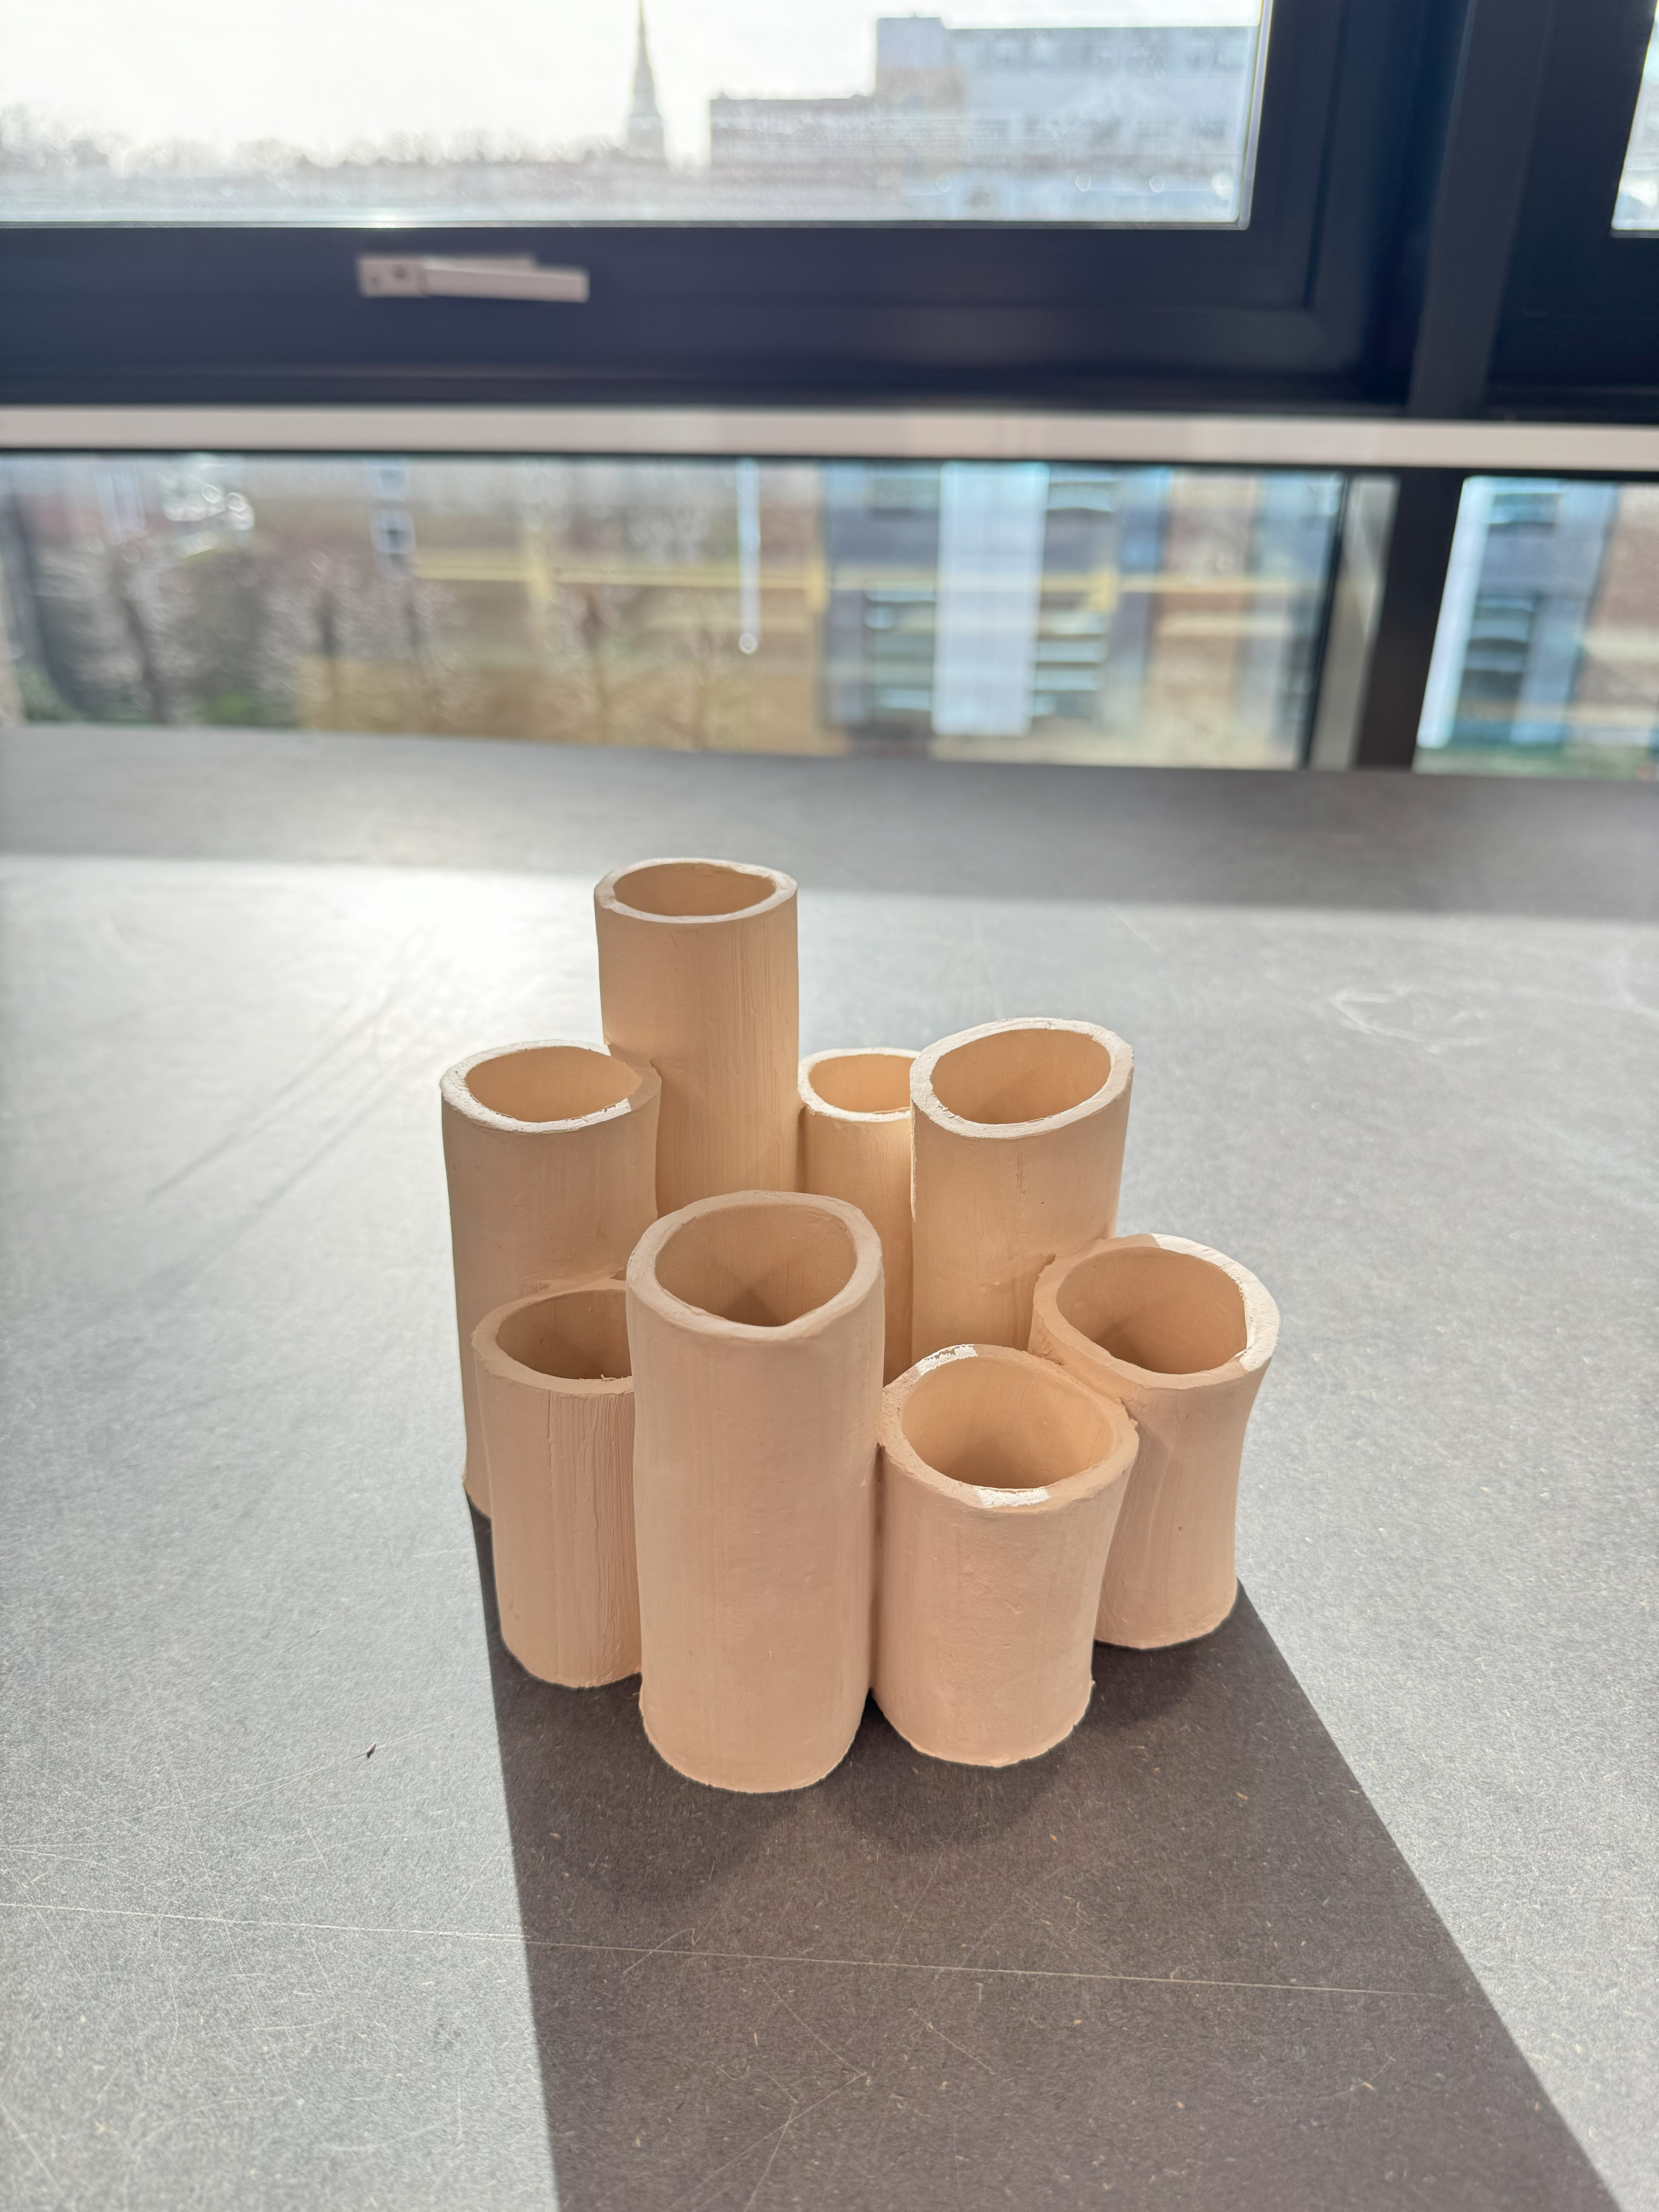
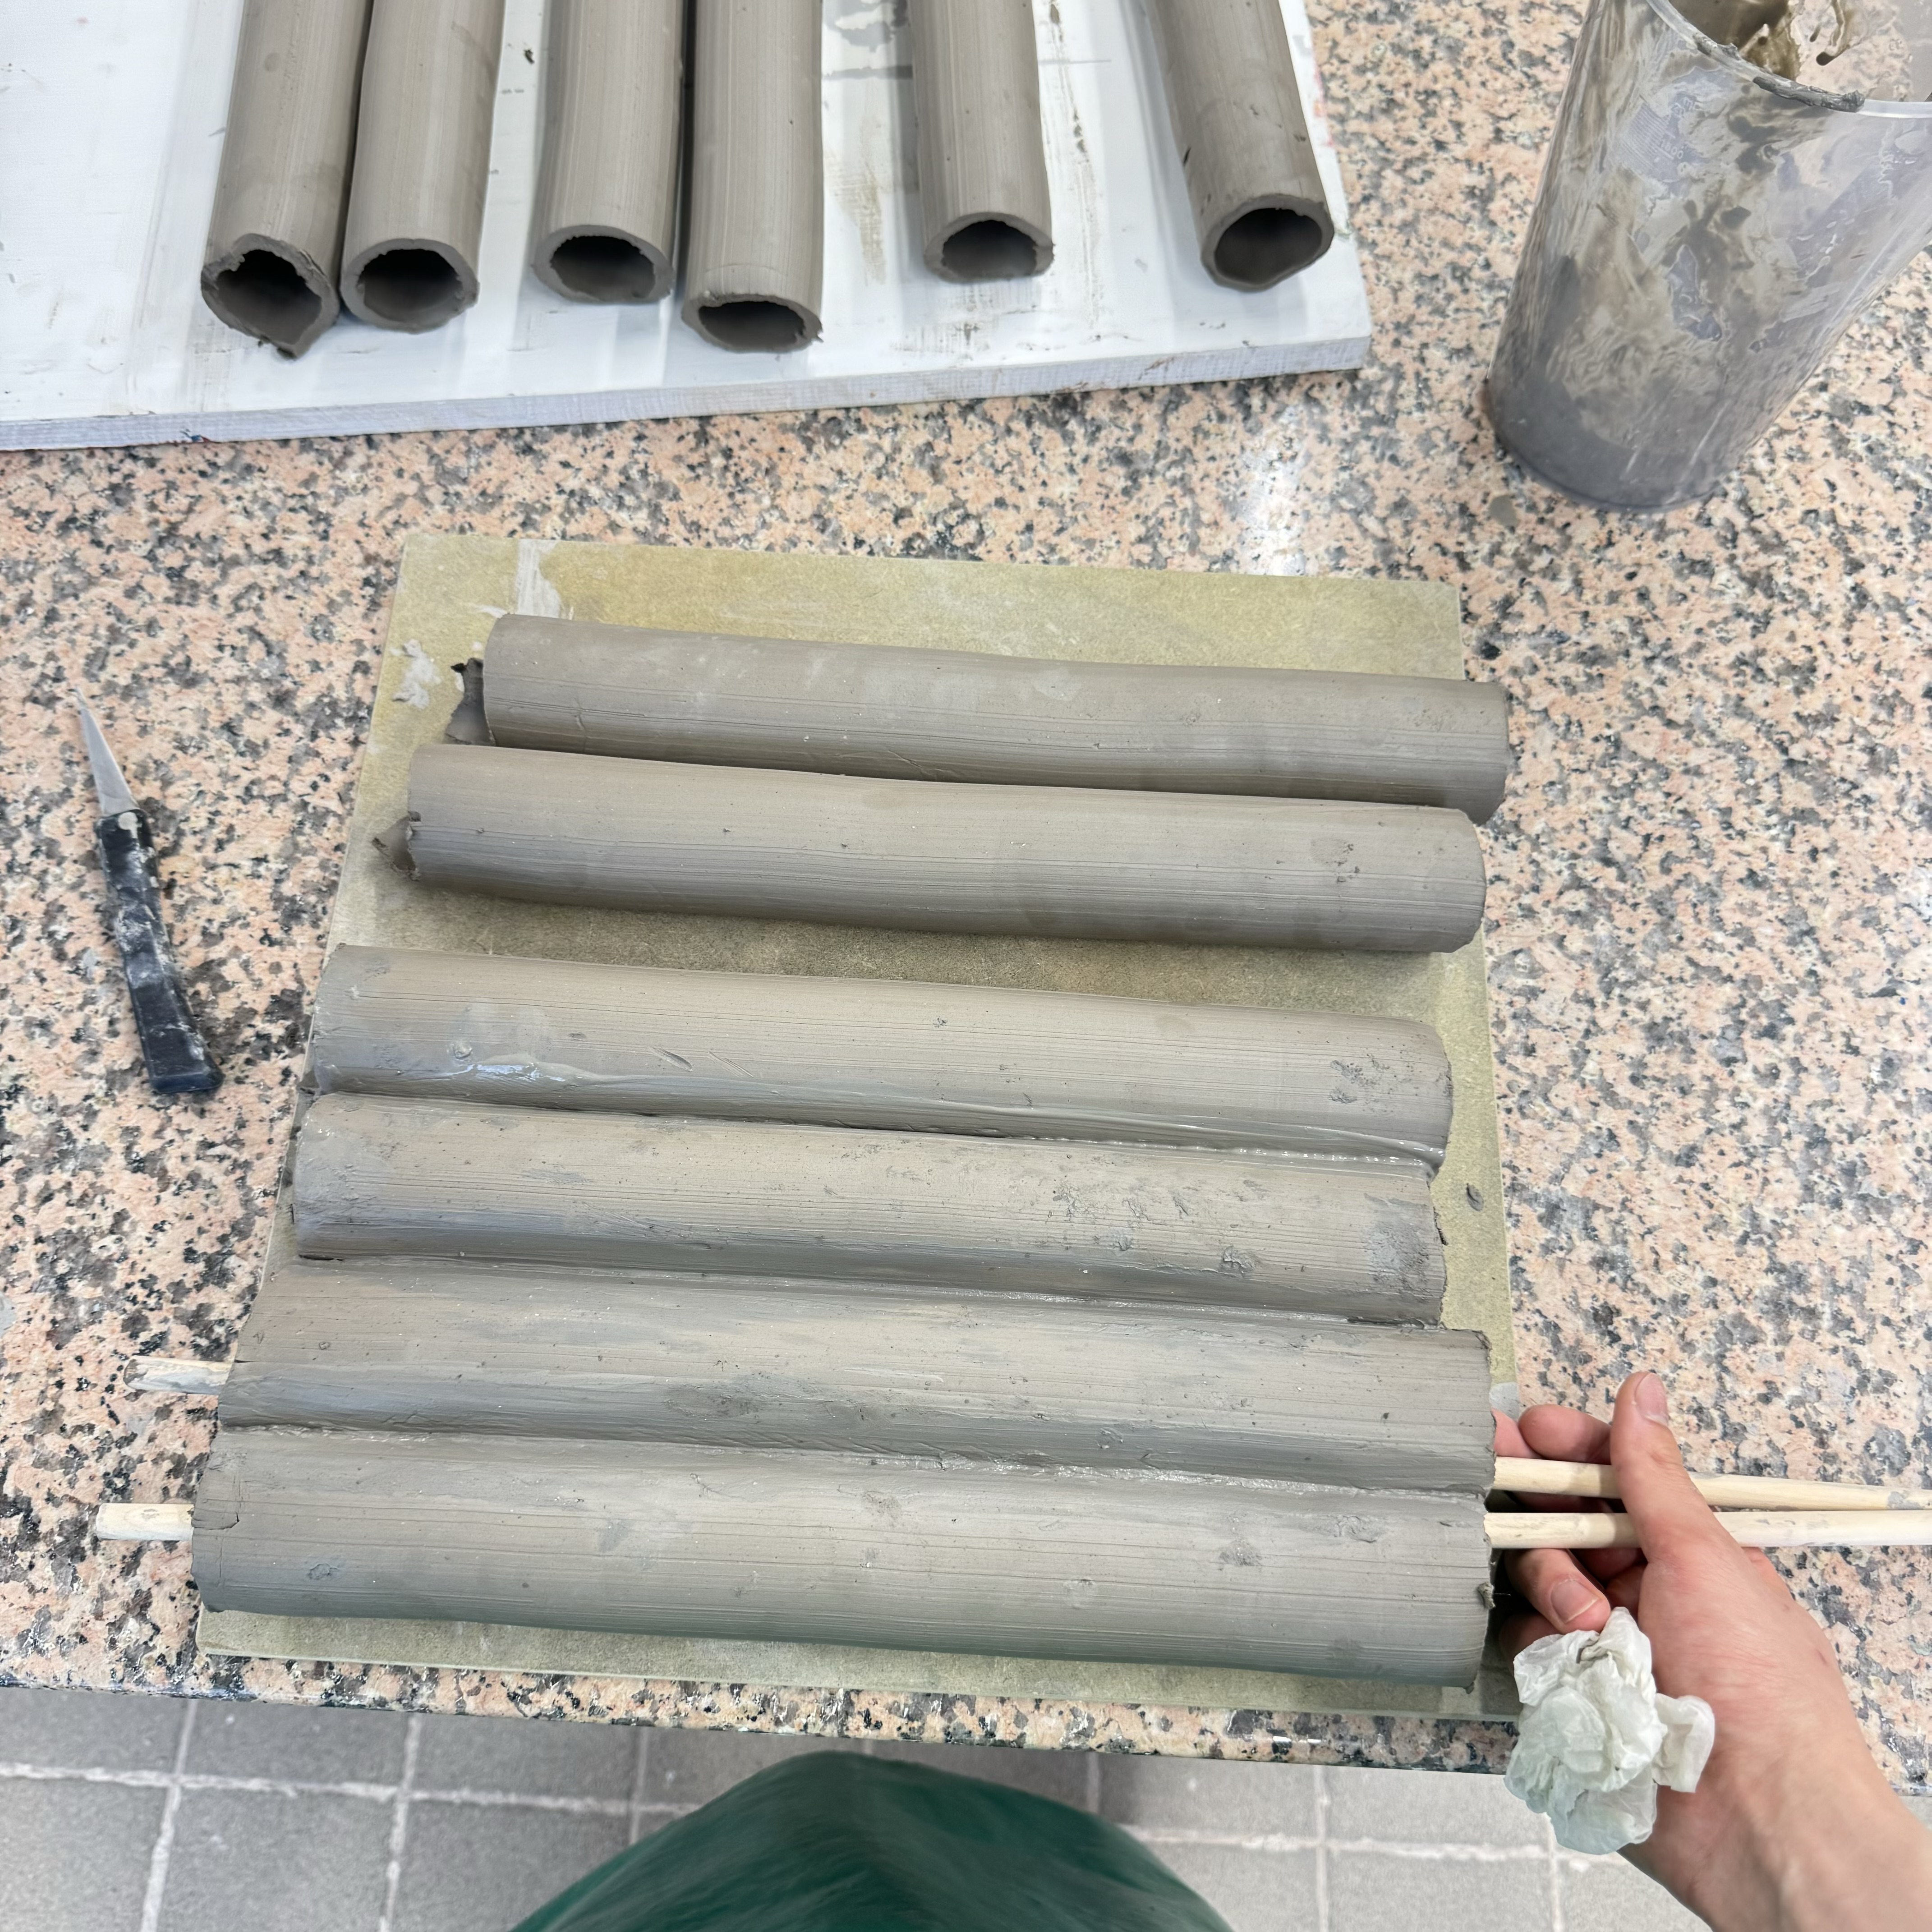
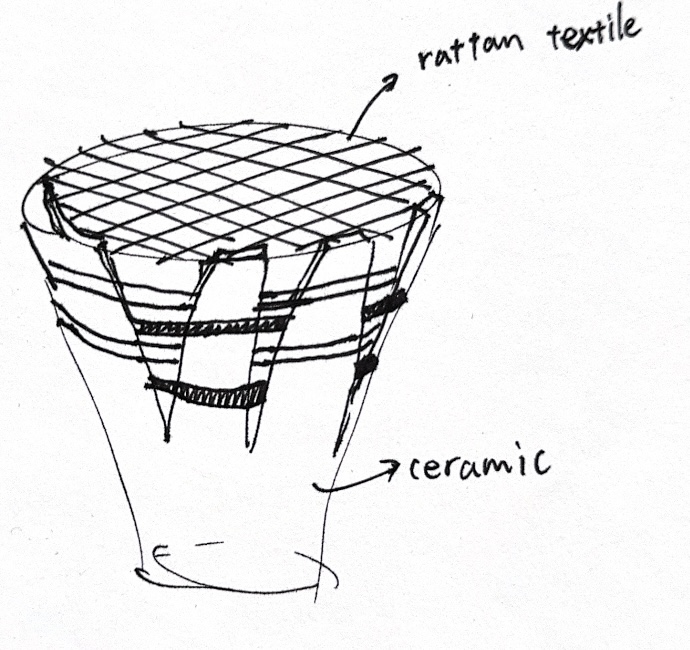
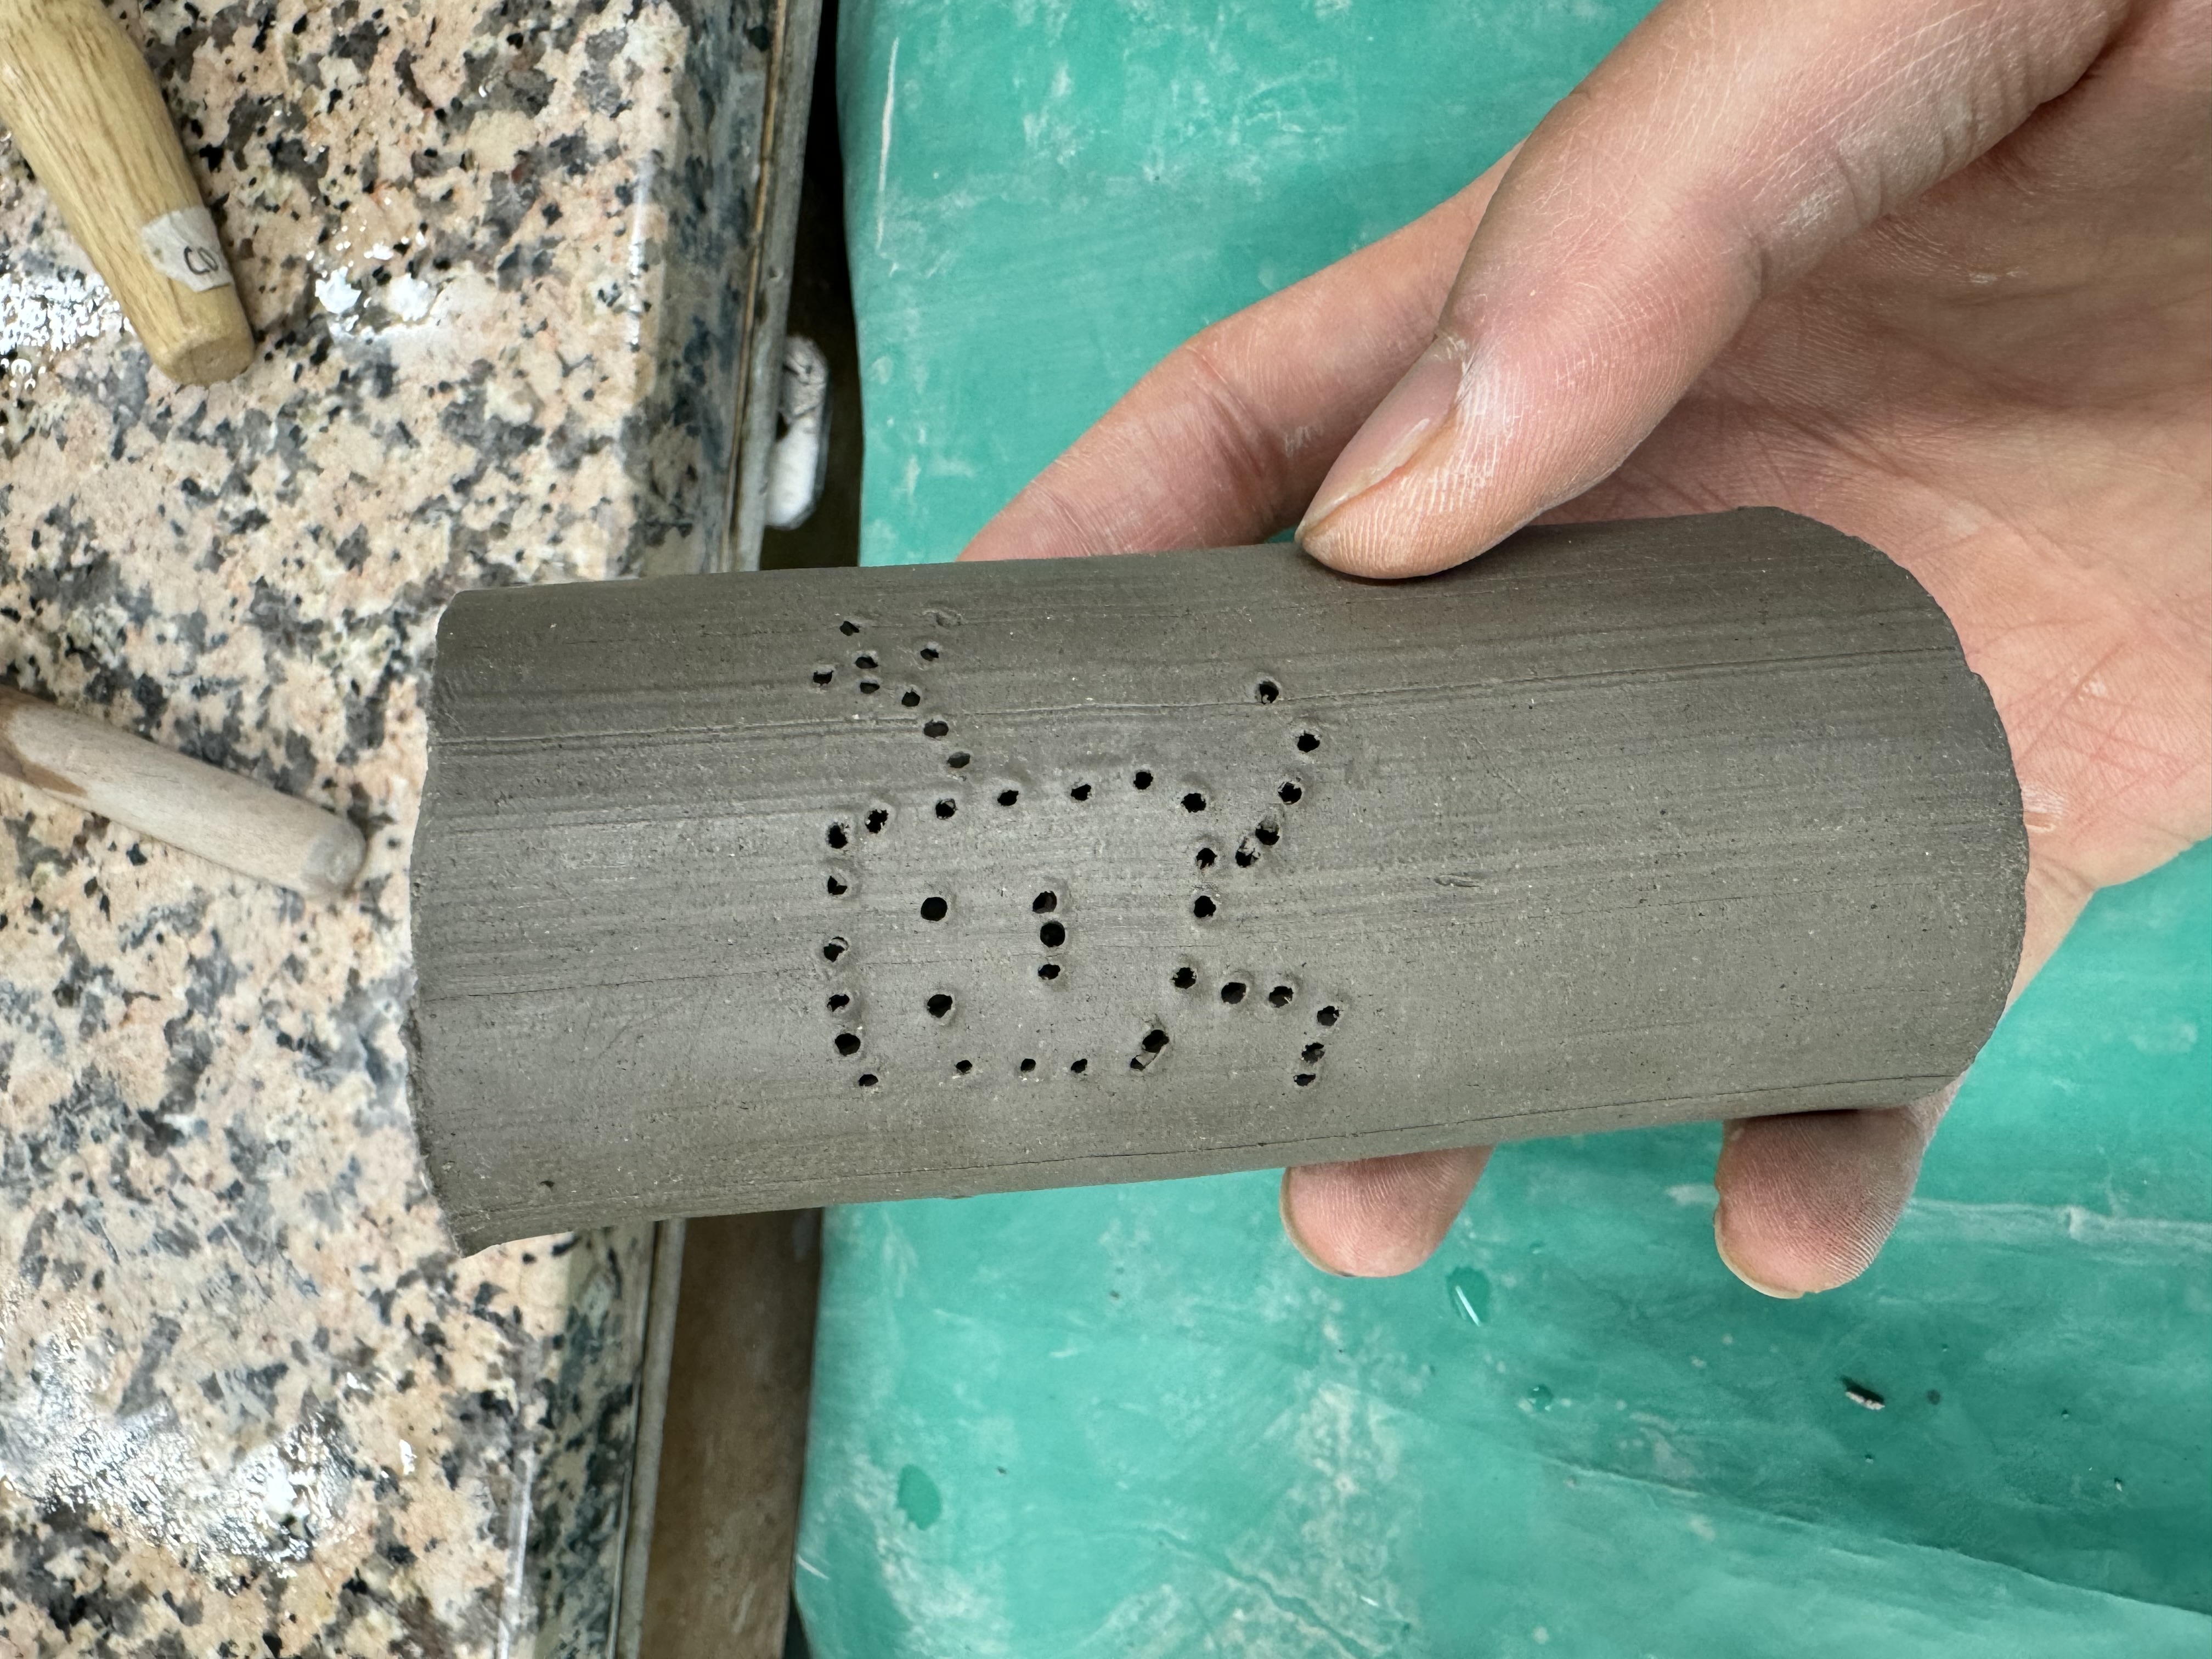
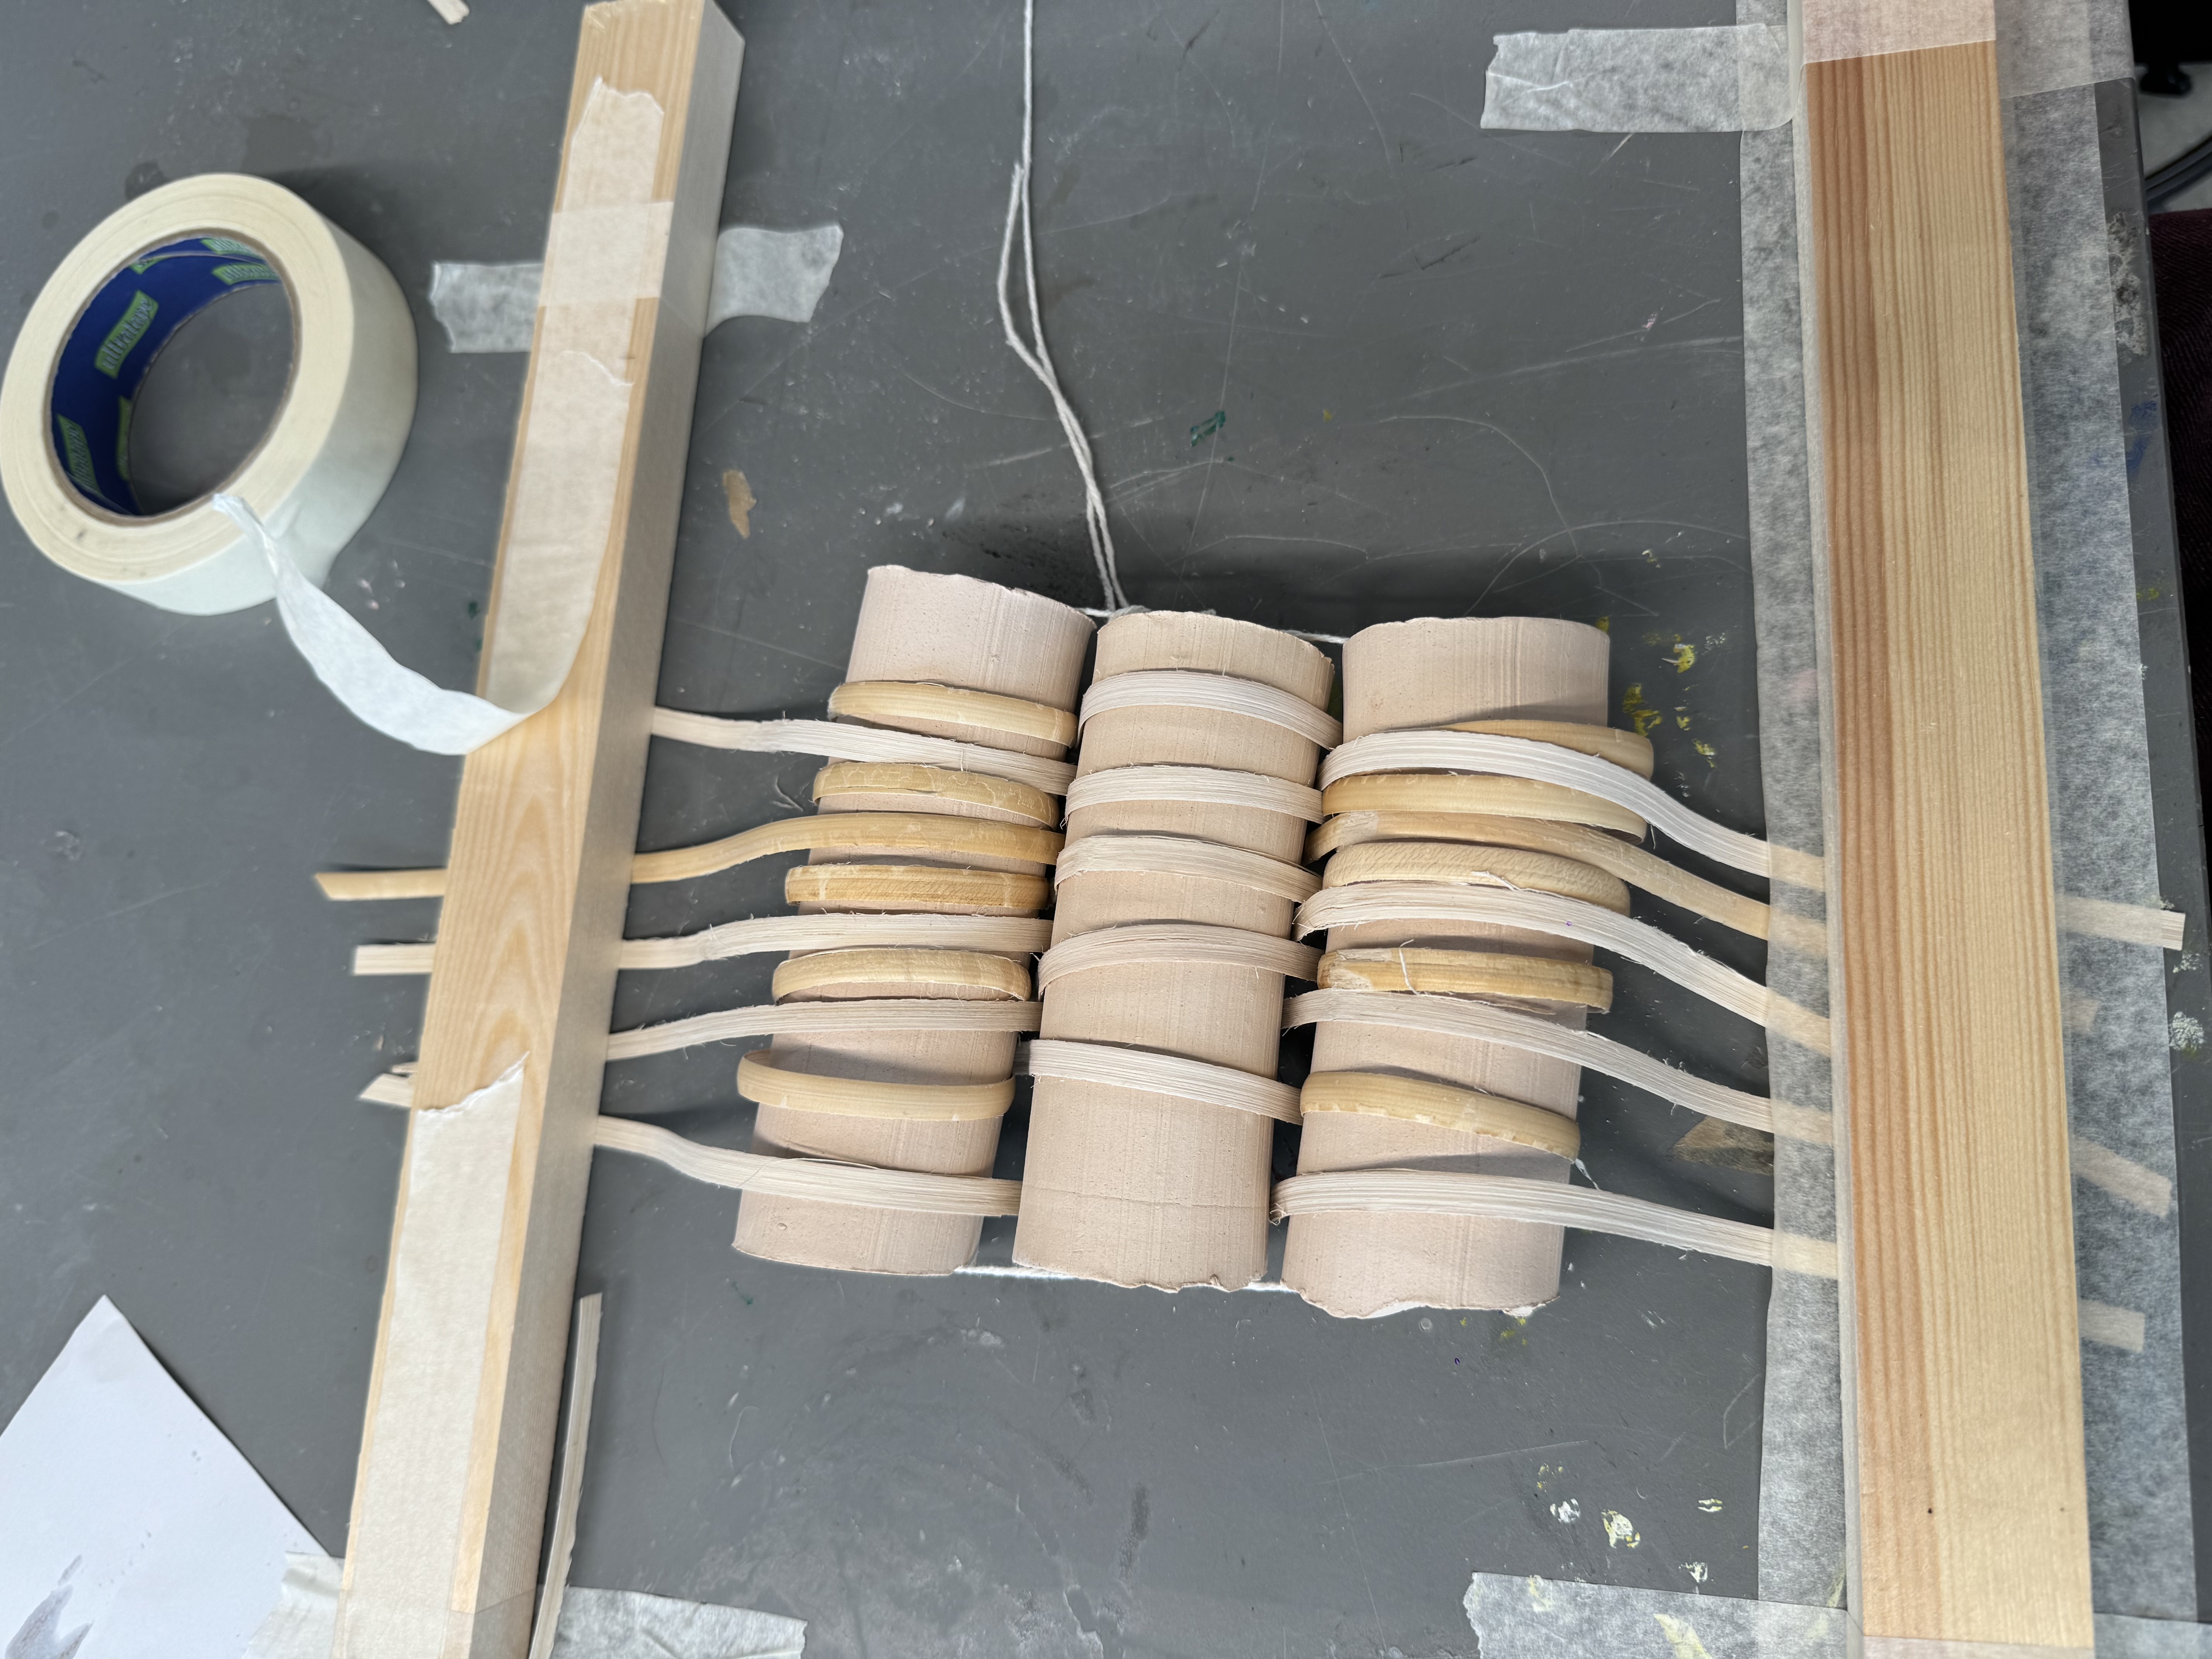
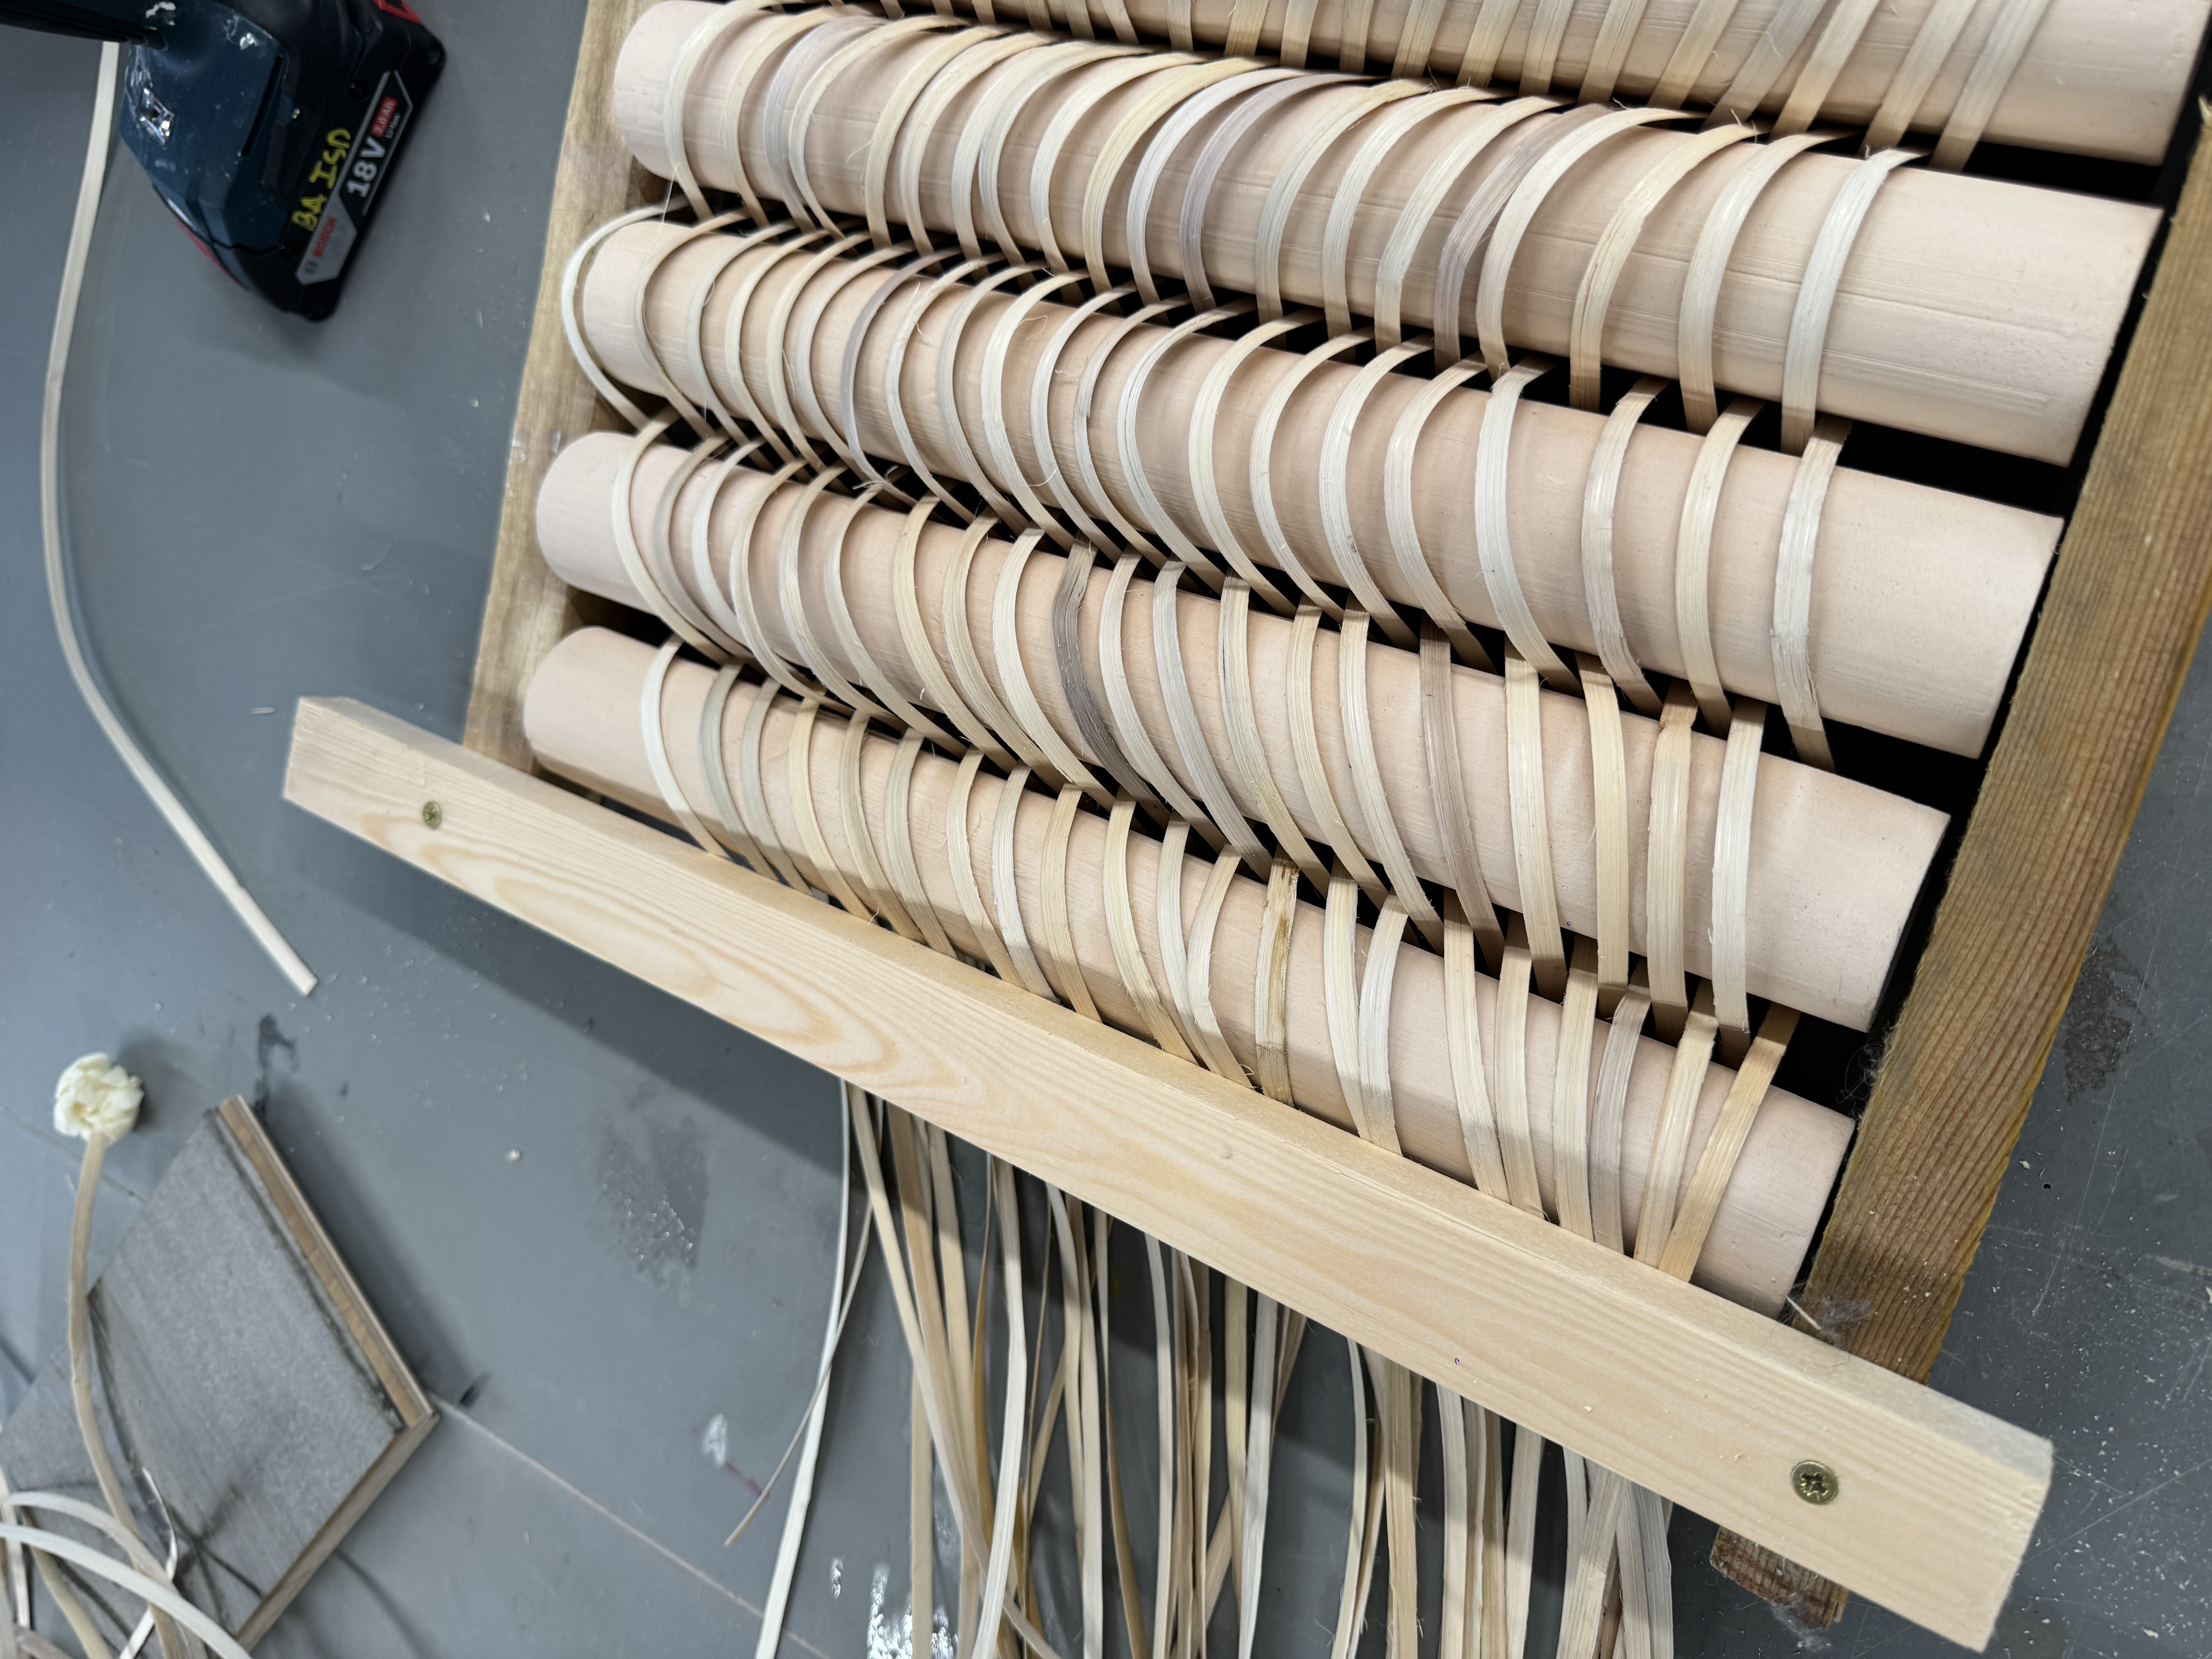
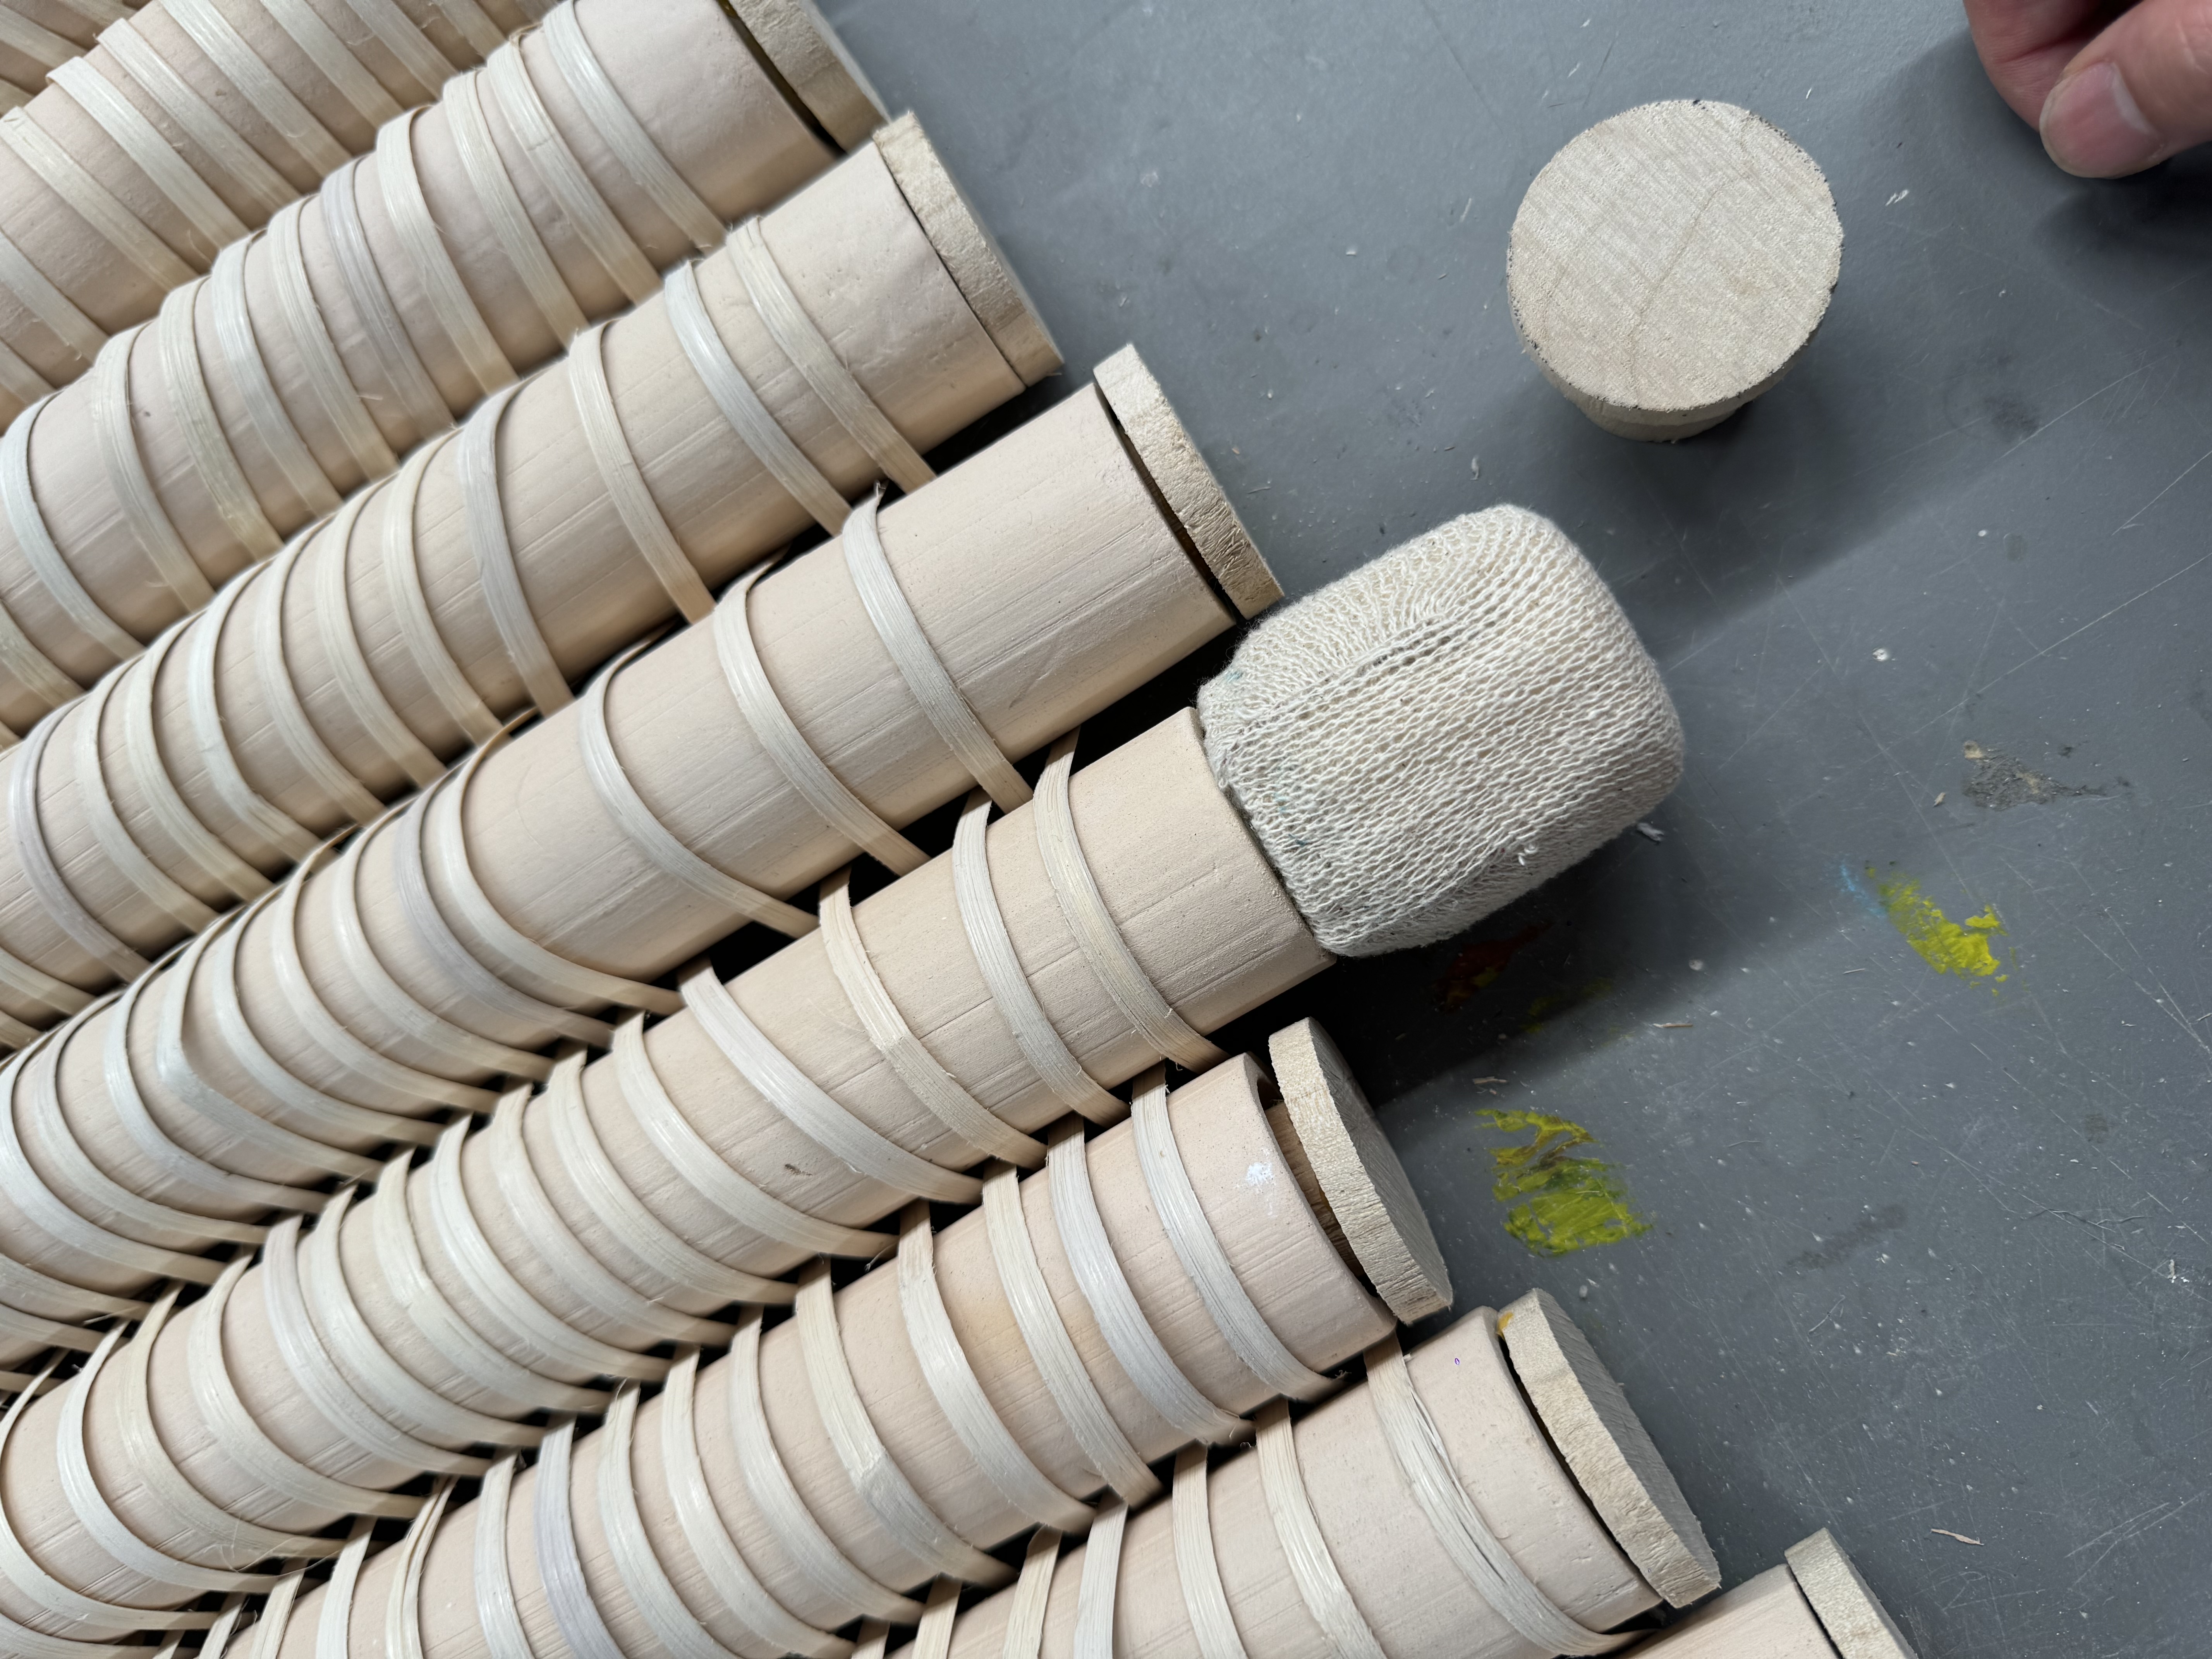
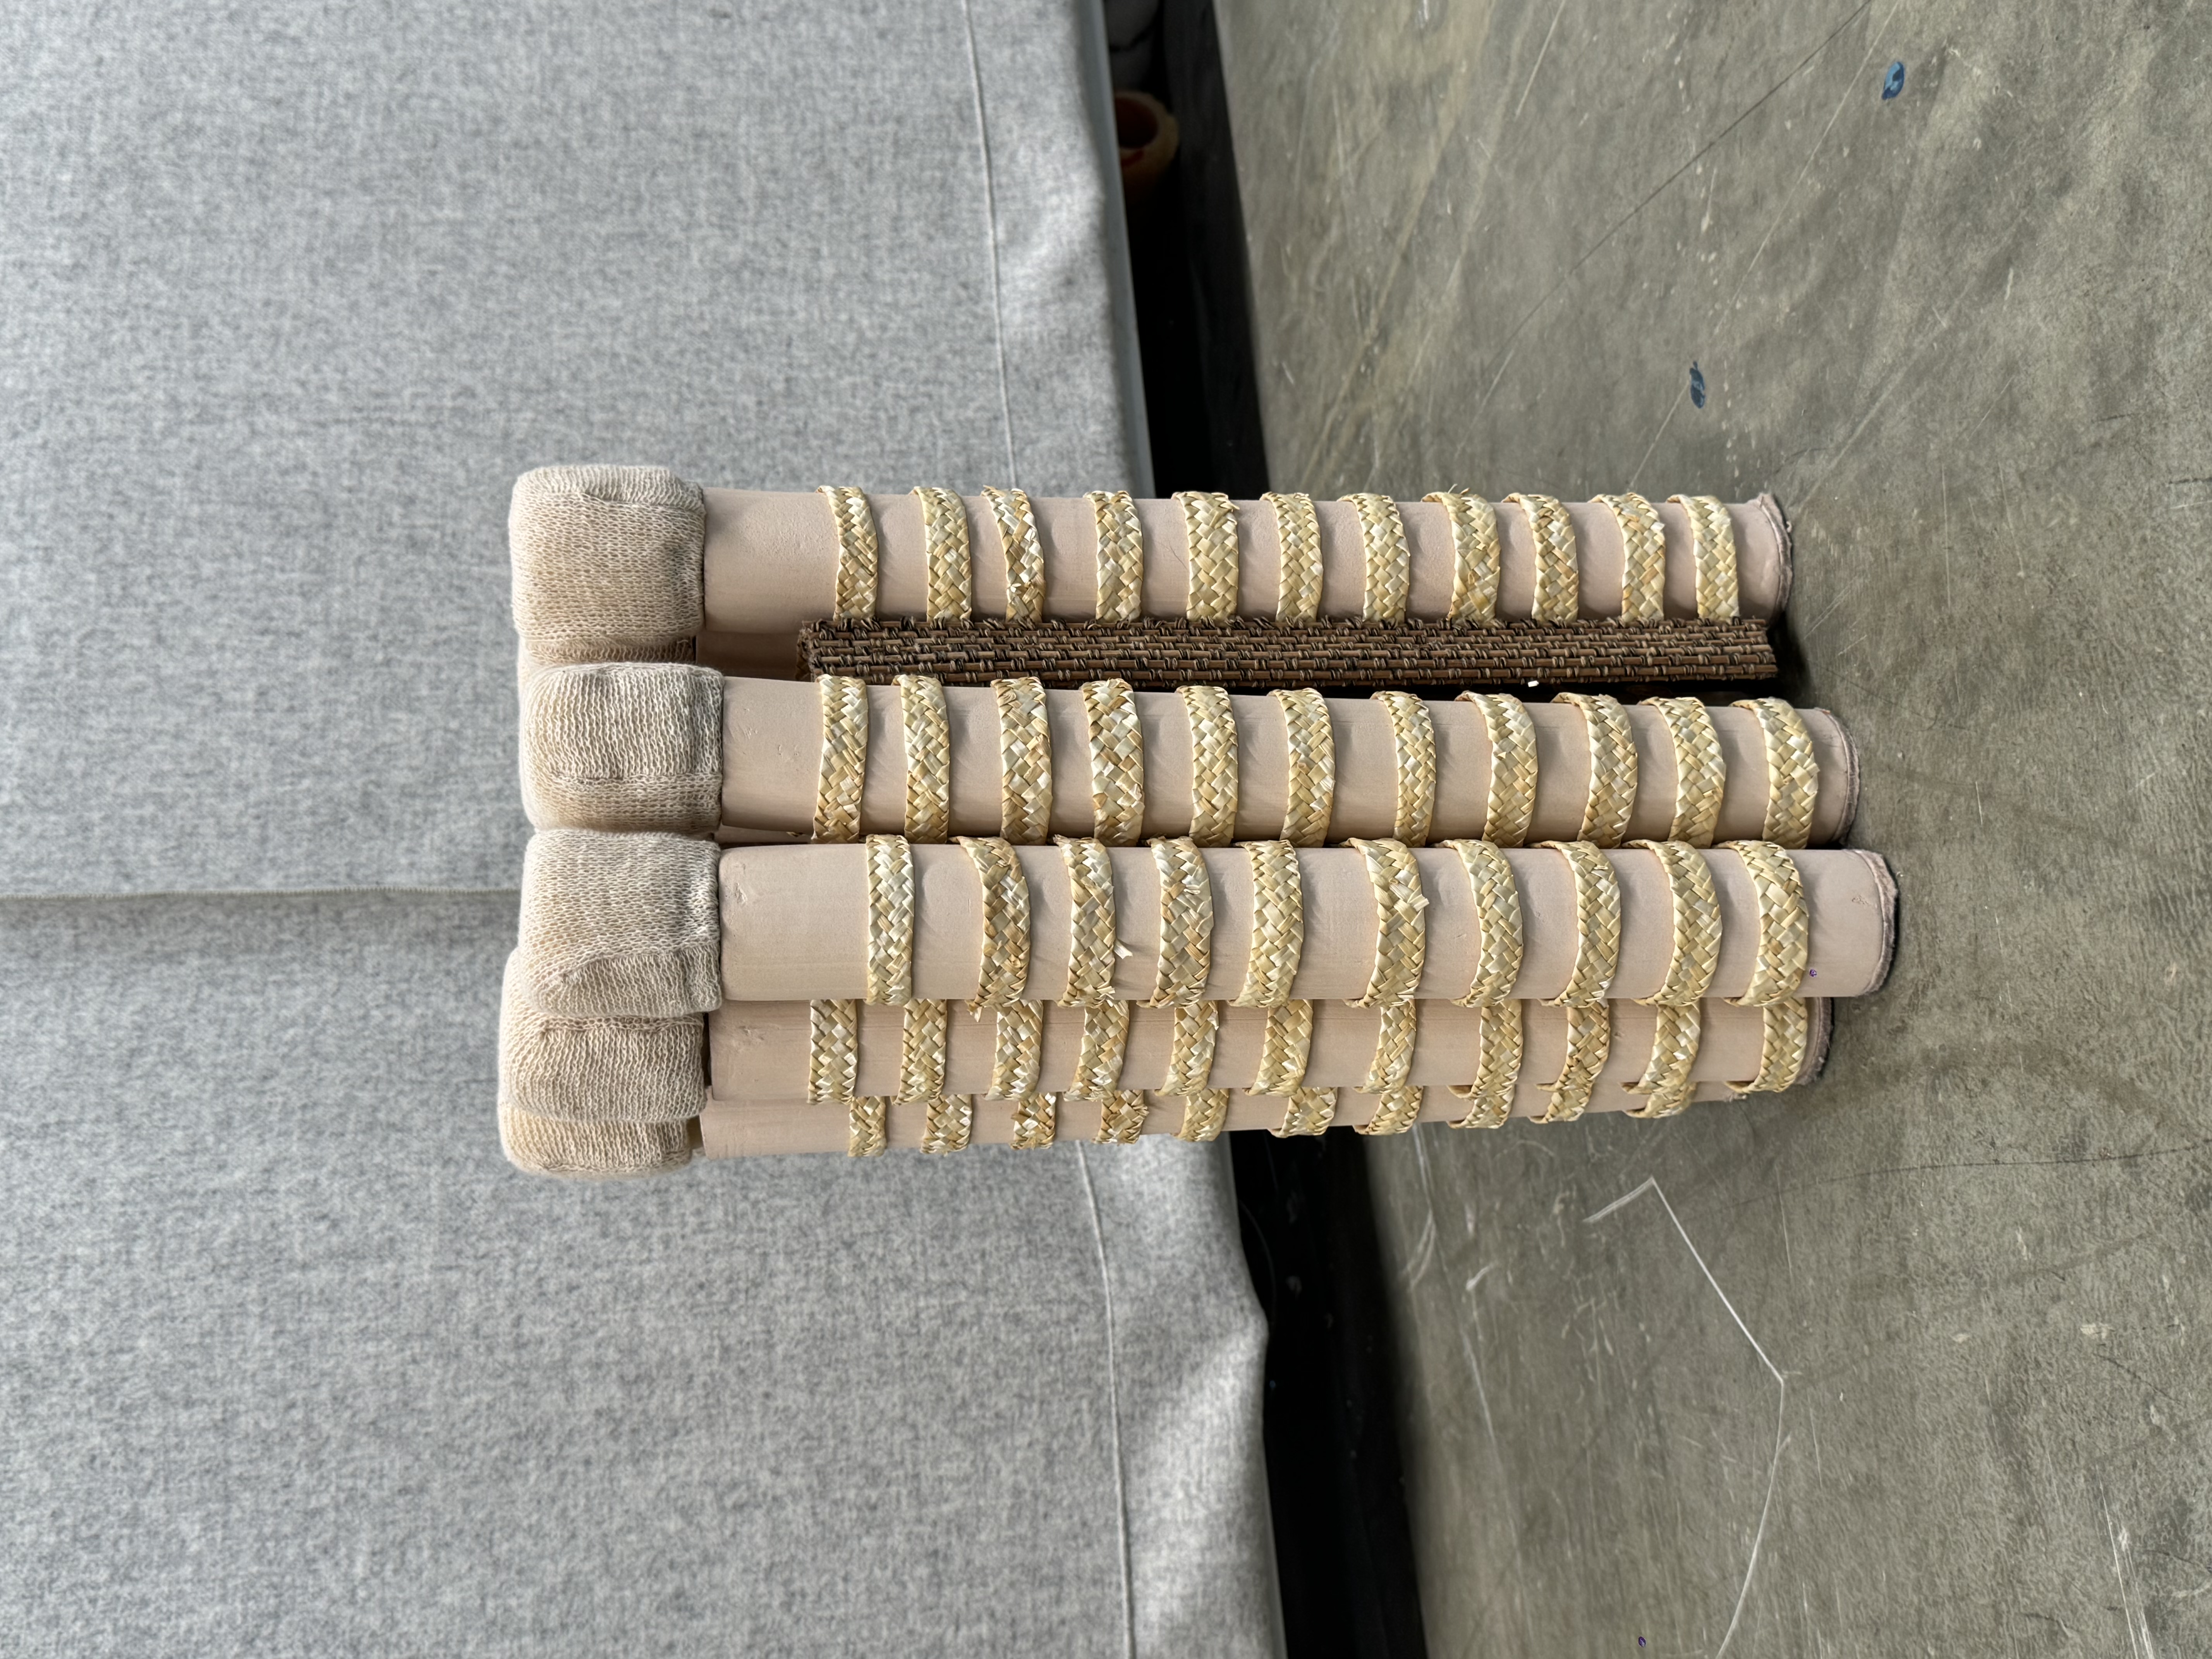
When making larger objects, I clearly feel that the traditional method of connecting small objects, which is to use liquid clay to bond cylinders, is not very suitable for connecting long cylinders. When making this tool, I used two long wooden sticks to apply force to the inside of the cylinder to bond it. It is also very difficult to keep the cylinder upright while extruding. James' hand making stand is not as good as handheld directly. The freshly extruded cylinder is very soft and must be laid flat, but laying it flat will cause the cylinder to flatten. I needed to wait until the next day to glue it. After gluing, it is best to wait for another day to let it dry before sanding. This will also make it easier to move the whole thing on the table. It took me a lot of time to get the surface smooth. The stool has been in the cabinet for a holiday. I wrapped it well with plastic wrap, so the clay wrapped in plastic wrap can really last for a long time in the cabinet. The final result is that this tool is pretty solid. Since the traditional connection method is too troublesome and requires high skills, I plan to use the method of drilling holes and then connecting with rattan. And as Oscar proposed, ceramics have high tolerance to pressure but low tolerance to tension, while rattan has a high tolerance to tension, so using rattan for connection may be a good choice. And I recently read in the book Cradle to Cradle that the classification of biological materials and industrial materials, rattan and ceramics both belong to biological materials. Materials with the same properties are easier to recycle.

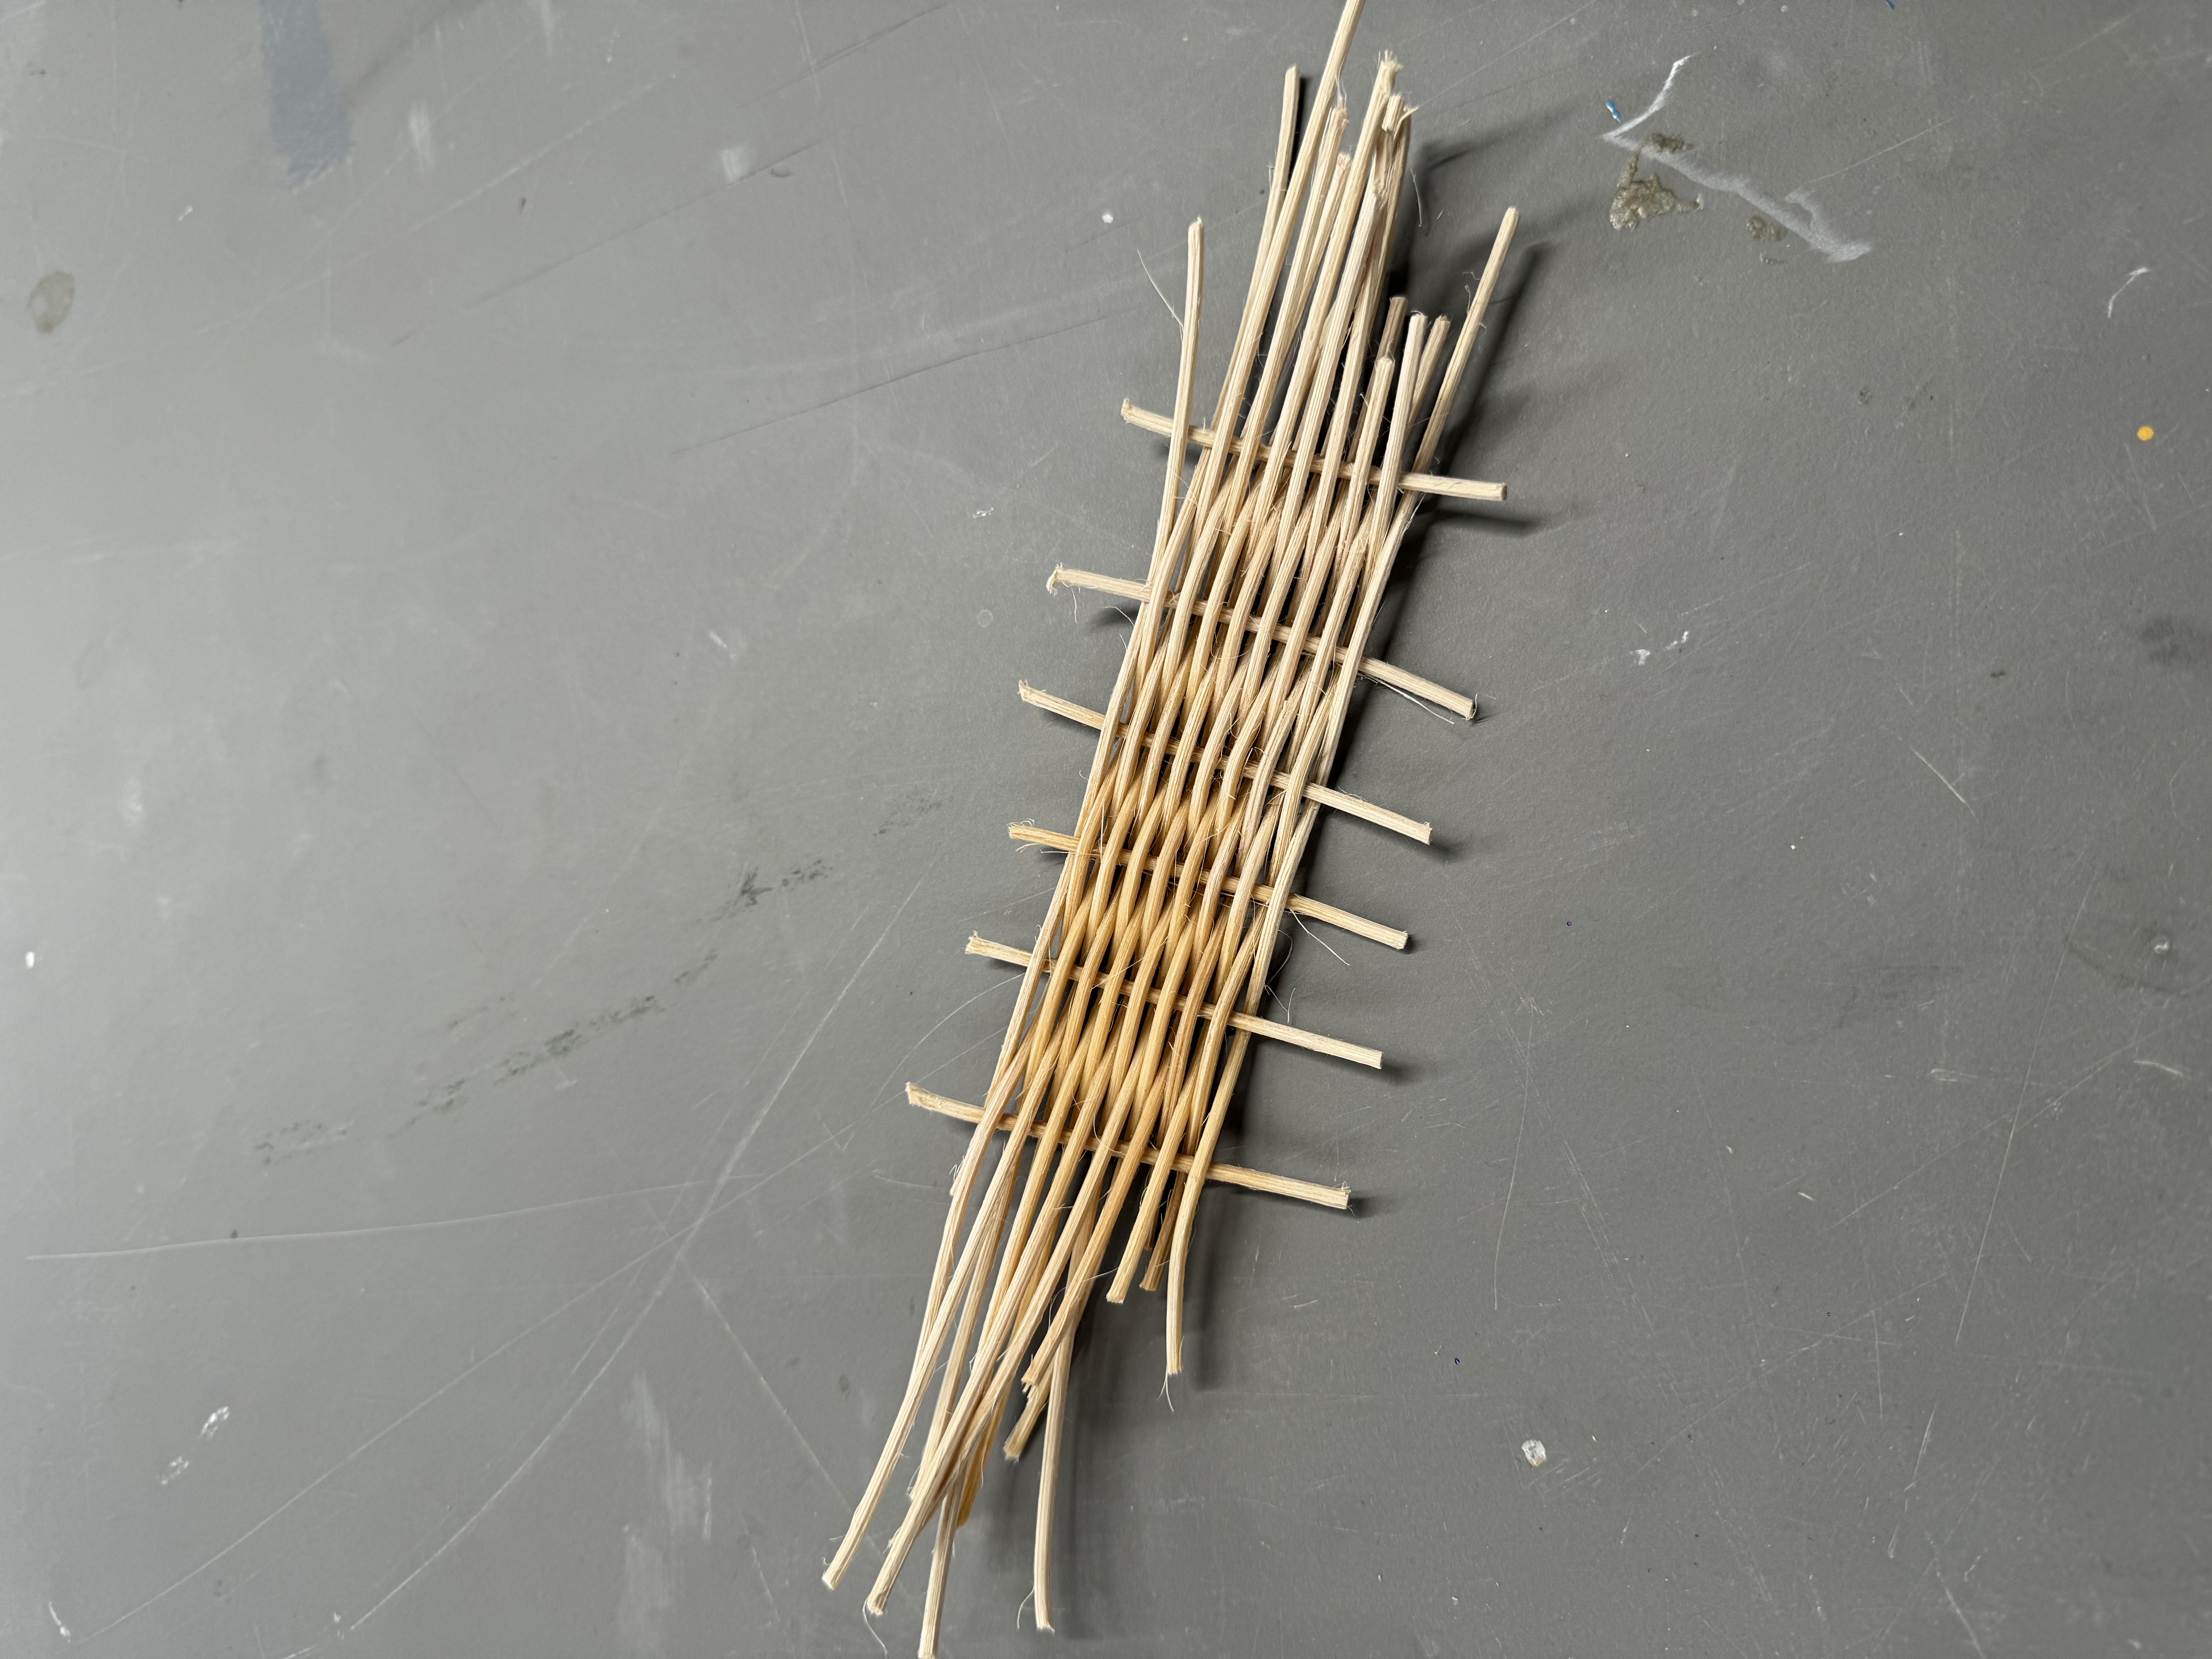
And I made rattan textile samples in two ways. I think the second one is more in line with the square structure of the stool.
23/04/2024

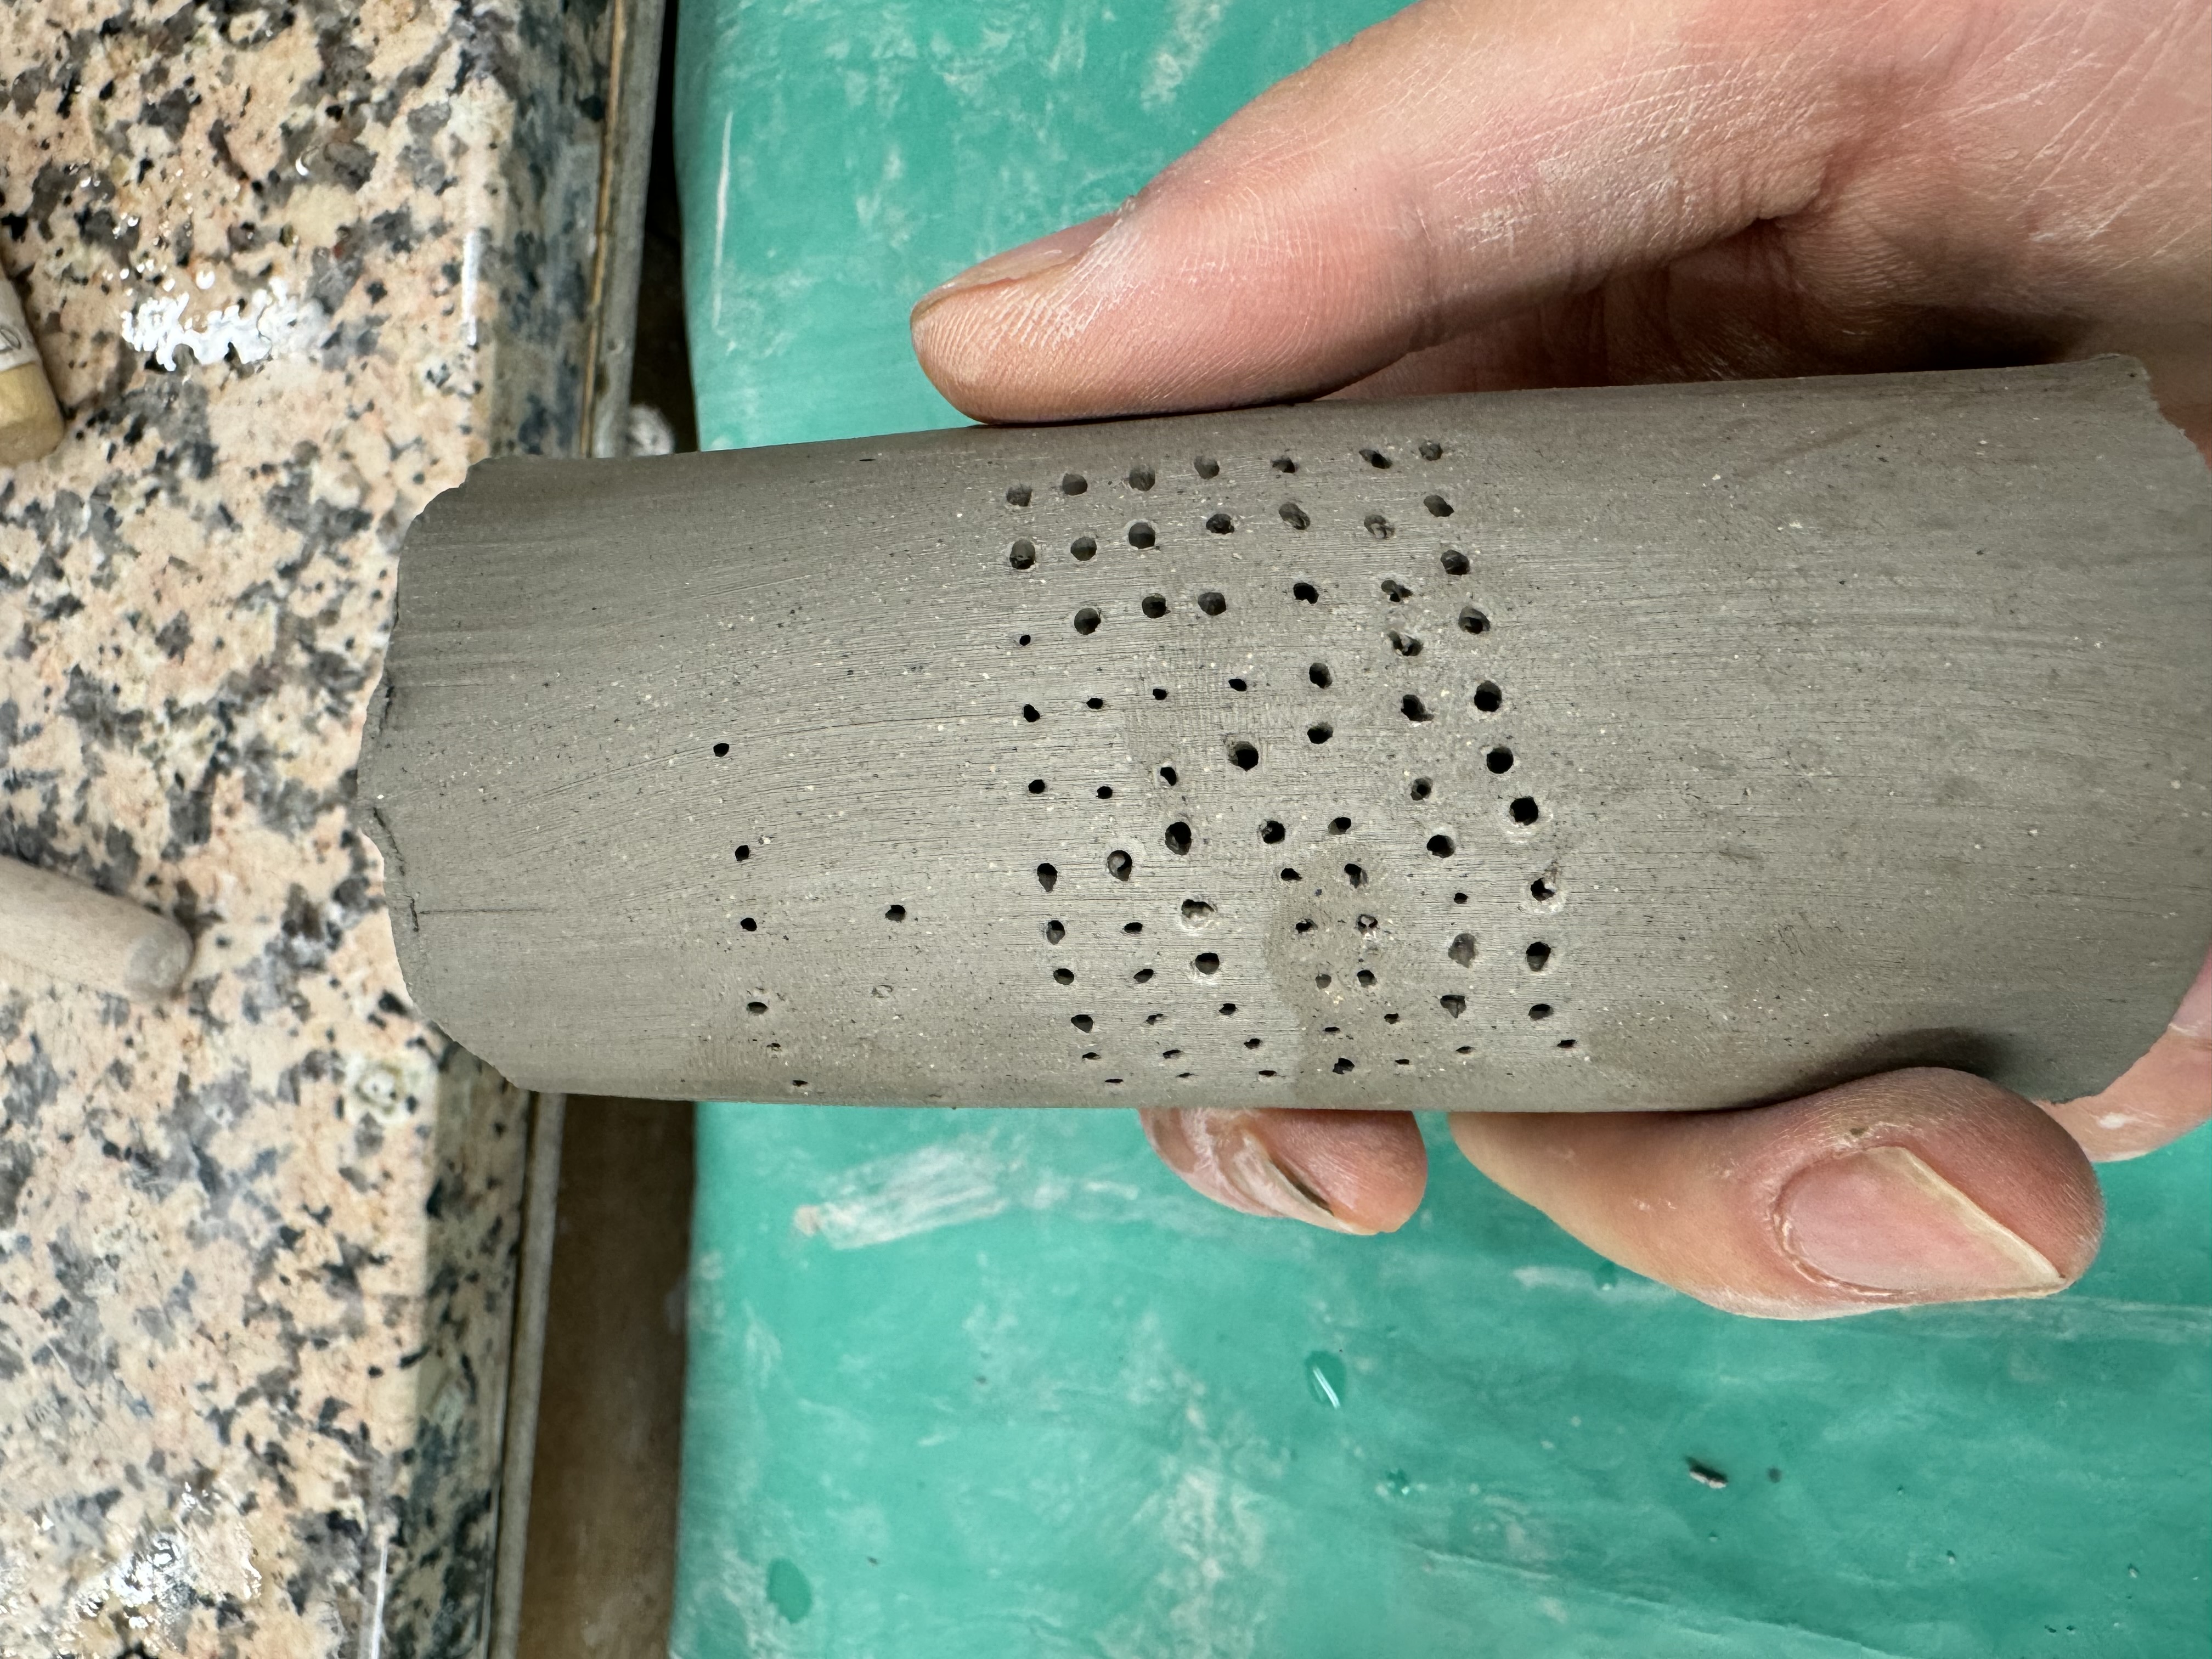
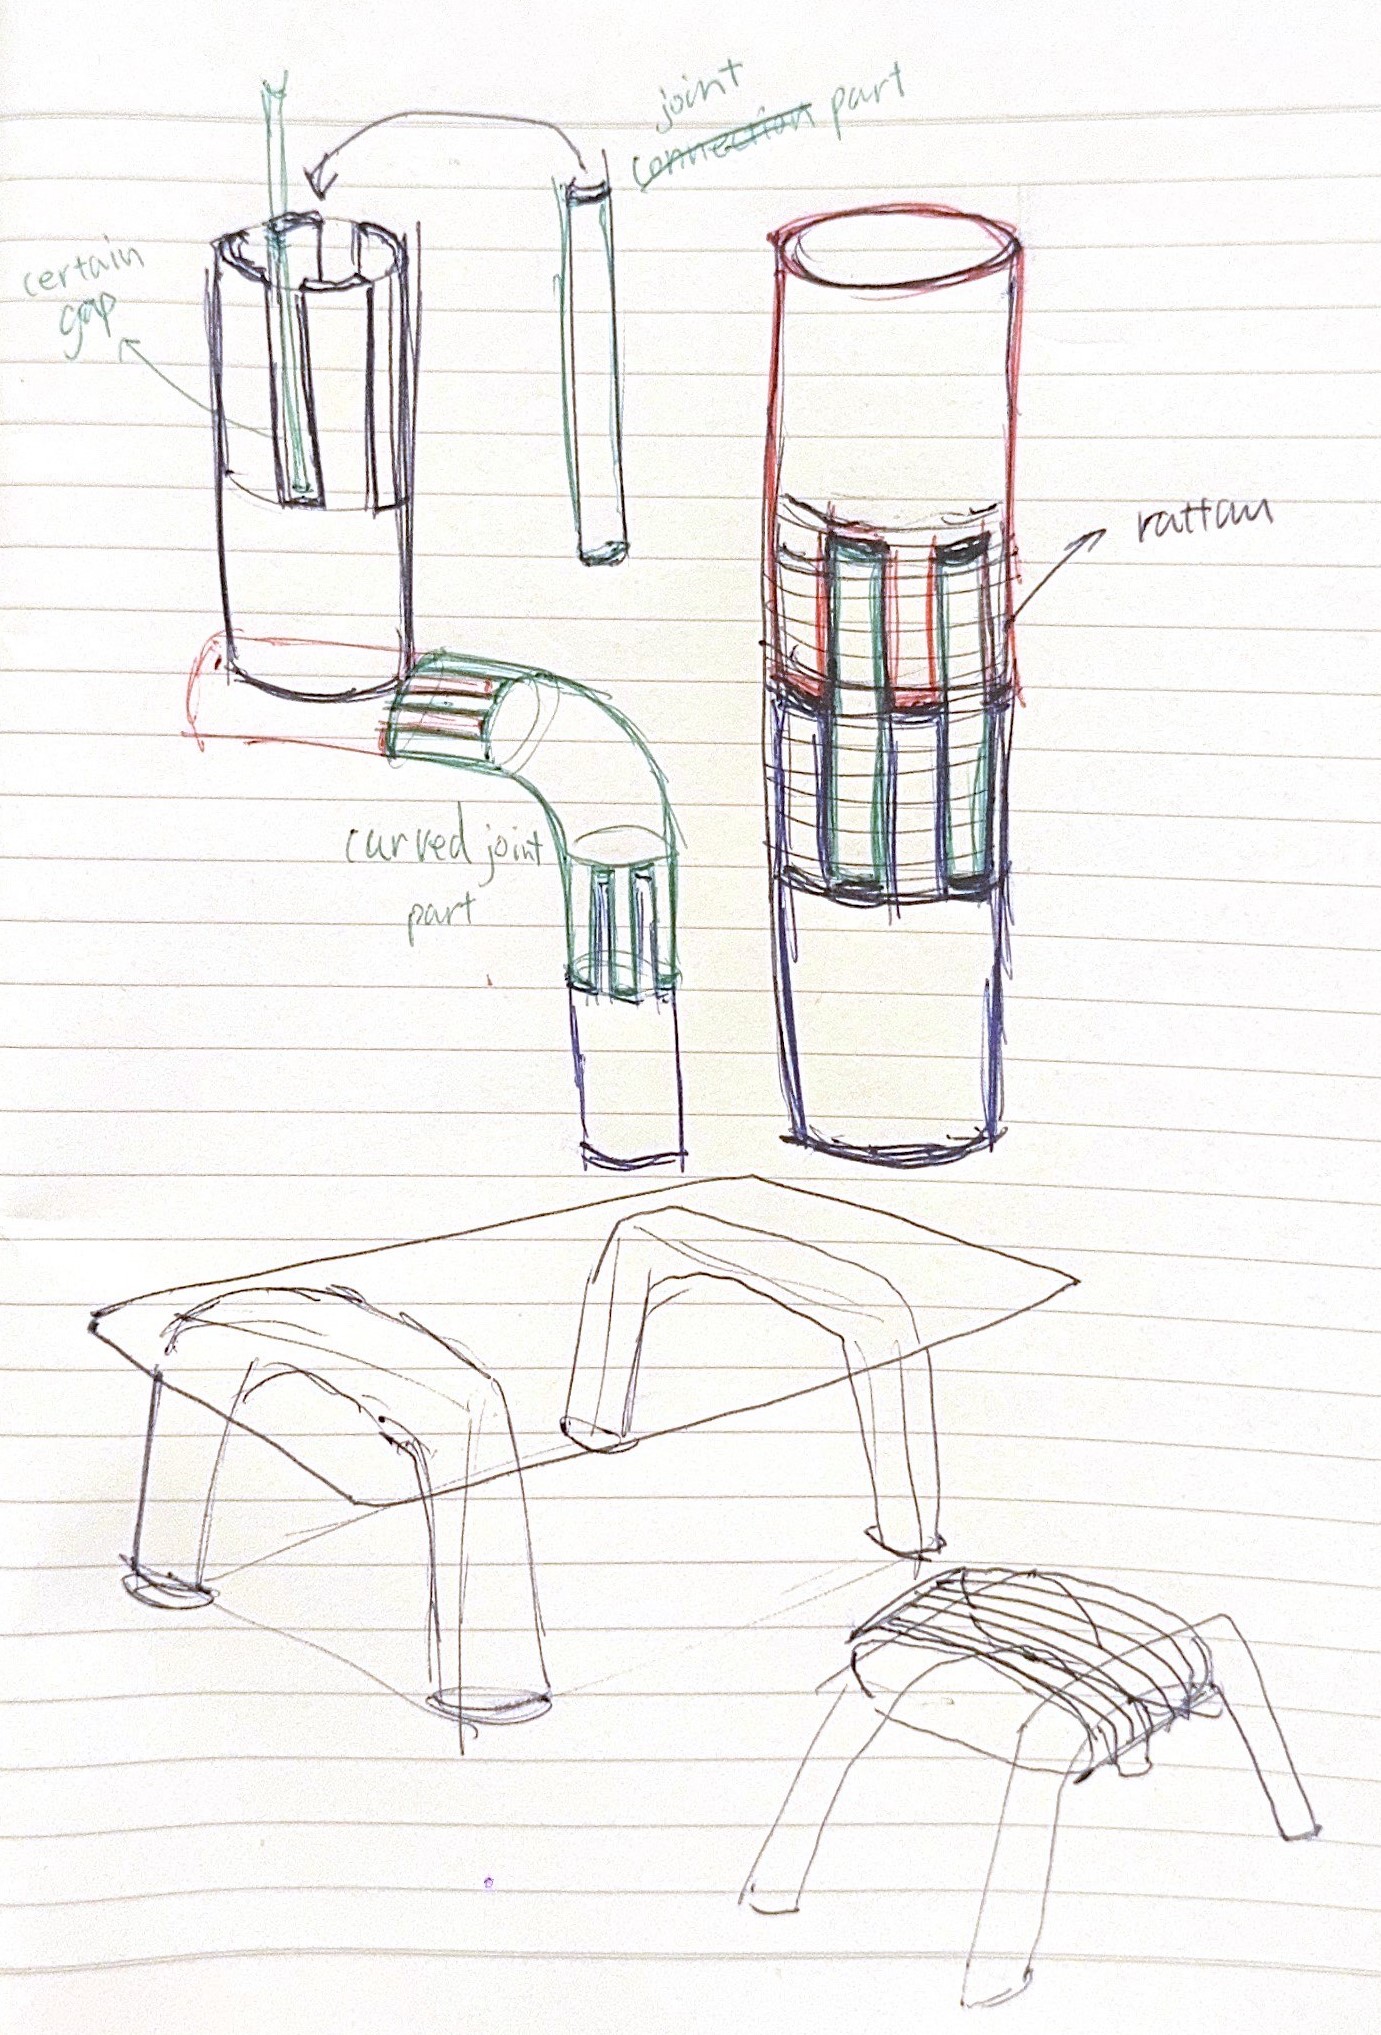
 Because the vase I made last time reminded me of bamboo, I was curious about how the bamboo is connected. I consulted the knowledge in the book and skeched some ideas to make furniture using the way bamboo joins ceramics and avoiding lateral extrusion forces.
26/04/2024
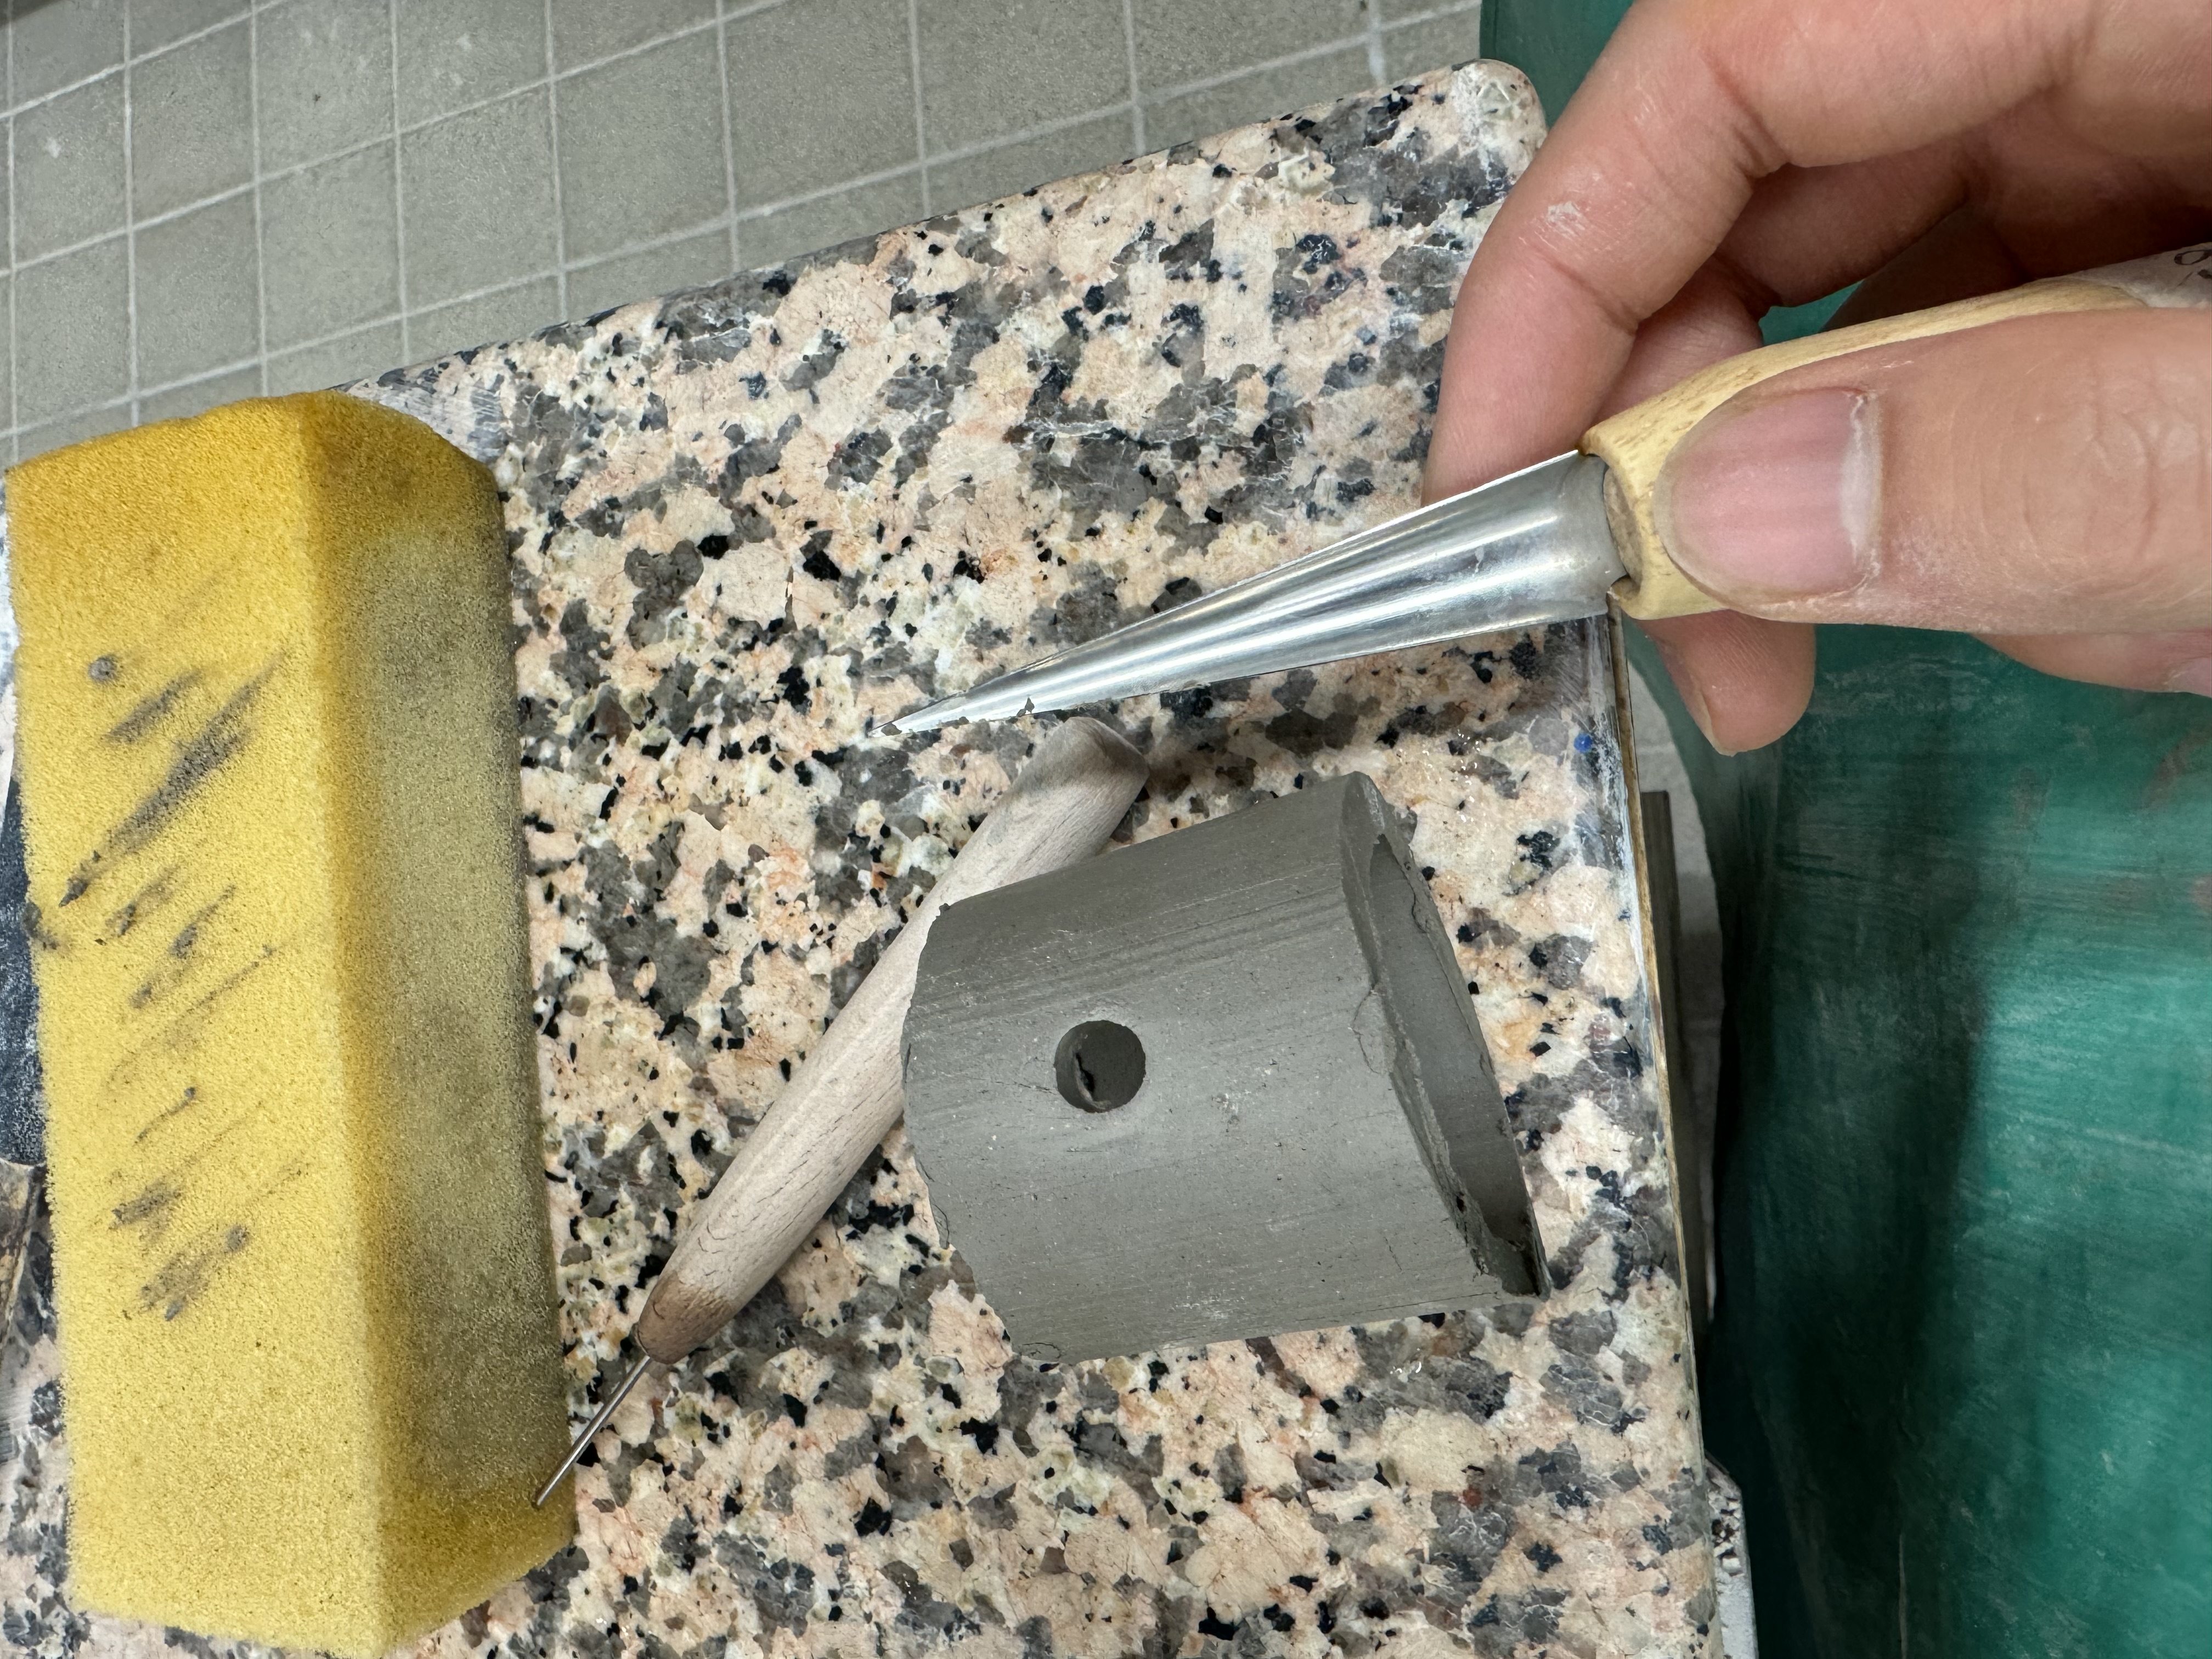
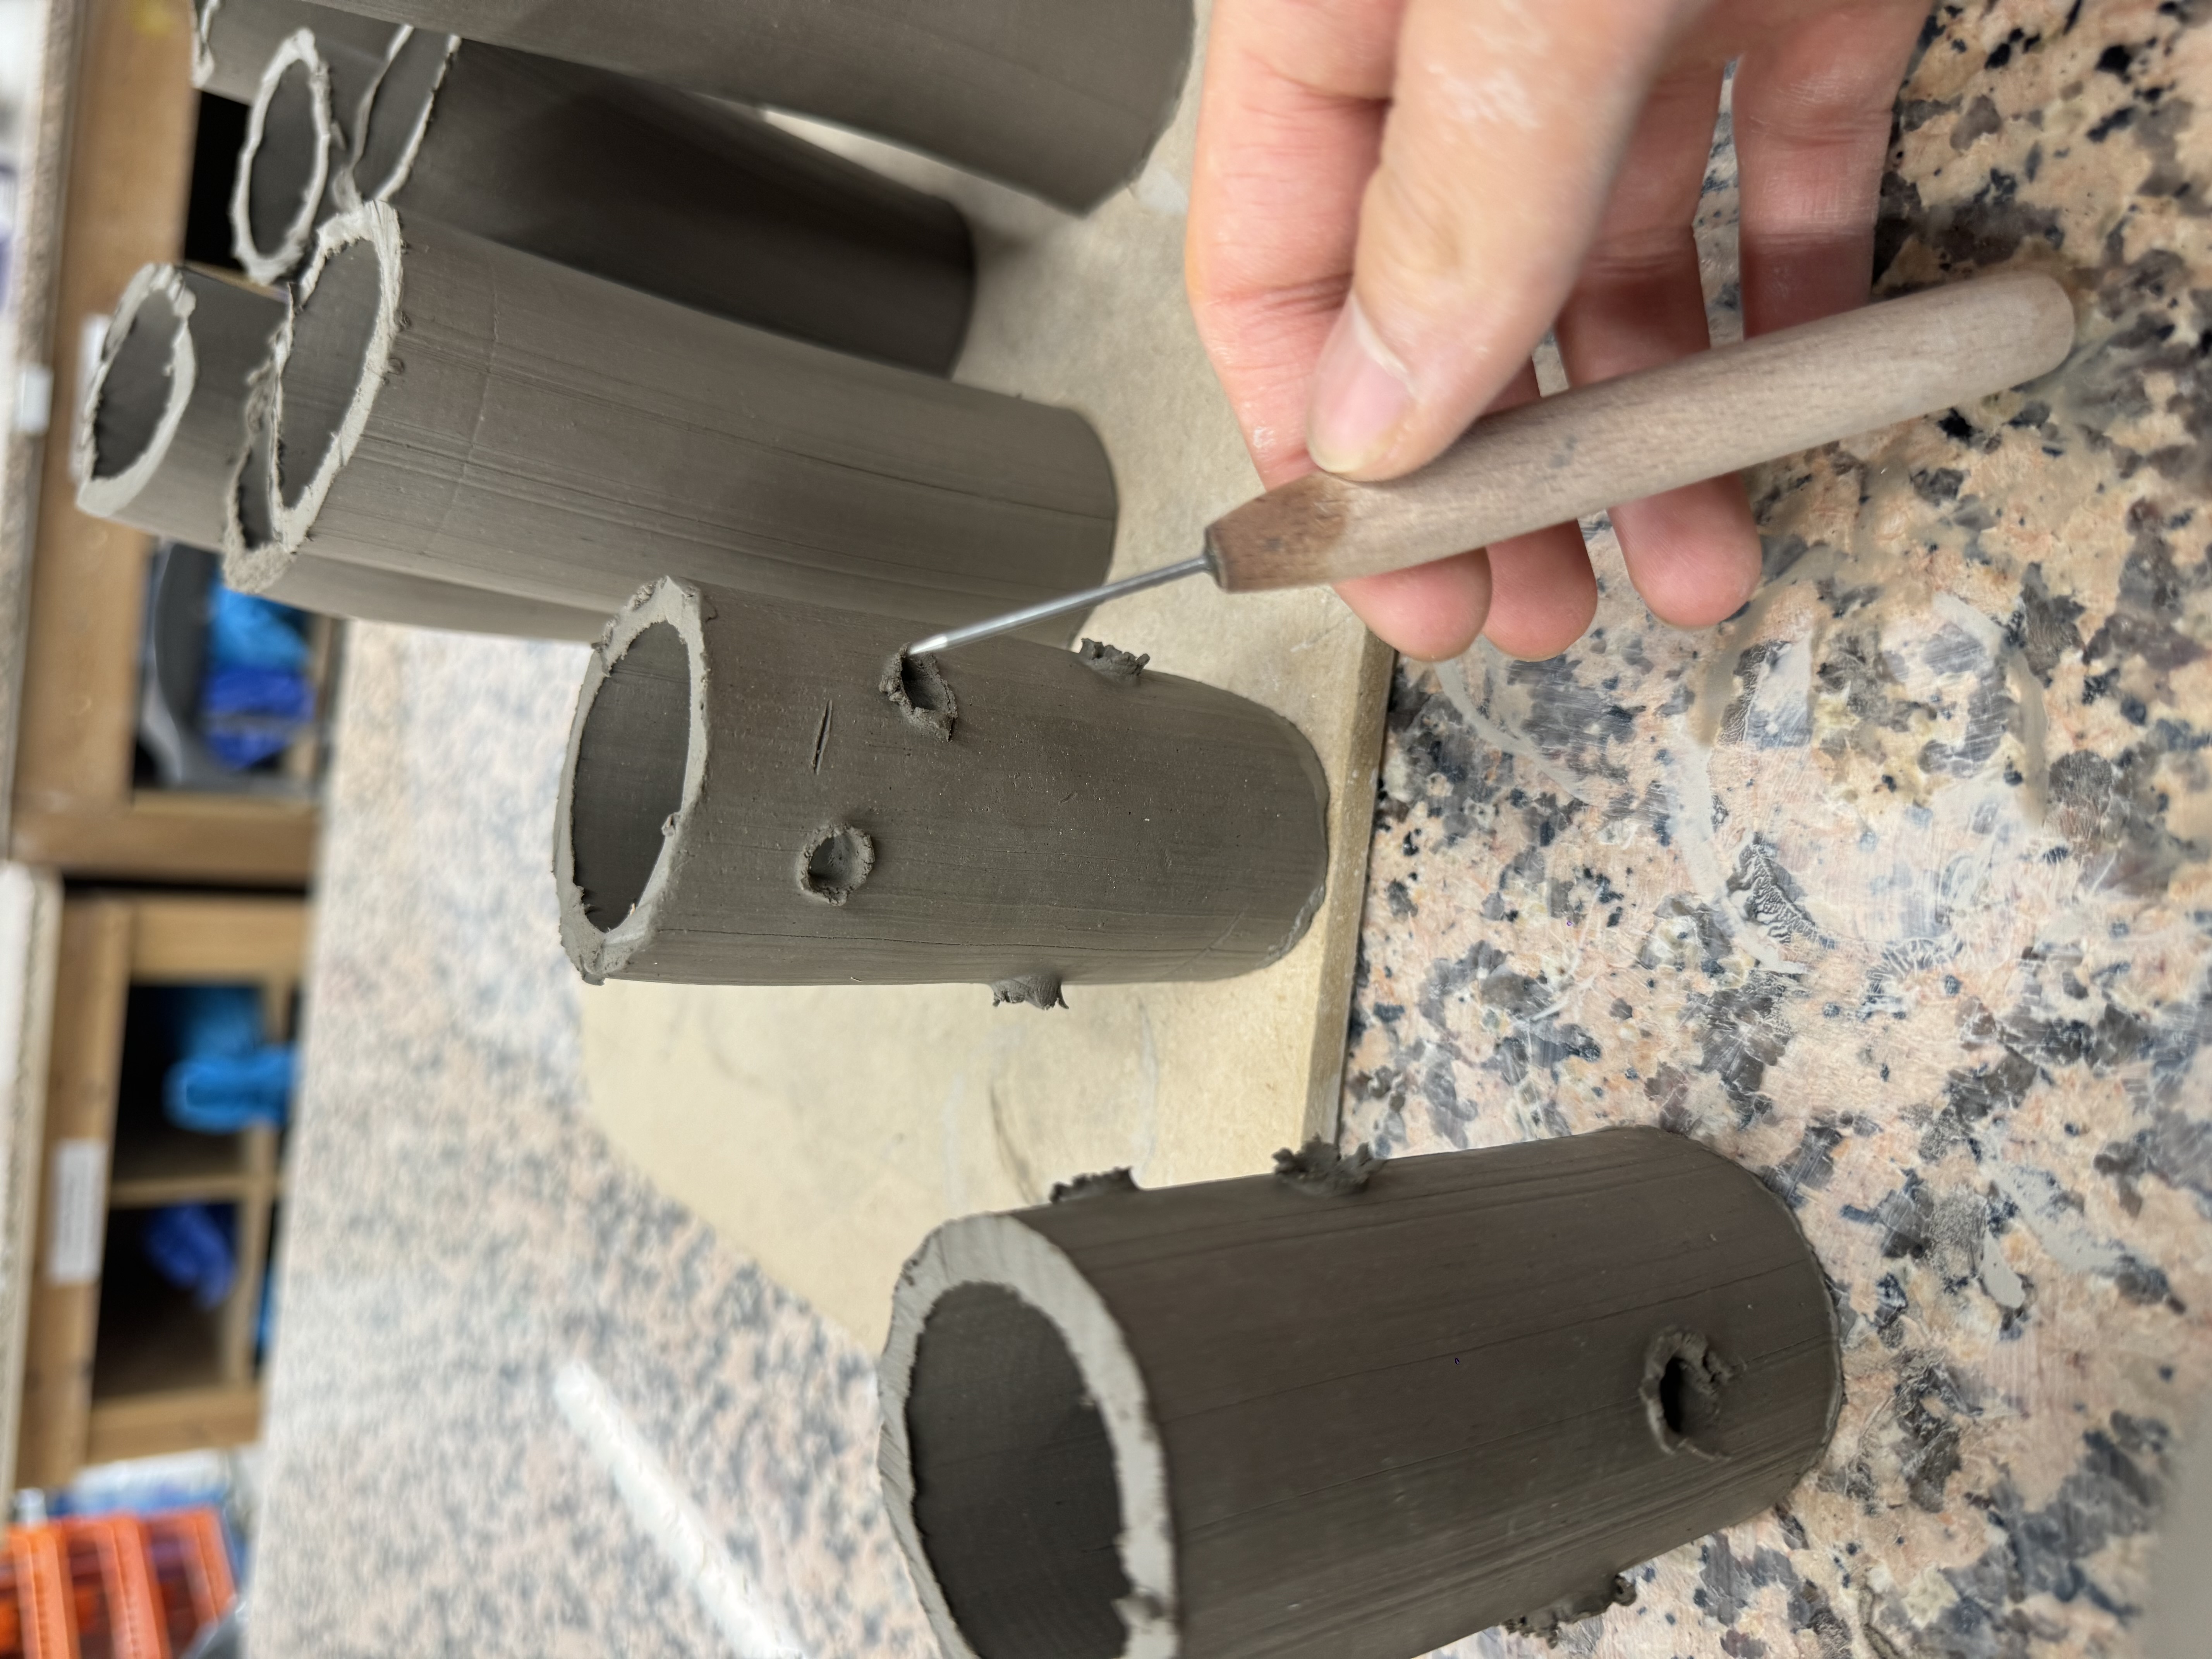
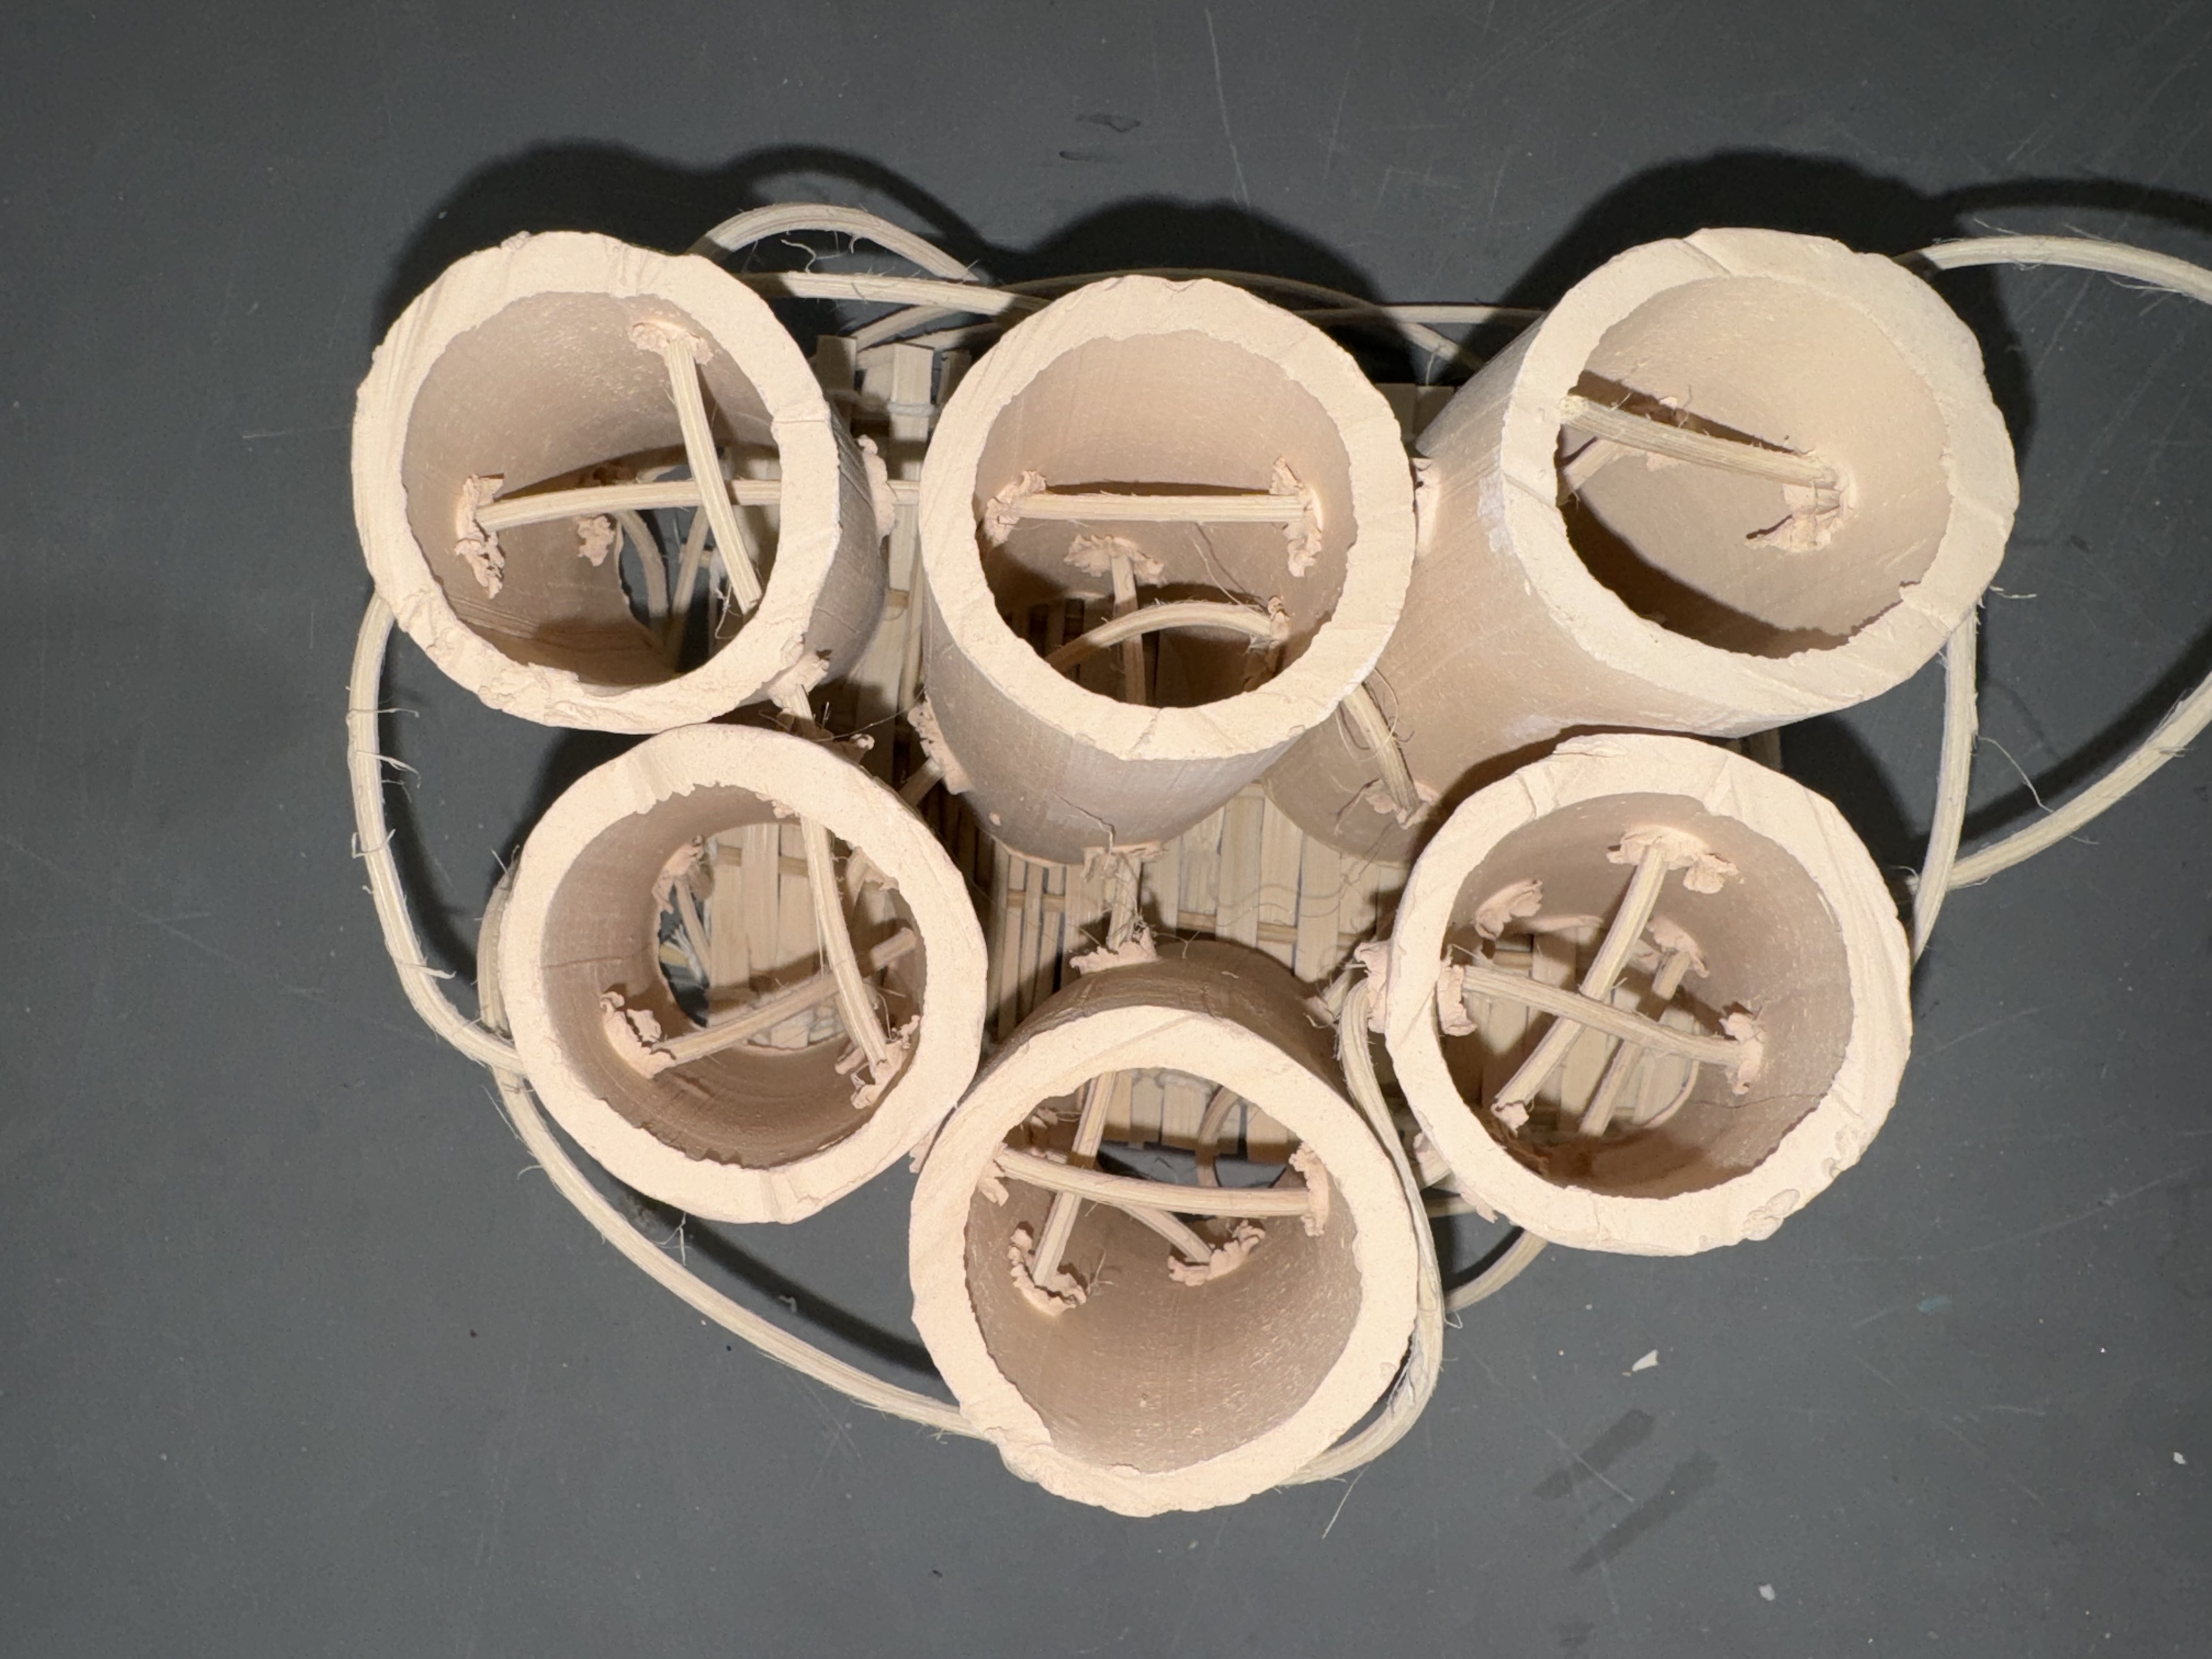
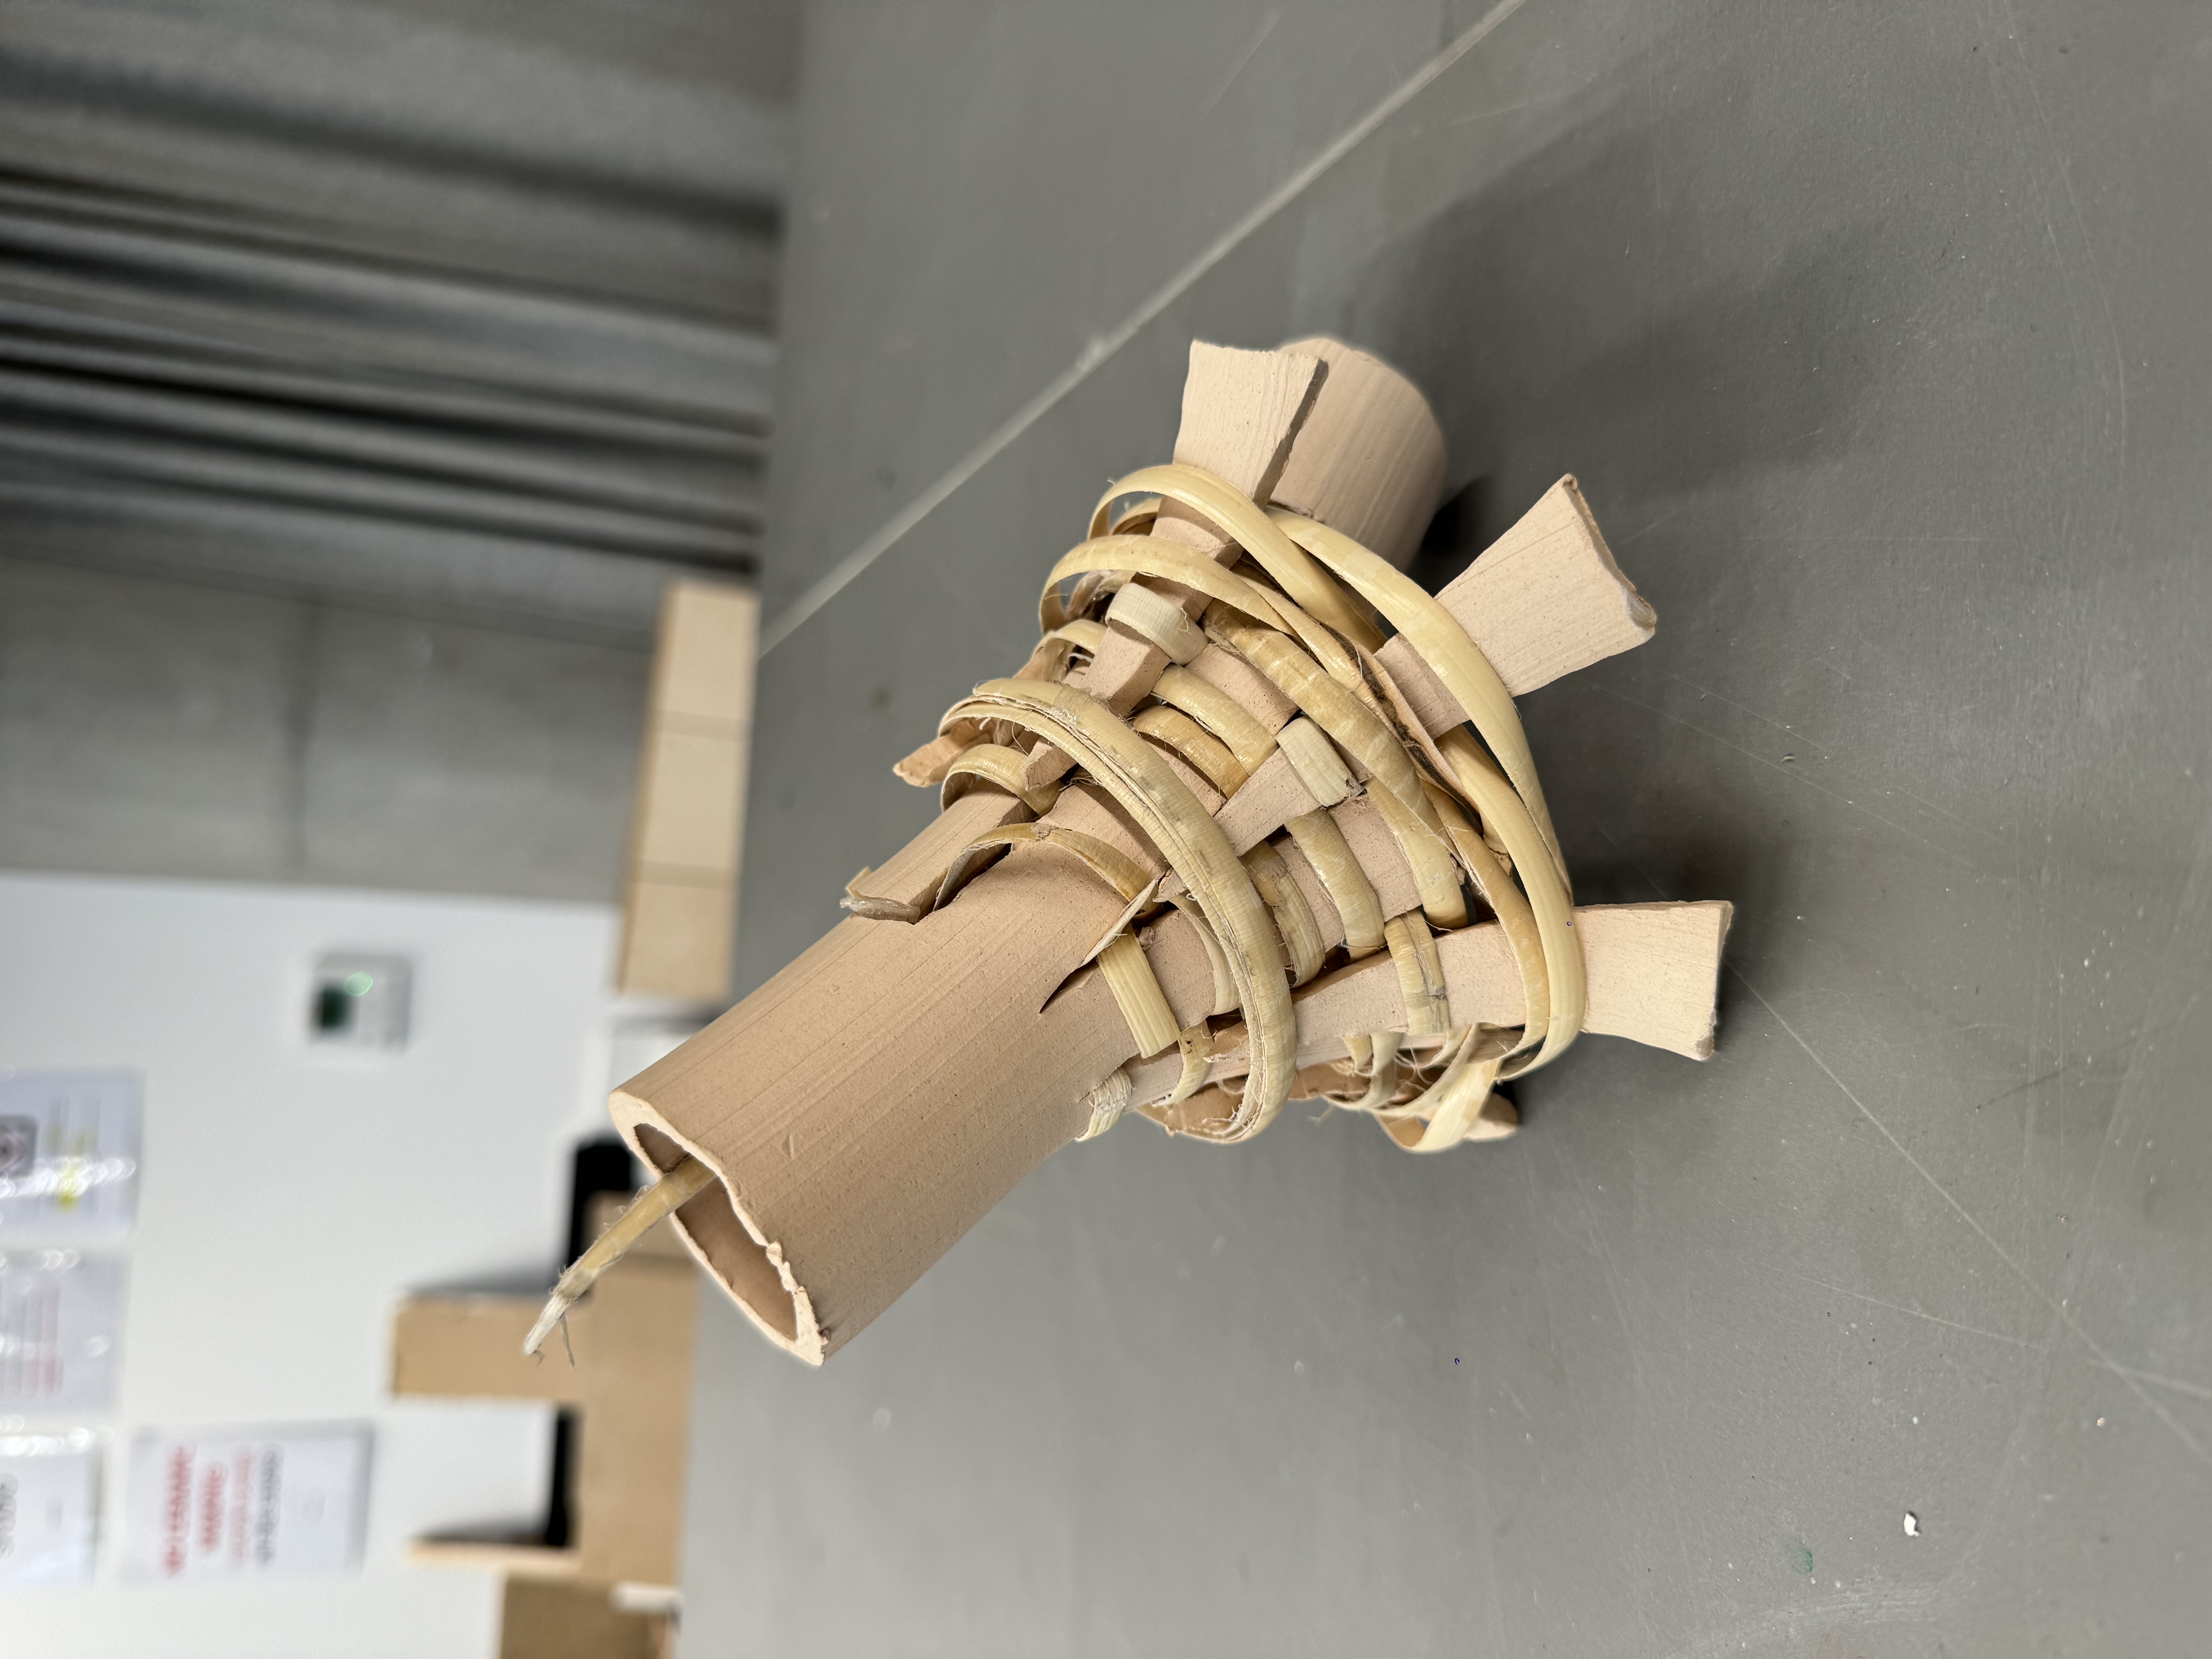
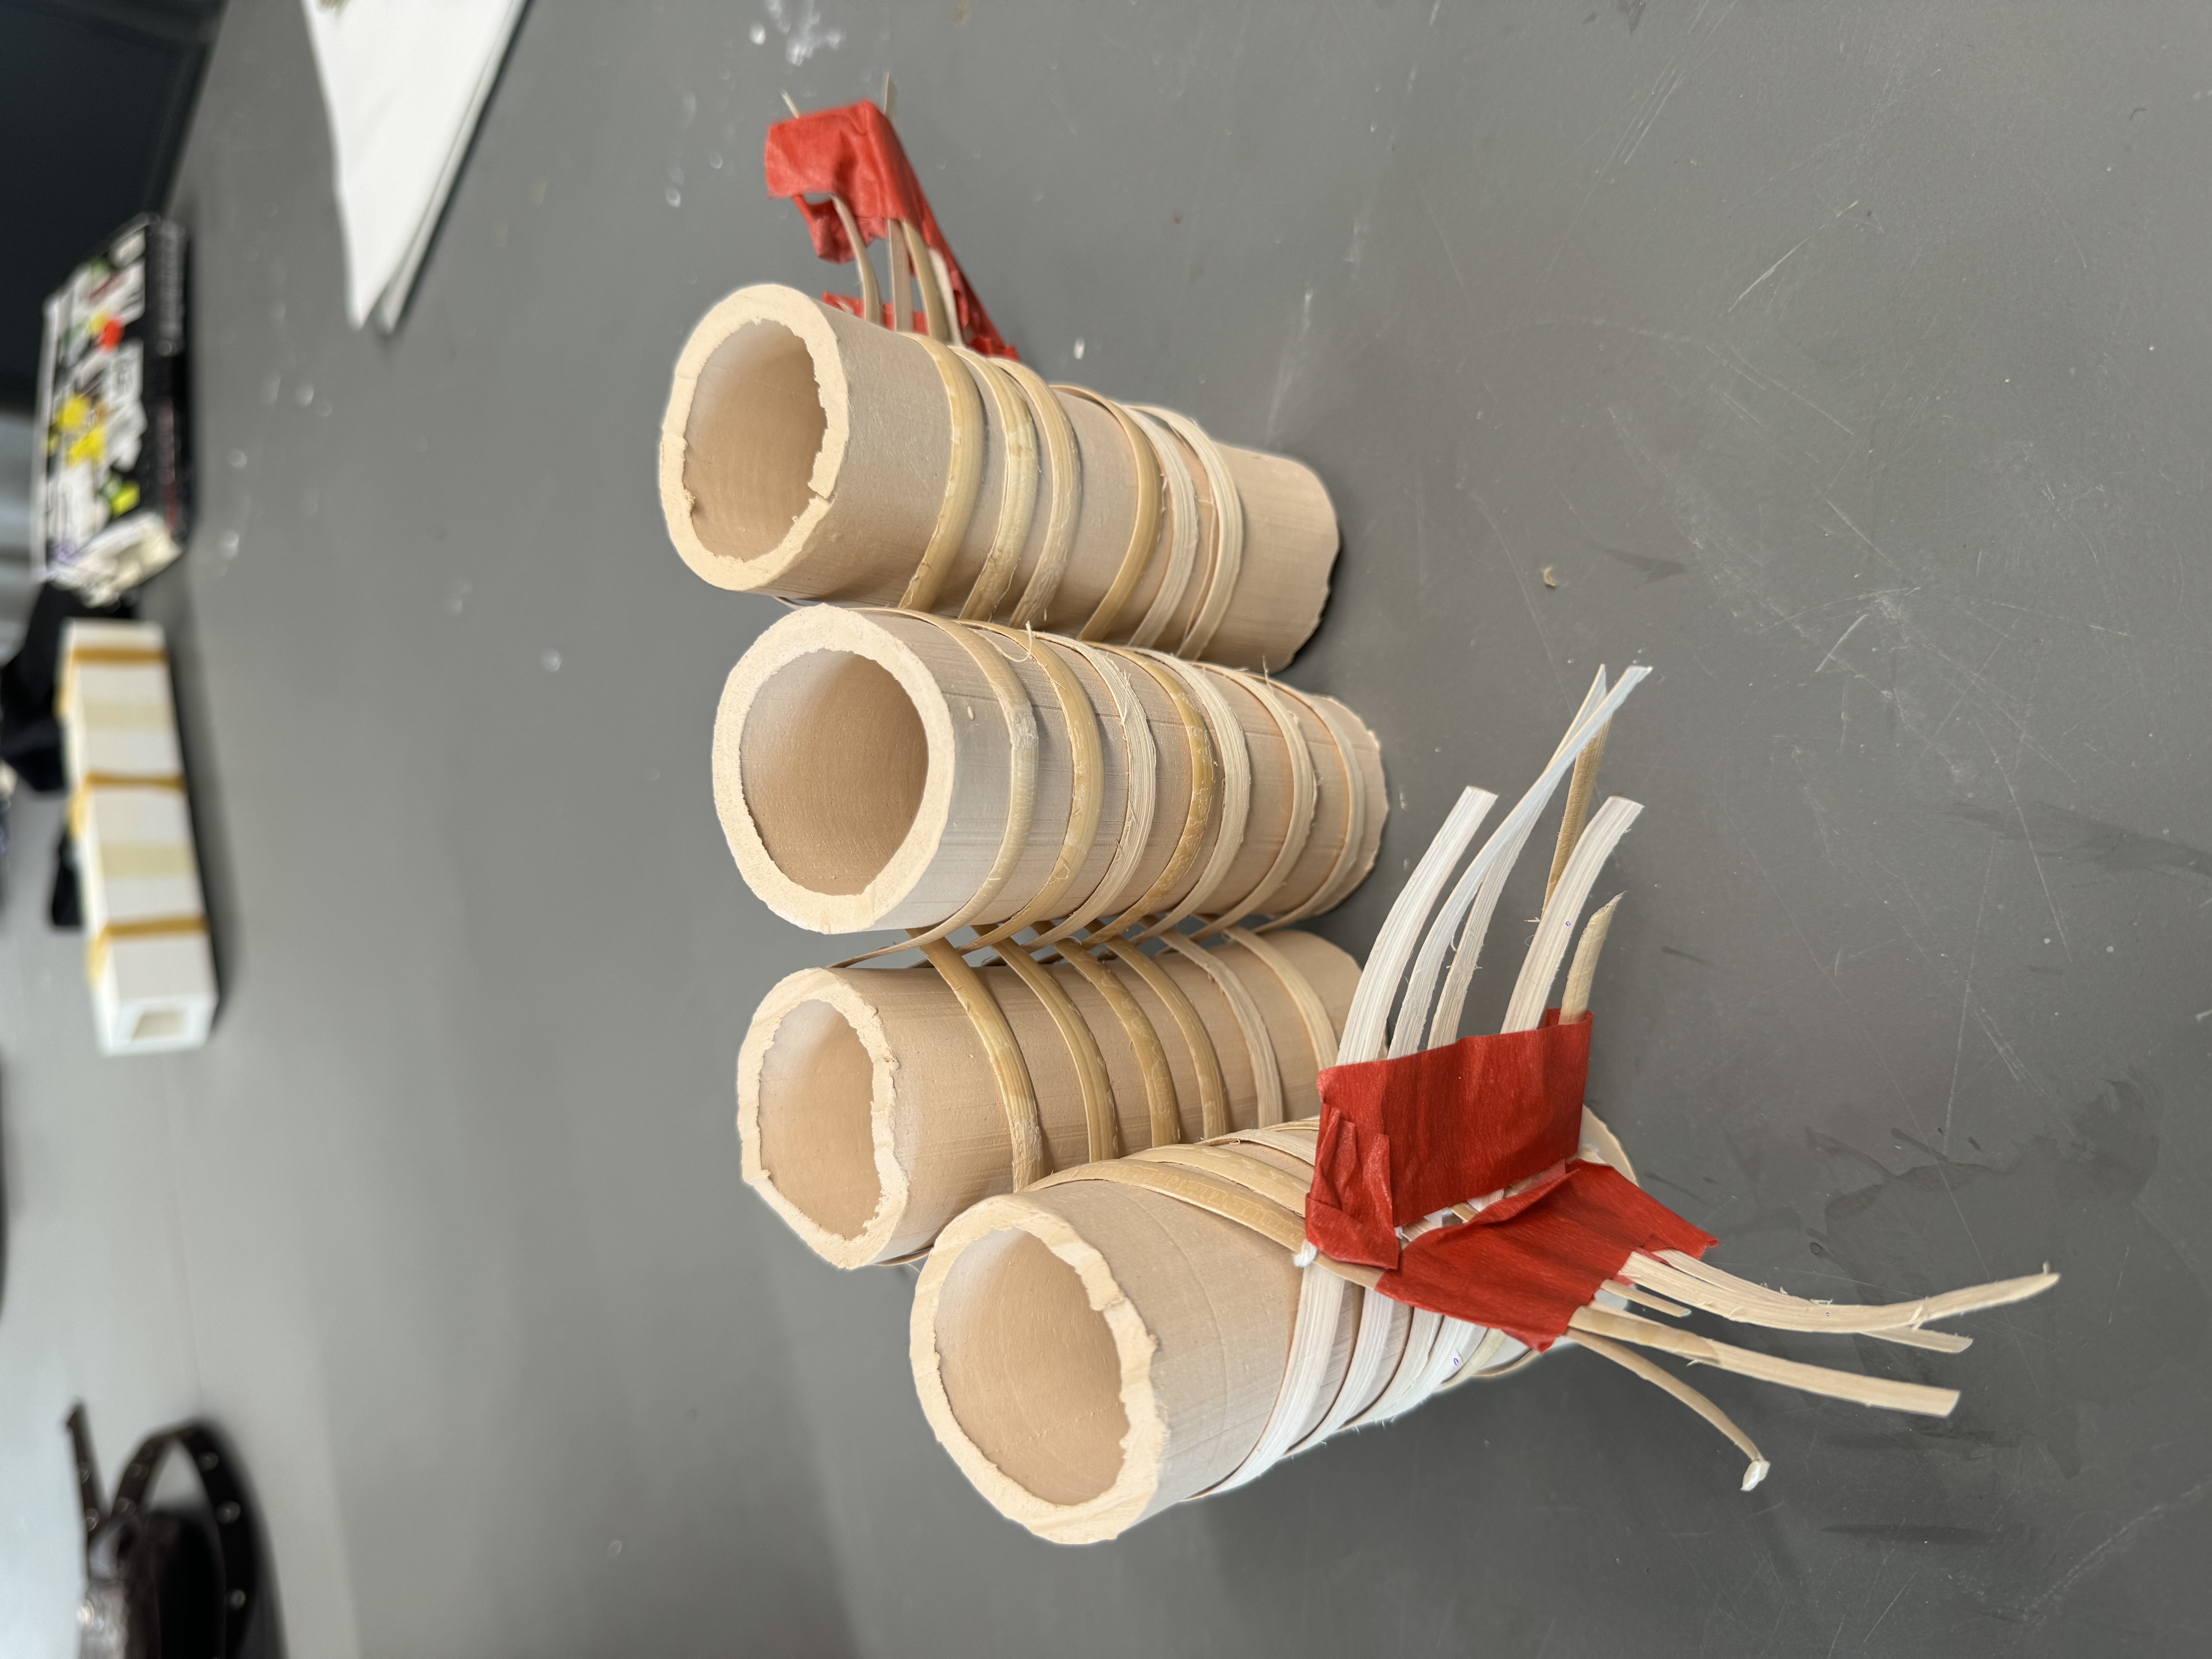
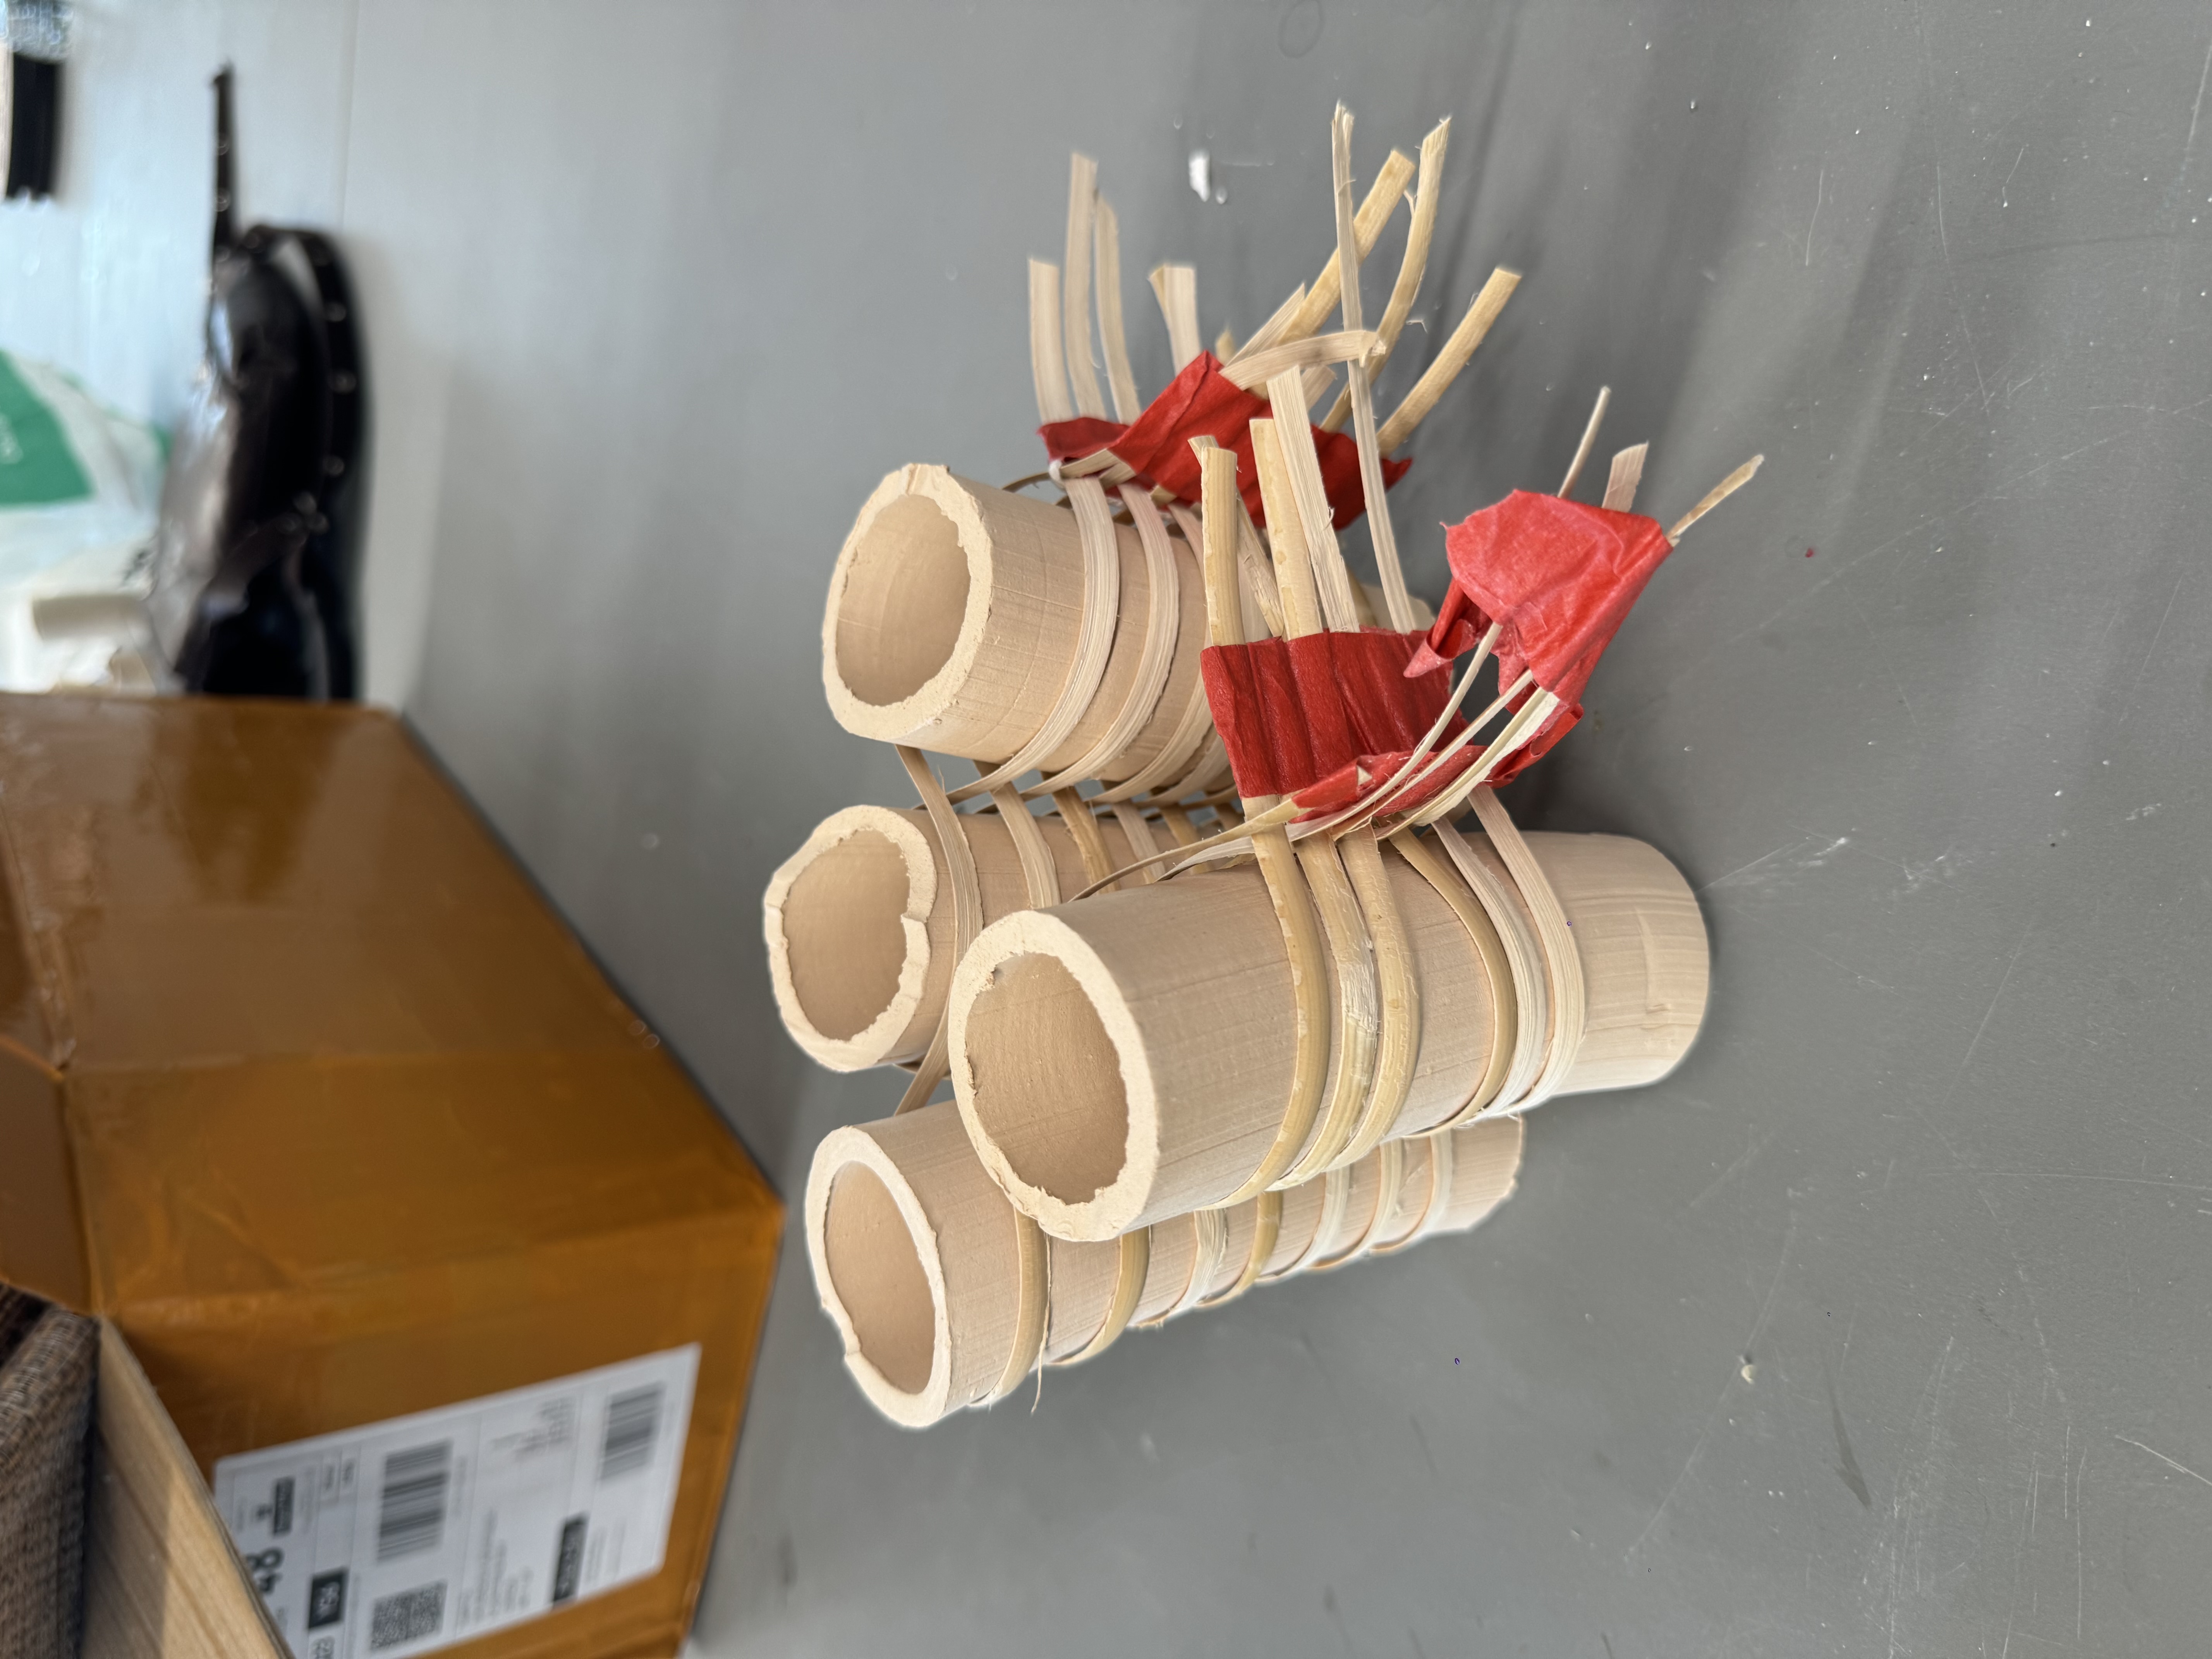
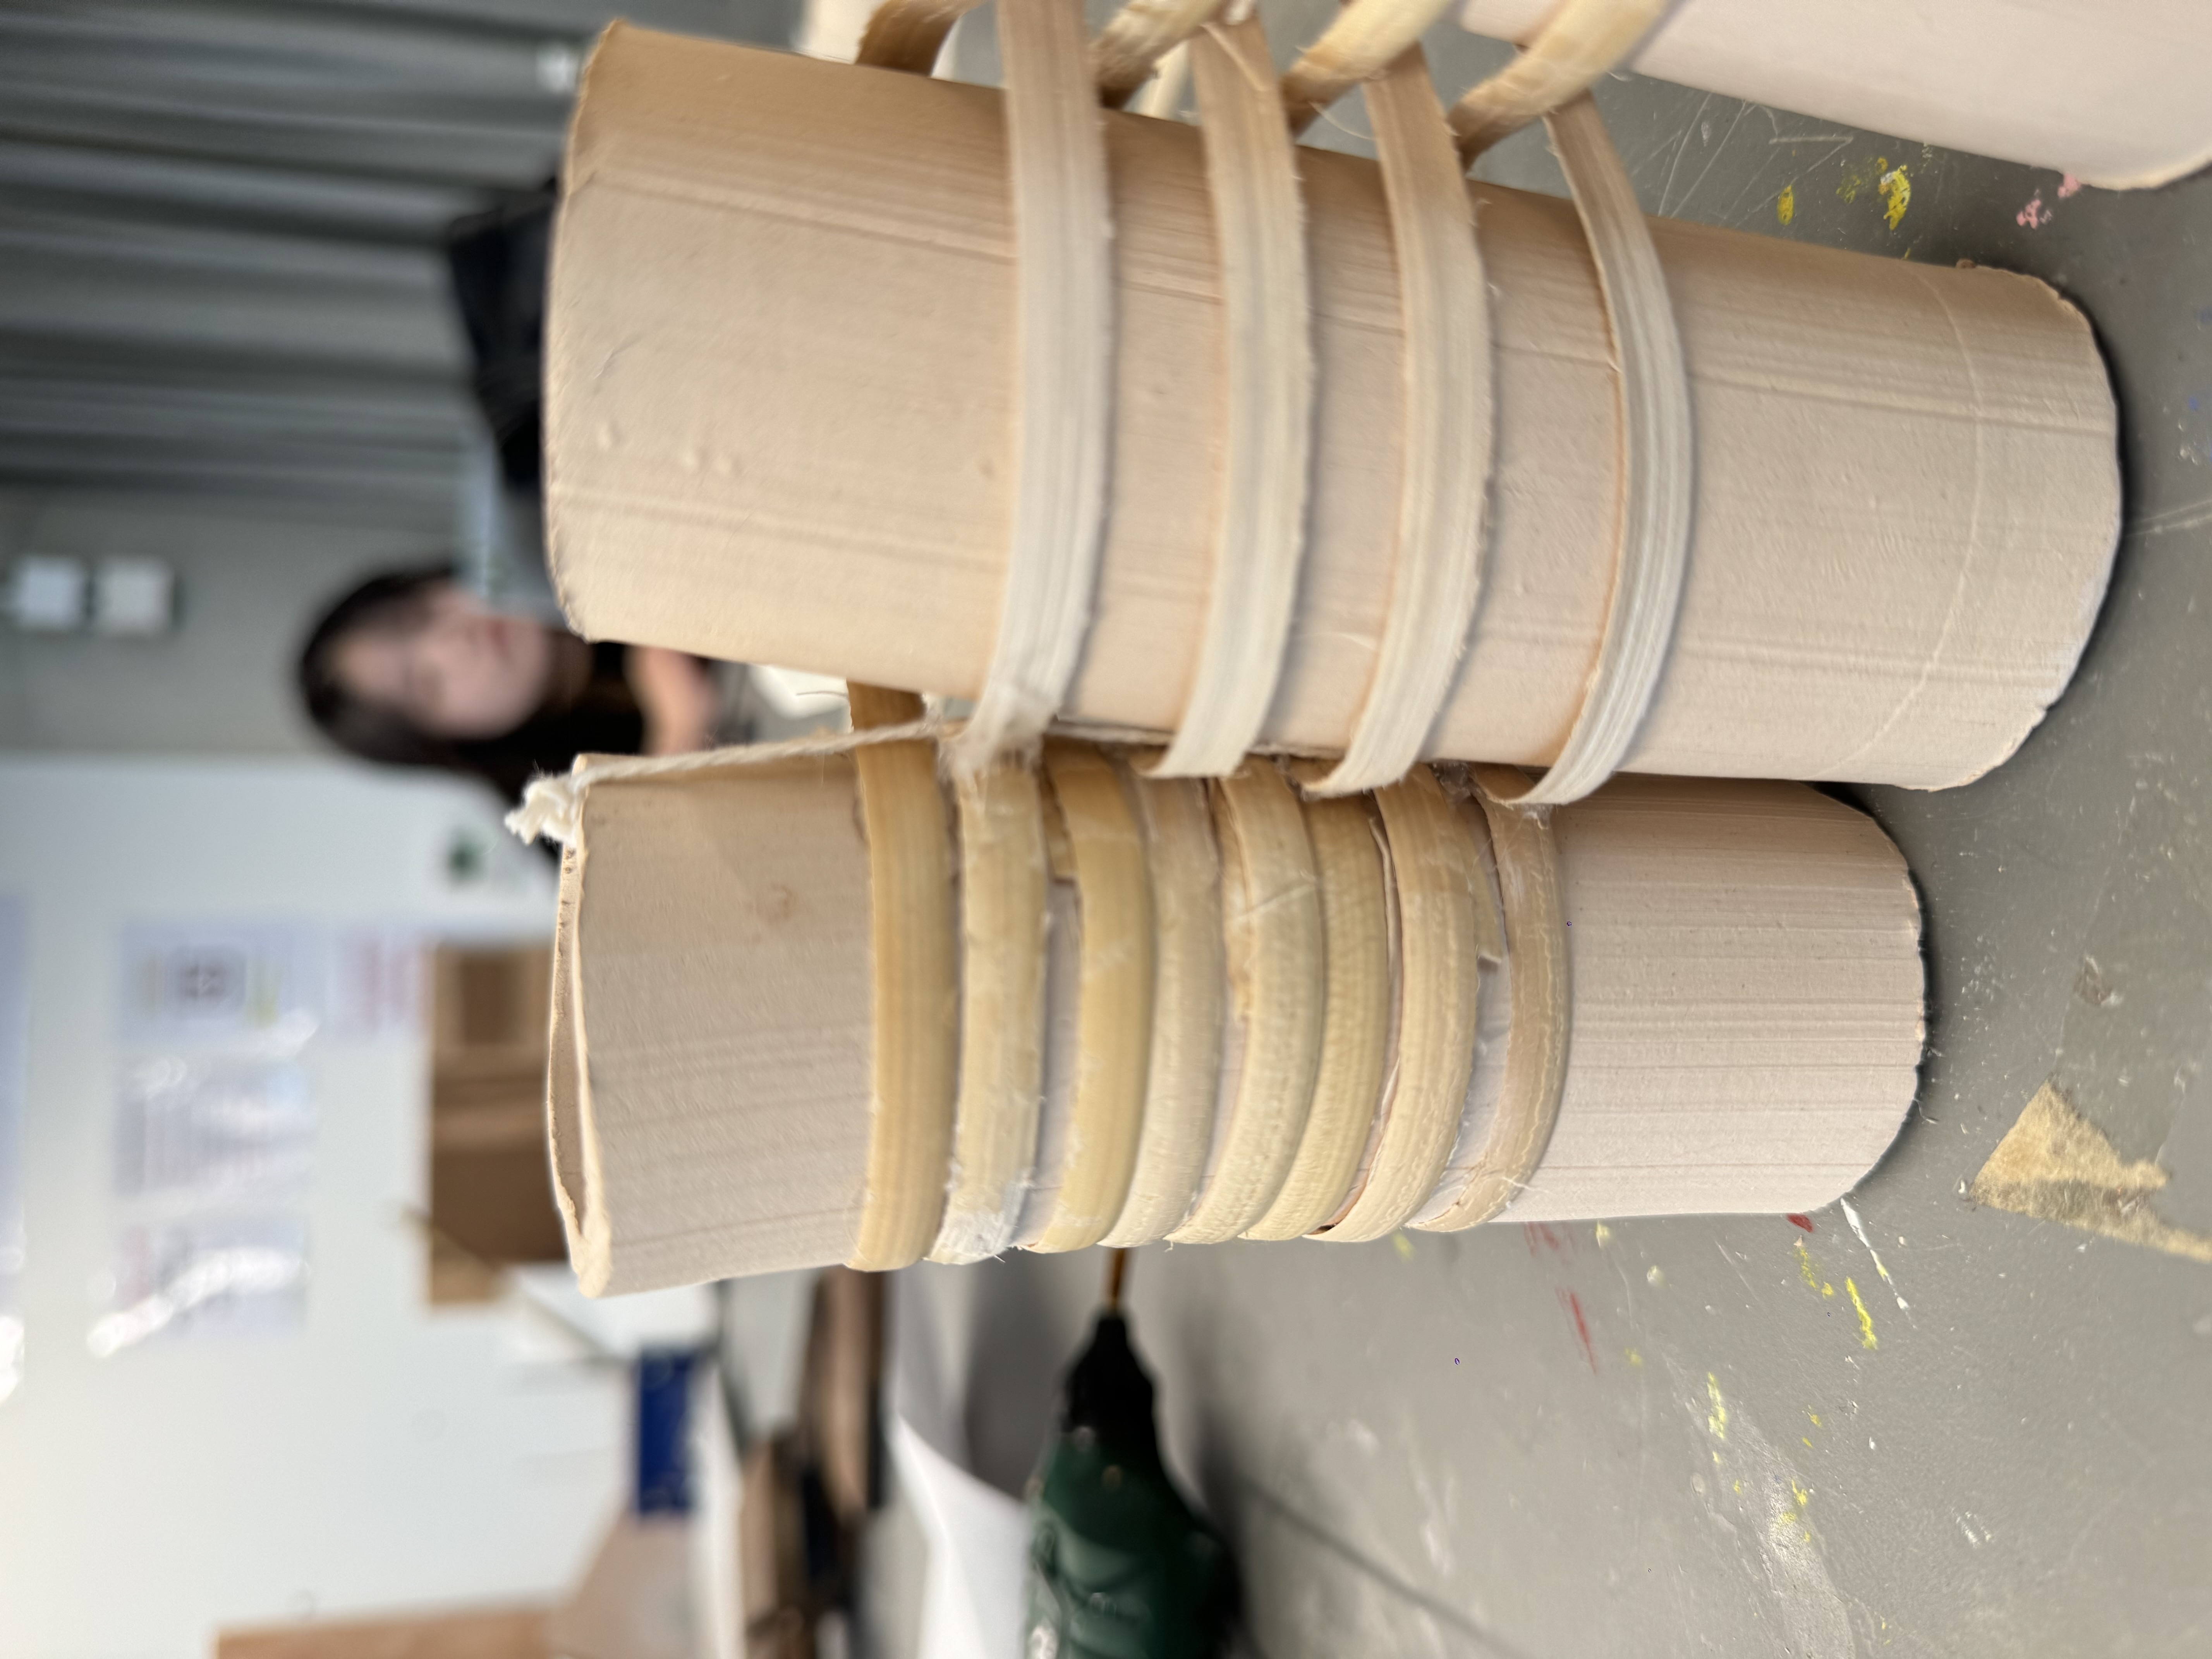
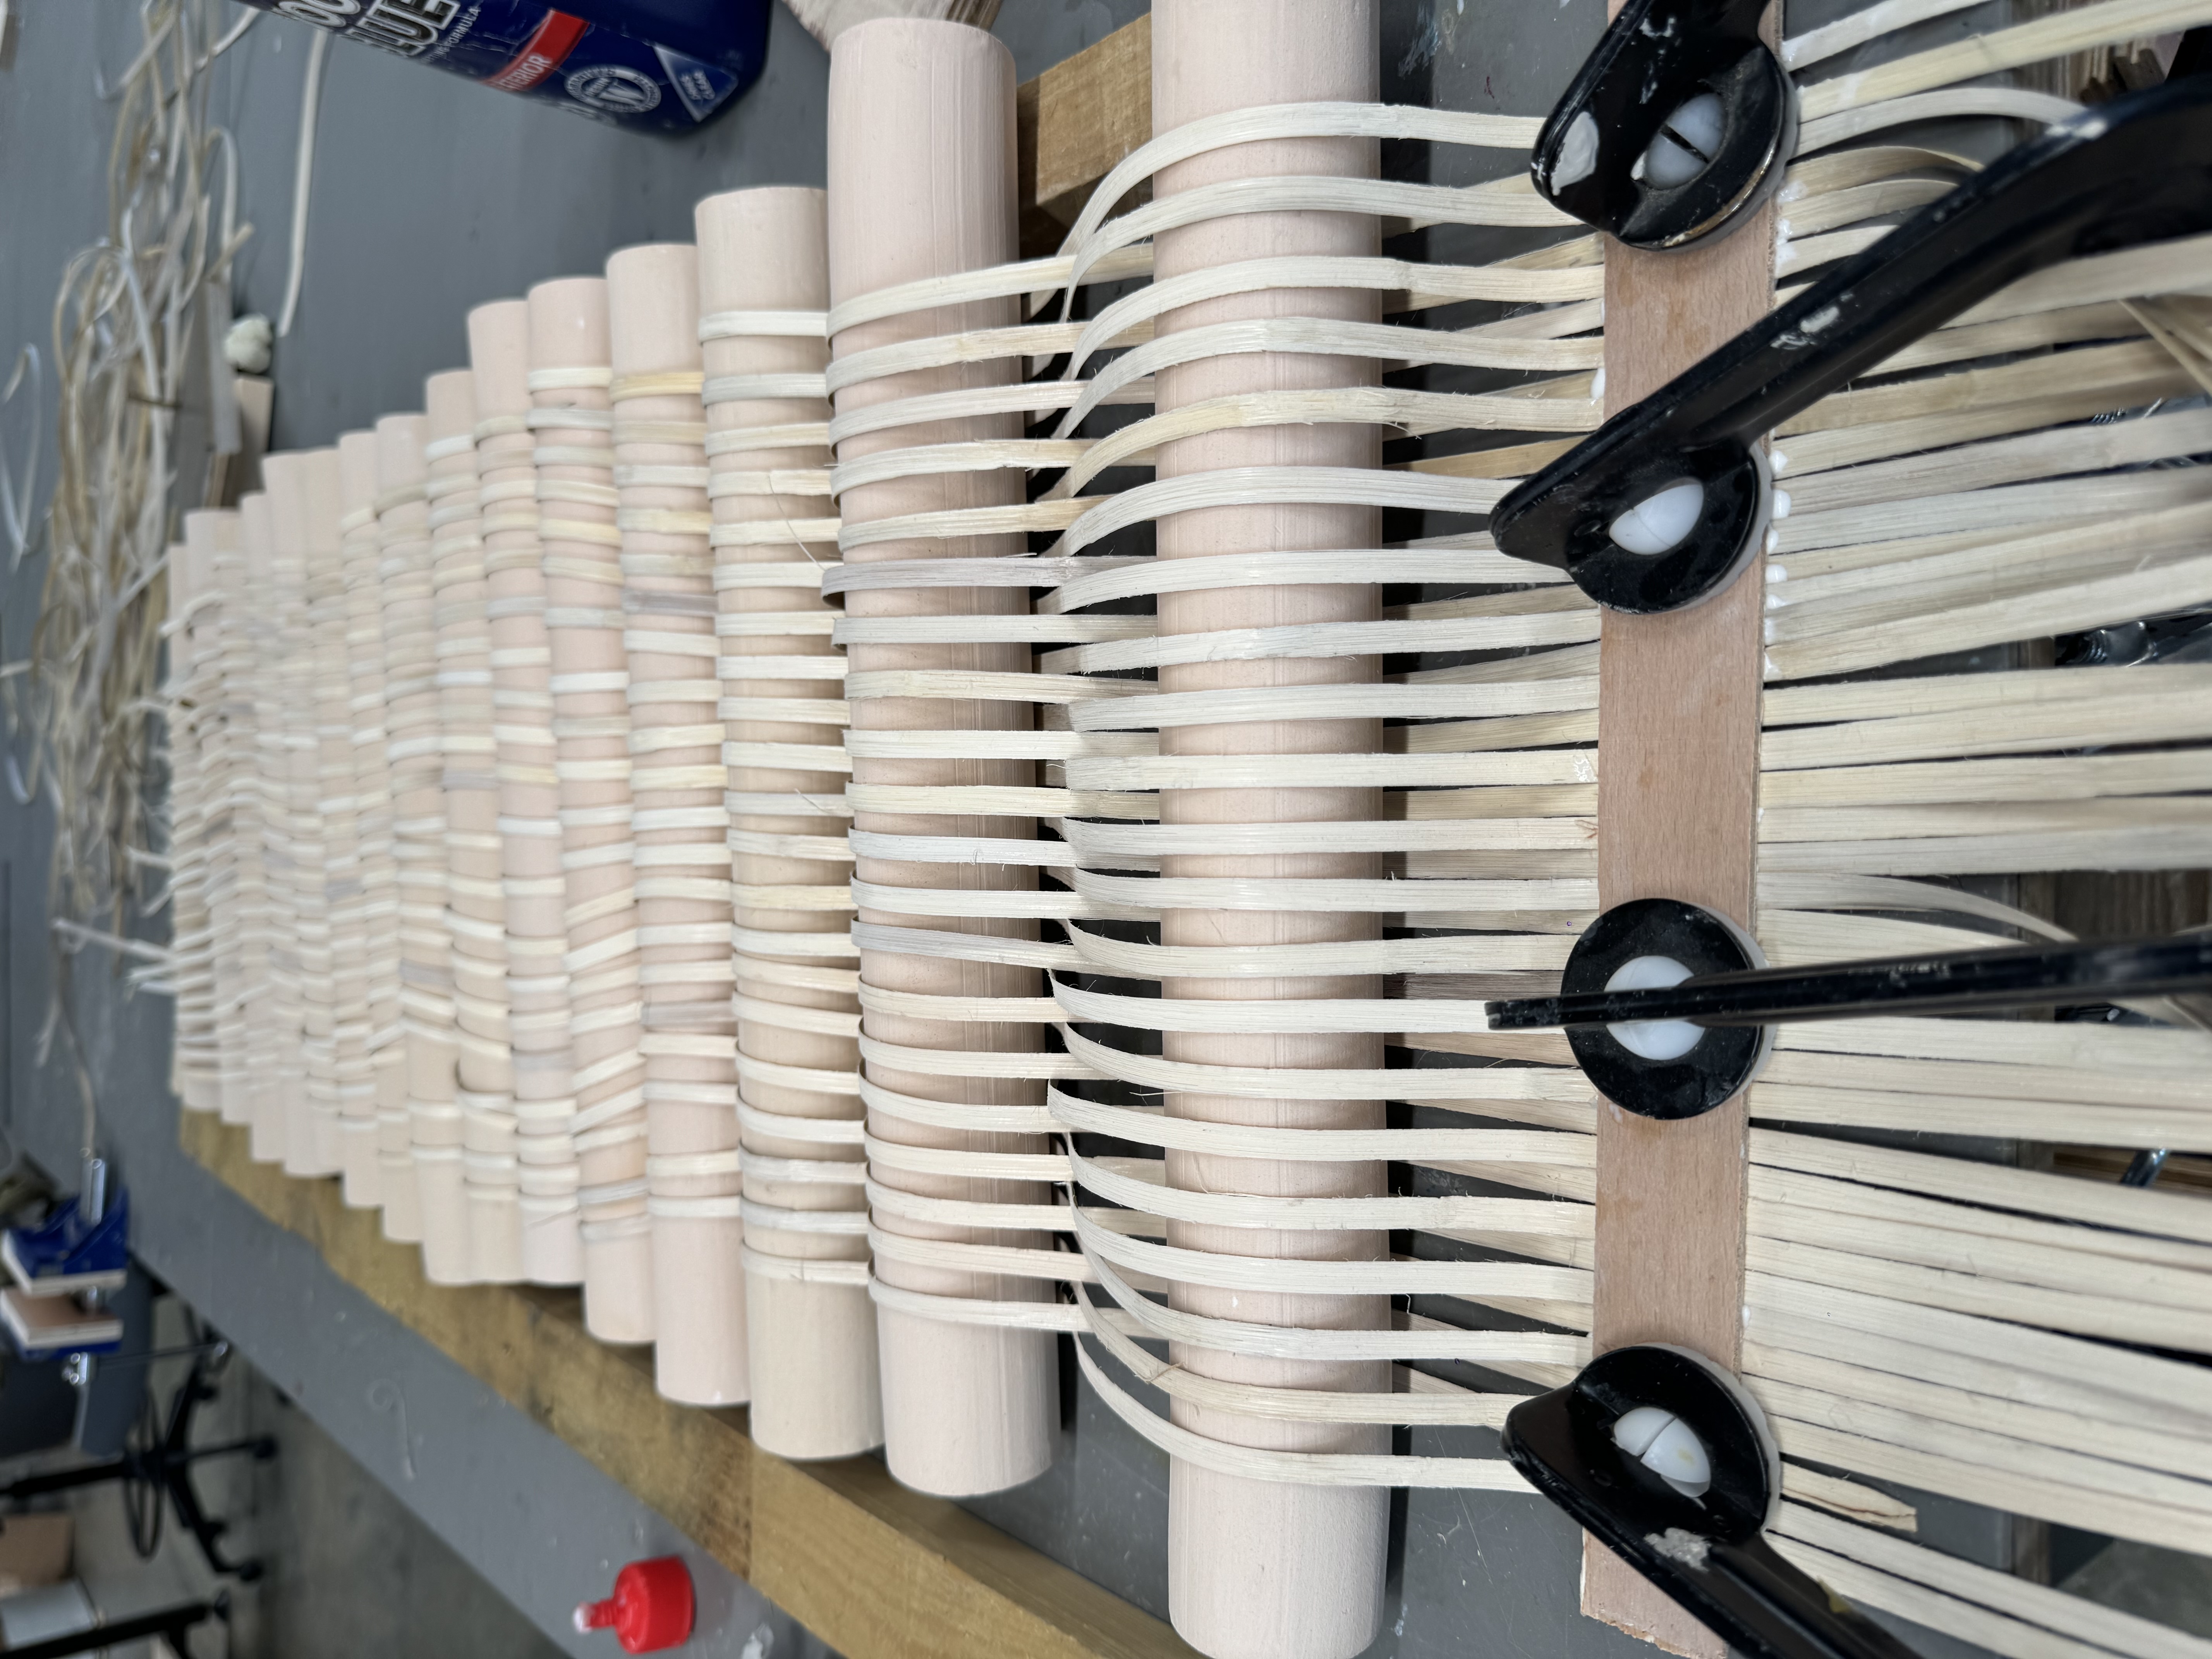
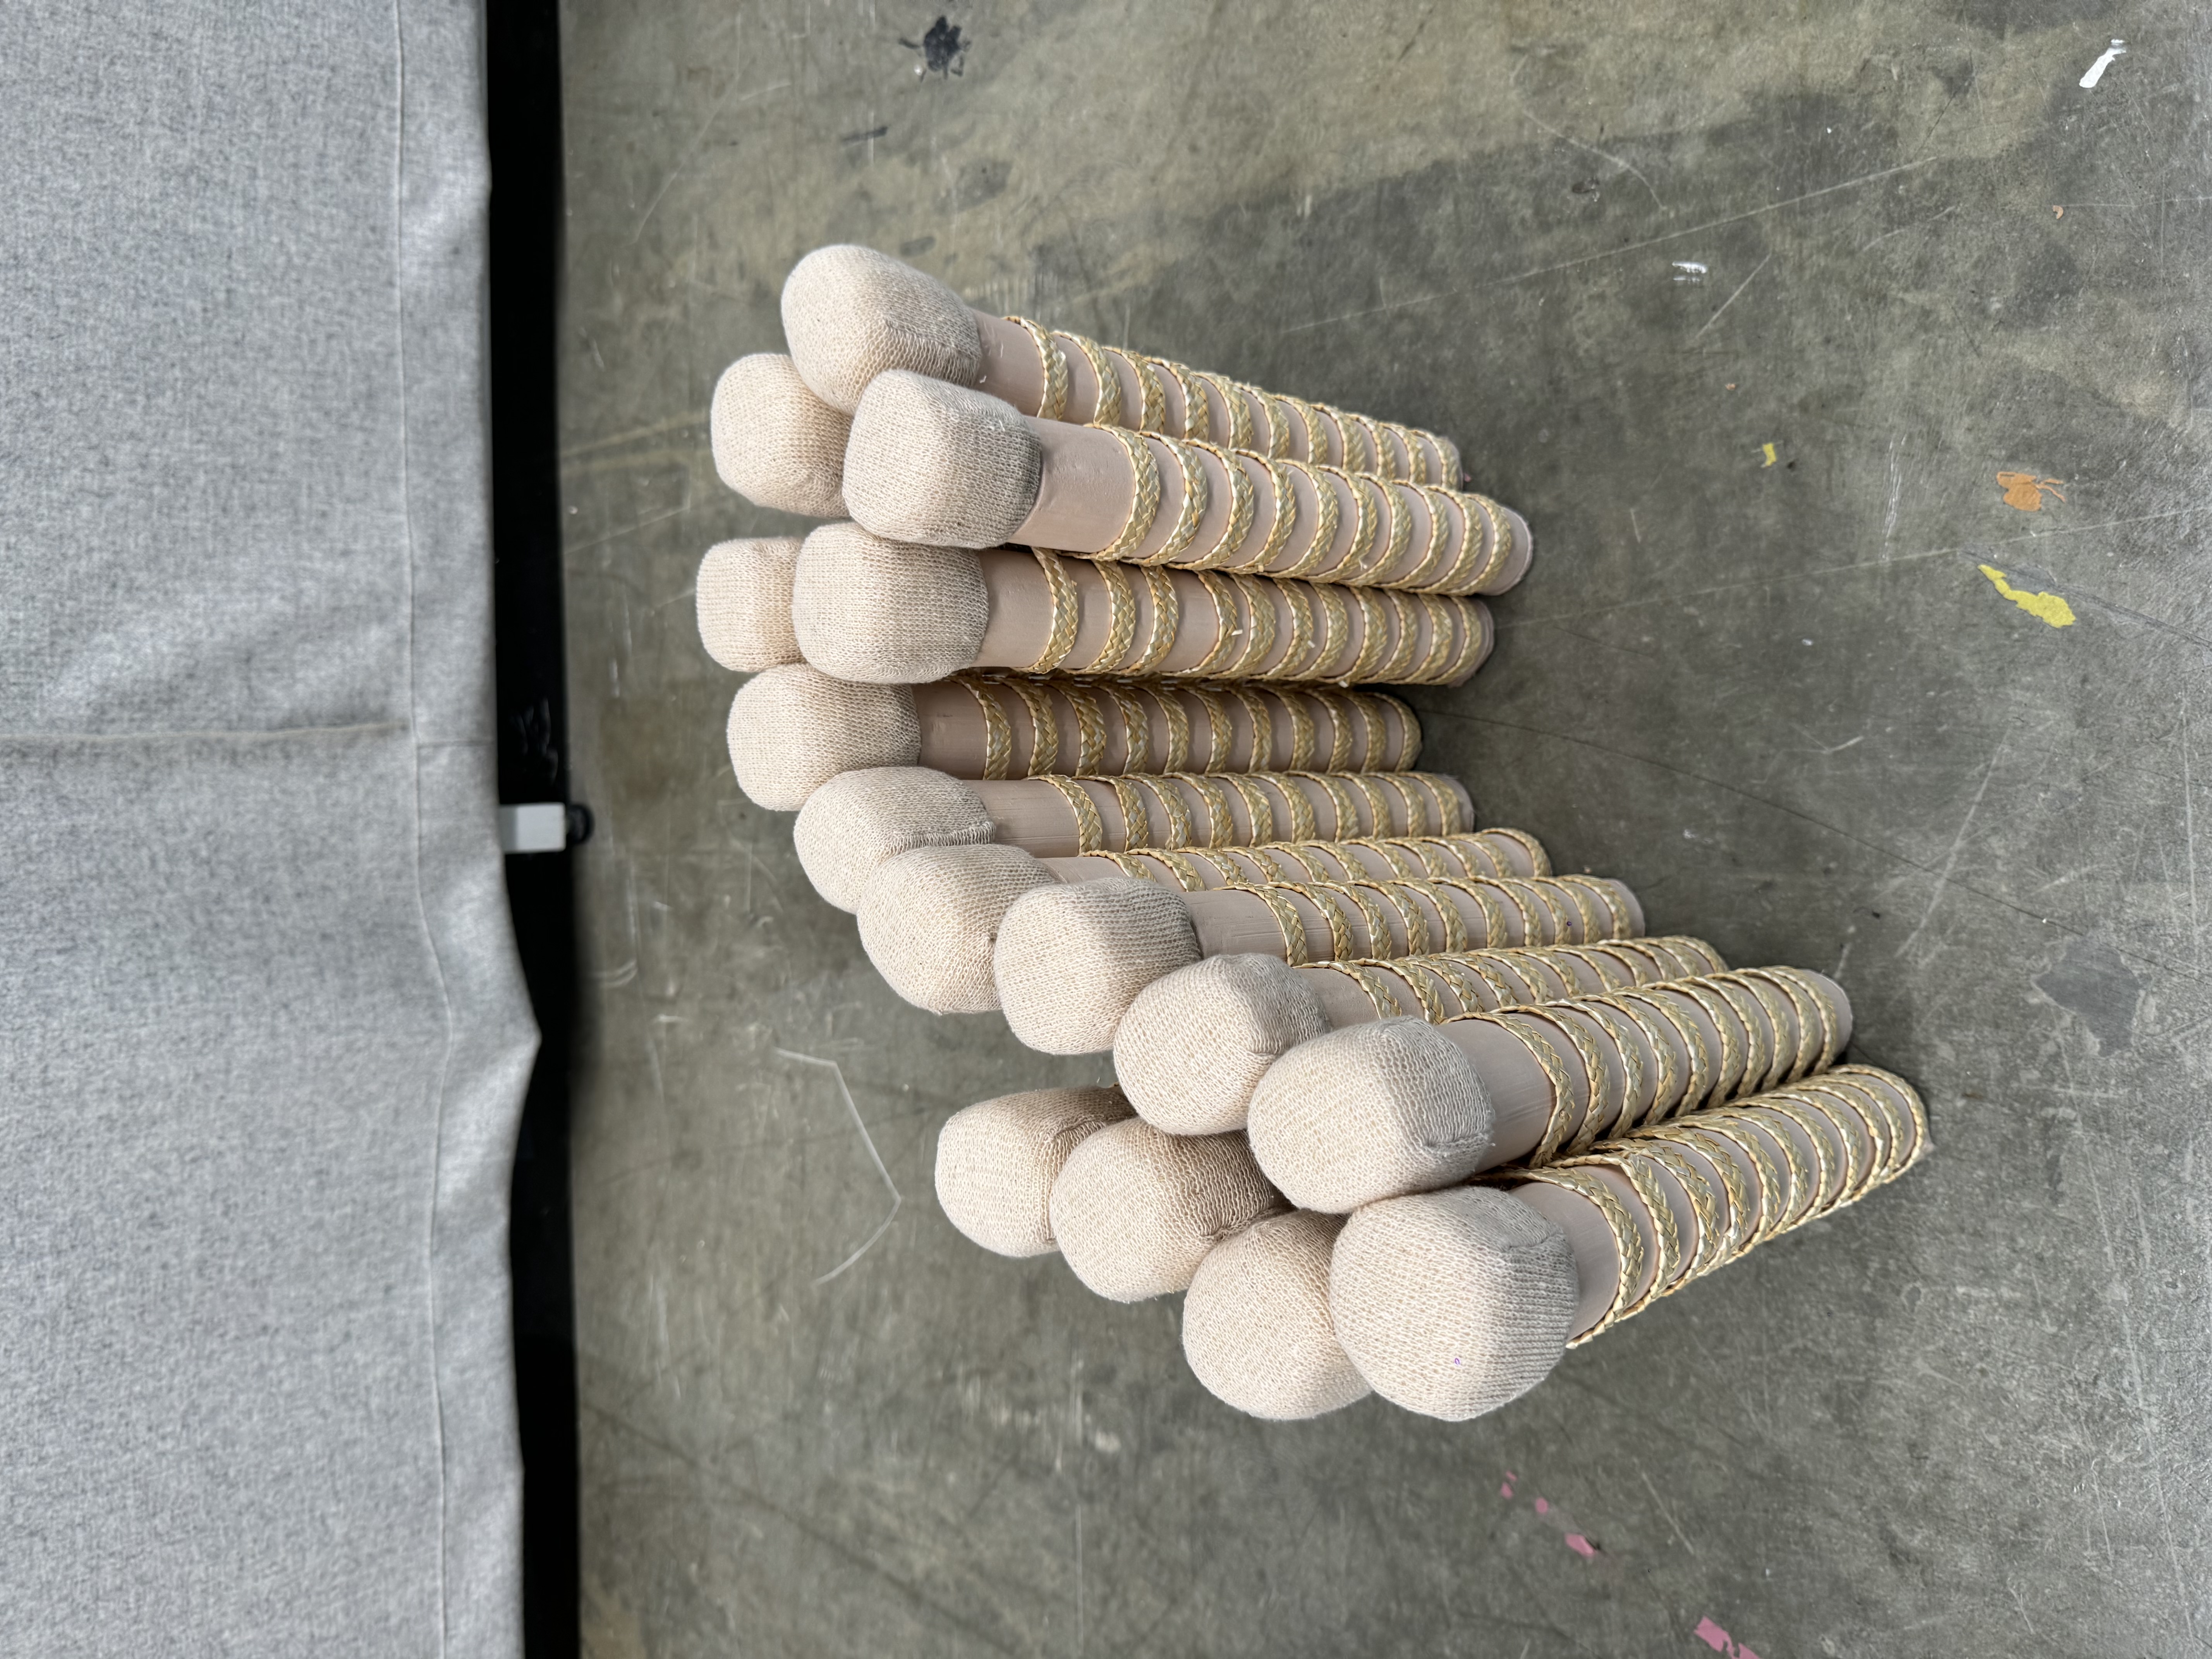
Since joining the ceramic posts in traditional ways was too difficult and not very strong, I looked for other options. I drilled holes into these ceramic posts and connected them with rattan. During the production process I came up with the idea of making a chandelier, combining rattan and ceramics. But the downside is that ceramics are very heavy and can be dangerous.

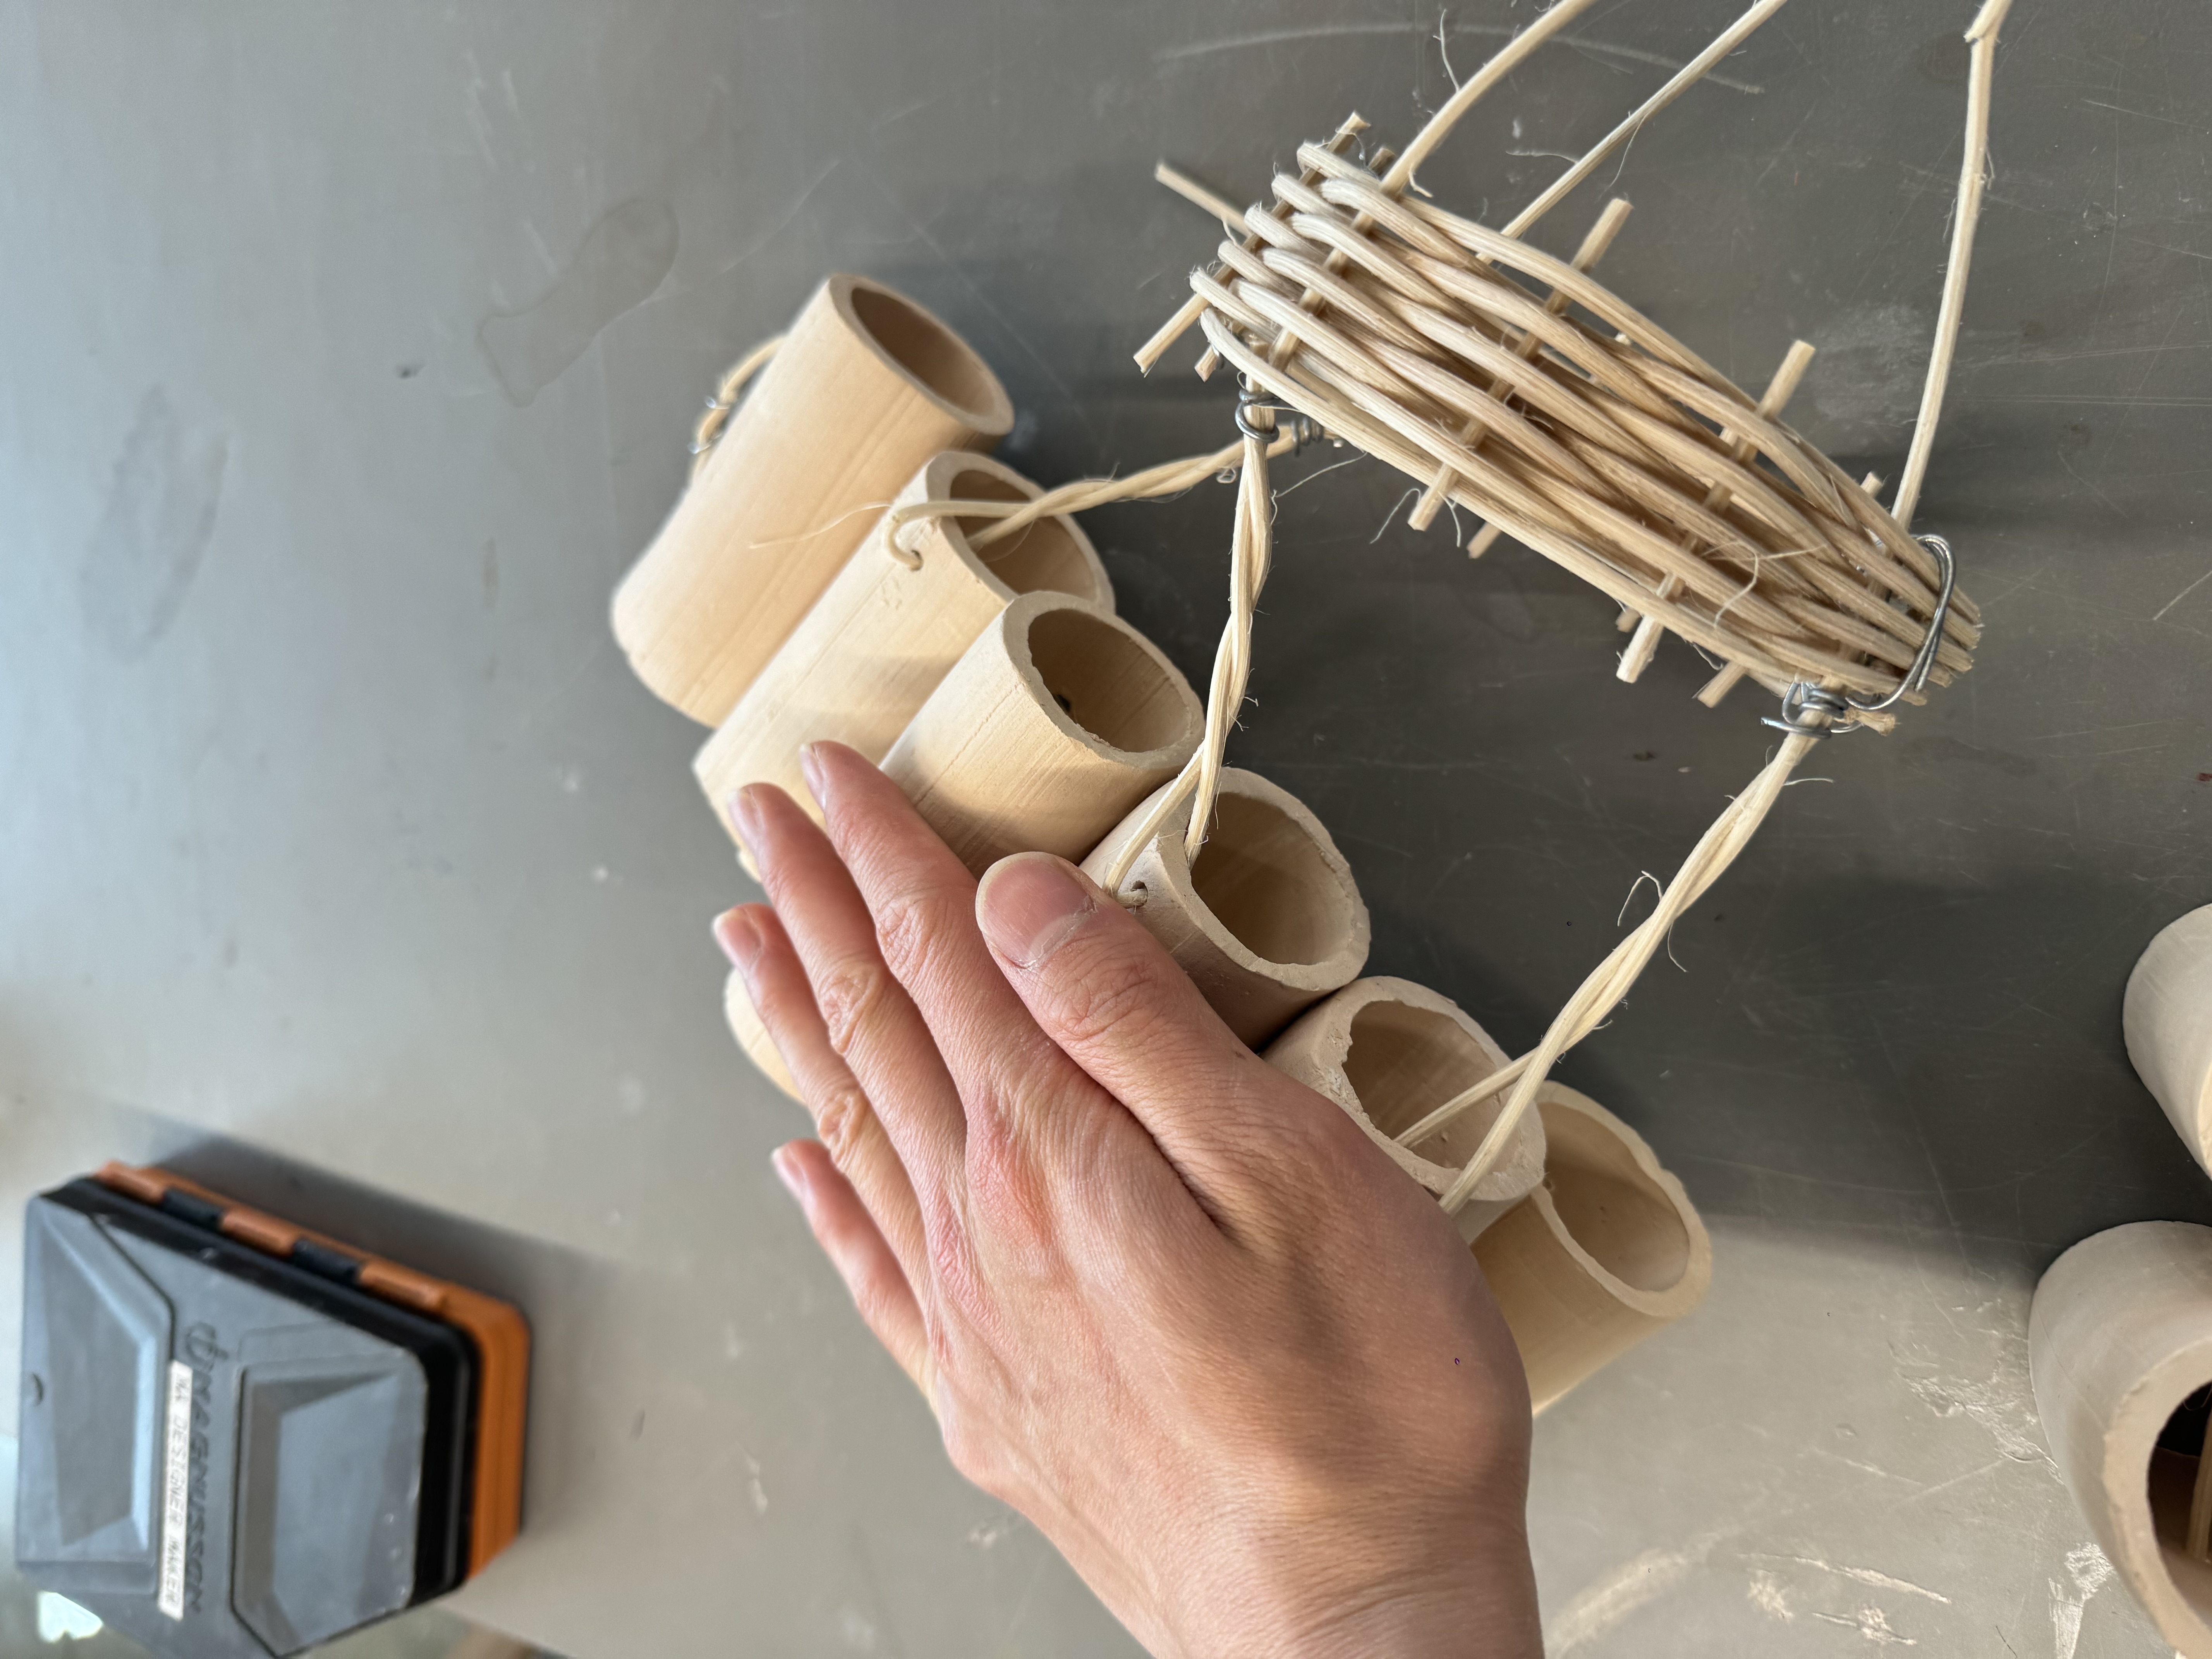
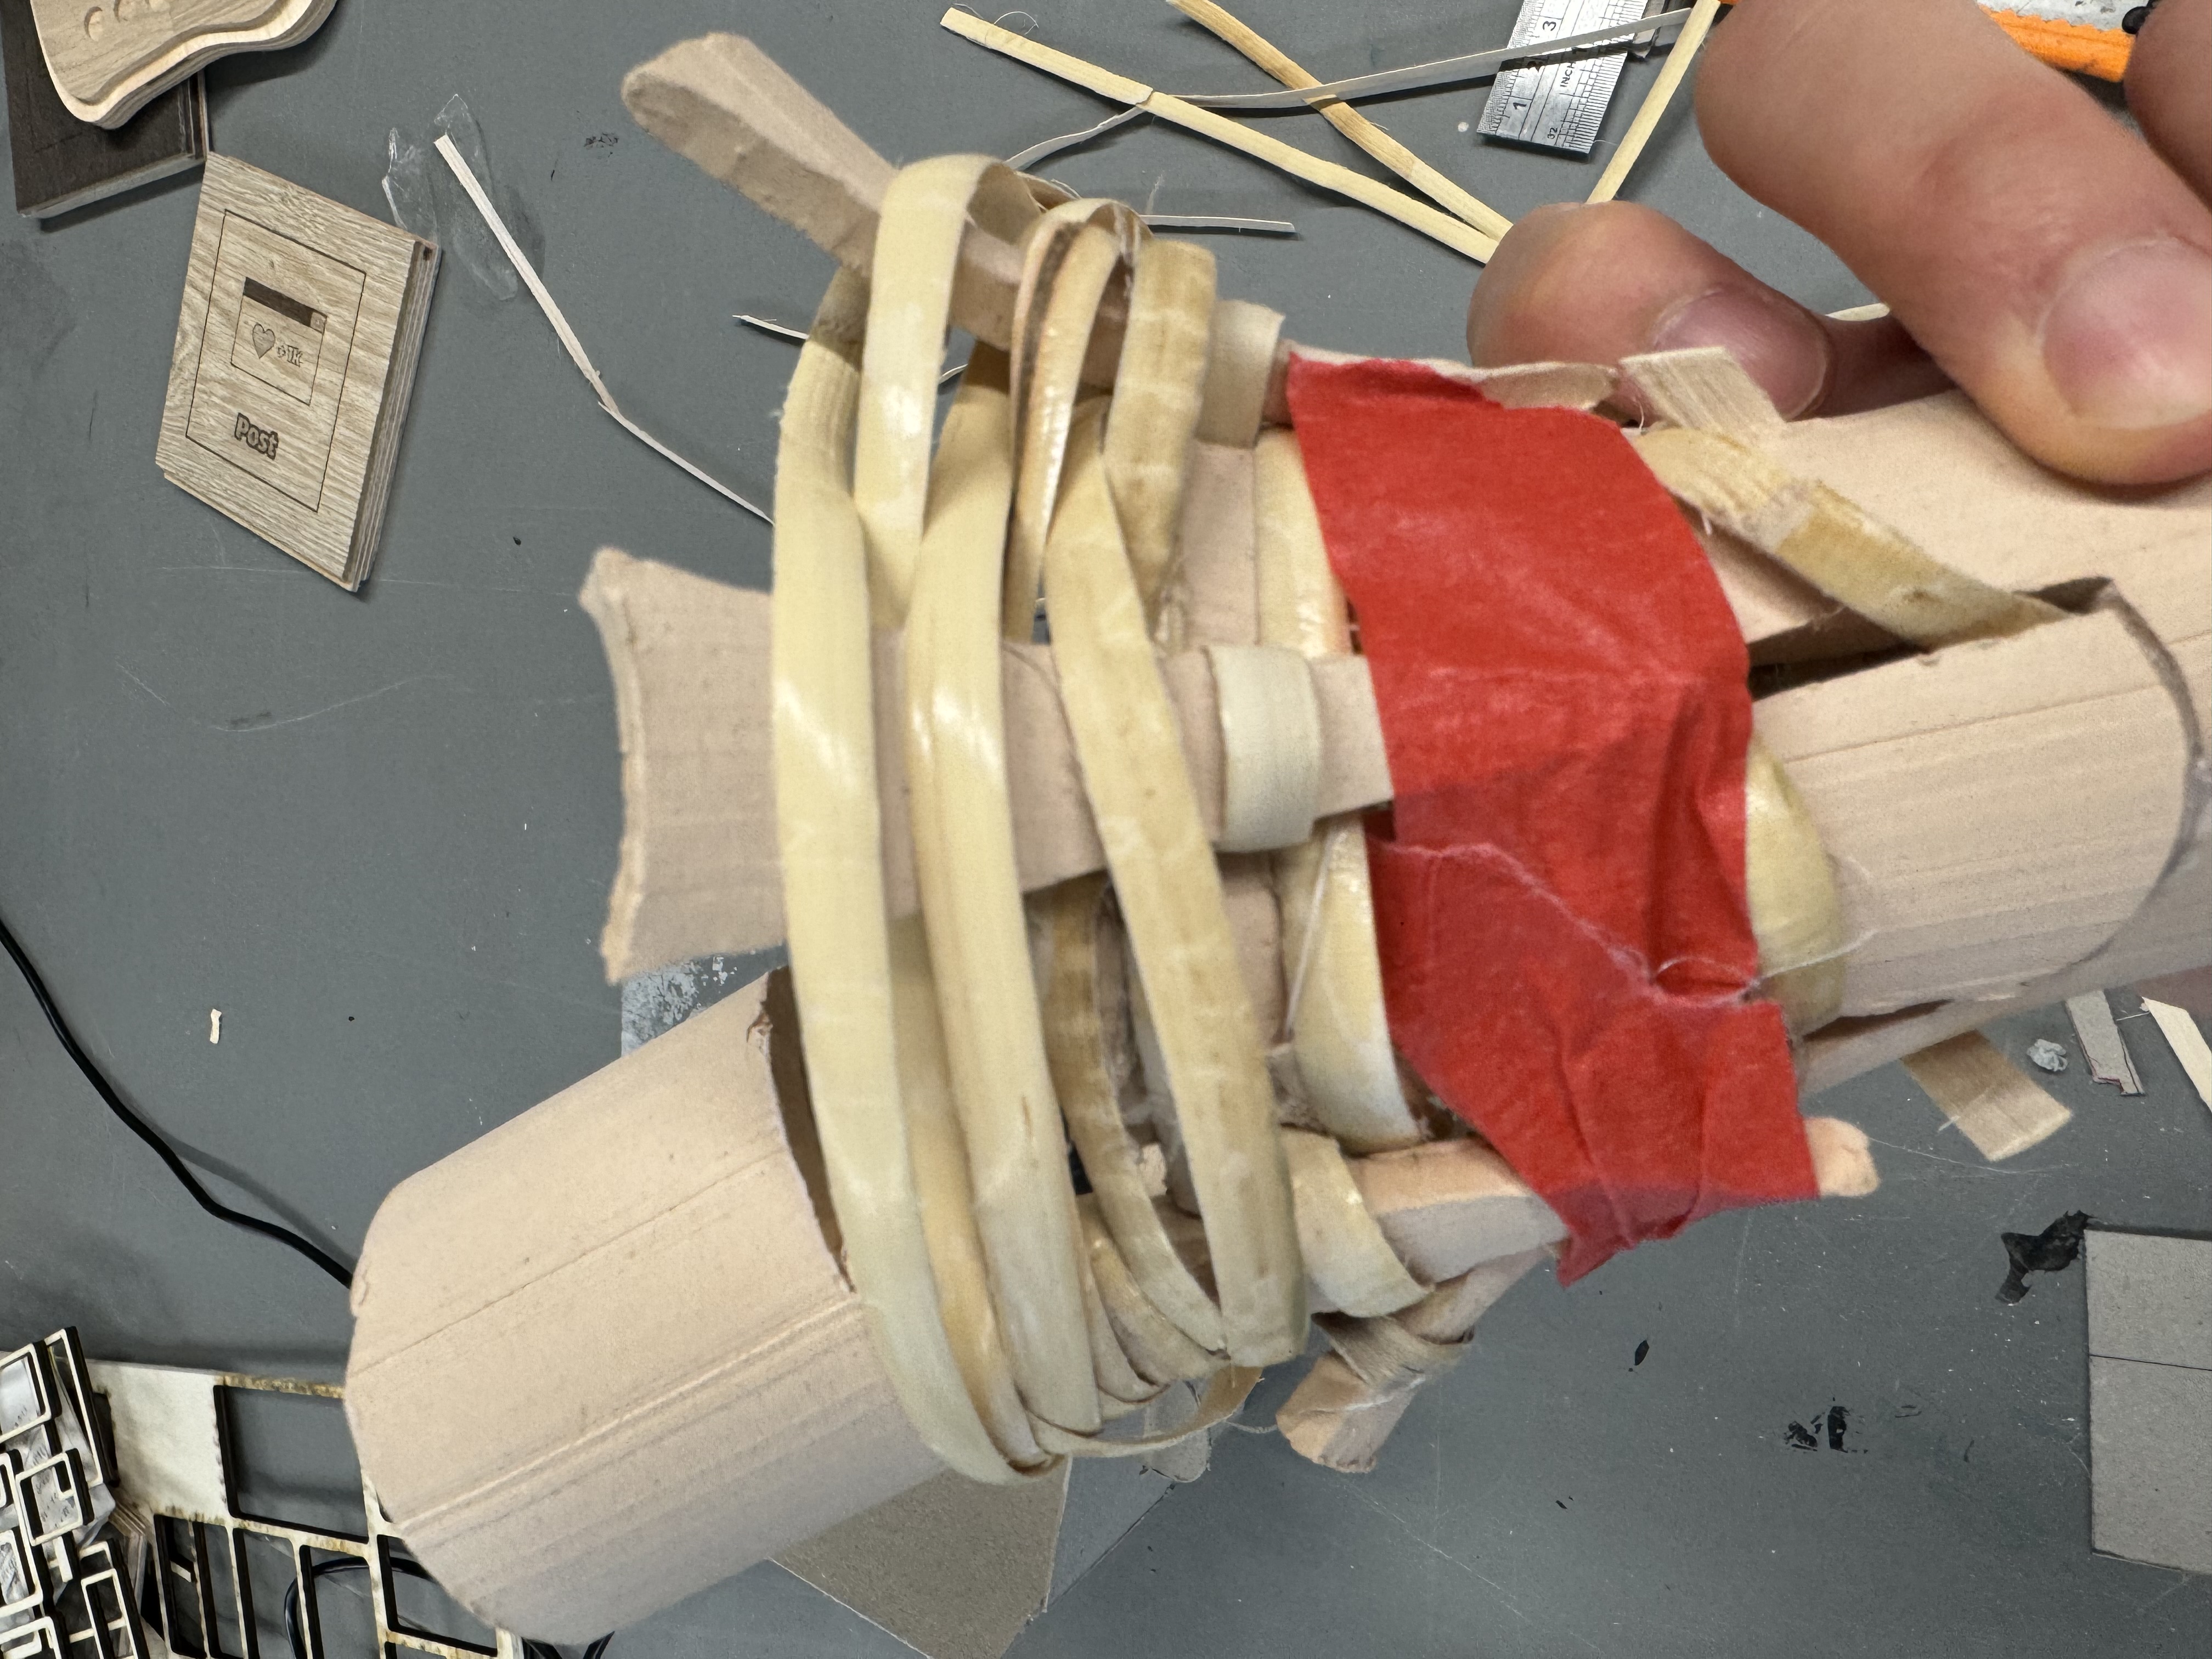
The video shows me testing the strength of this connection. It can be seen that the rattan is very elastic, but after repeated pressing, the rattan broke because the ceramic cut the rattan during the process. Therefore, it is not reasonable to use this method to make furniture.
When connecting, I found that it is important to keep the cane wet, otherwise the dry cane will break very easily when bent. Moreover, the holes between the ceramic pillars must be aligned, otherwise the rattan will bend at a large angle at the connection and easily break. I didn't know what to do with the end of the cane, so I roughed it with wire. I've learned from other examples of rattan furniture that some are treated with twine or other softer varieties to prevent the rattan from falling apart.

03/05/2024

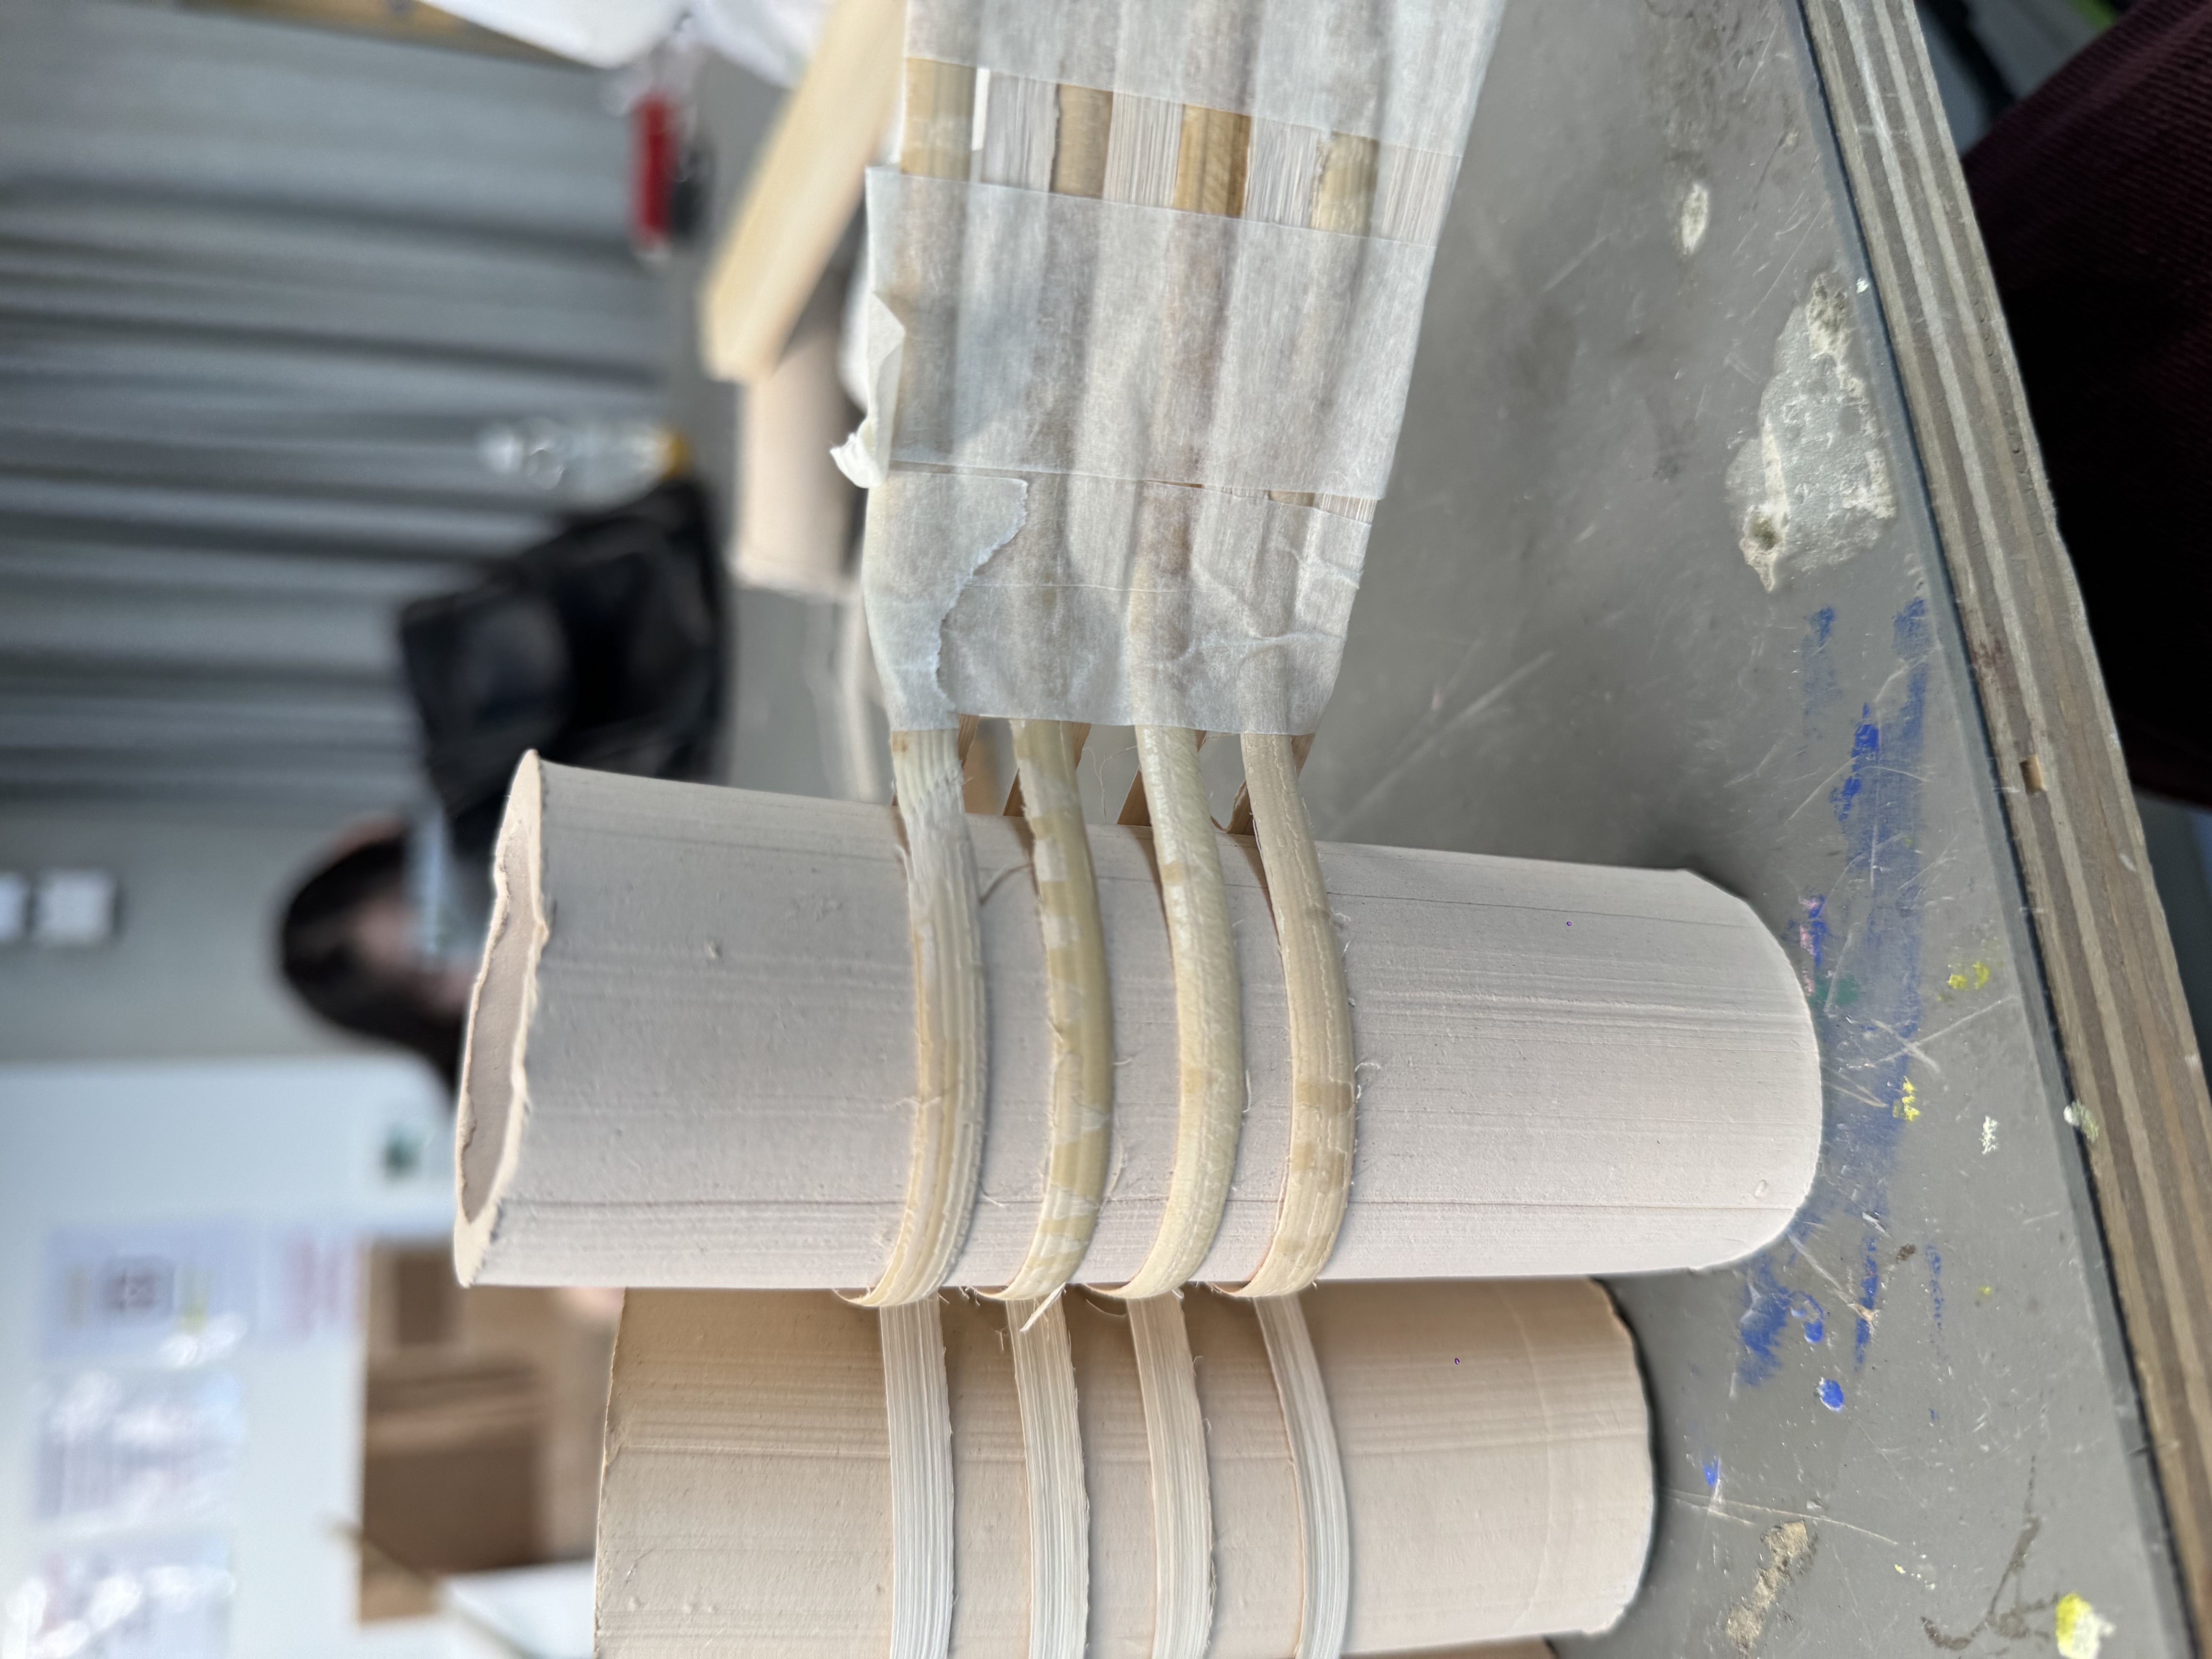
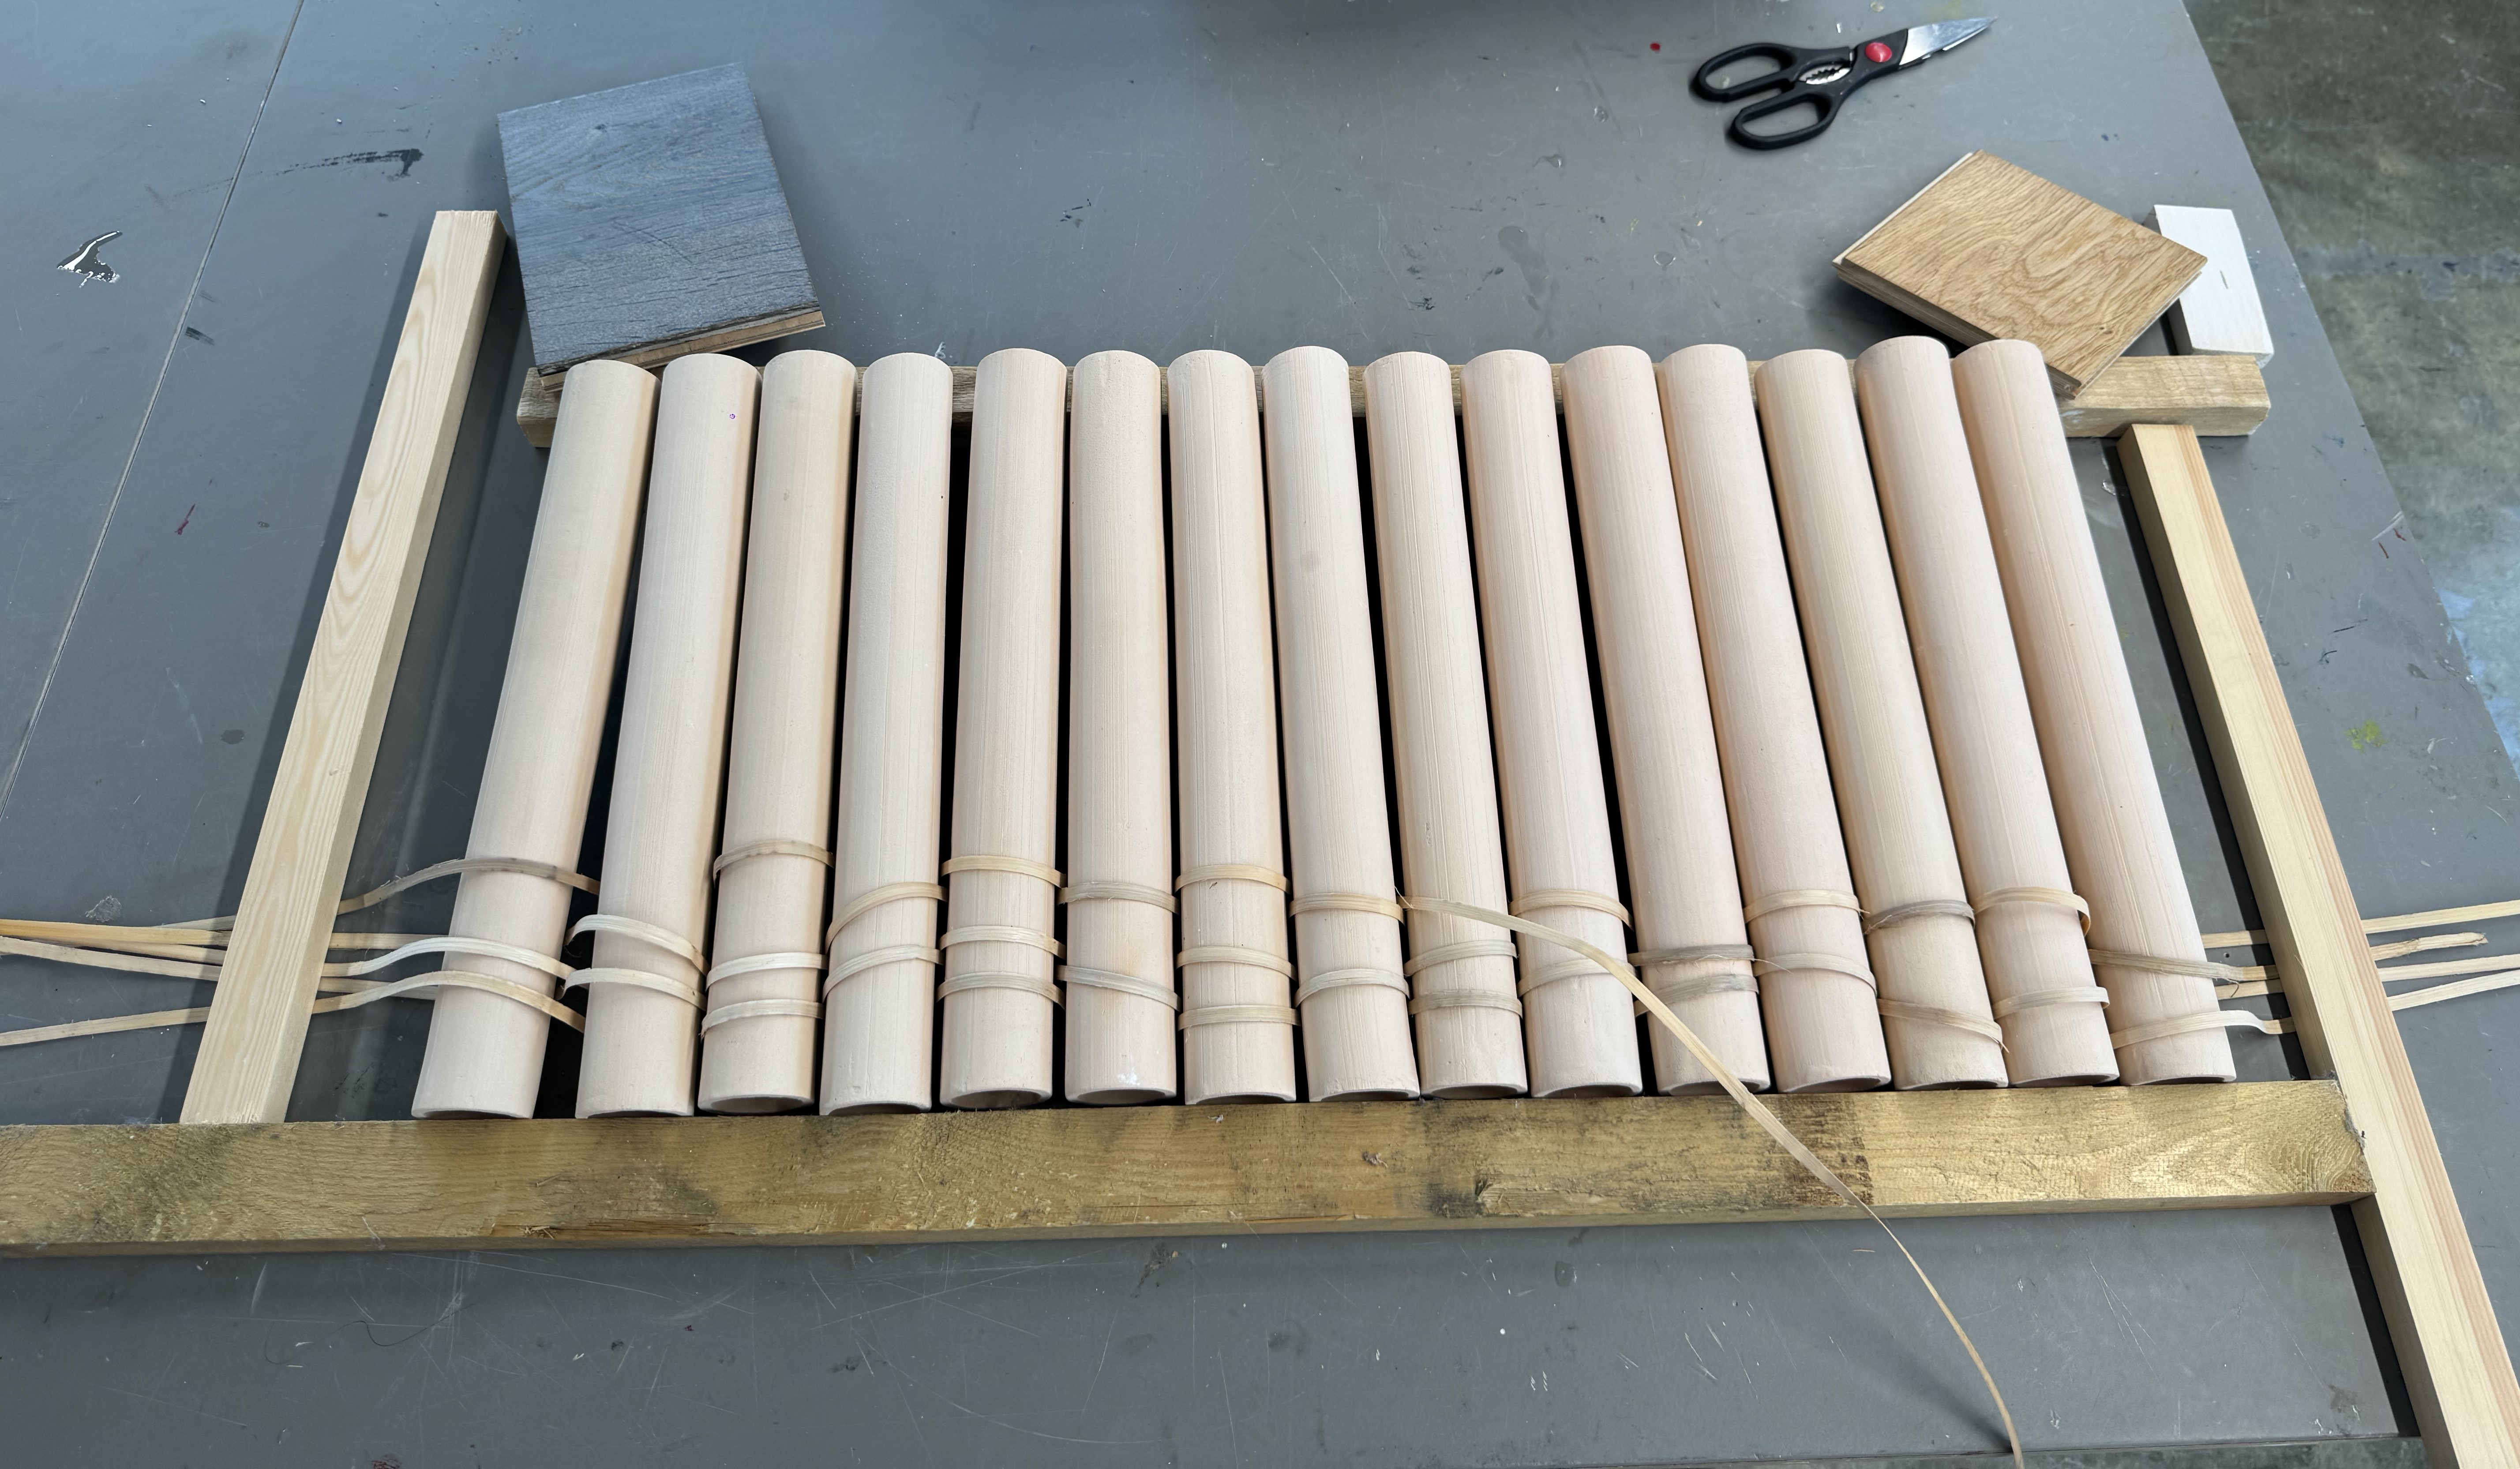
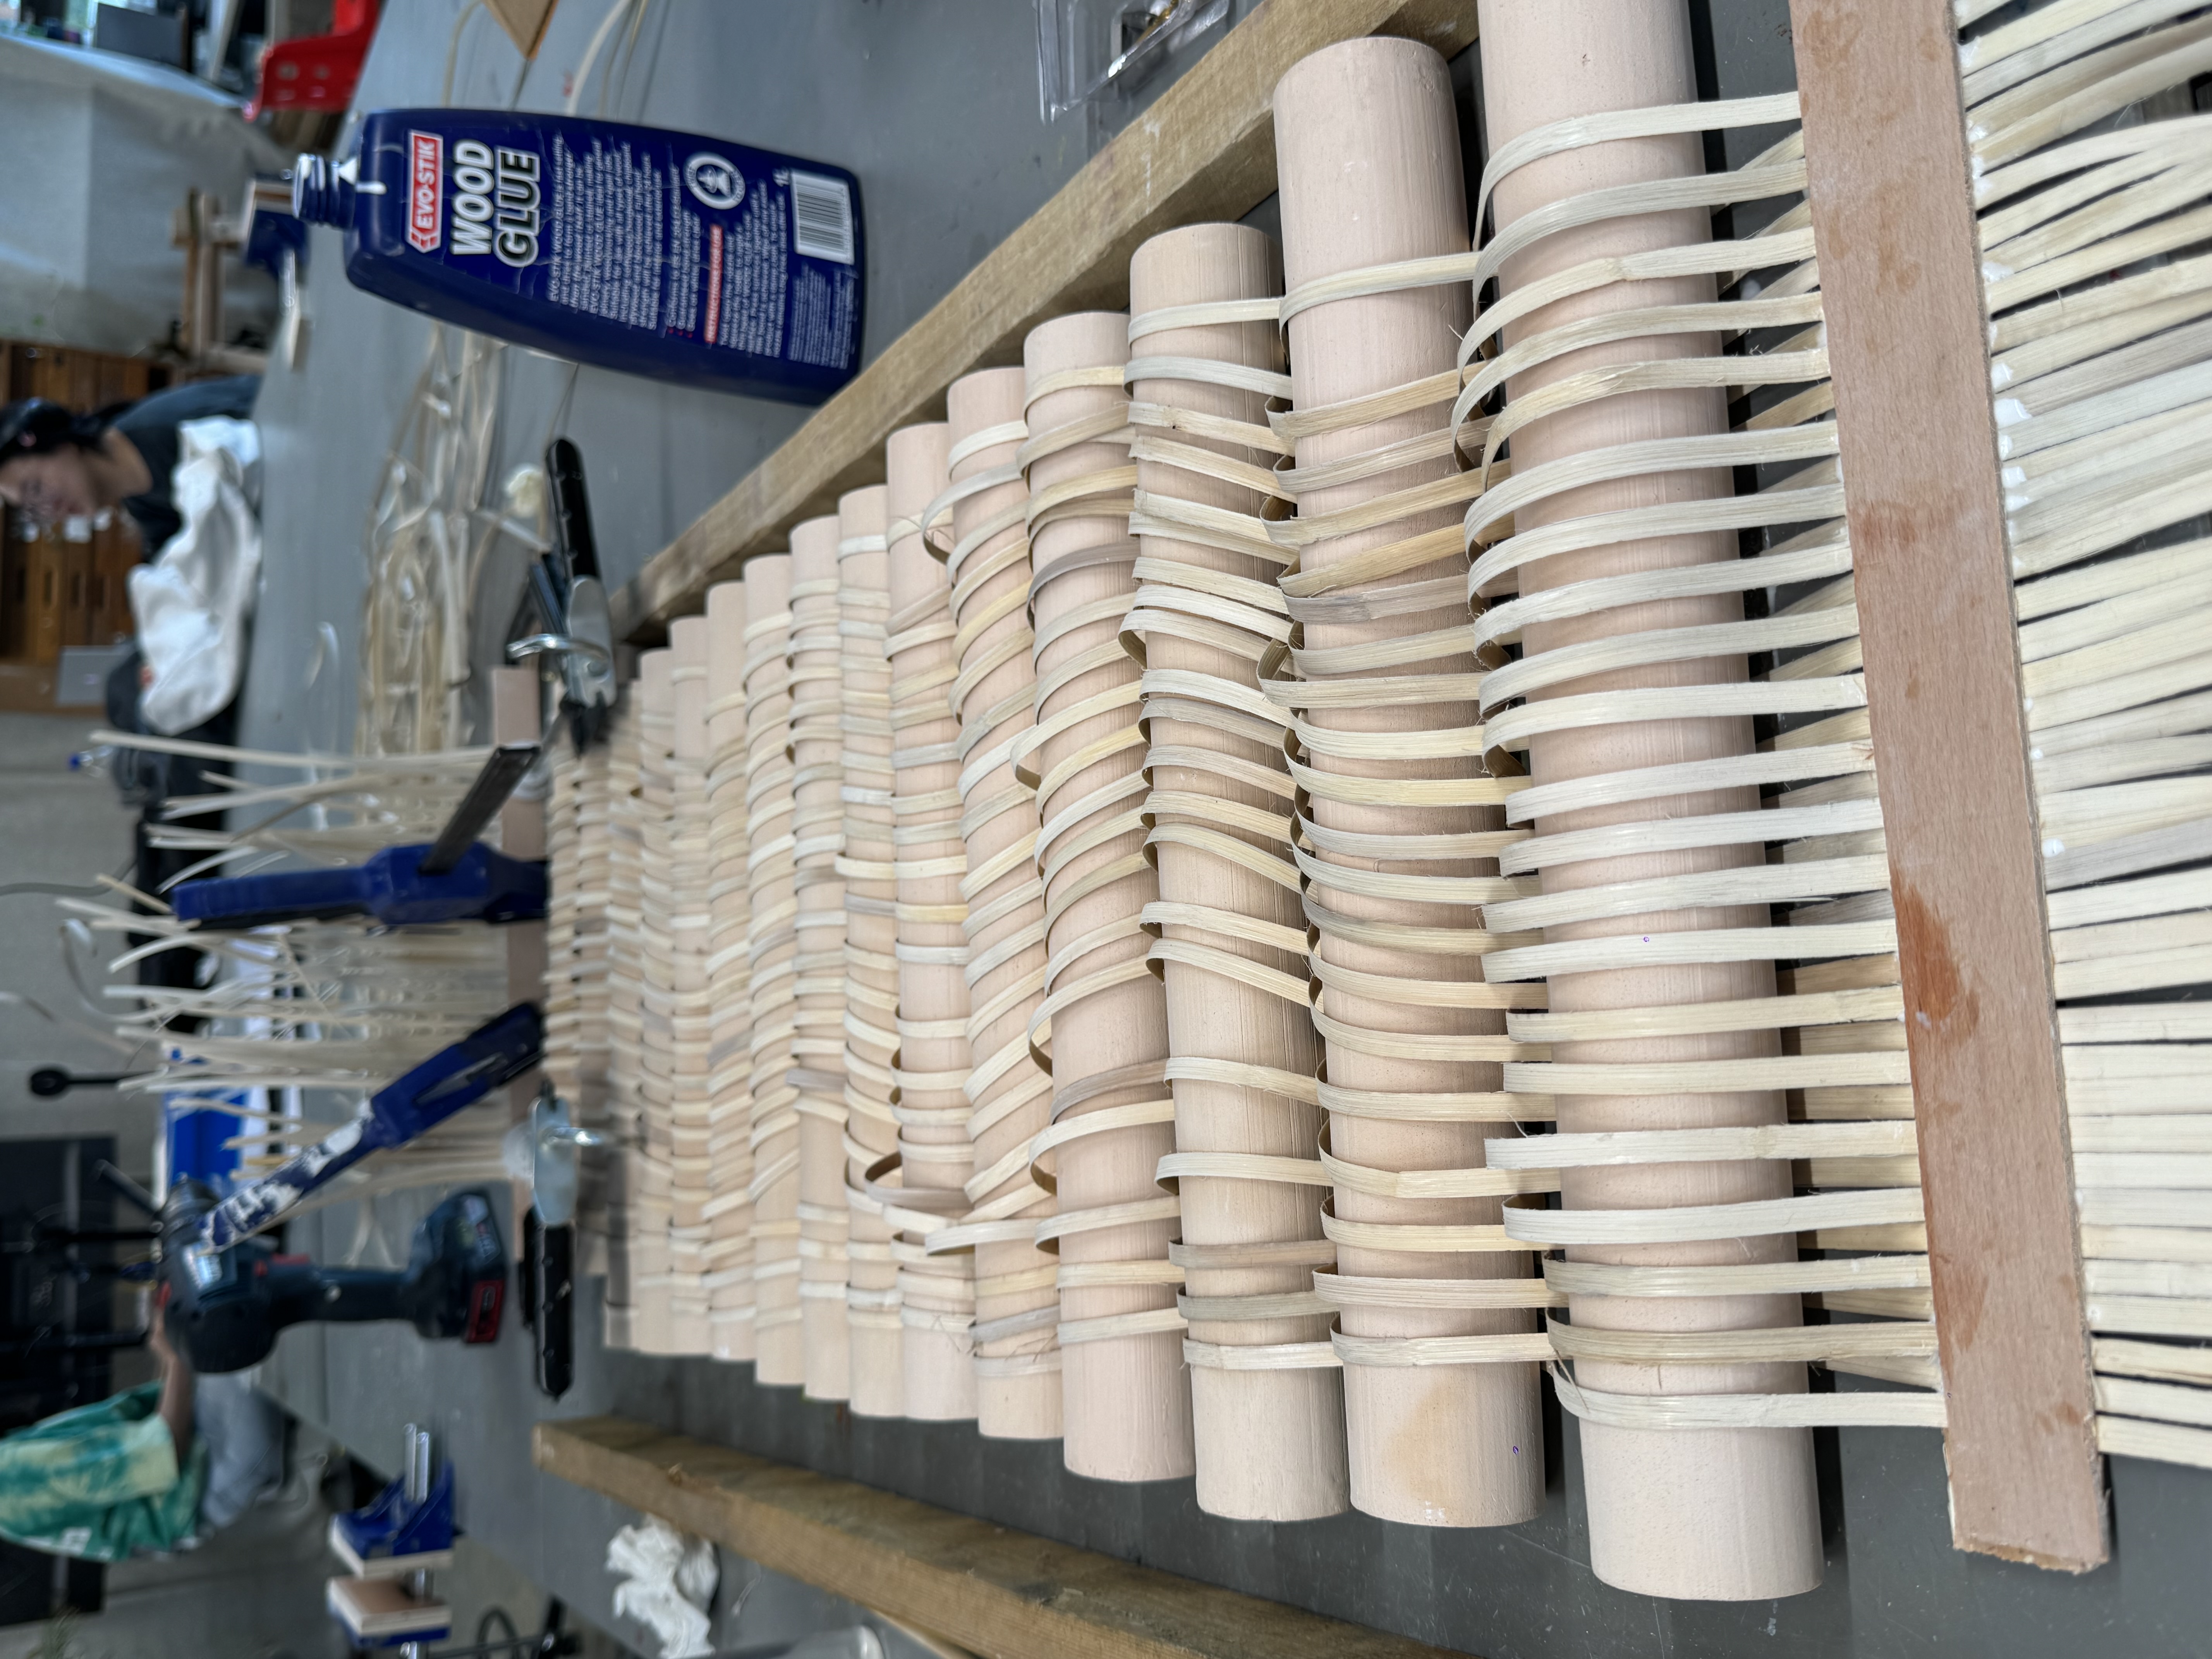
I took advantage of another connection method and replaced the rattan in the middle with ceramic pillars. This method is relatively strong and flexible. The disadvantage is that the spacing is relatively large and the end processing is more difficult because the pillars are thicker.

Then I figured out the new plan of stool. But the main problem is I do not know if the connection would be stiff enough and maybe the gap would be too big to pinch people when sitting there.
07/05/2024


10/05/2024


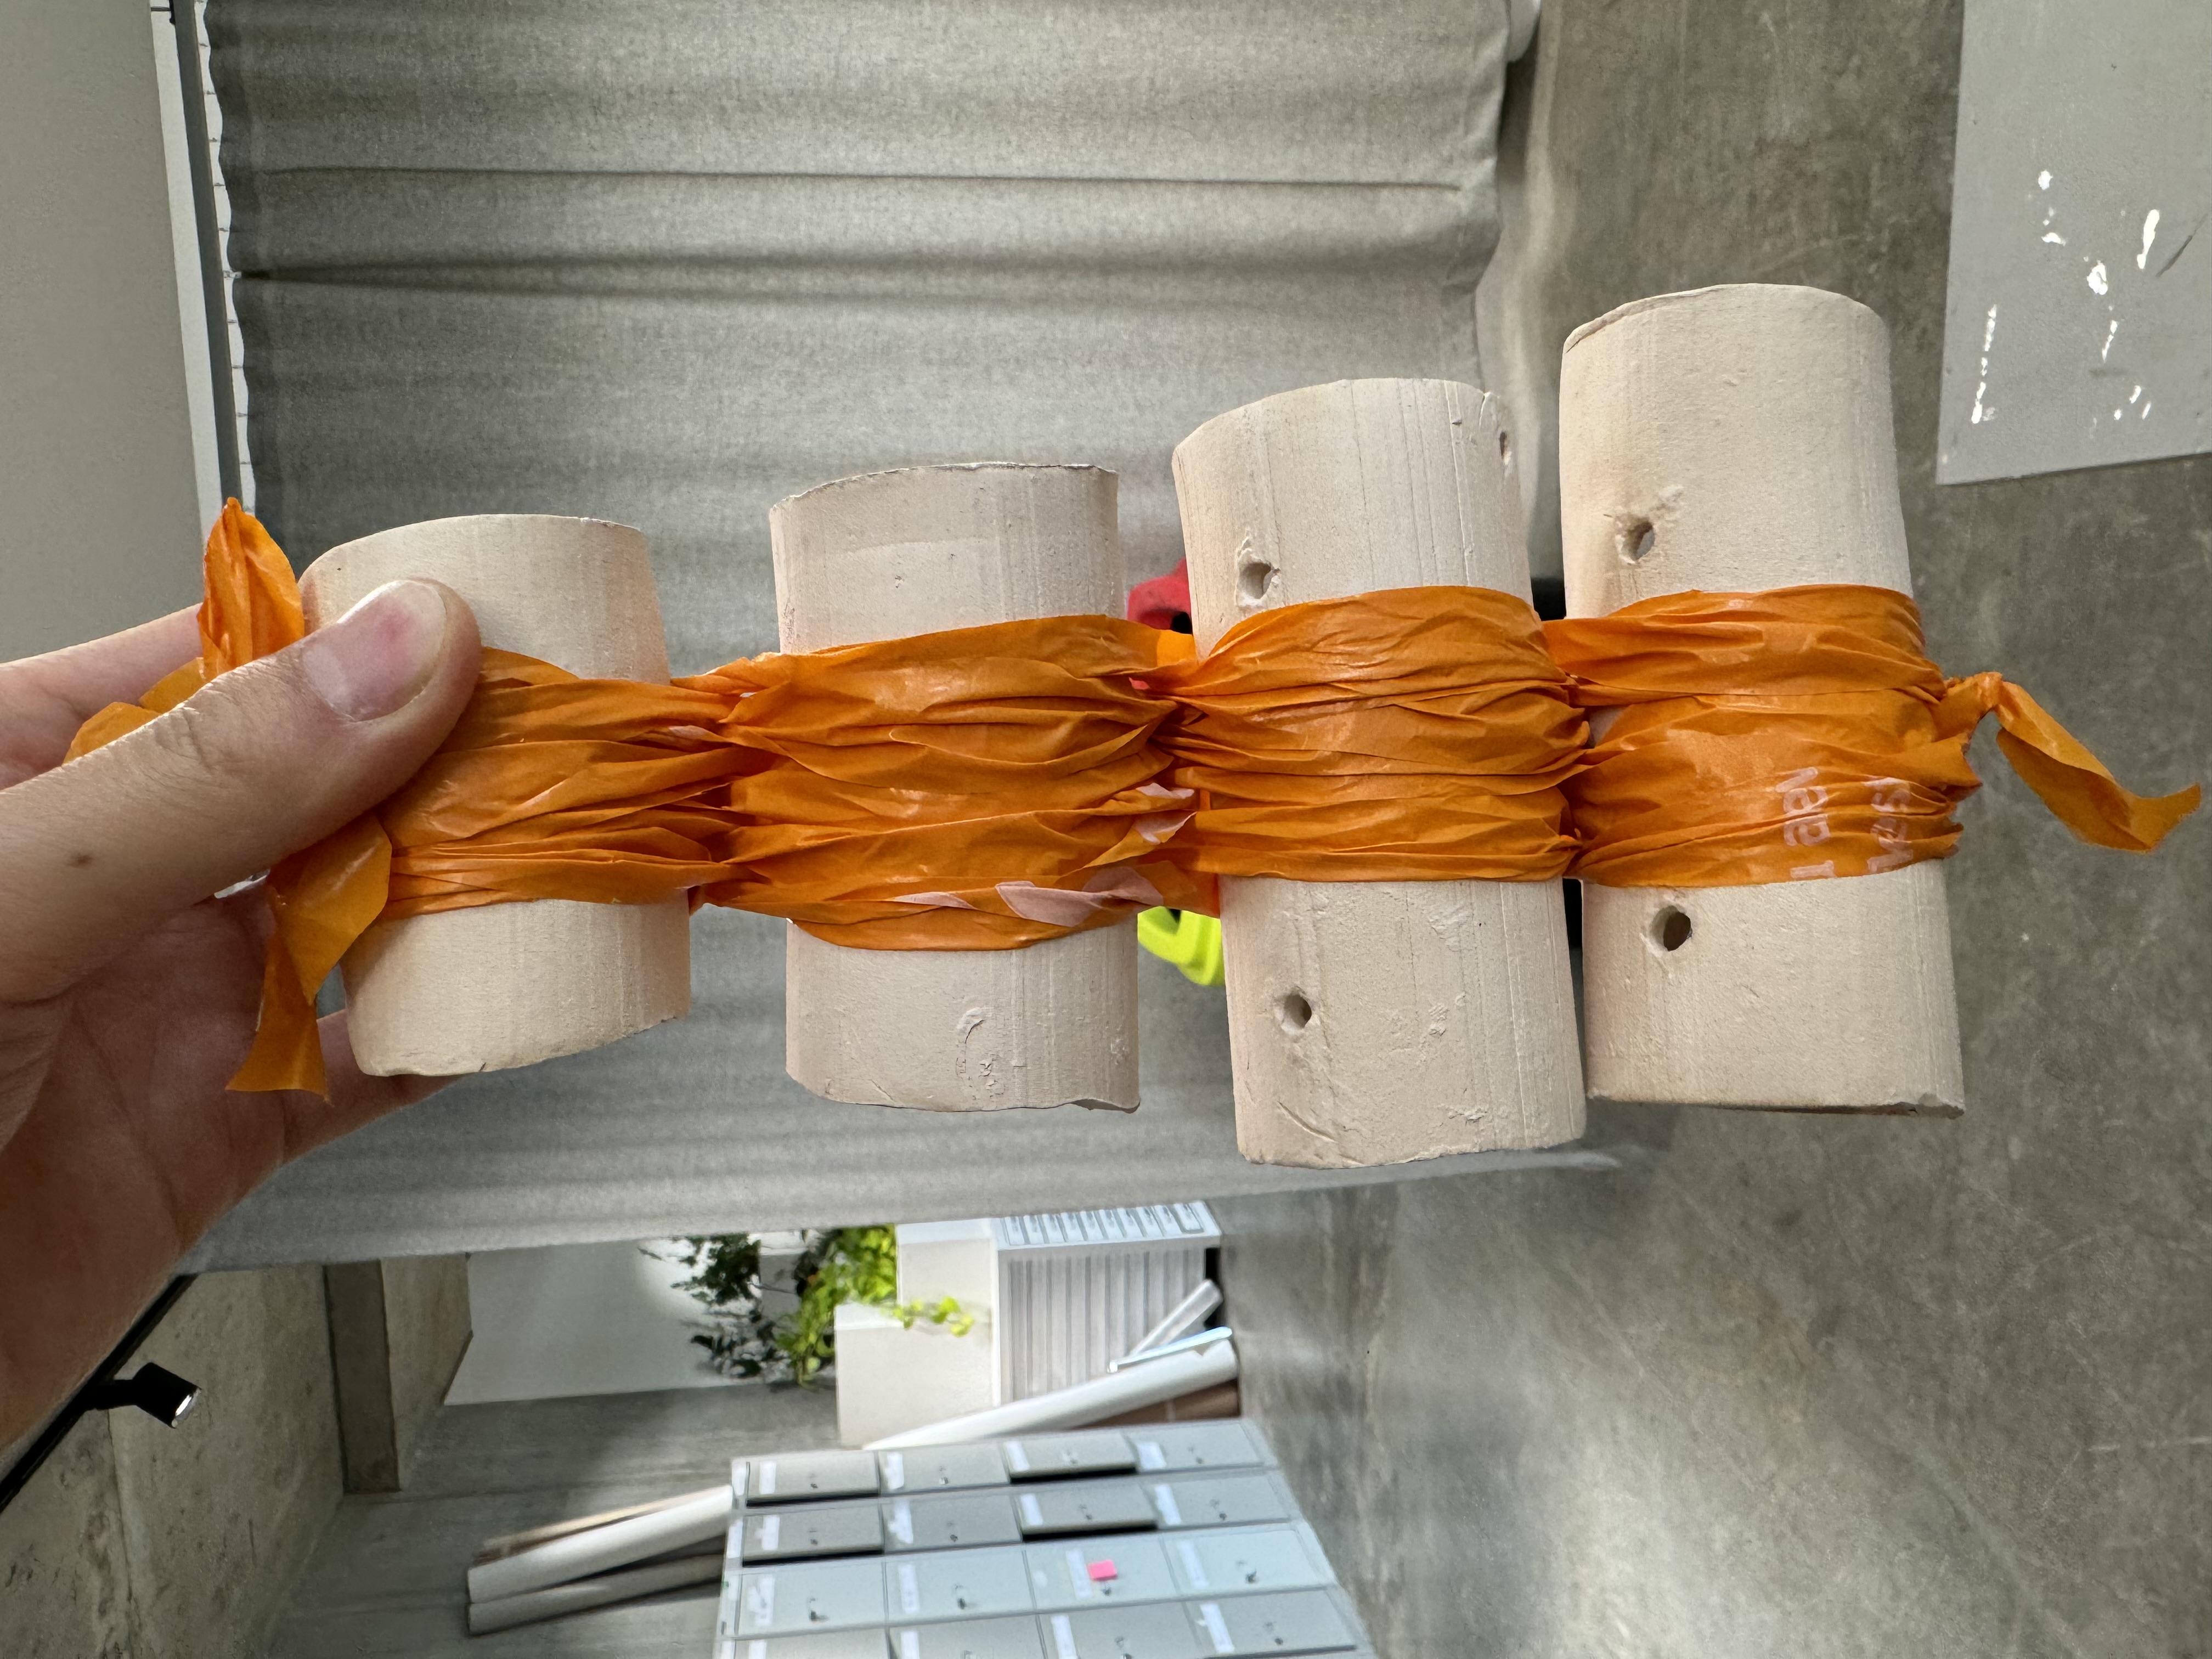

I found that there is reinforced design around hand area with extra stronger plastic sheet.
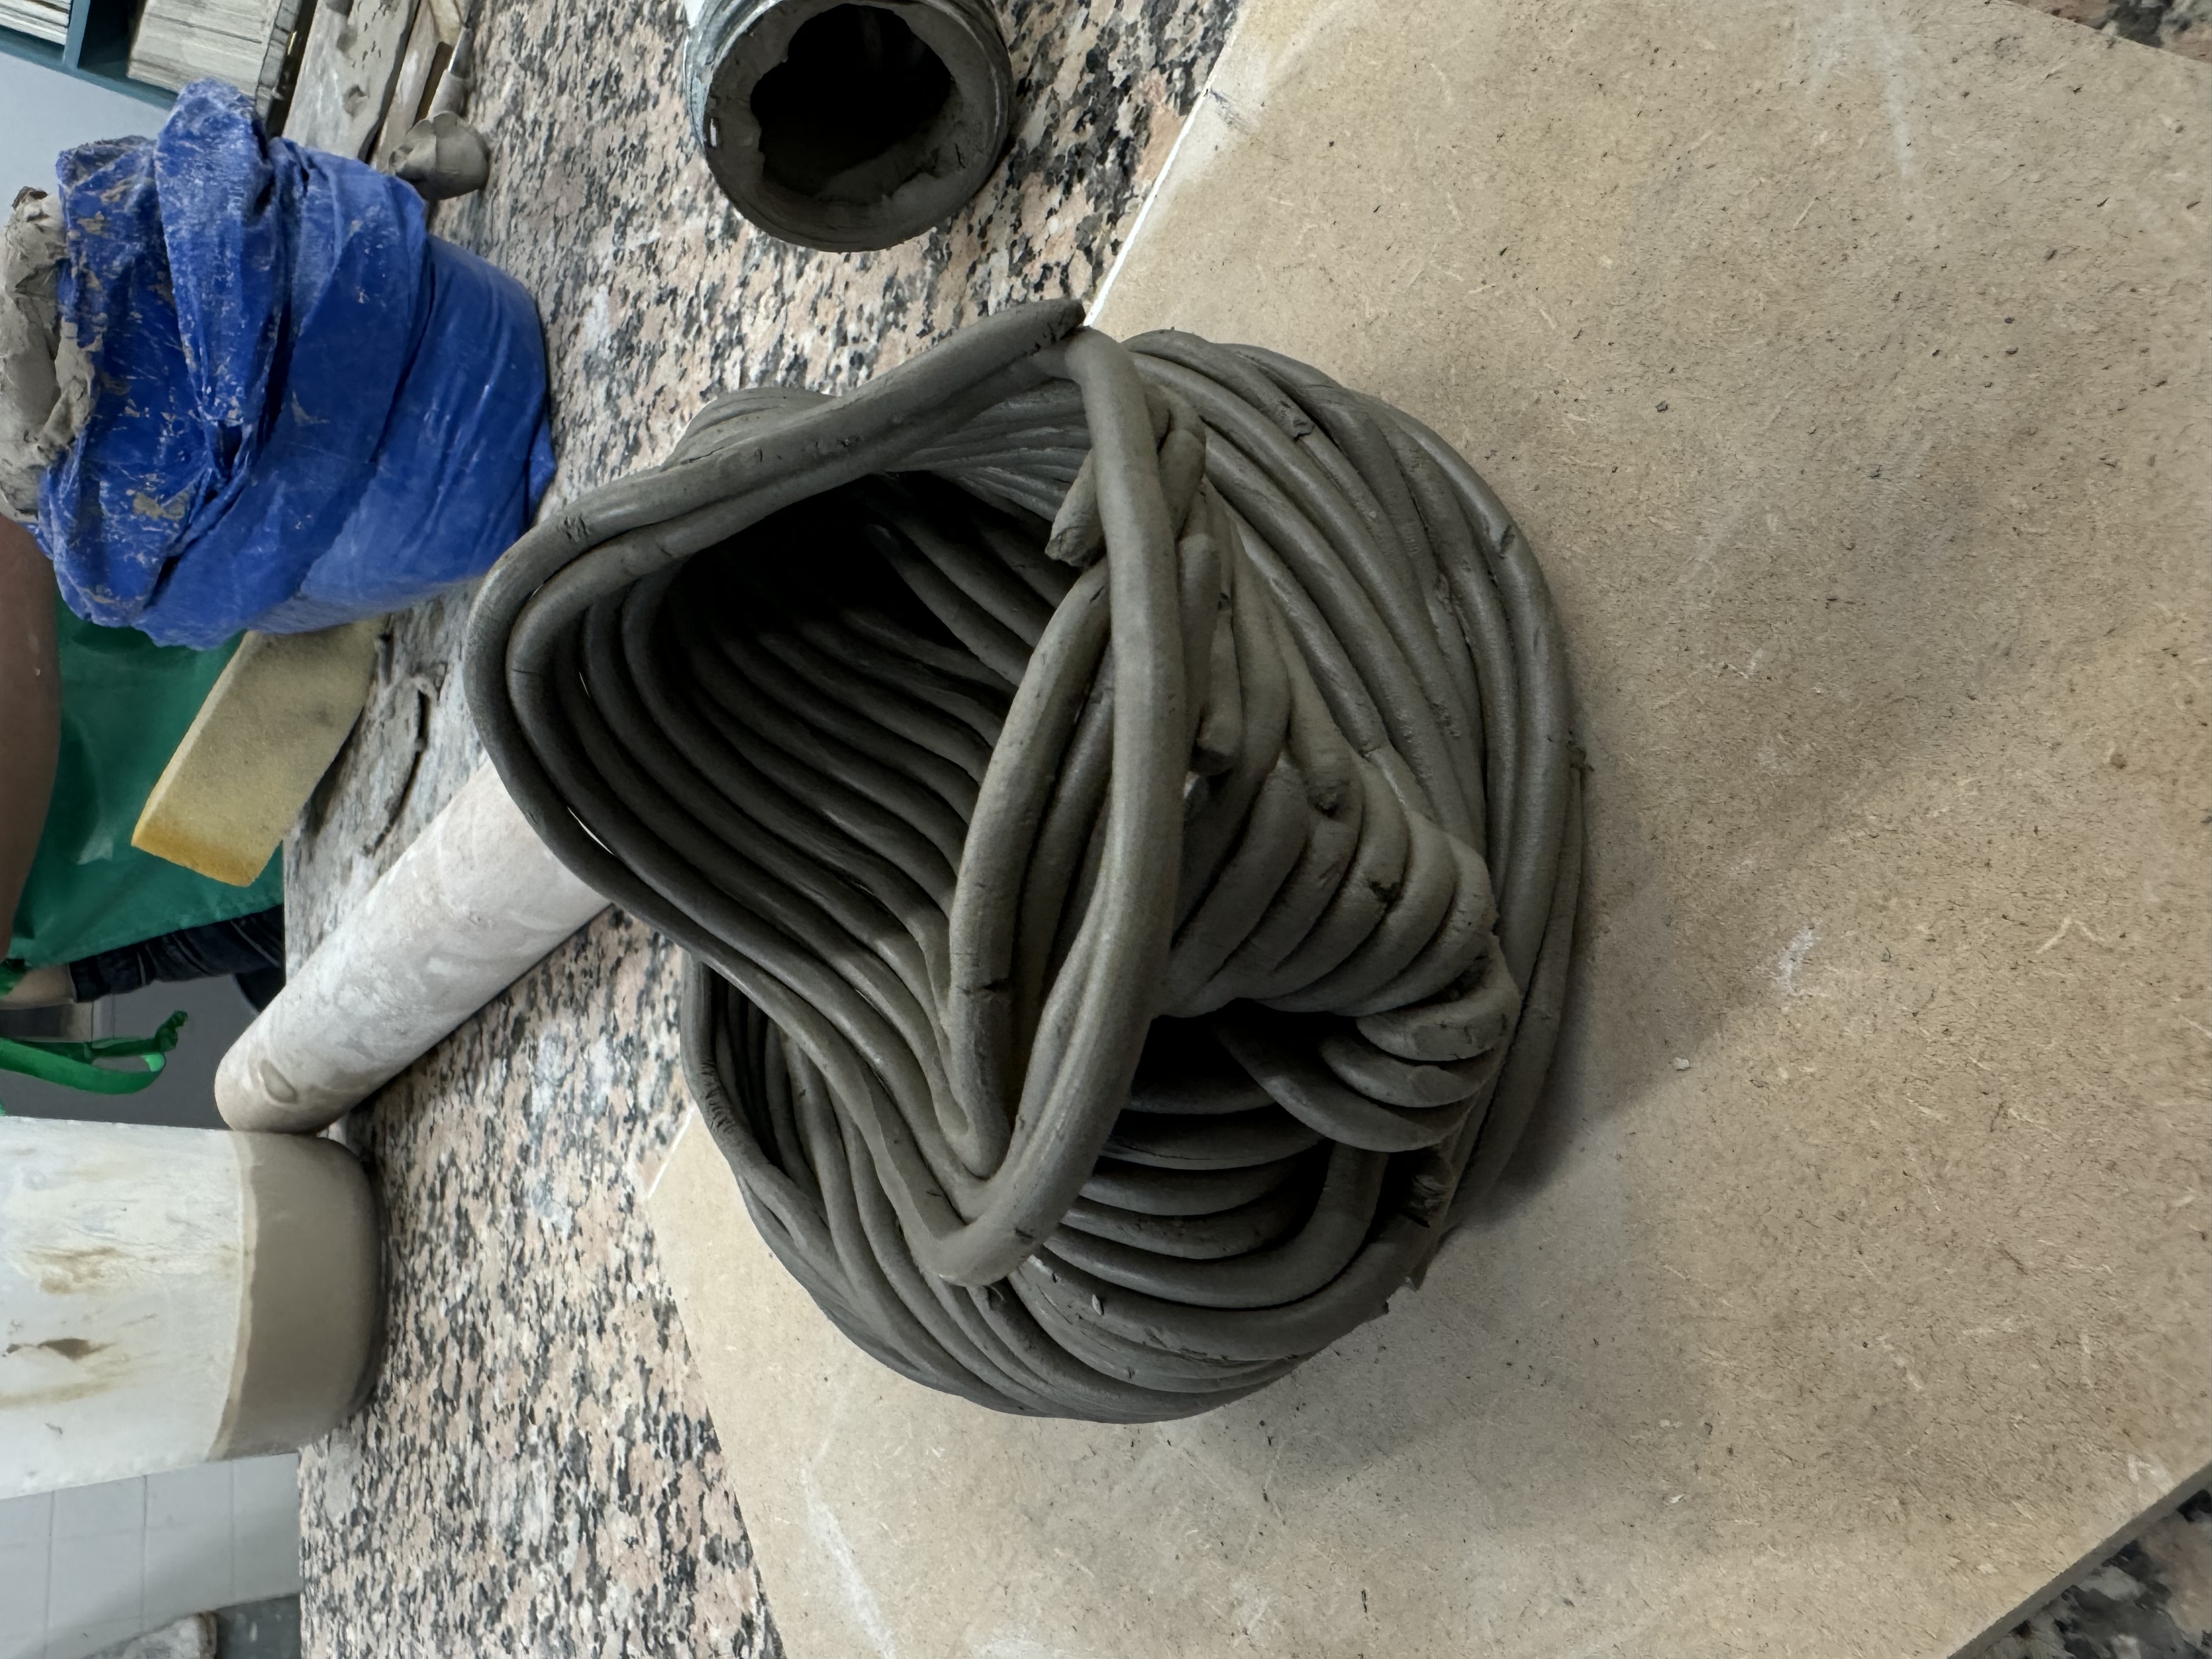
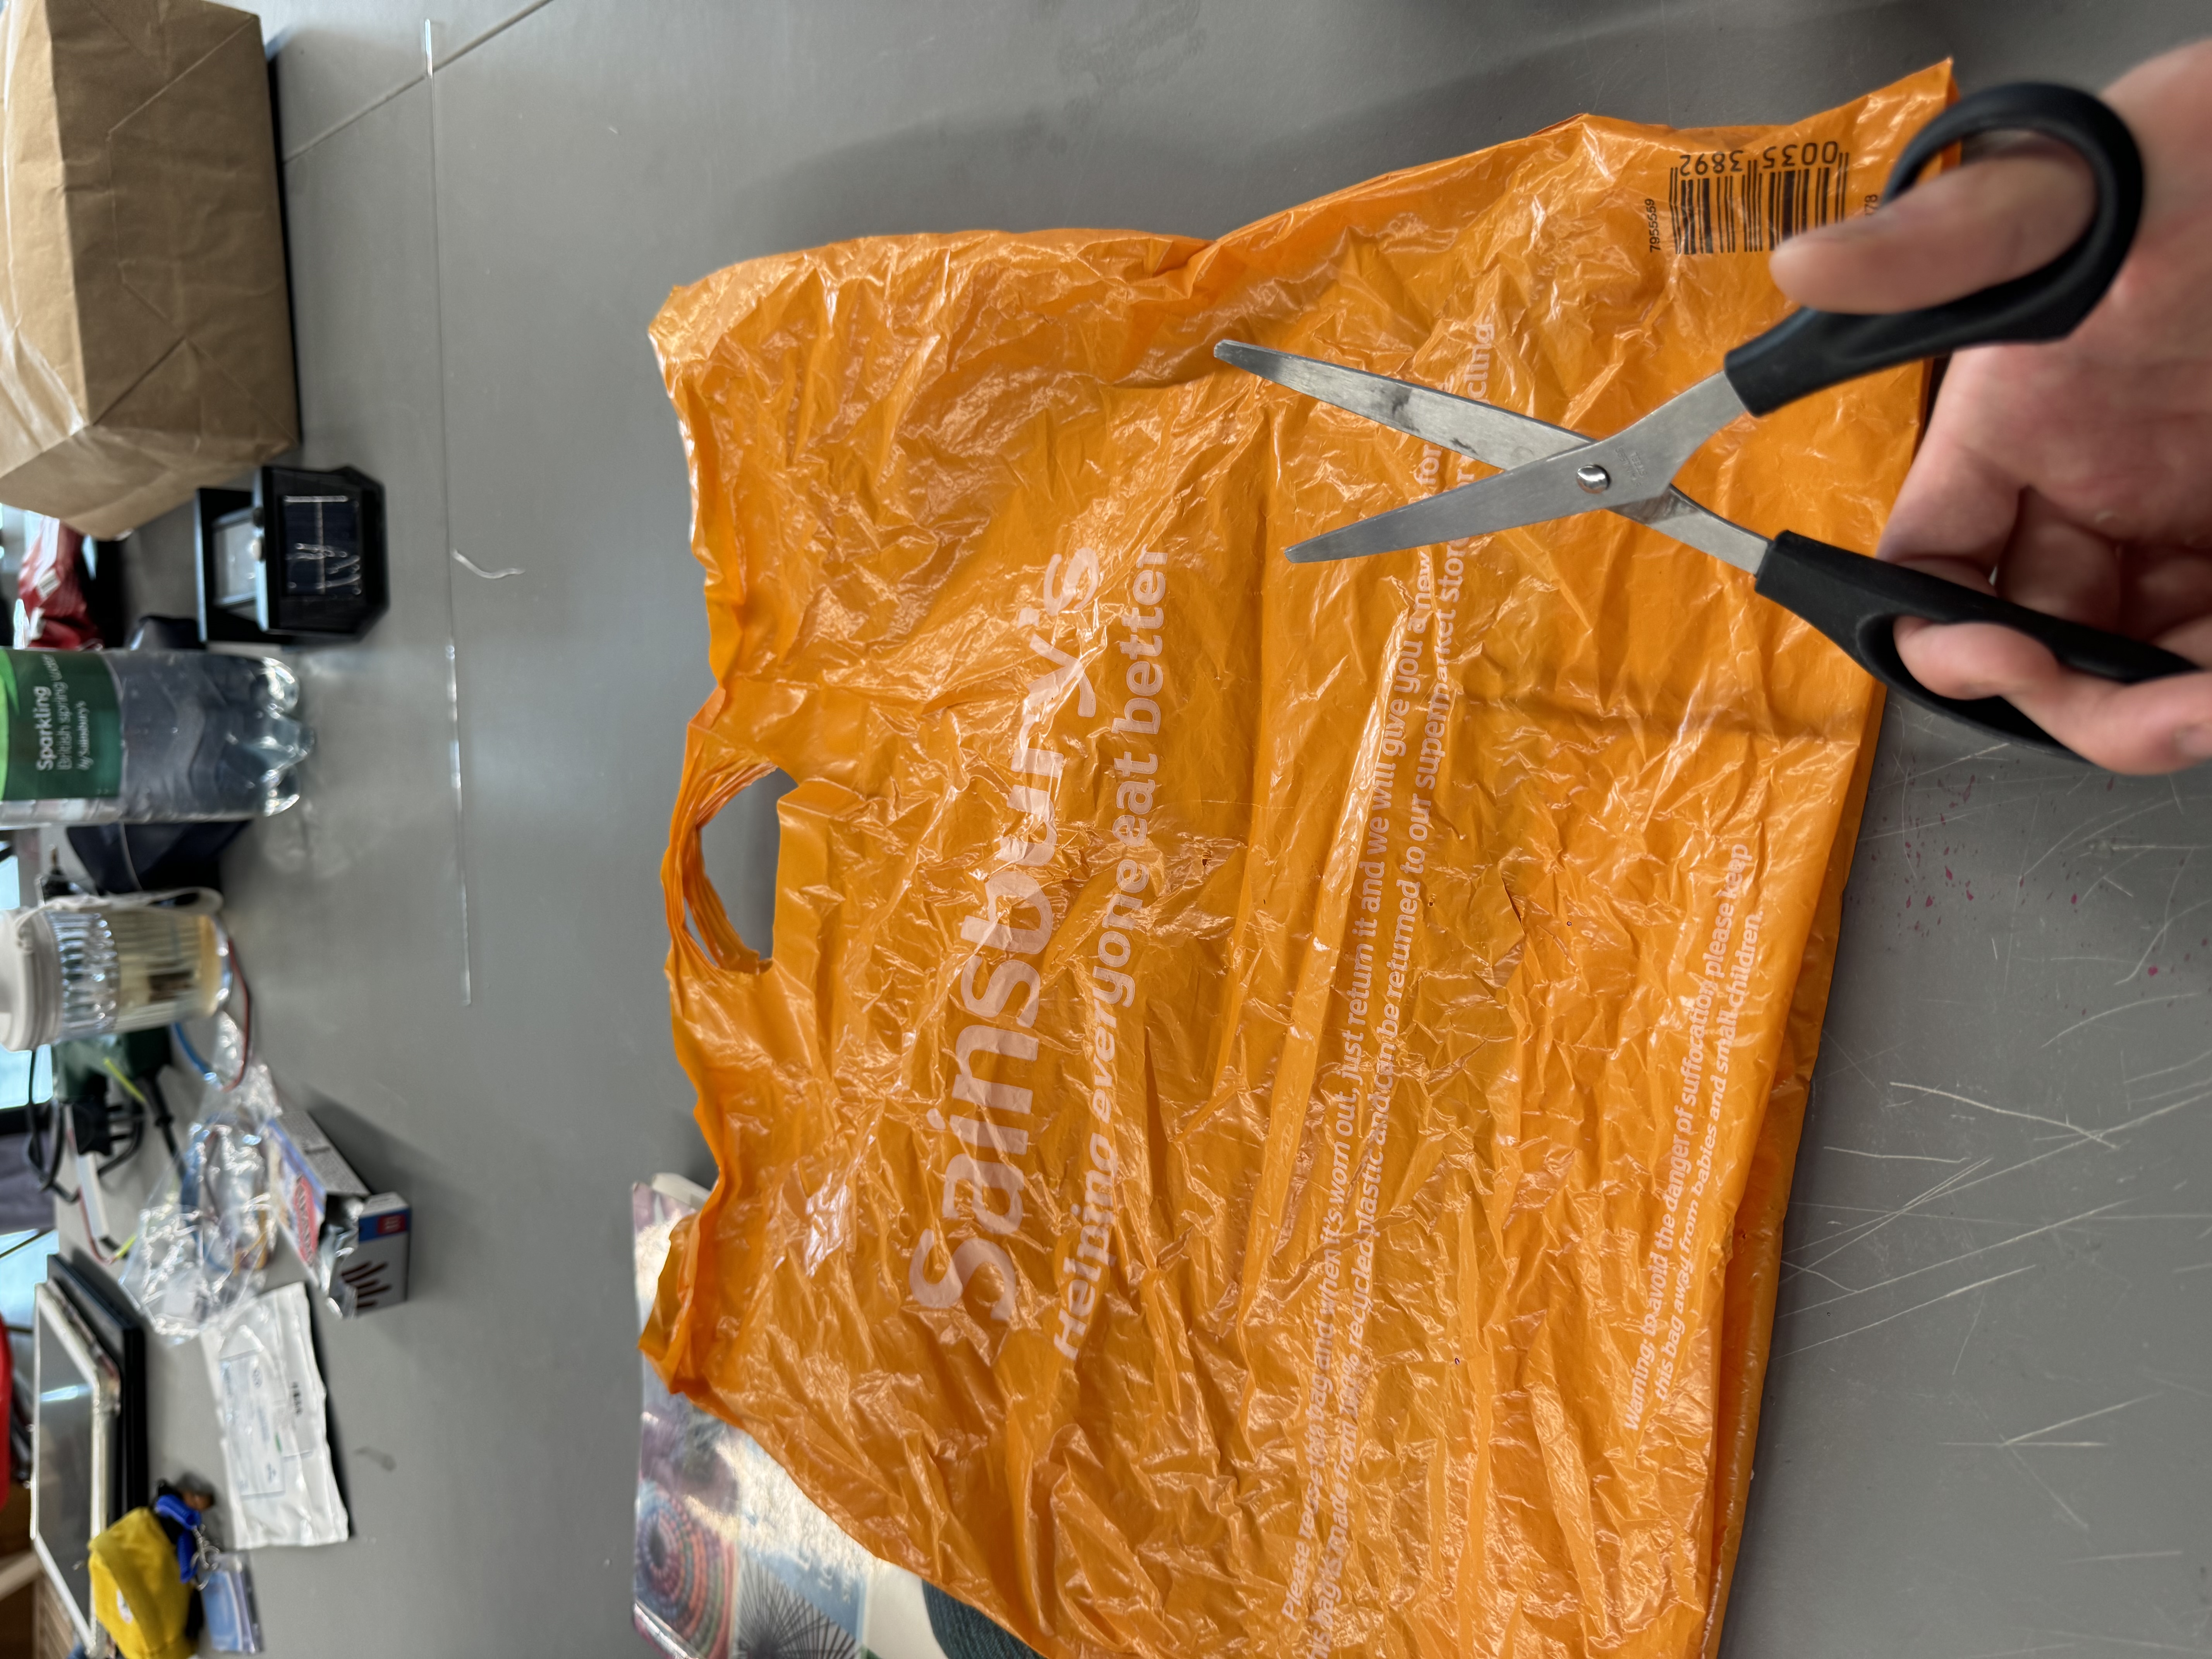
The visual effect is like the seaweed or the wrinkled clothes. The connection part between cylinders is beautiful. The drawback of plastic bag string is too soft and make cylinders easier to move, but it may be the strength if I design it well. If I want it to be stiff, next time I can try the plastic bottle strings.
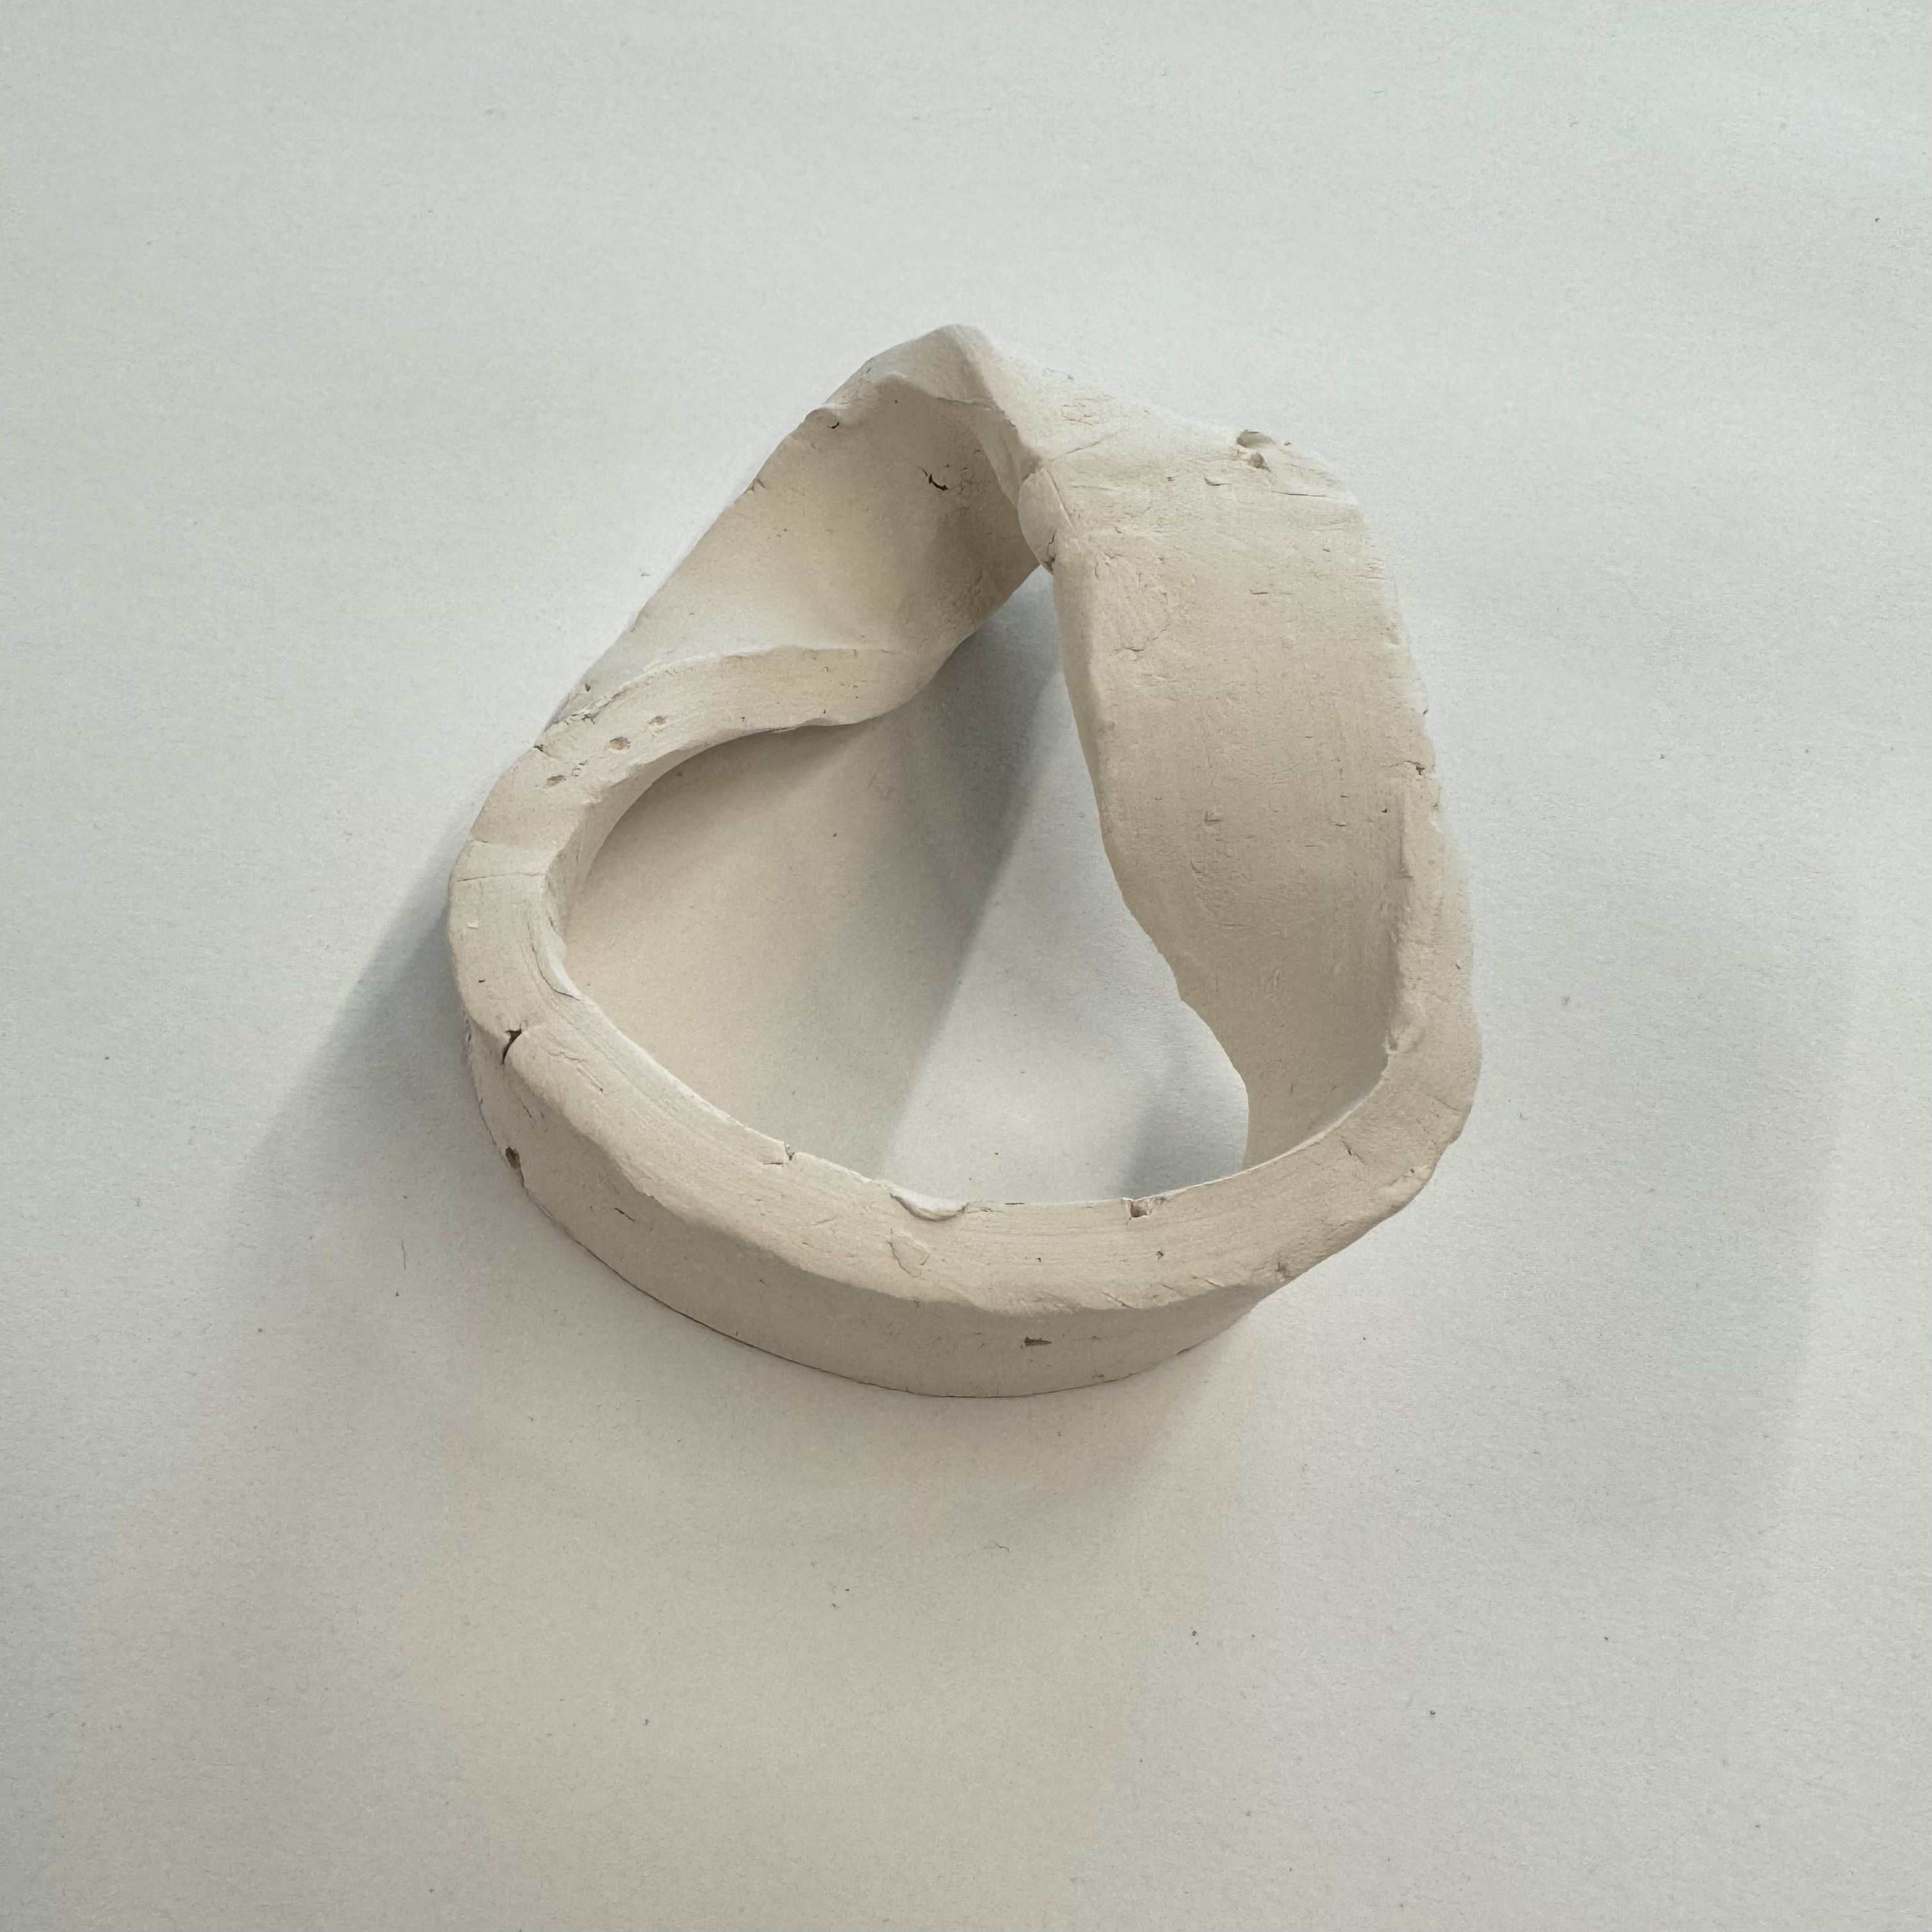
 For the second time I do this vase, I enlarge the base and reduce the curve, but unfortunatly one side still collapse. The collapsed side did not affect the use of vase, so I planned to bisque fire it. For the inside of the lower part, I applied some slip on to reinforce and contain water for further use.
14/05/2024


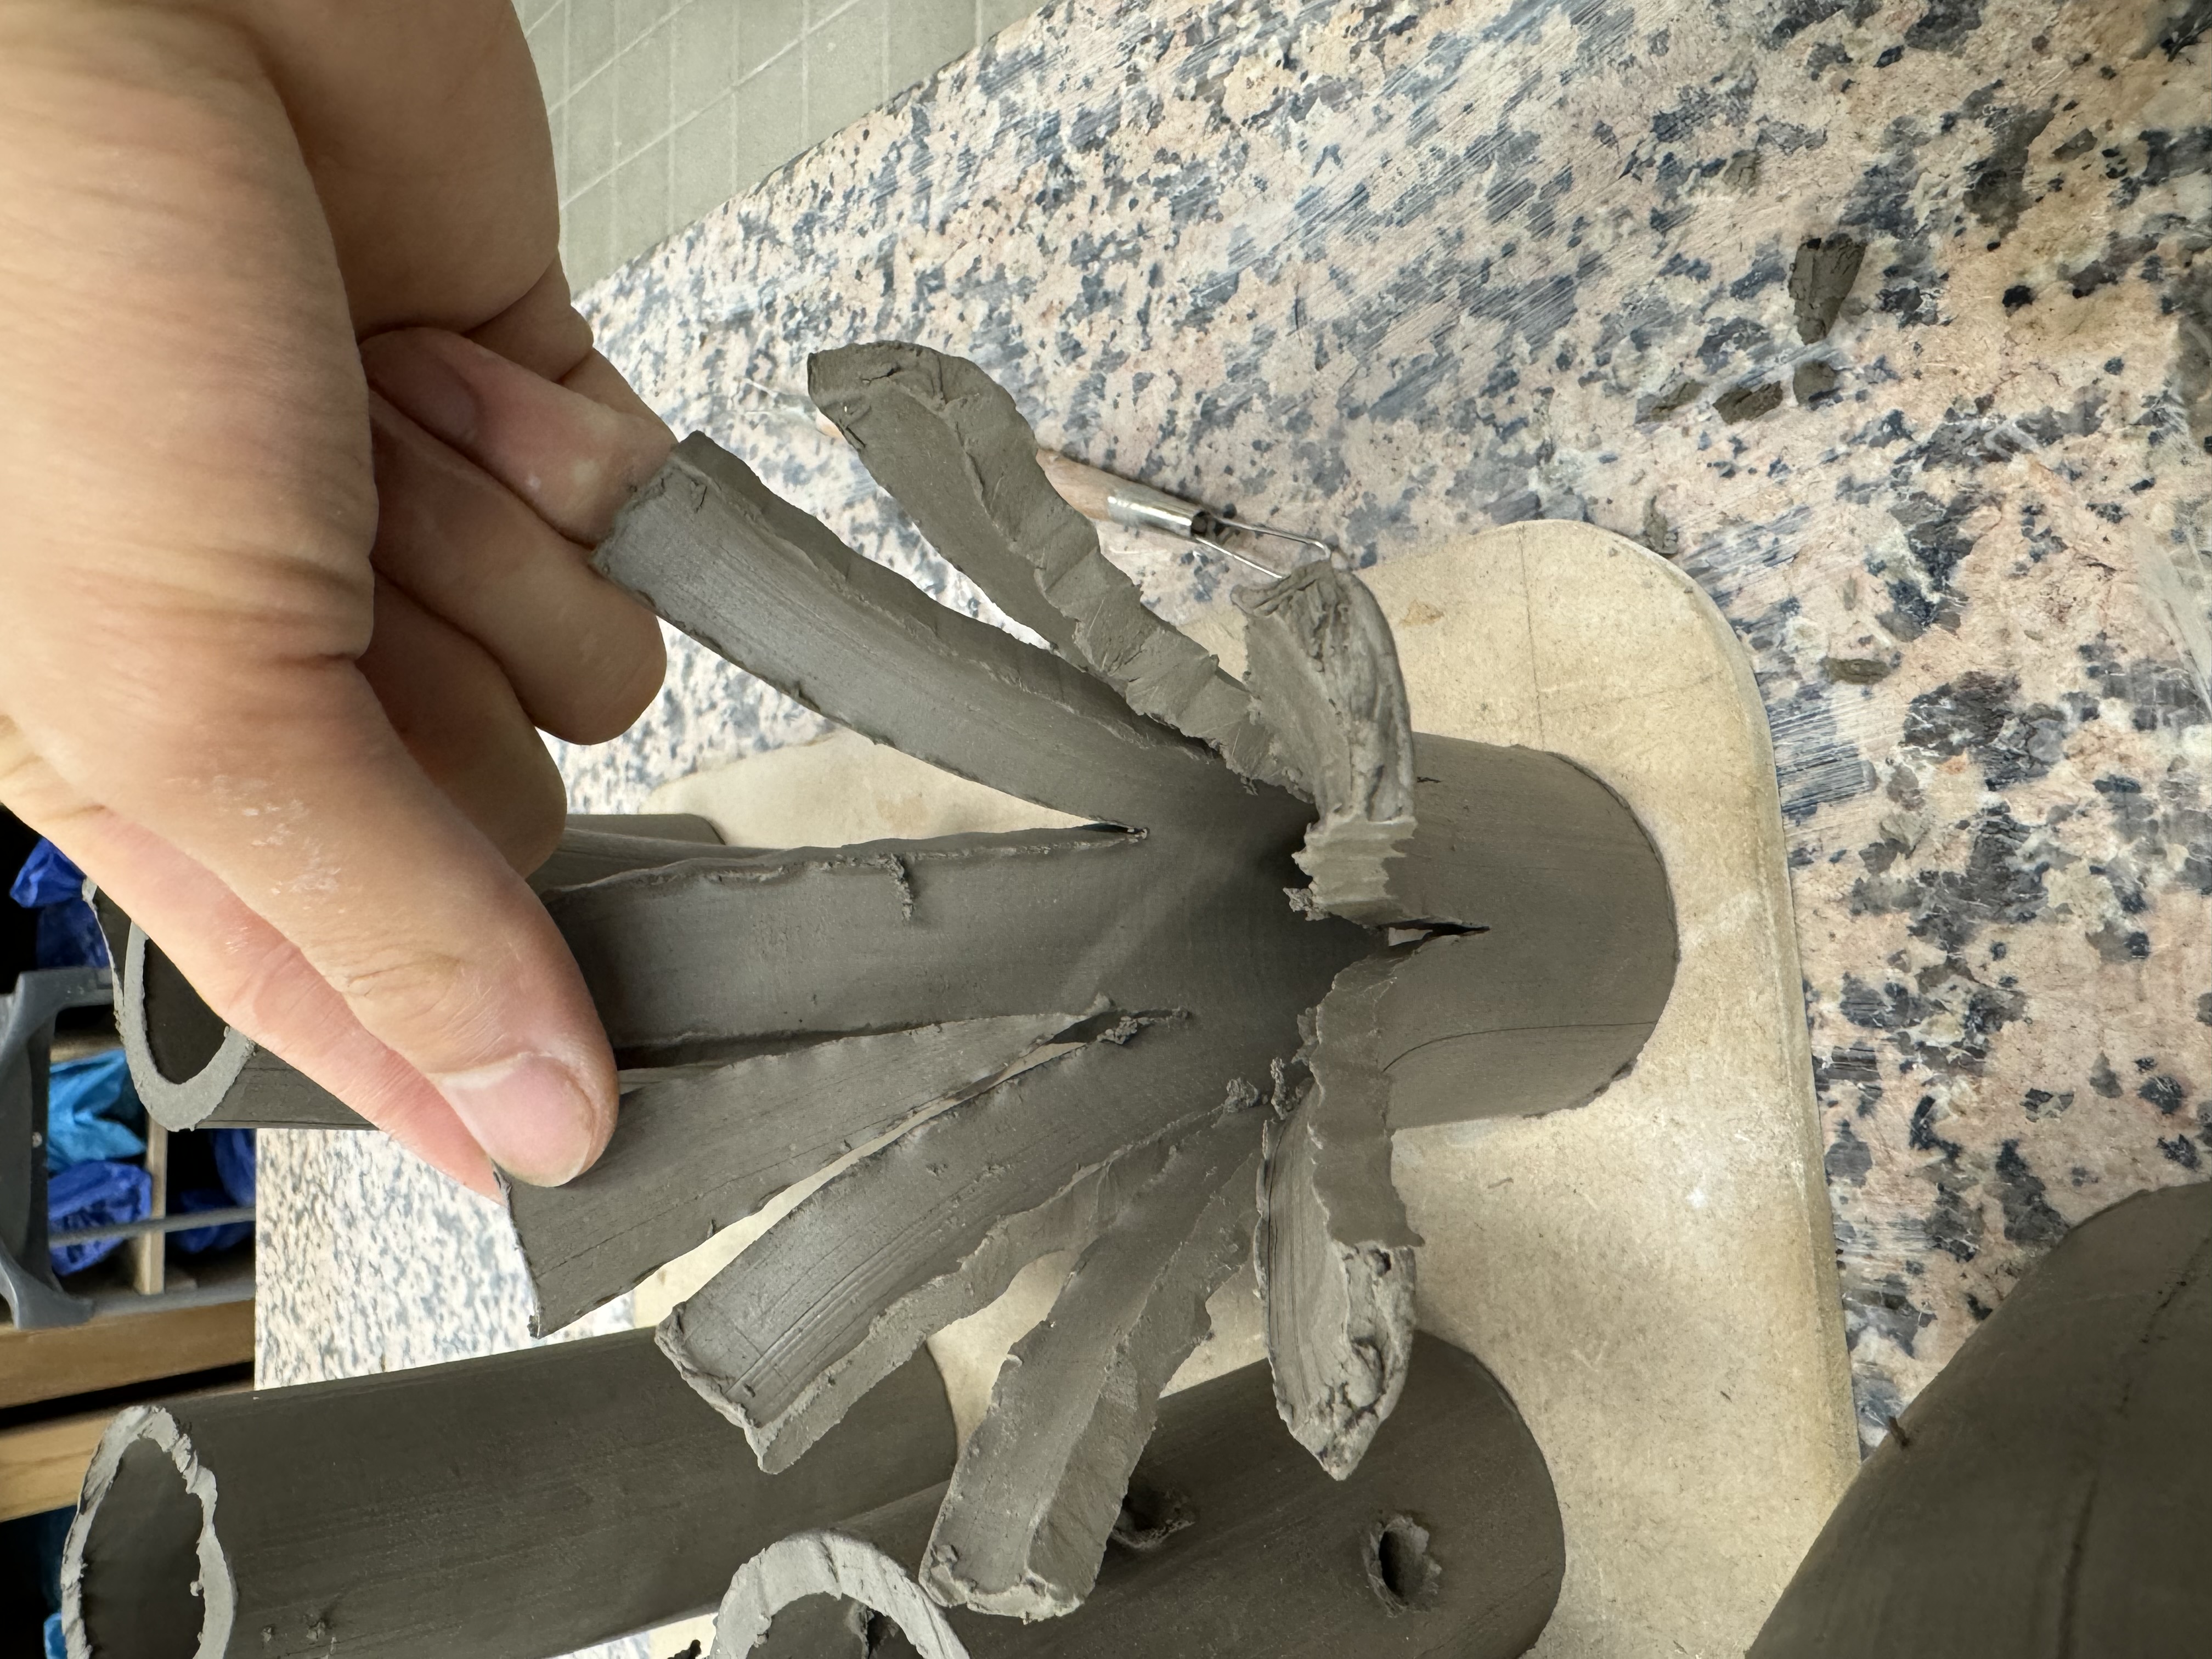
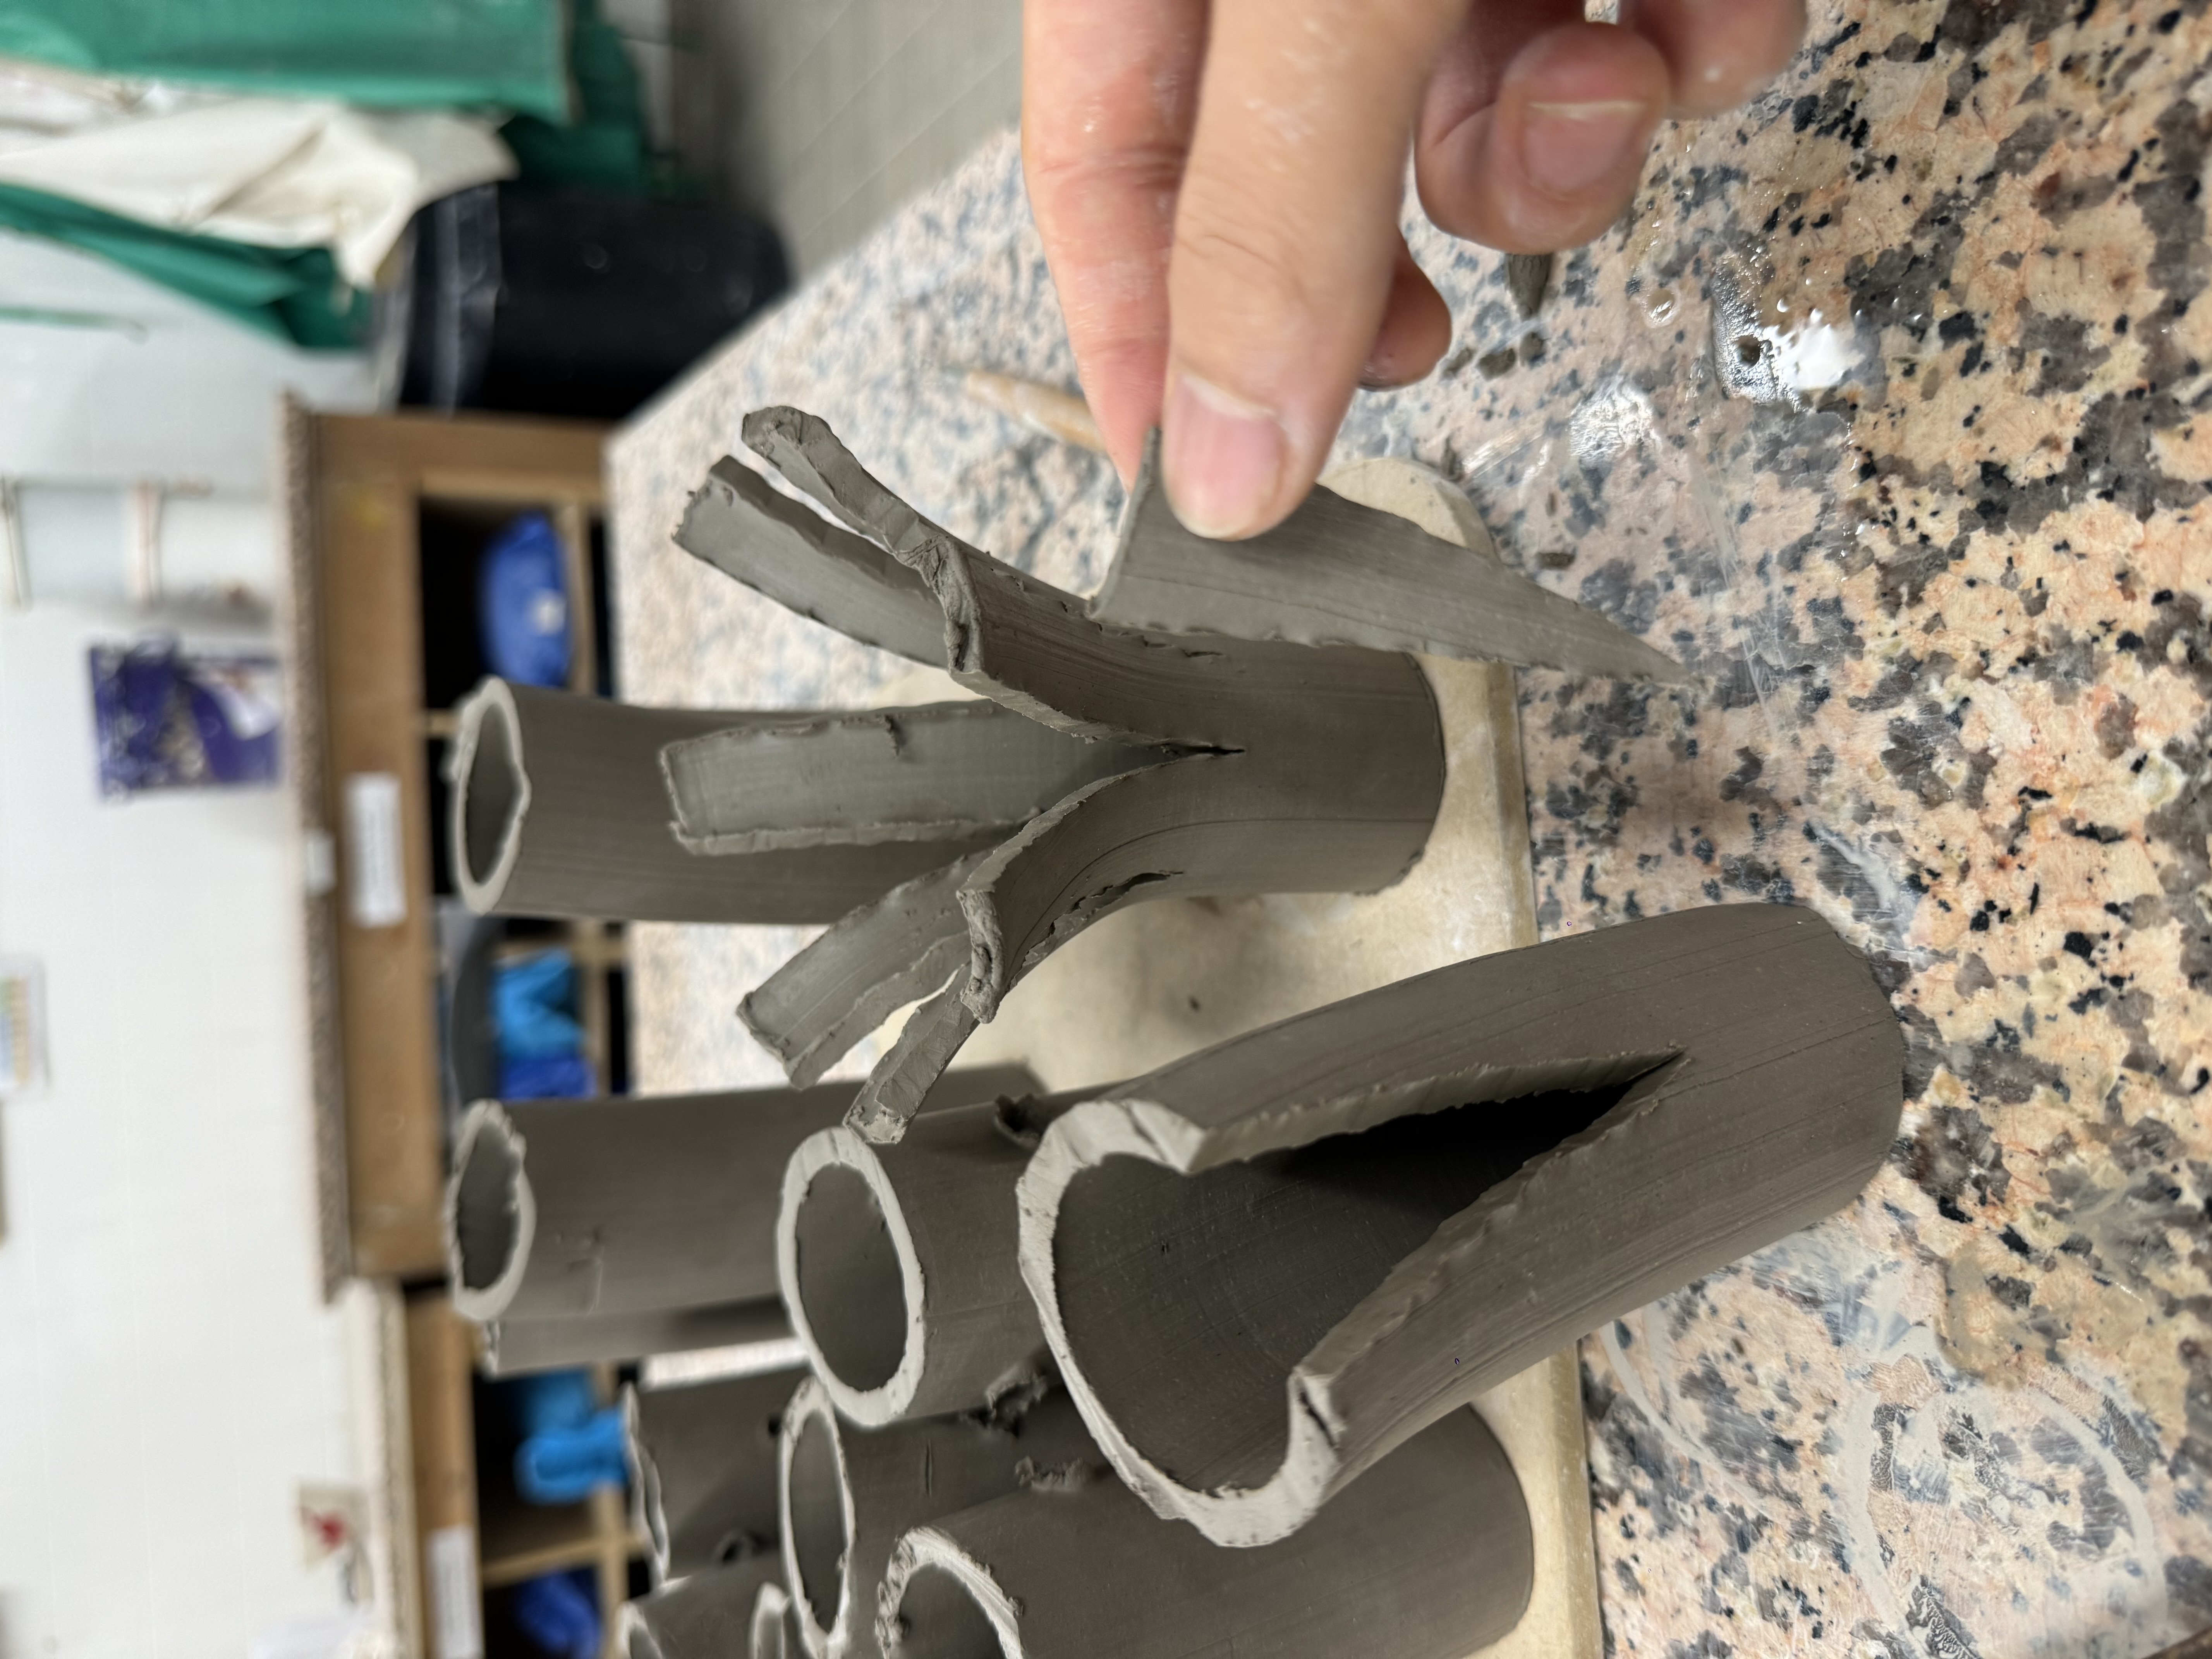
Next is the connection method mentioned last time, but the effect of this method of linking is not ideal. The connecting piece must have a certain length, and the gap with the main body must be relatively large. During the connection process, one flap of the main body was broken. But I think this can be improved. First of all, the shape of my triangular connecting piece is unreasonable, and it is easy to pull away from it after being pulled at a certain angle. Secondly, for the main body, the gap is triangular, causing the bottom gap to be too small.The following sketching is what I plan to improve.
17/05/2024


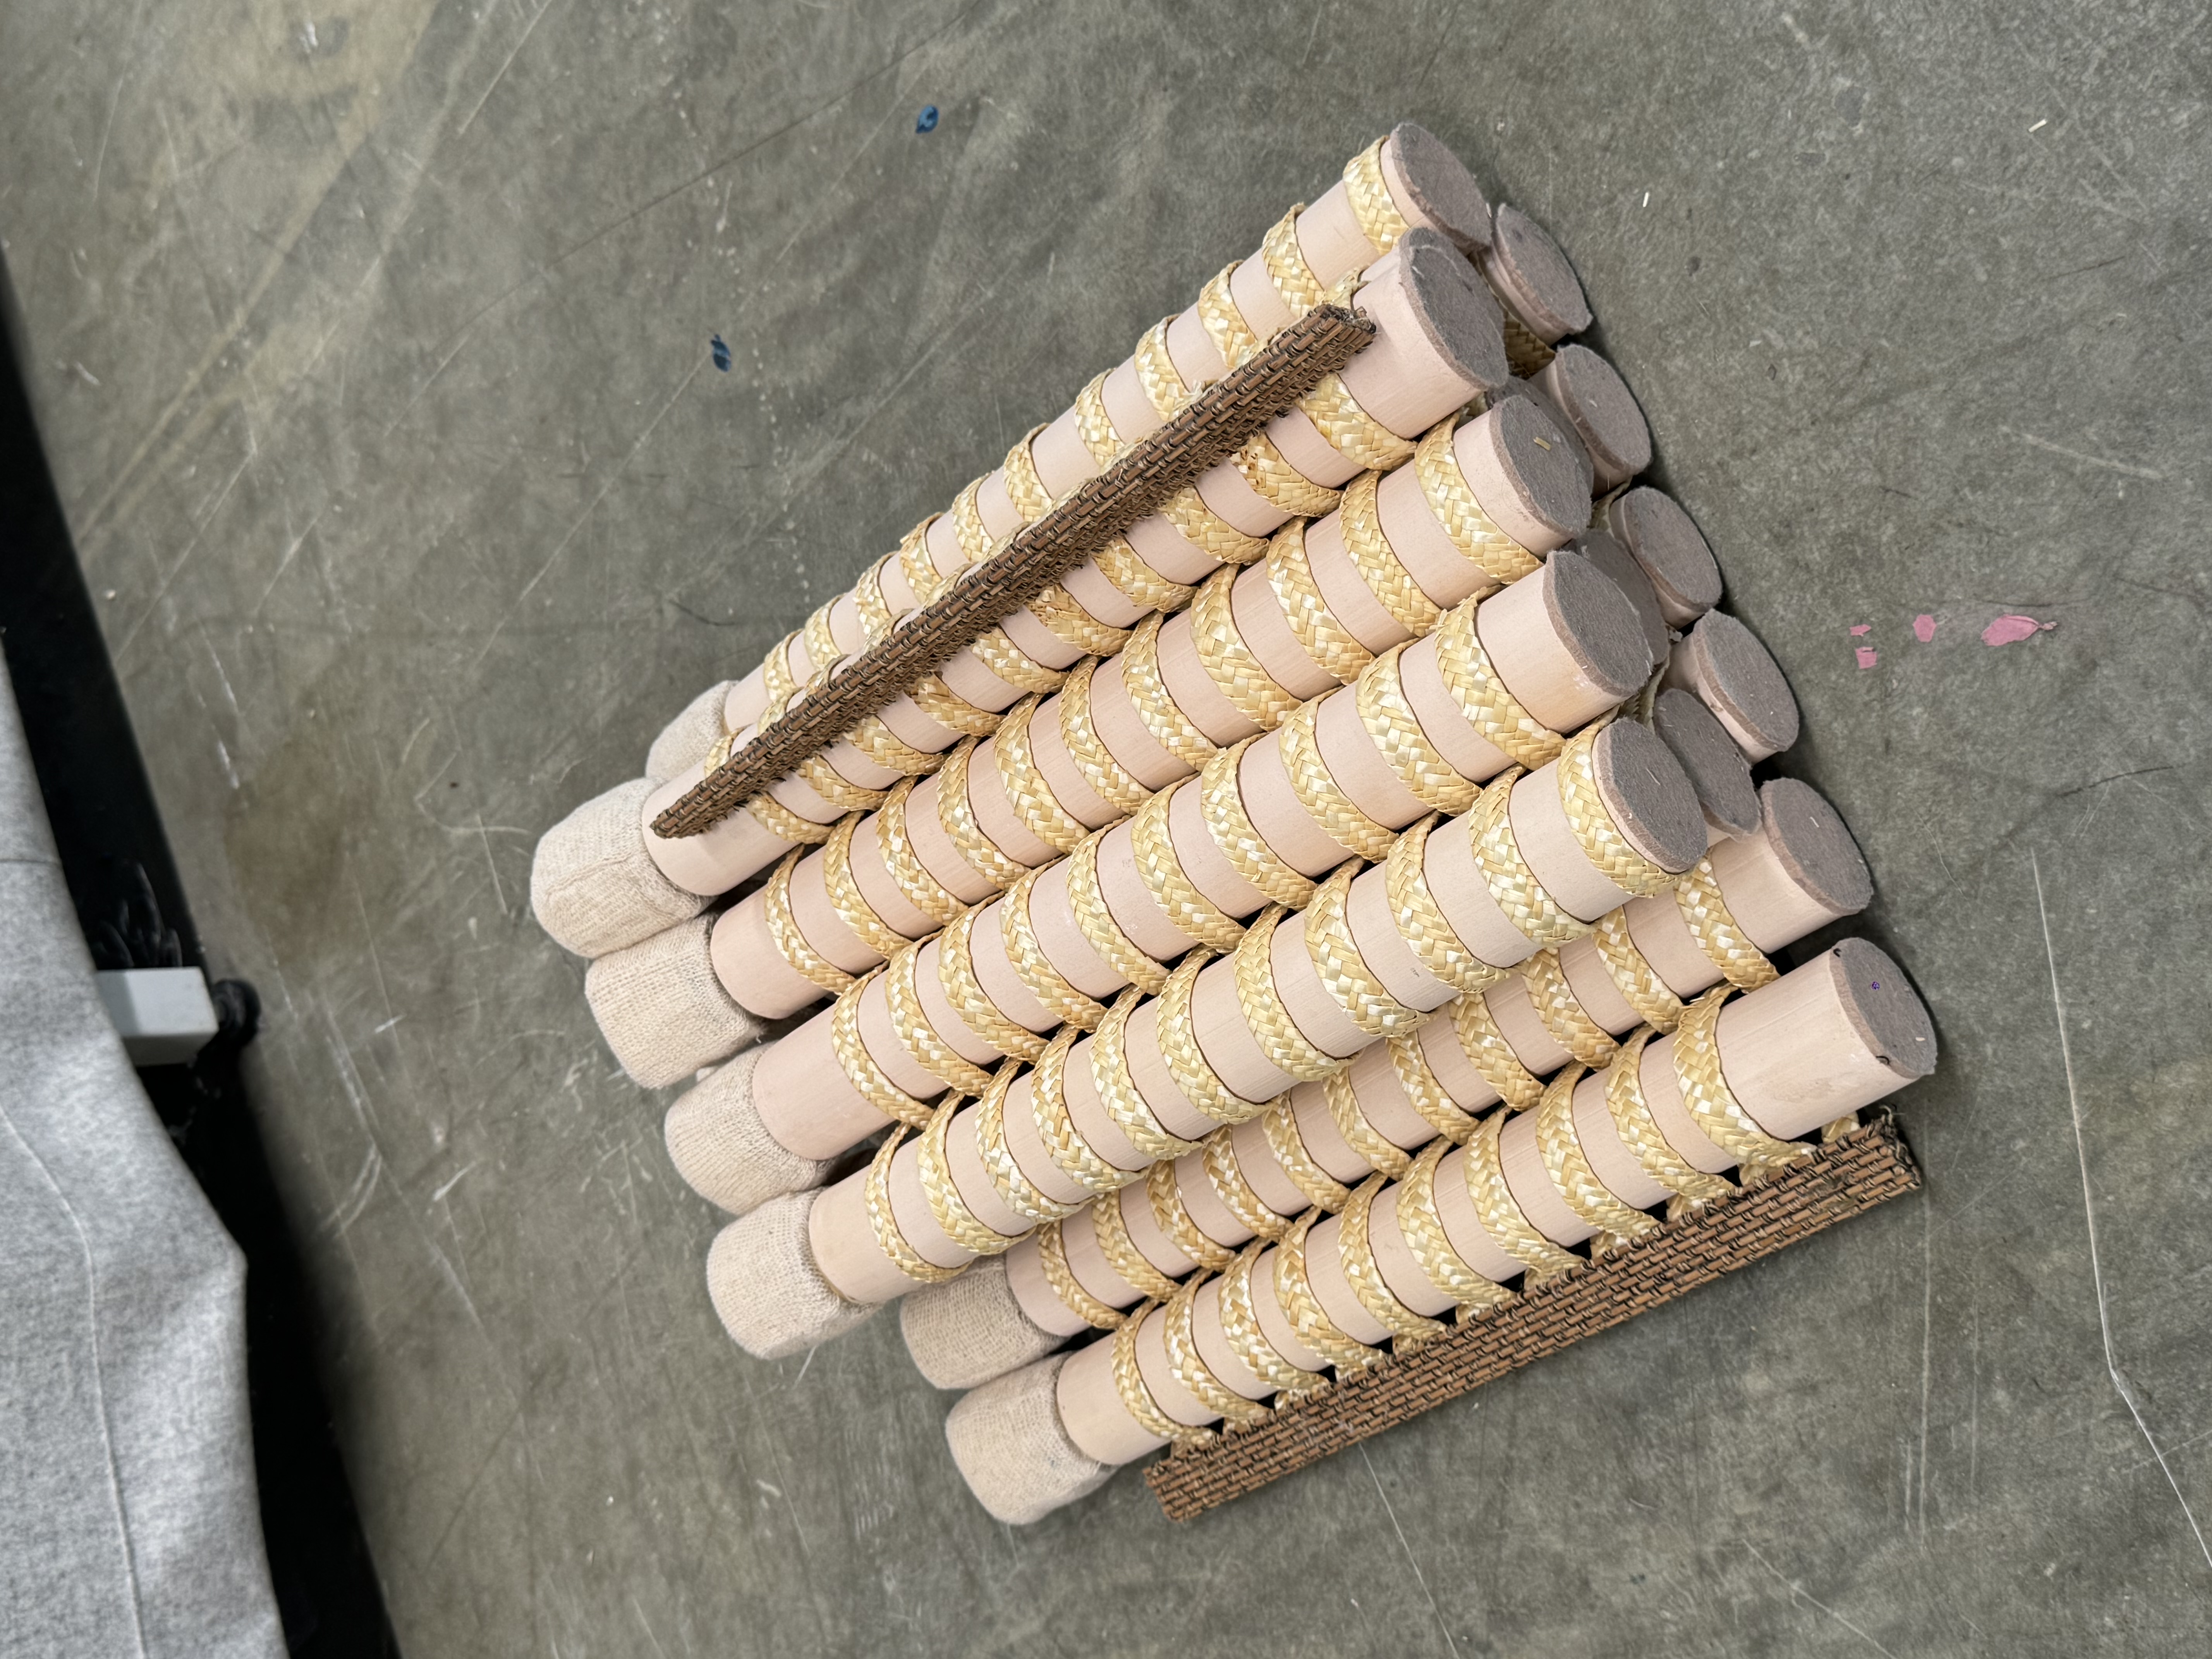
 I plan to add cushions to each unit of the upward part, so that together they become one big cushion. Then because of its flexible characteristics, it can also be stacked and transported, saving transportation costs.
21/05/2024


This is the vase after glazing. When I glaze it, I wiped it and only remain the glaze in gap. The final texture is amazing and the glaze naturally fills the breaches.


 When I trimed it, there are some cylinders not sealed properly becoming a little too dry for triming so they took more time. But for the proper ones, it is easy and time-saving. I spent 2 hours to get them all done.
24/05/2024
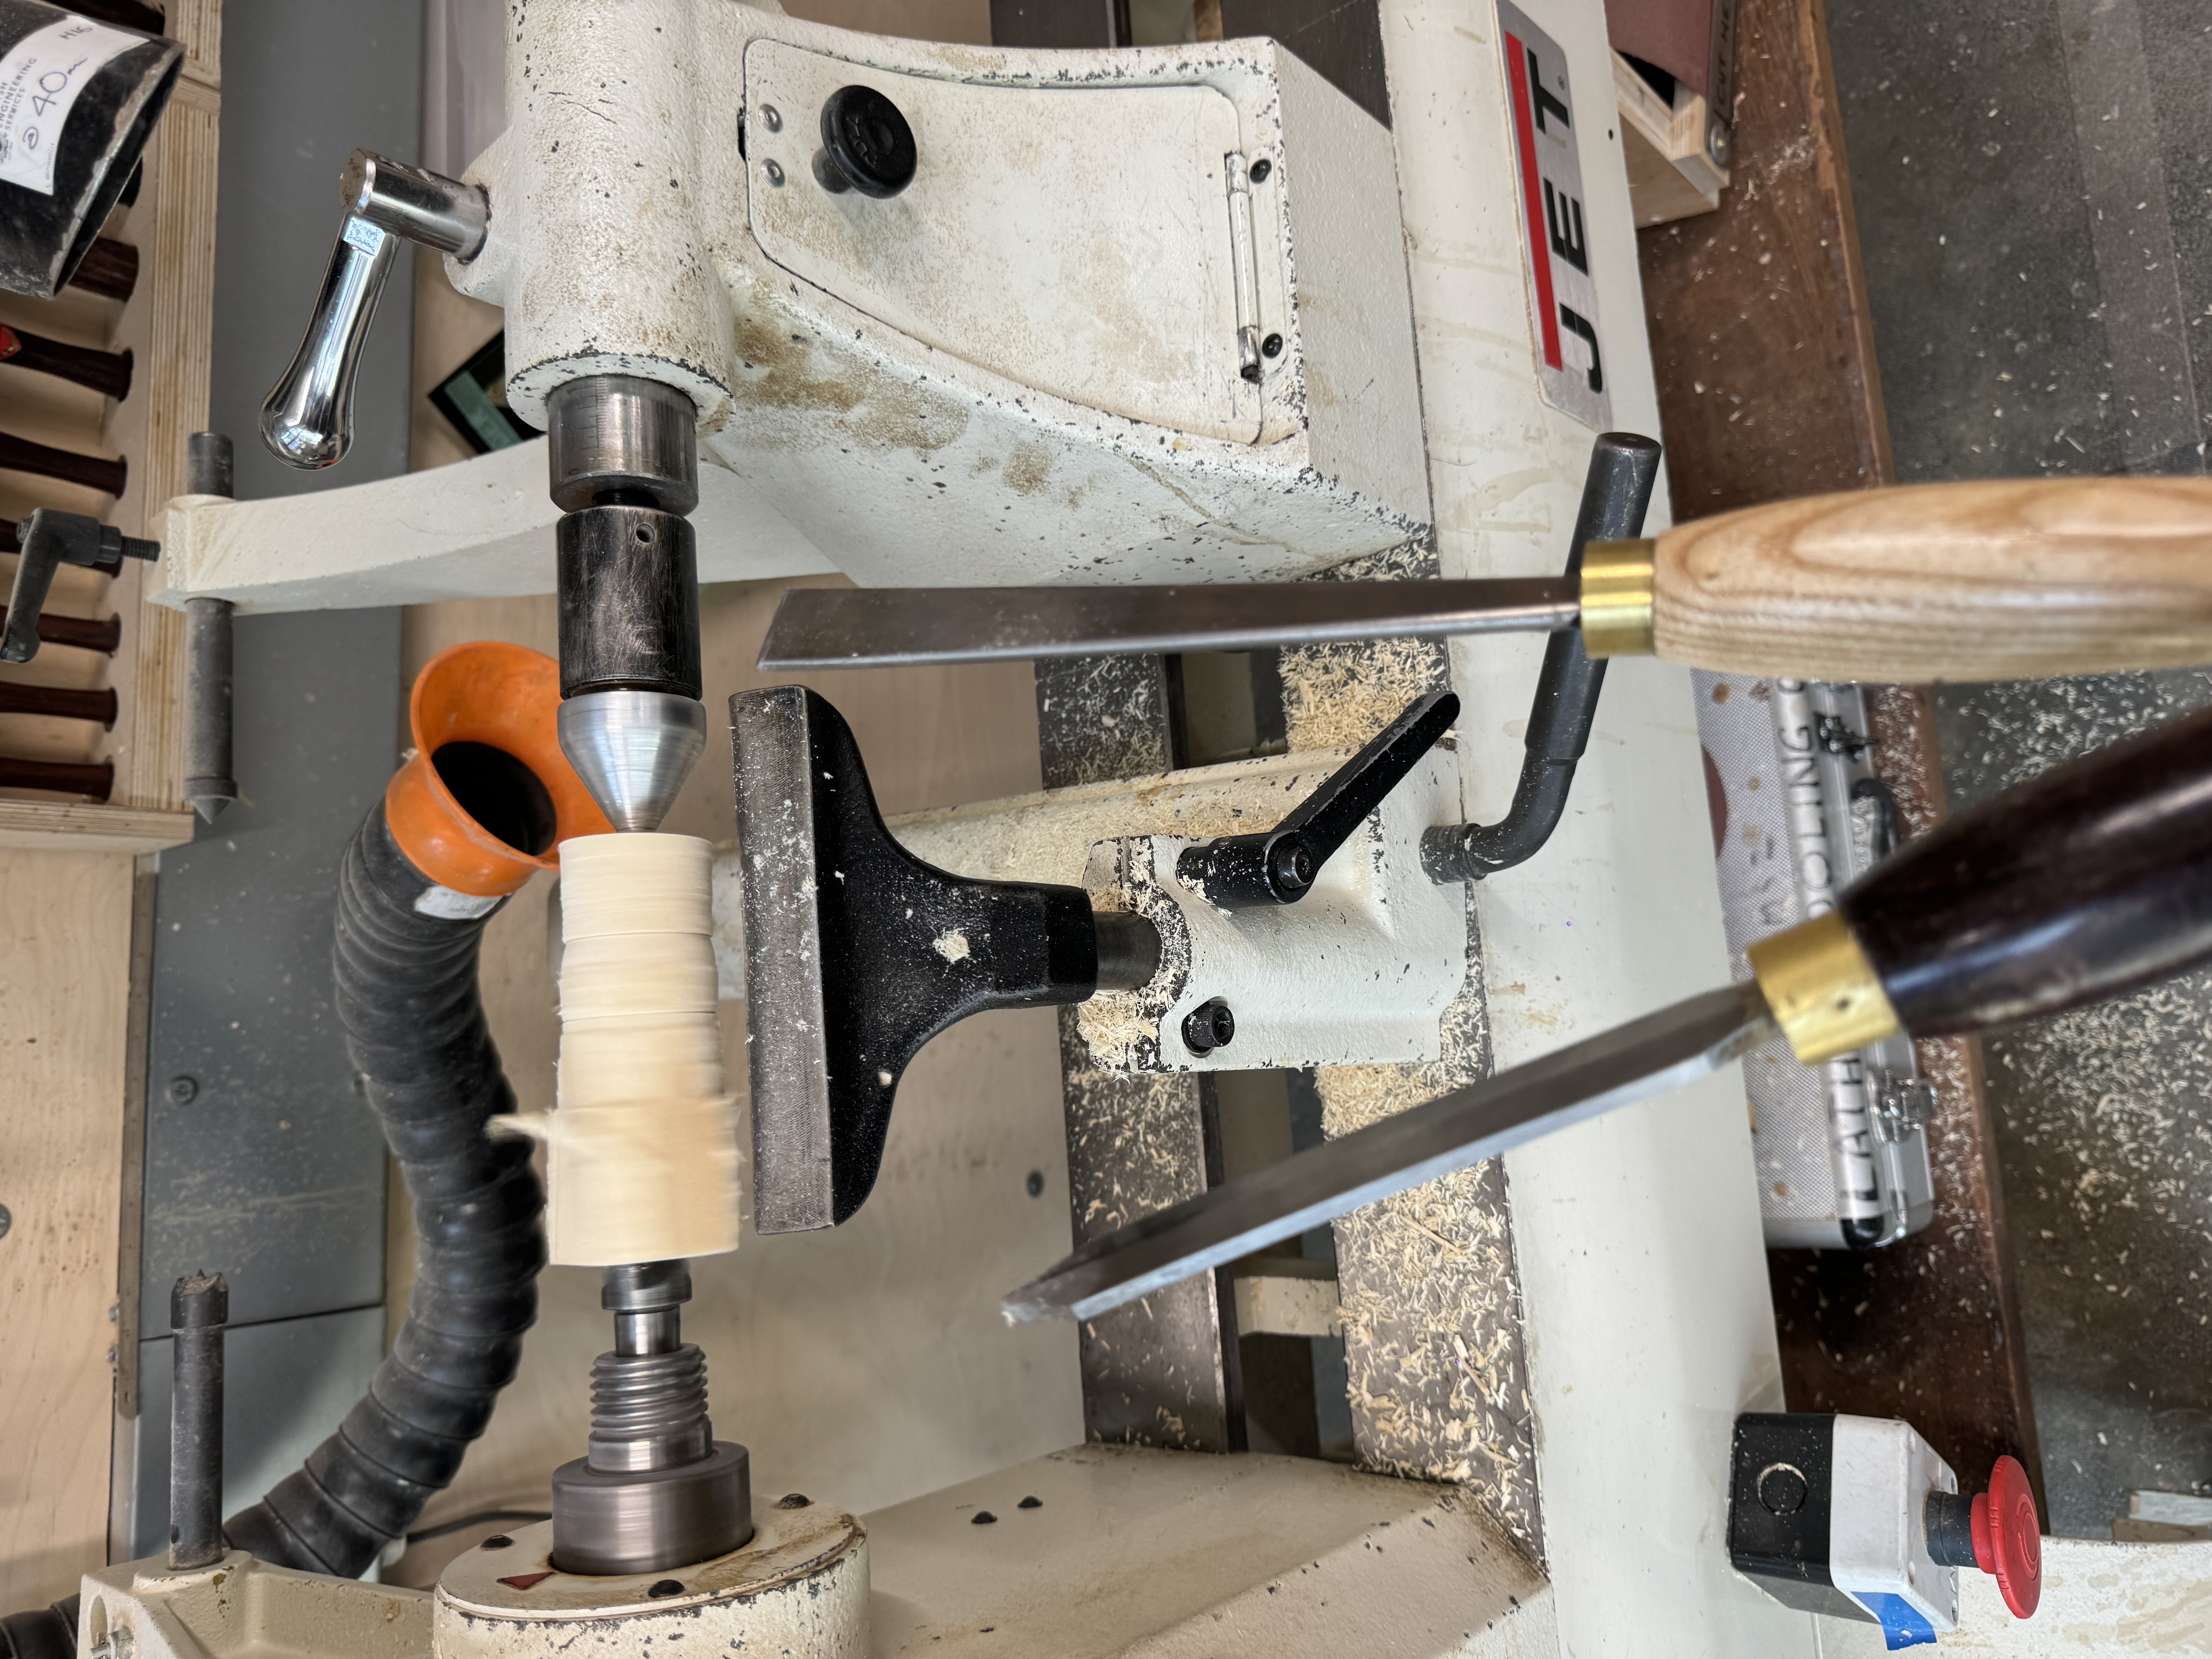
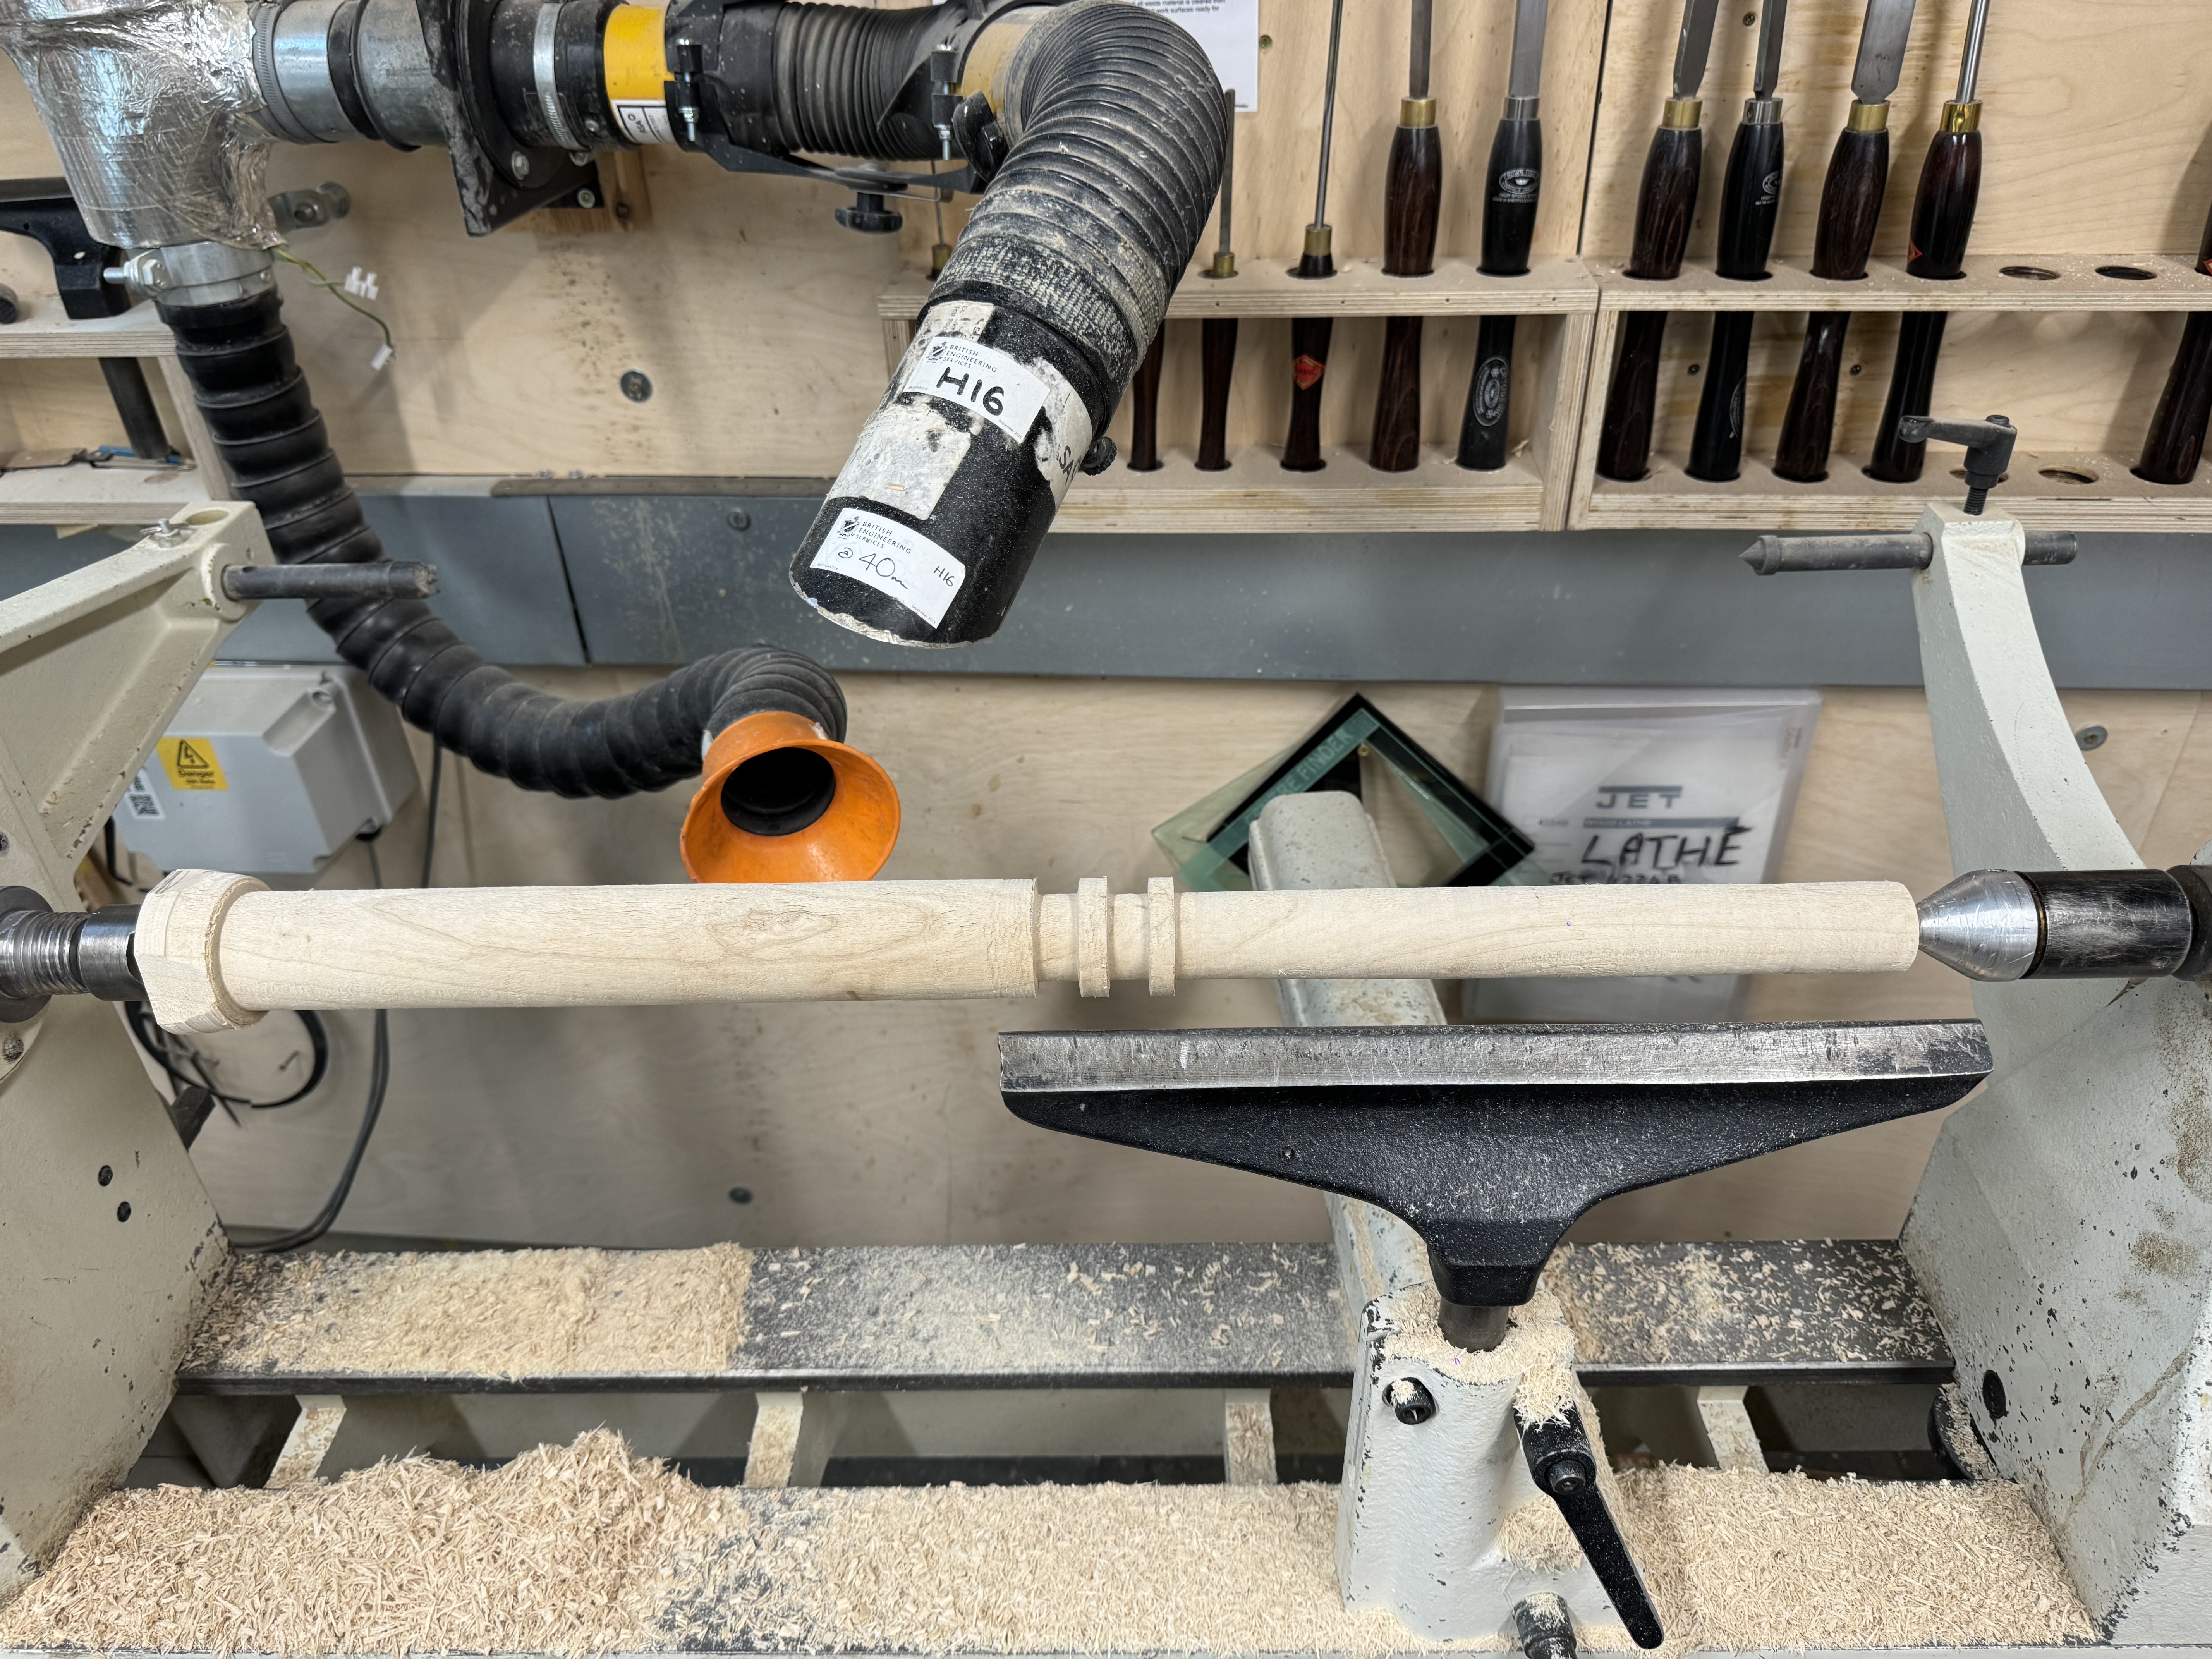
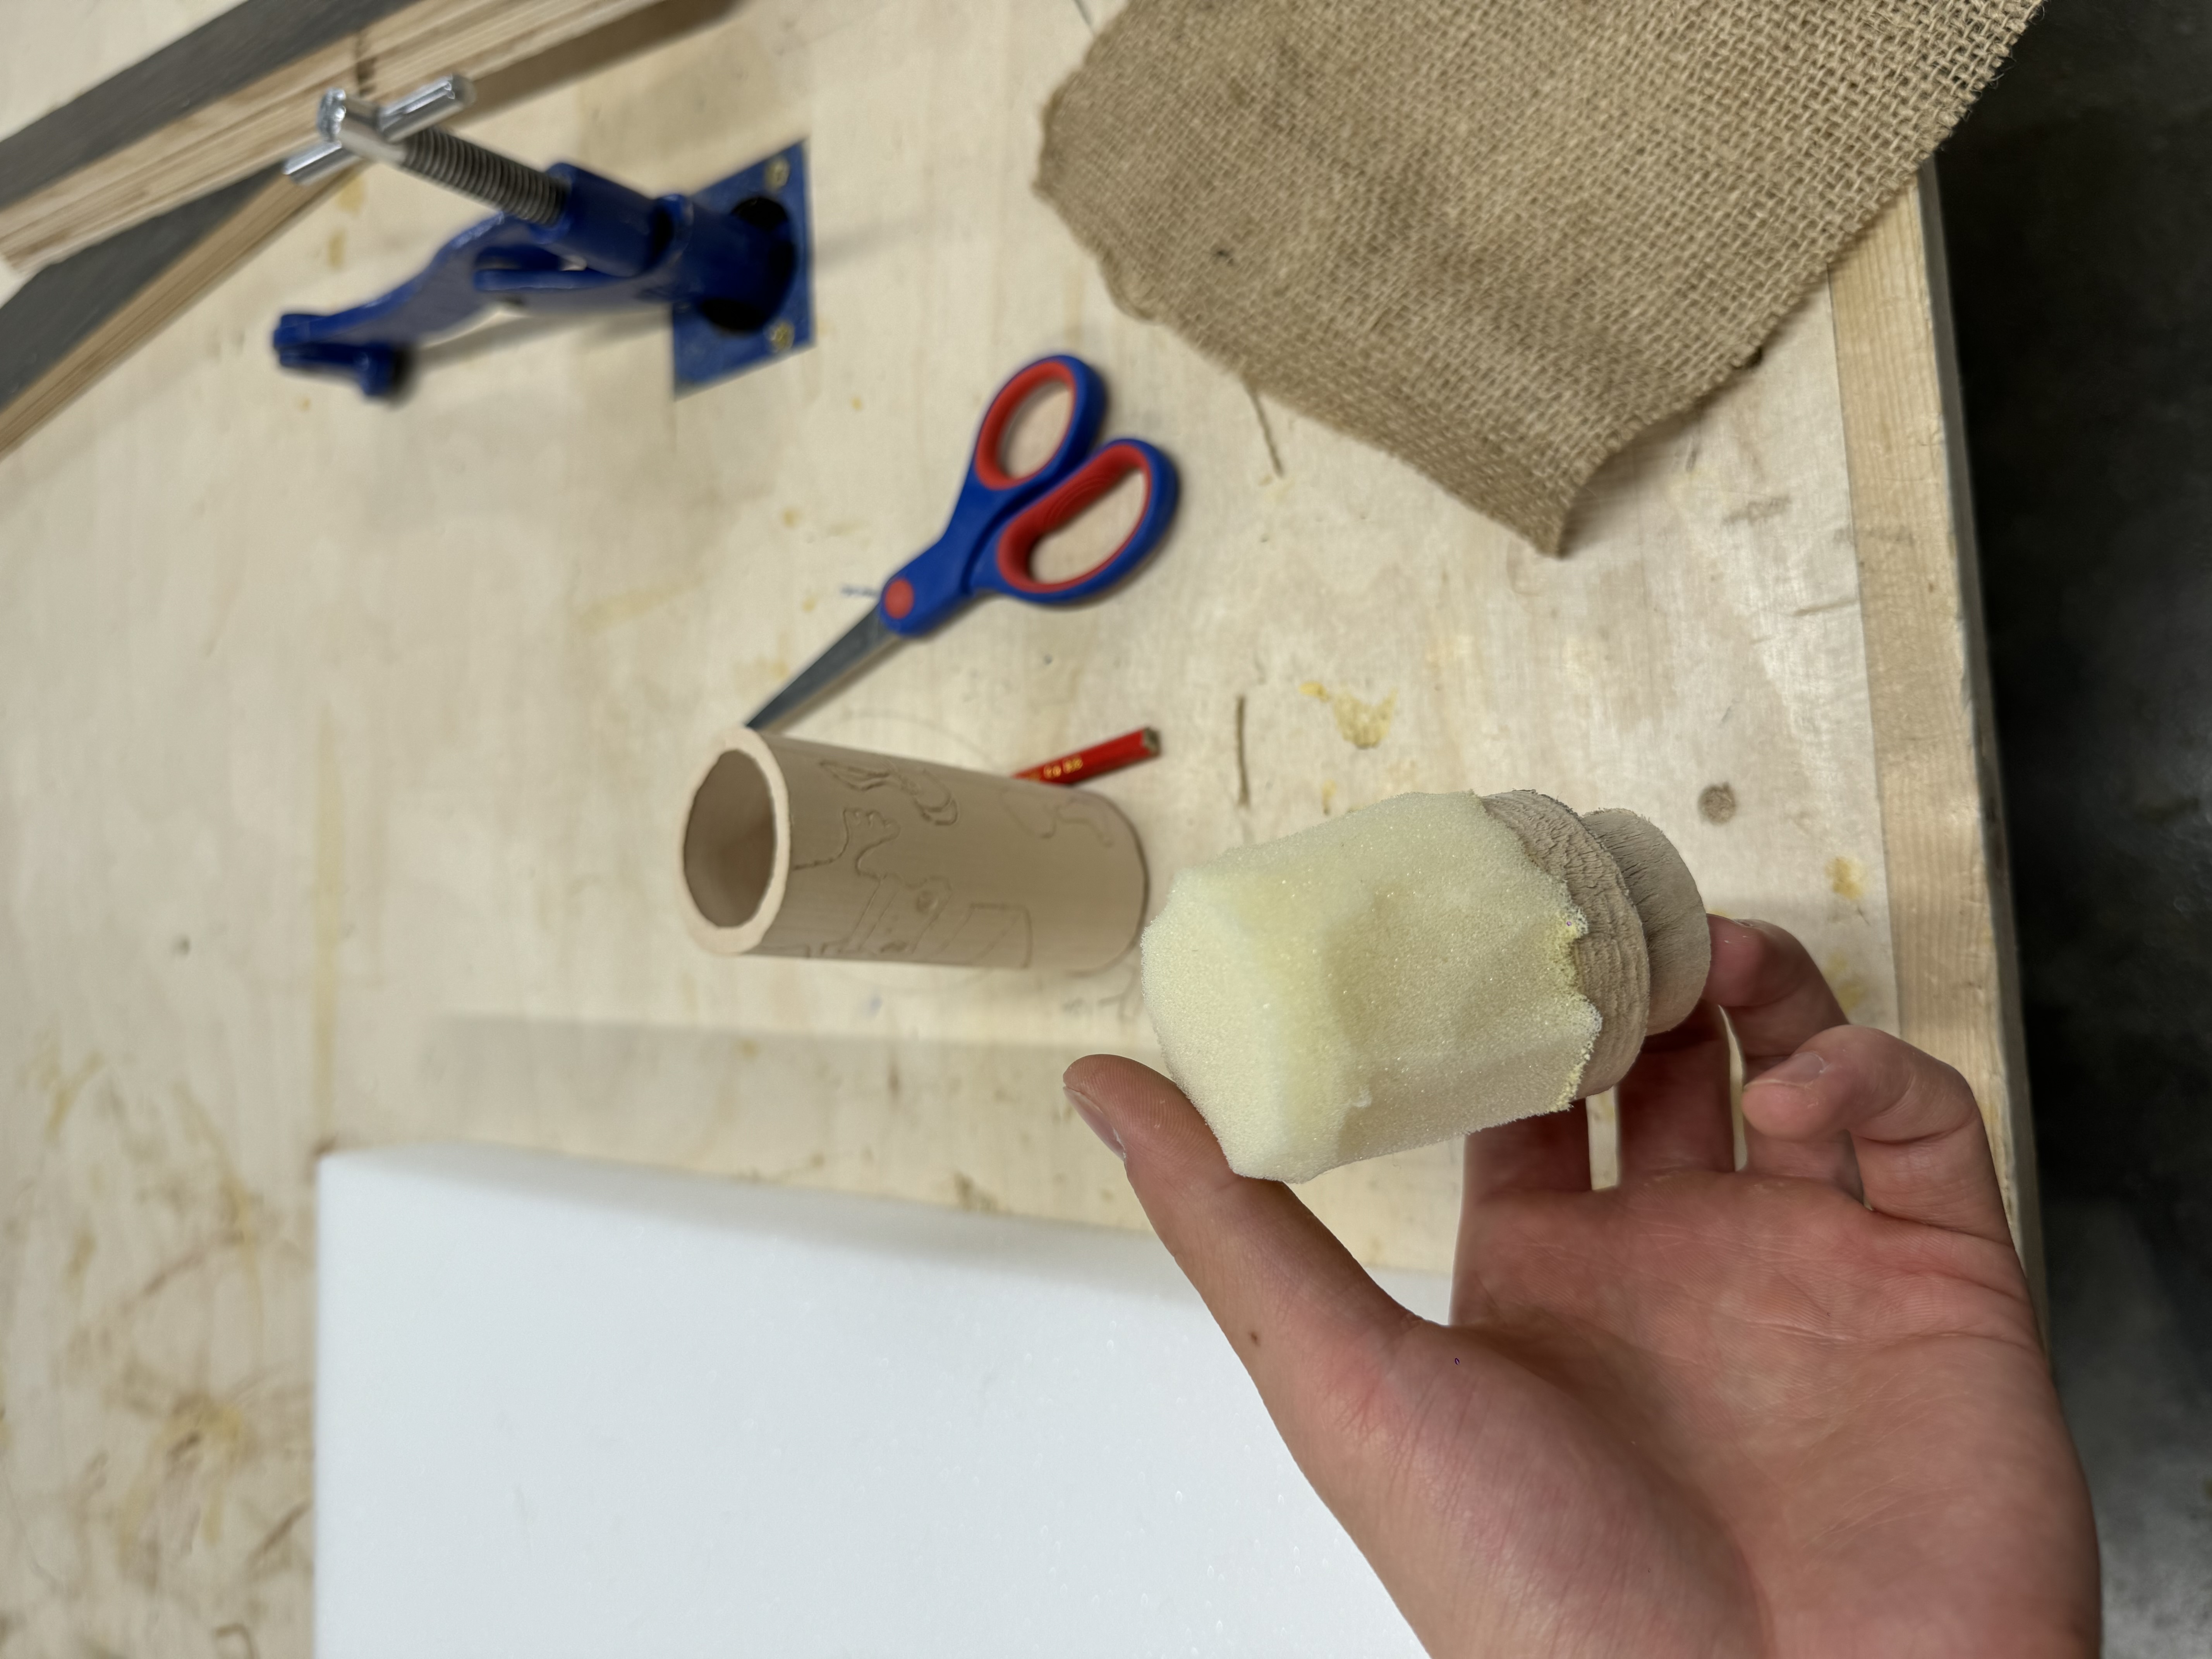
 For the previous sketchings, I wanted to make a cushion for it but I did not know how. After tutorial with Oscar, I got the structure of the cusion. The technician told me it would be much fast to make the wood disks in lathing rather than CNC.
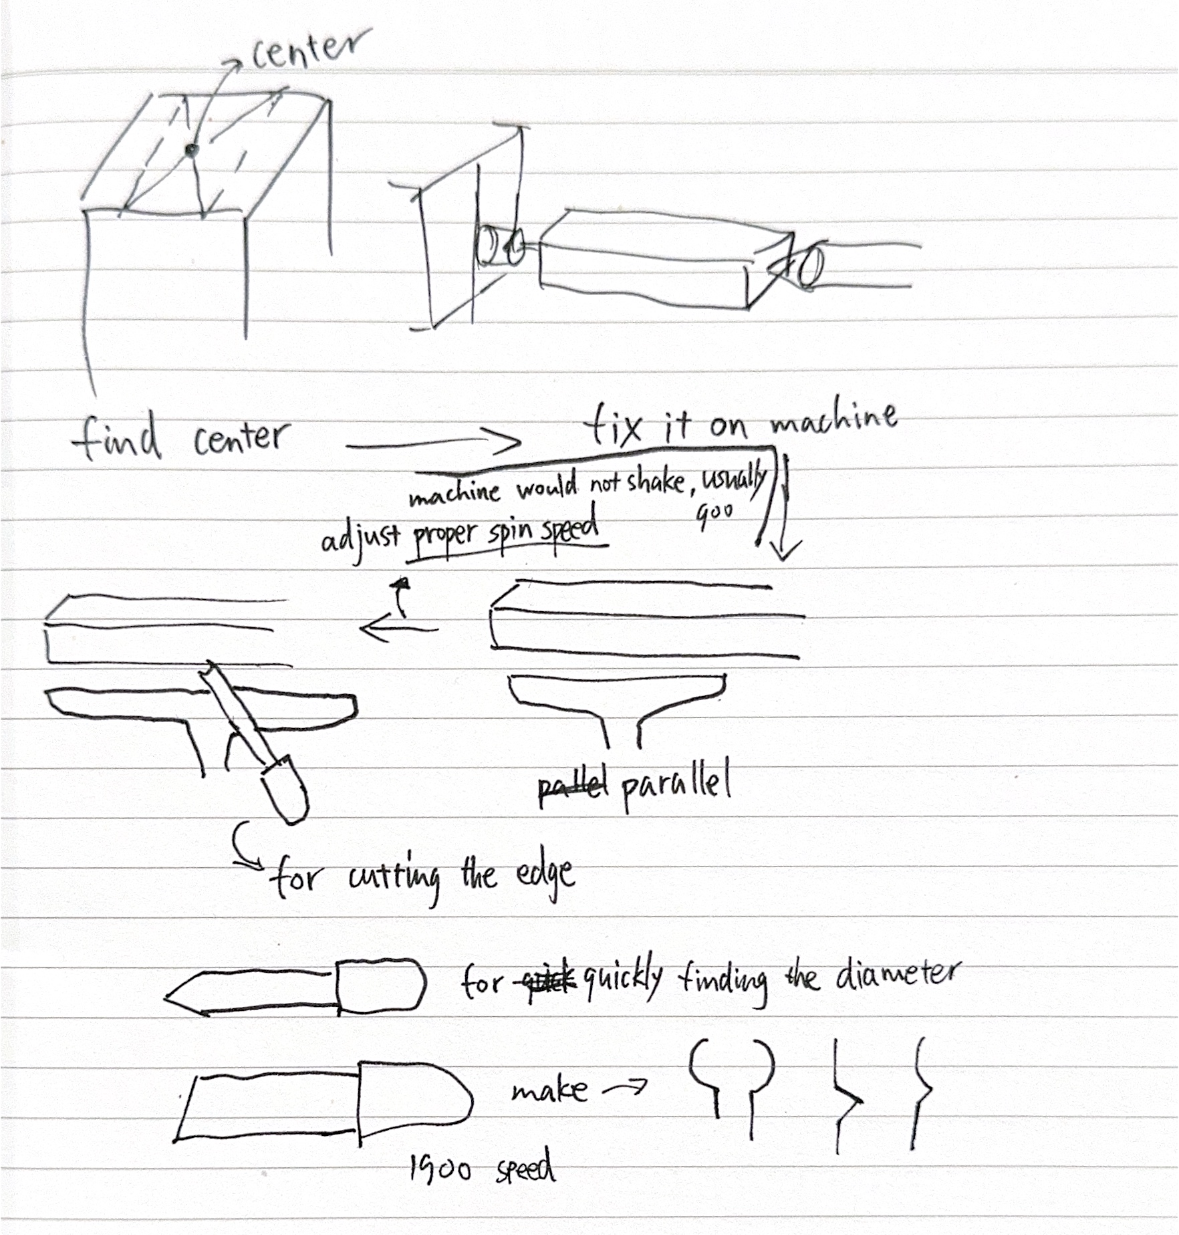


28/05/2024


29/05/2024
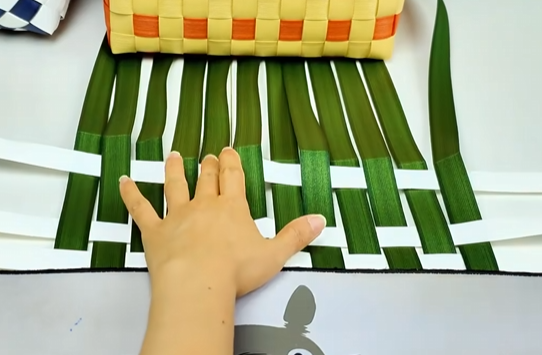
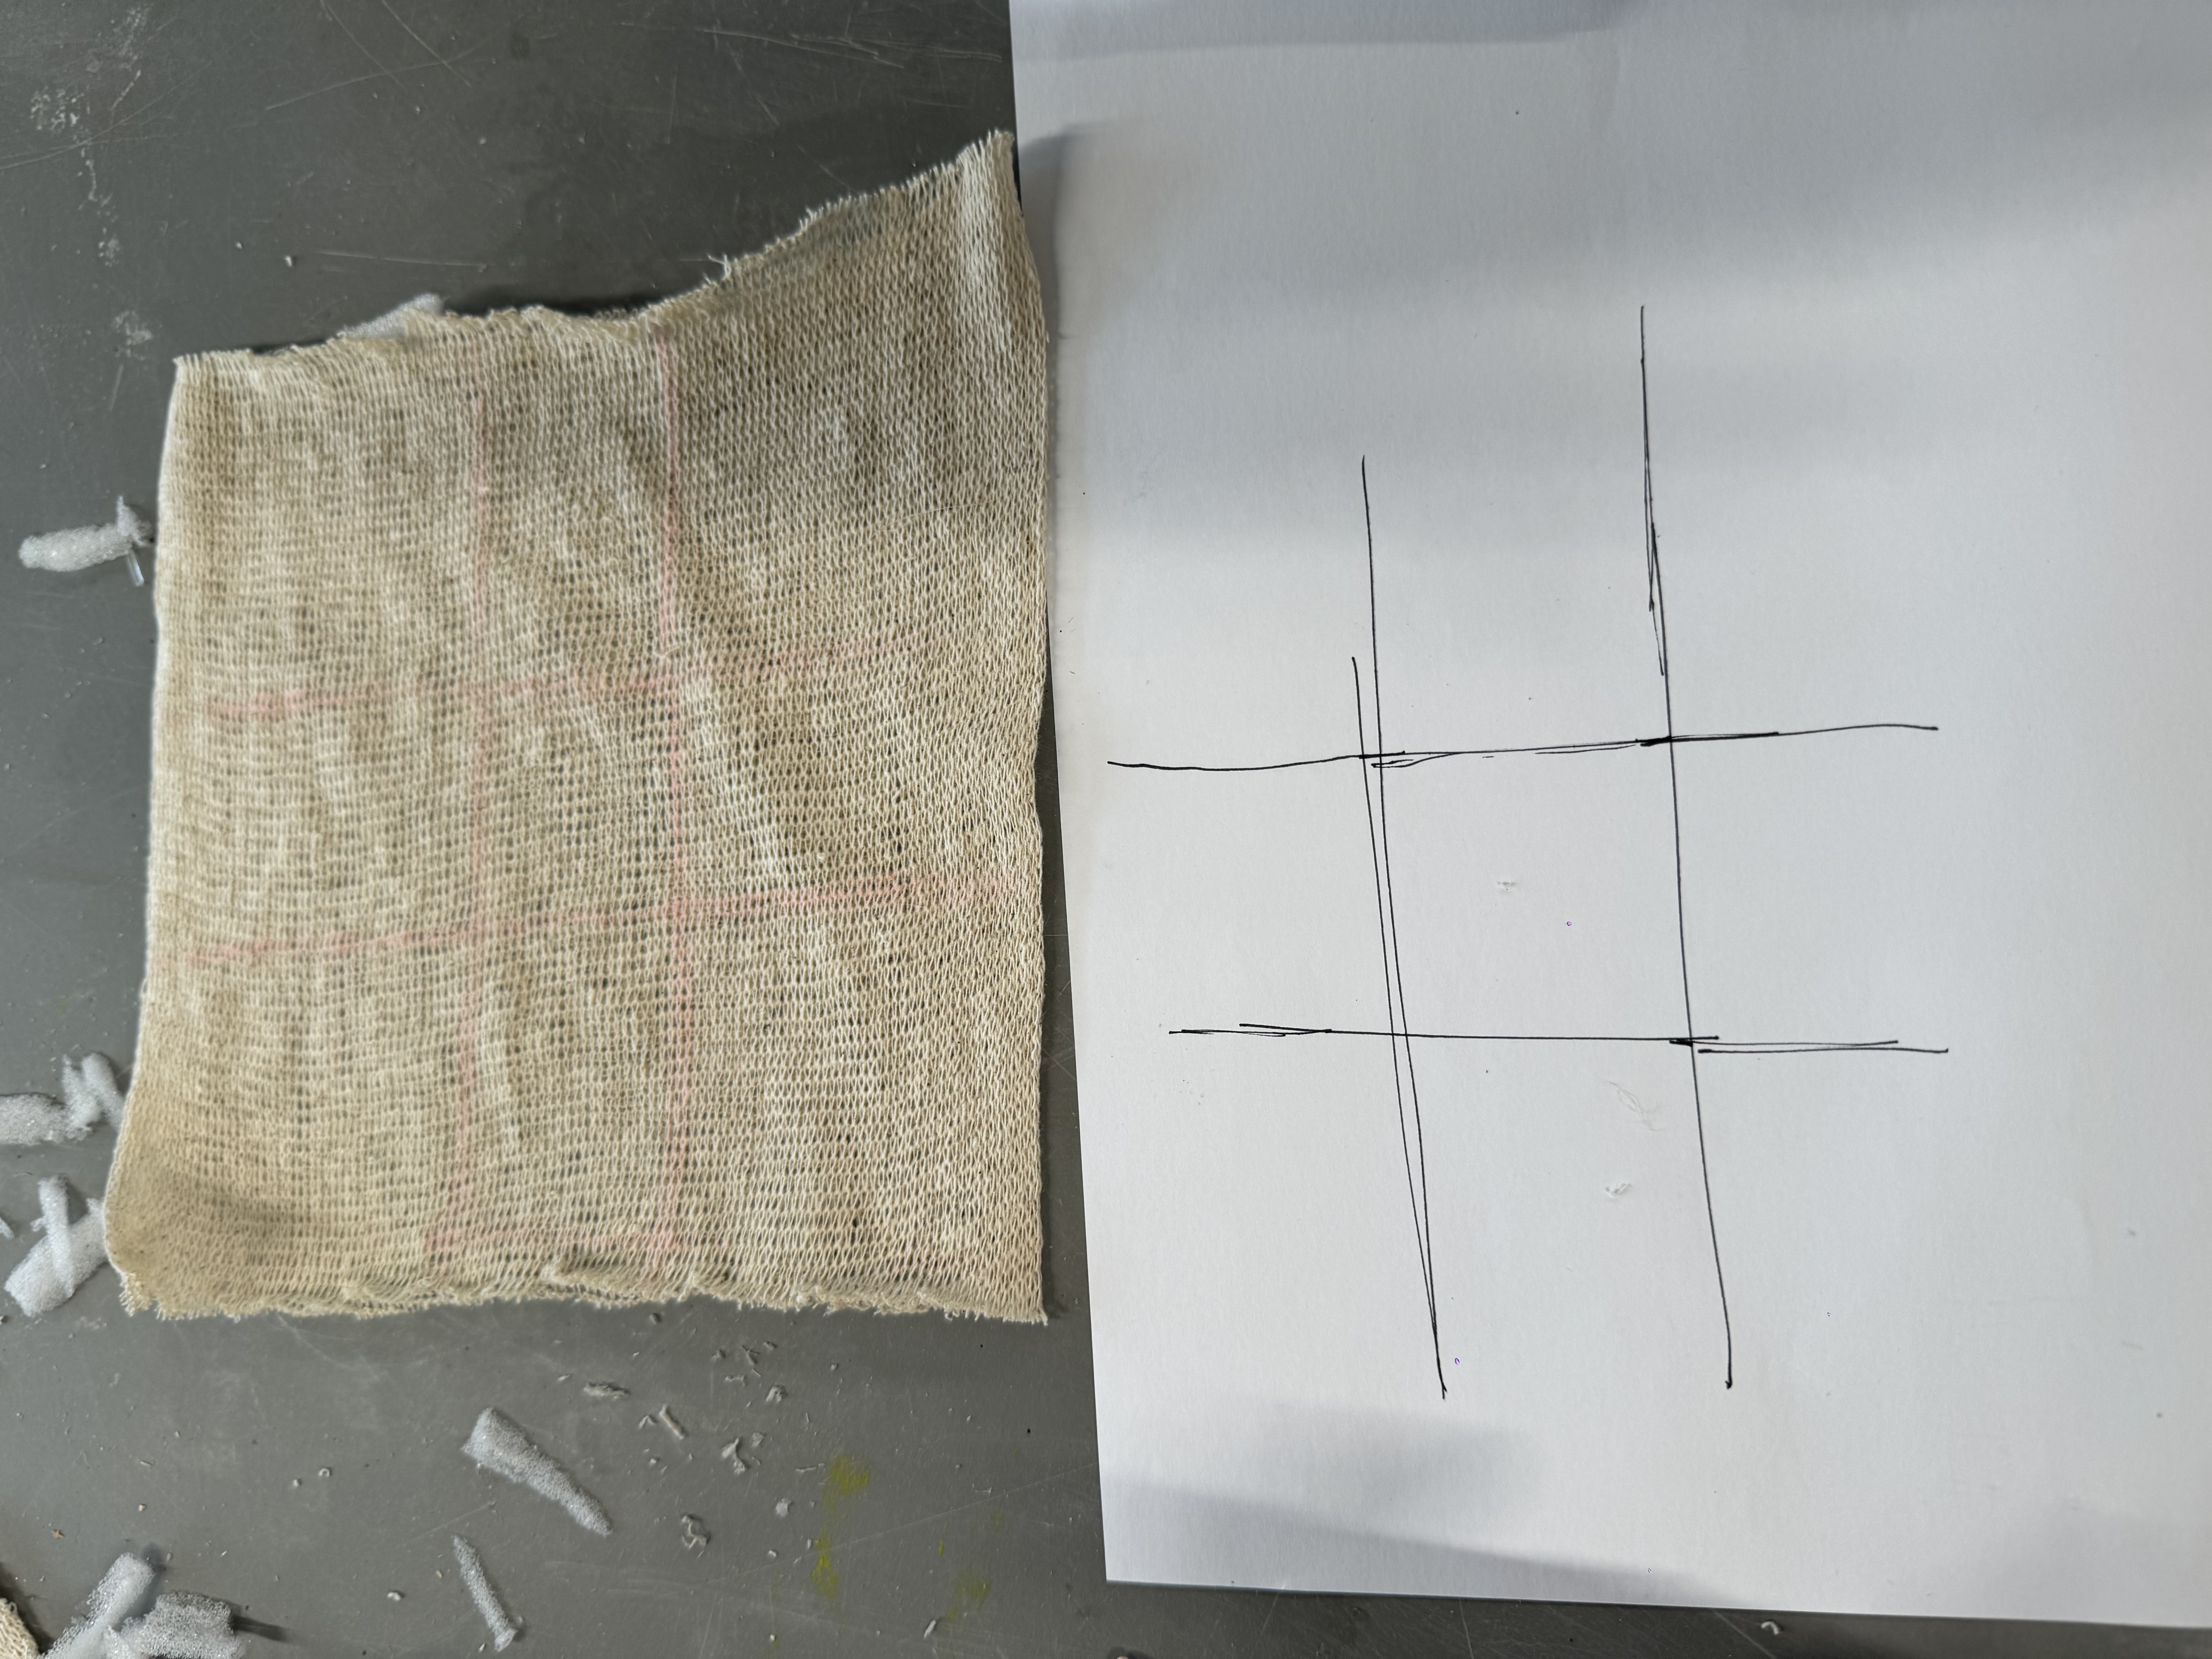
Before I worked on real scaled ceramic cylinders, I tested how can I wave it on the small sample. It would be easier for waving to fix the both ends, which I learnt from bilibili.

31/05/2024


09/07/2024
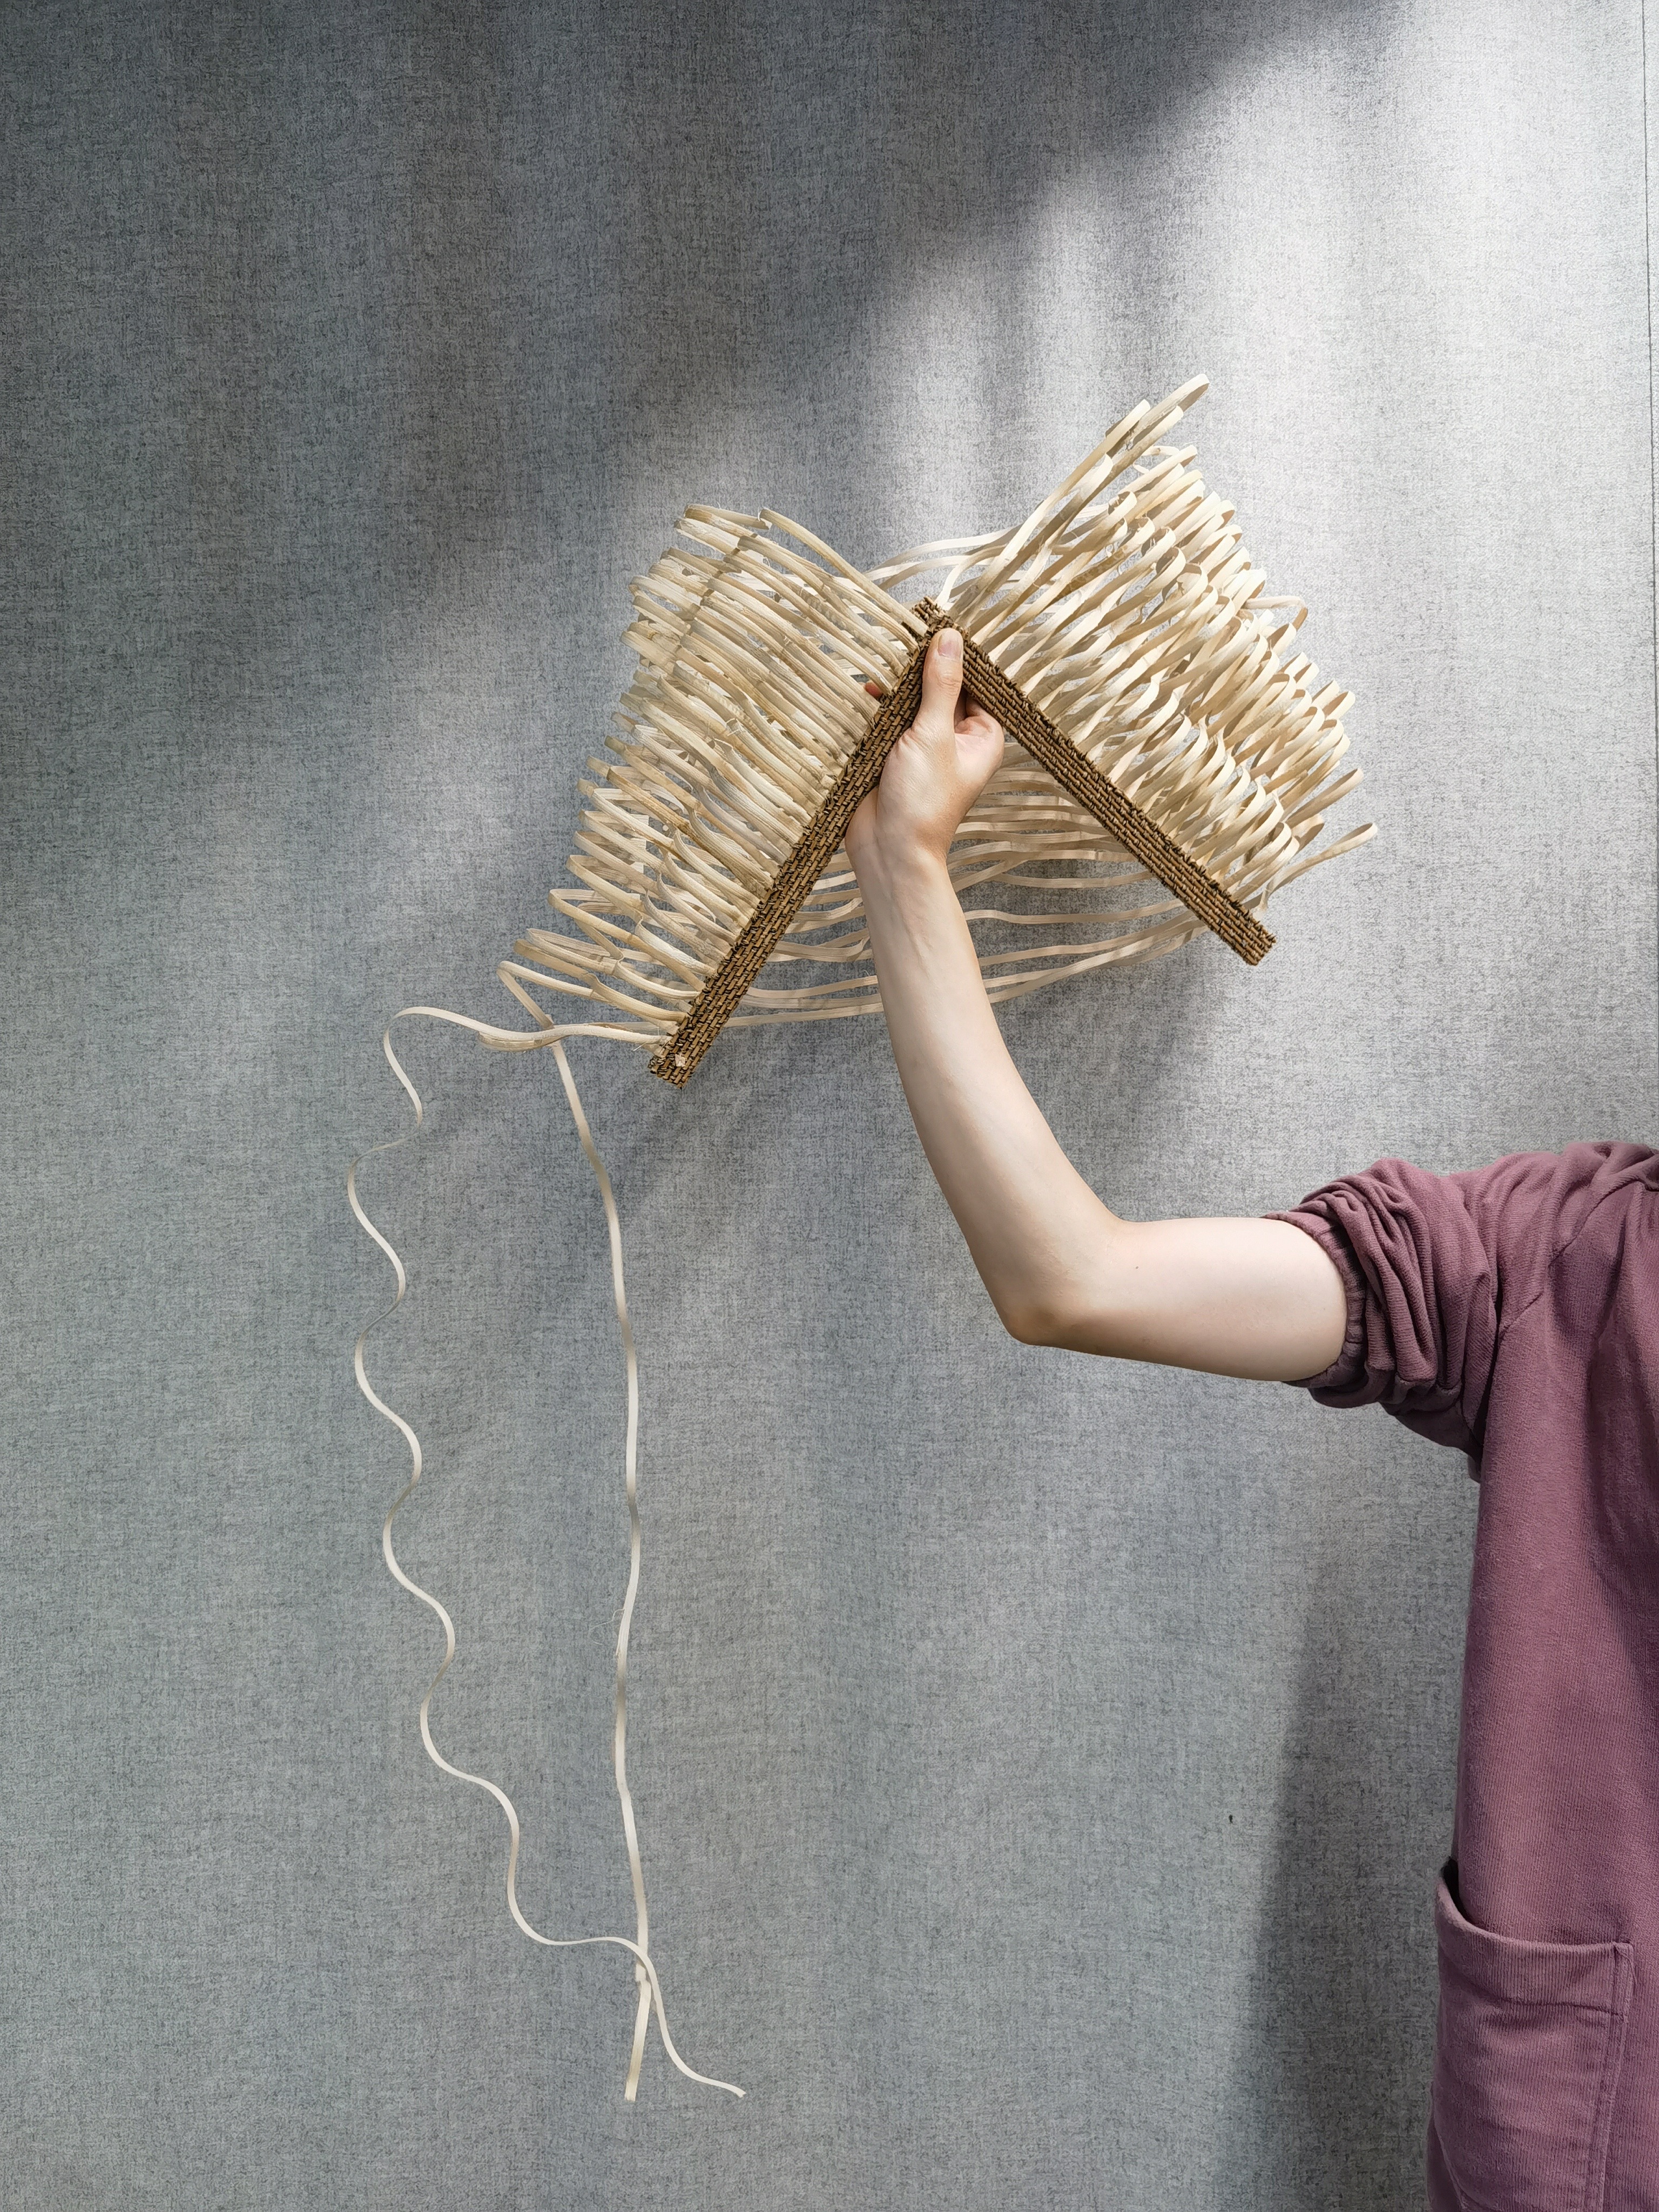
 When I was replacing the rattan, I found that the bent shape of the removed rattan was very beautiful. I thought, maybe I can use it to make a lamp in the future. This is also in line with the theme of sustainable development. This reminds me of the concept of cradle to cradle, which regards products as services. We provide a service instead of the product itself. What the customer buys is the right to use the product. The material of the product itself can belong to the company, so the company can recycle the damaged parts. It is a good thing for both parties. The company saves recycling costs, and the customer has product protection.

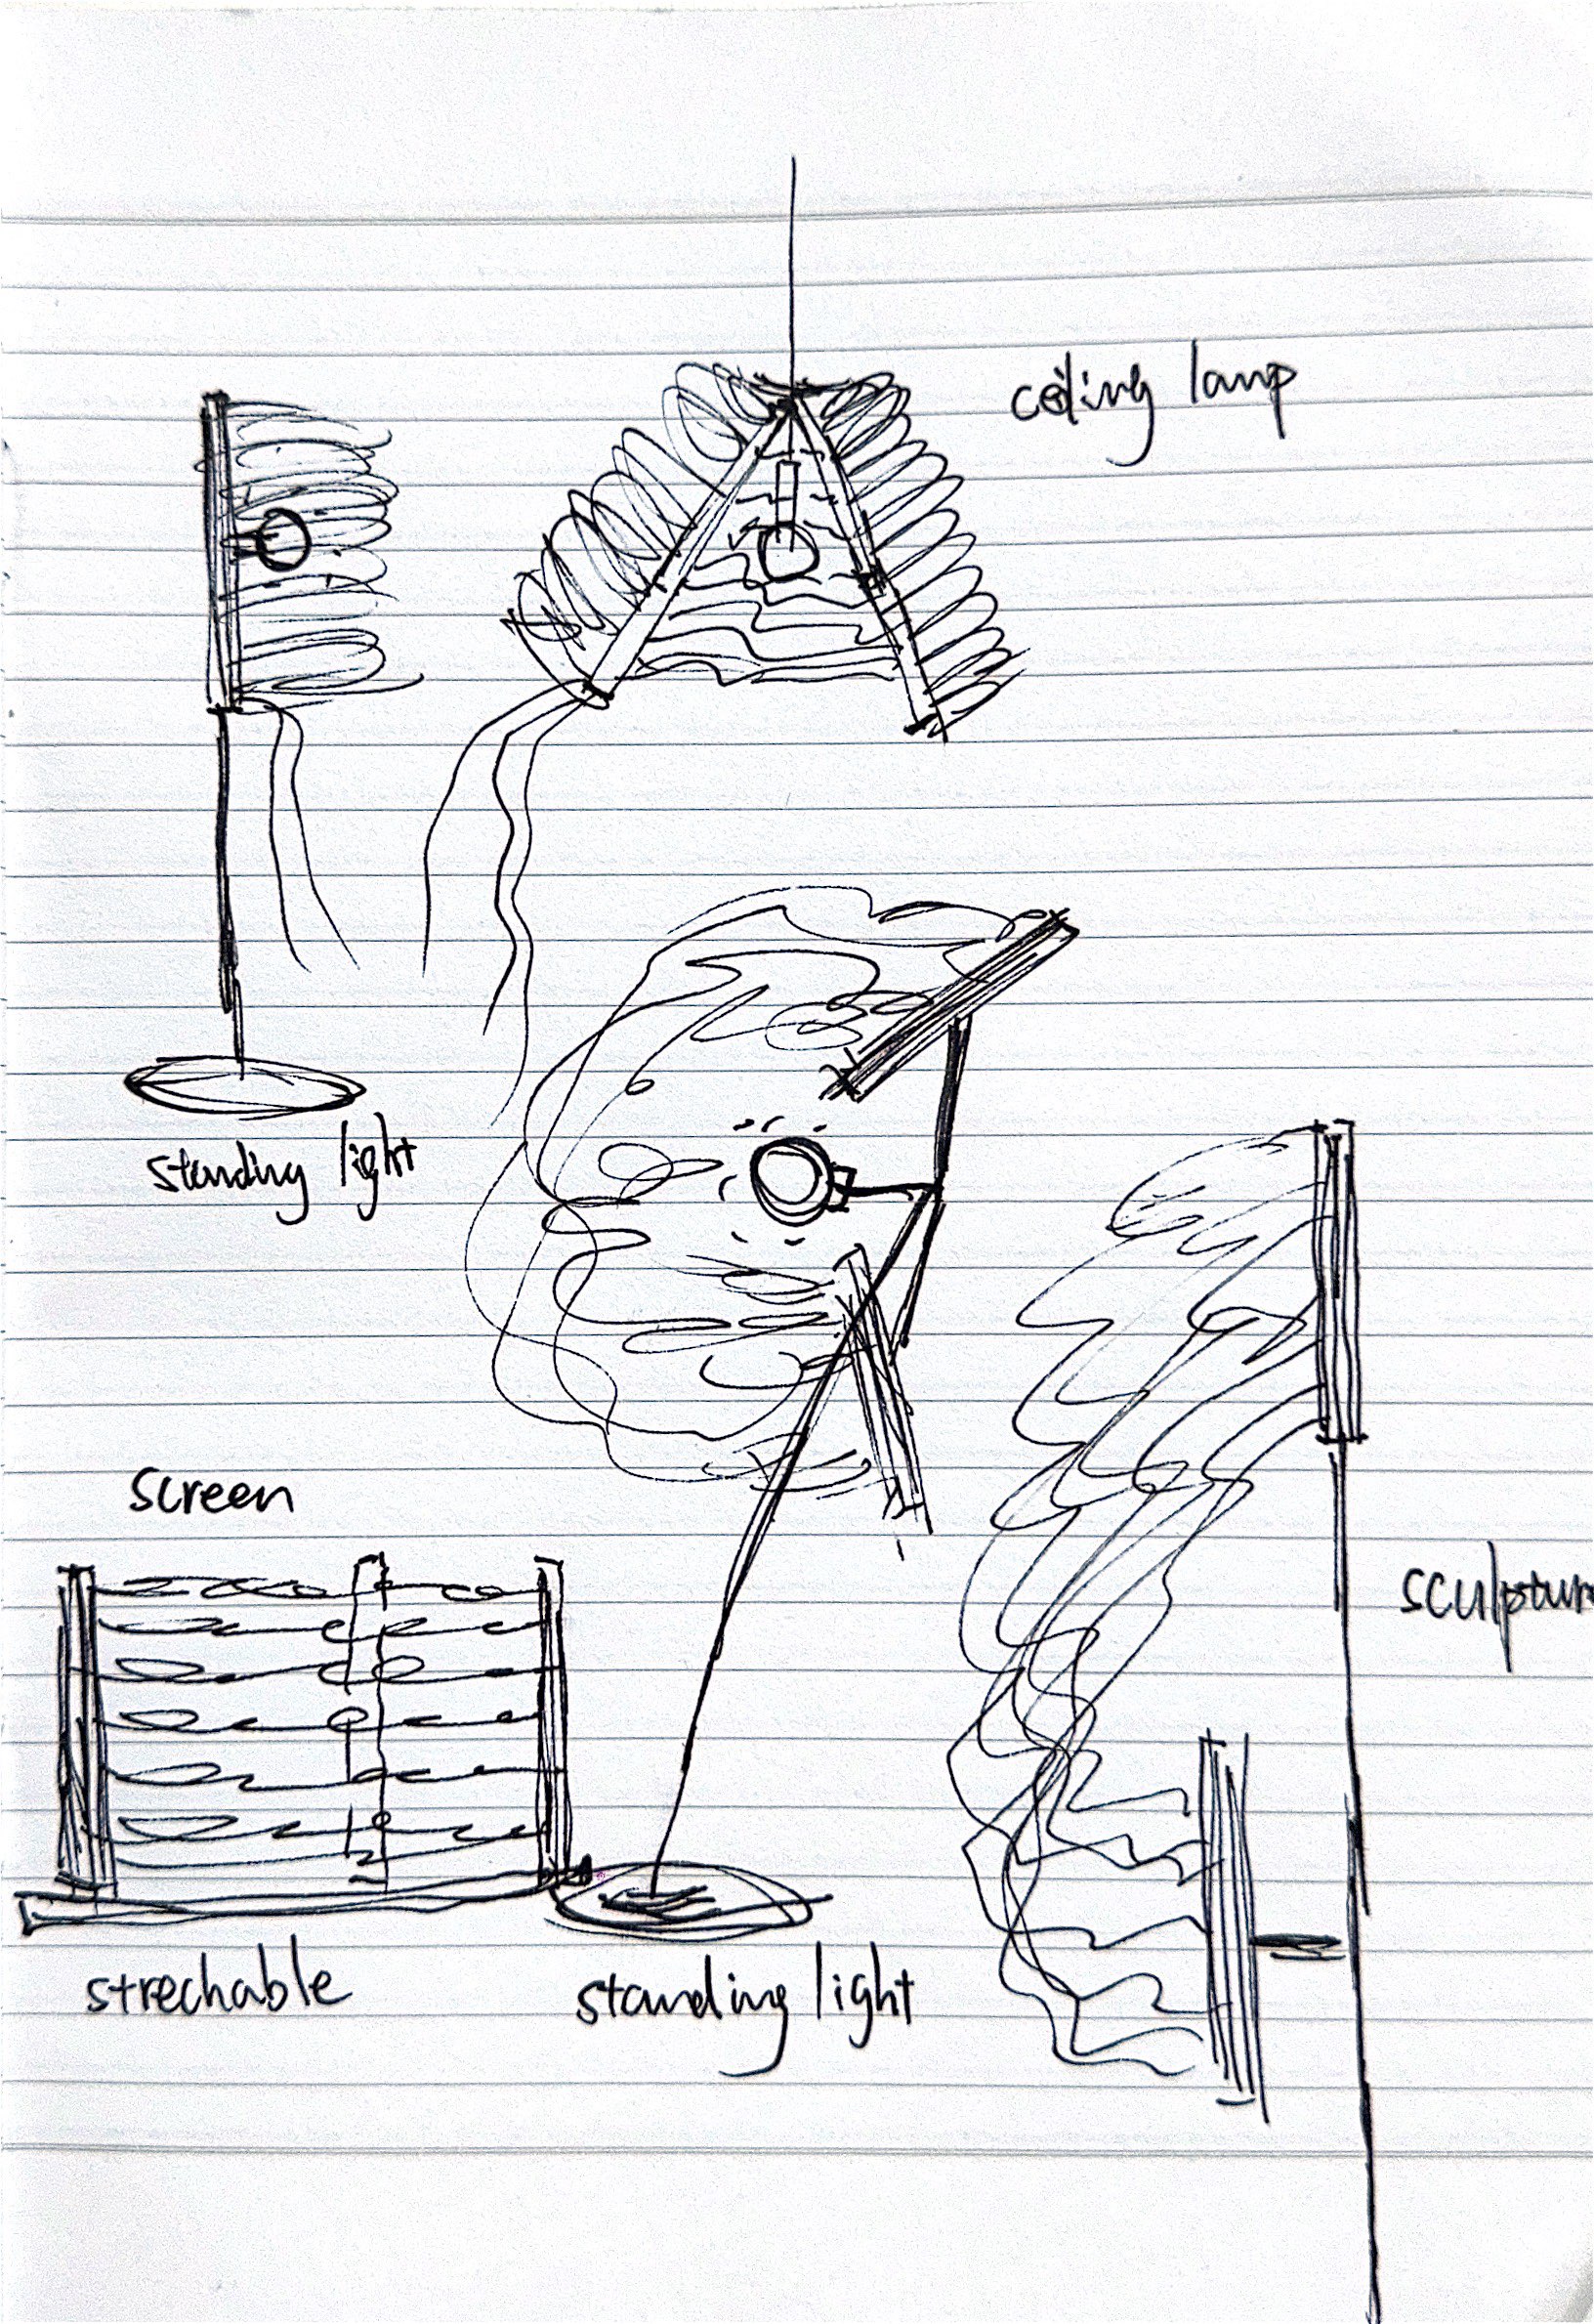
I tried different ways of displaying and came up with different ideas for furniture based on different ways of displaying. But I didn't know much about the arrangement of circuits, so I needed to look up some information and experiment.
11/07/2024

In order to give the product more visual possibilities, I tried to use the dyeing method. I asked for excess fabric from a company, which may increase the environmental protection attribute.