Works
Blog
-
Ceramic ashtray
![]()
-
Shoes Rack
-
Jean Wallet
-
The Emotional Utilitarian
-
Design Museum
-
Christo early works Exhibition
-
Numeric Skate Demo
-
The British Museum
-
Pitt rivers Museum
- Flax craft central
- Kate lecture
- LCC stiching tutorial
-
BOX by Max Lamb
-
Sheila Hicks: infinite potential
- Instagram viewing 1
- V&A Museum
- CCW MA graduation exhibition
- Scarf knitting
- Natural History Museum
- Tate Morden Museum
- The British Museum 2
- The Egyptian Museum
- Banksy Exhibition
- Tea table
- Cap making
- Unit 1 exhibition
- Remake shoes
- Antony Gormley Exhibition
- Tate Britain
-
Newspaper Ceramic
![]()
- Aromatherapy tray
- Kettle’s Yard
-
Paper samples for unit 2
![]()
- The Fitzwilliam Museum
- How to analyze the case
-
Woodcuts
![]()
- Collect 2024
-
Ceramic extrusion
![]()
- Tony’s cardboard space
- Tony’s tour London
- Ceramic London 2024
-
Wheel-throw learning
![]()
![]()
- CSM shows 2024
- Tony’s tour East London
- Portland Carving tour
- FUMI Casa al mare
![]()
- Silicone Molding in summer break
- London Transportation Museum
- Dongyang Chinese furniture market
- Prototype redoing for previous work
- Jingdezhen visiting
![]()
- London Design Festival 2024
- Hang for Fun lamp
![]()
![]()
- Emotion Breaker stool
![]()
- Reverse Grind table
![]()
Yusen
Info
Previous works by Yusen have delved deeply into themes of functionality, sustainability, and humanization. Yusen’s practice highlights a curiosity about cultural influences and their potential to inform modern design approaches, blending cultural resonance with innovative environmental solutions.
36. Woodcuts
23/02/2024


I saw a terrazzo made of glass and cement in a book. The book said it was an environmentally friendly design that recycles waste glass bottles on the beach. So I was very interested in terrazzo, so I first made a cement sample in a cup using cement and scrap clay fragments. Because of the Woodcuts project and being inspired by Max Lamb, I came up with an idea, which is to combine wood waste and cement to make terrazzo, and then use this terrazzo to make furniture and connect it with wood. I think this is also sustainable design to a certain extent. , because the table legs and tabletop are replaceable. But Simons believes that cement is not an environmentally friendly material. Therefore, I want to conduct further research on the definition of environmentally friendly design and whether cement materials are environmentally friendly materials. I made the material out of sand, cement, and wood, but found it wasn't strong, I thought I added too much sand. I may use less sand or substitute materials next time.
Bridget told me about a similar company that uses wood to make terrazzo, but I found that their company only made a thin layer on the surface. Their materials are made from wood waste, mineral powders, and environmentally friendly binders. This replaces cement with mineral powder. It does look more environmentally friendly. I bought a sample and planned to see how it feels.


15/04/2024


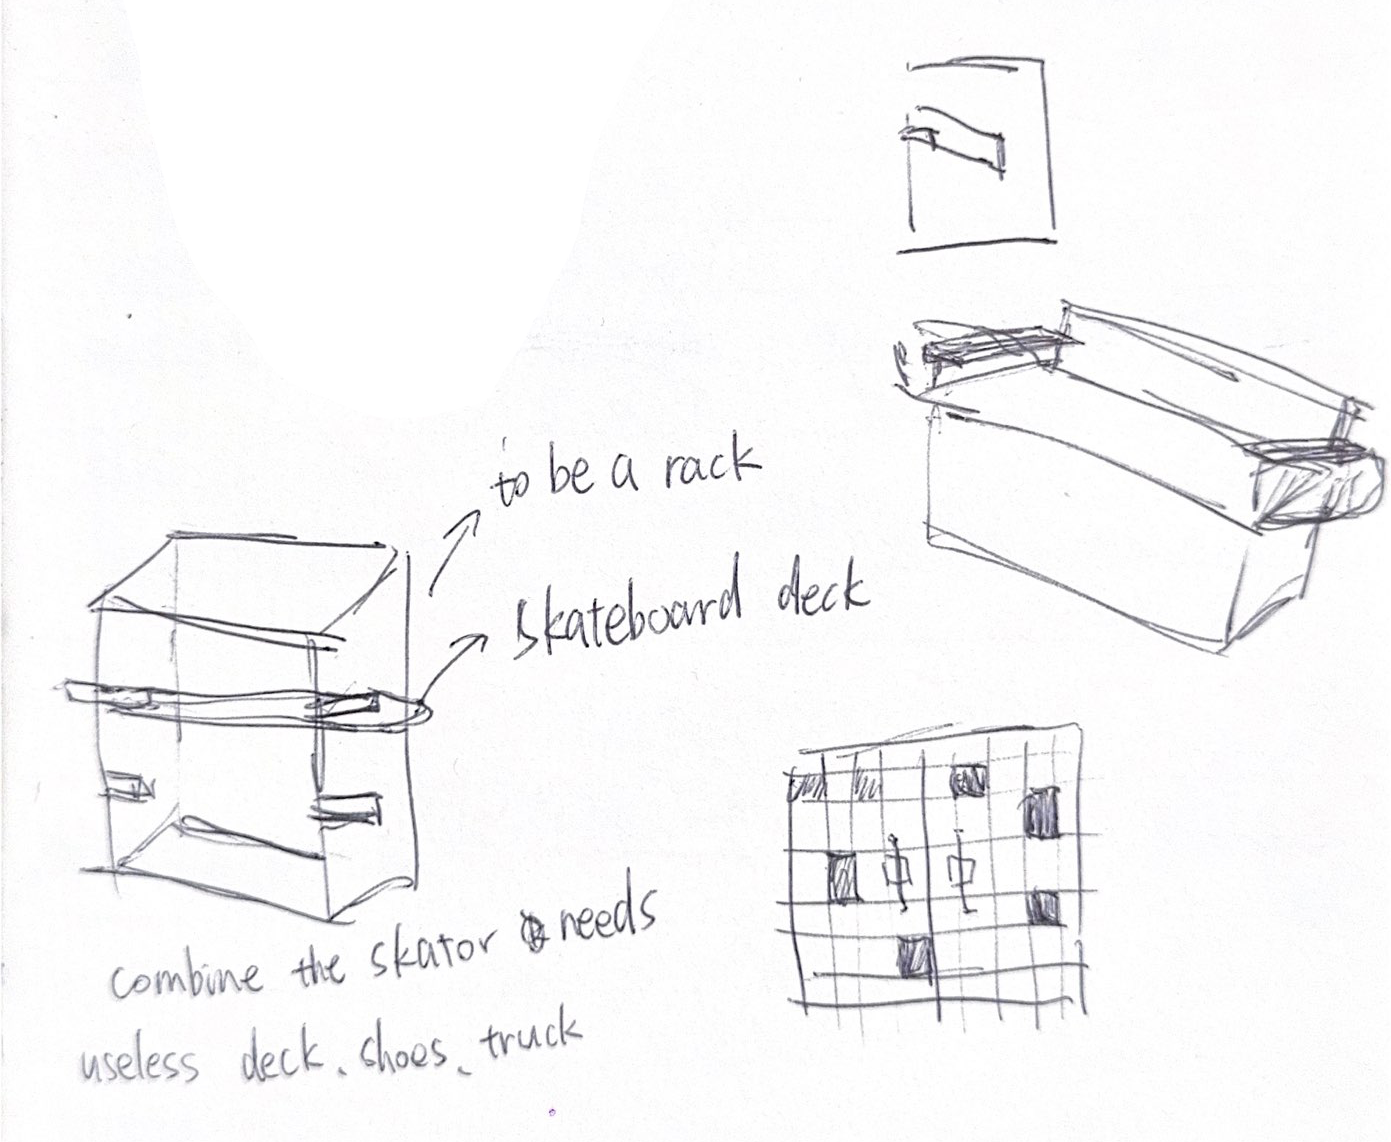
I just thought about making something that combines skateboard props and furniture. And listed a few of my goals. But after Oscar's tutorial, it is very difficult to achieve the two goals of not easy to steal and easy to move at the same time, and it is difficult for one thing not to be stolen. And Oscar pointed out that I should use a 1:5 scale to make the model, so that I can imagine what it will look like in the end.


24/04/2024


 I think the previous plan is not appropriate enough for the theme of sustainable. Although it is made of waste materials and multifunctional as a point that fits the theme, people cannot think of sustainable design when they see this work. So I'm going to use another approach to design, which is to use waste through design. This is inspired by banana box shelf and plastic storage container. I'm going to make an item using discarded skateboard supplies.
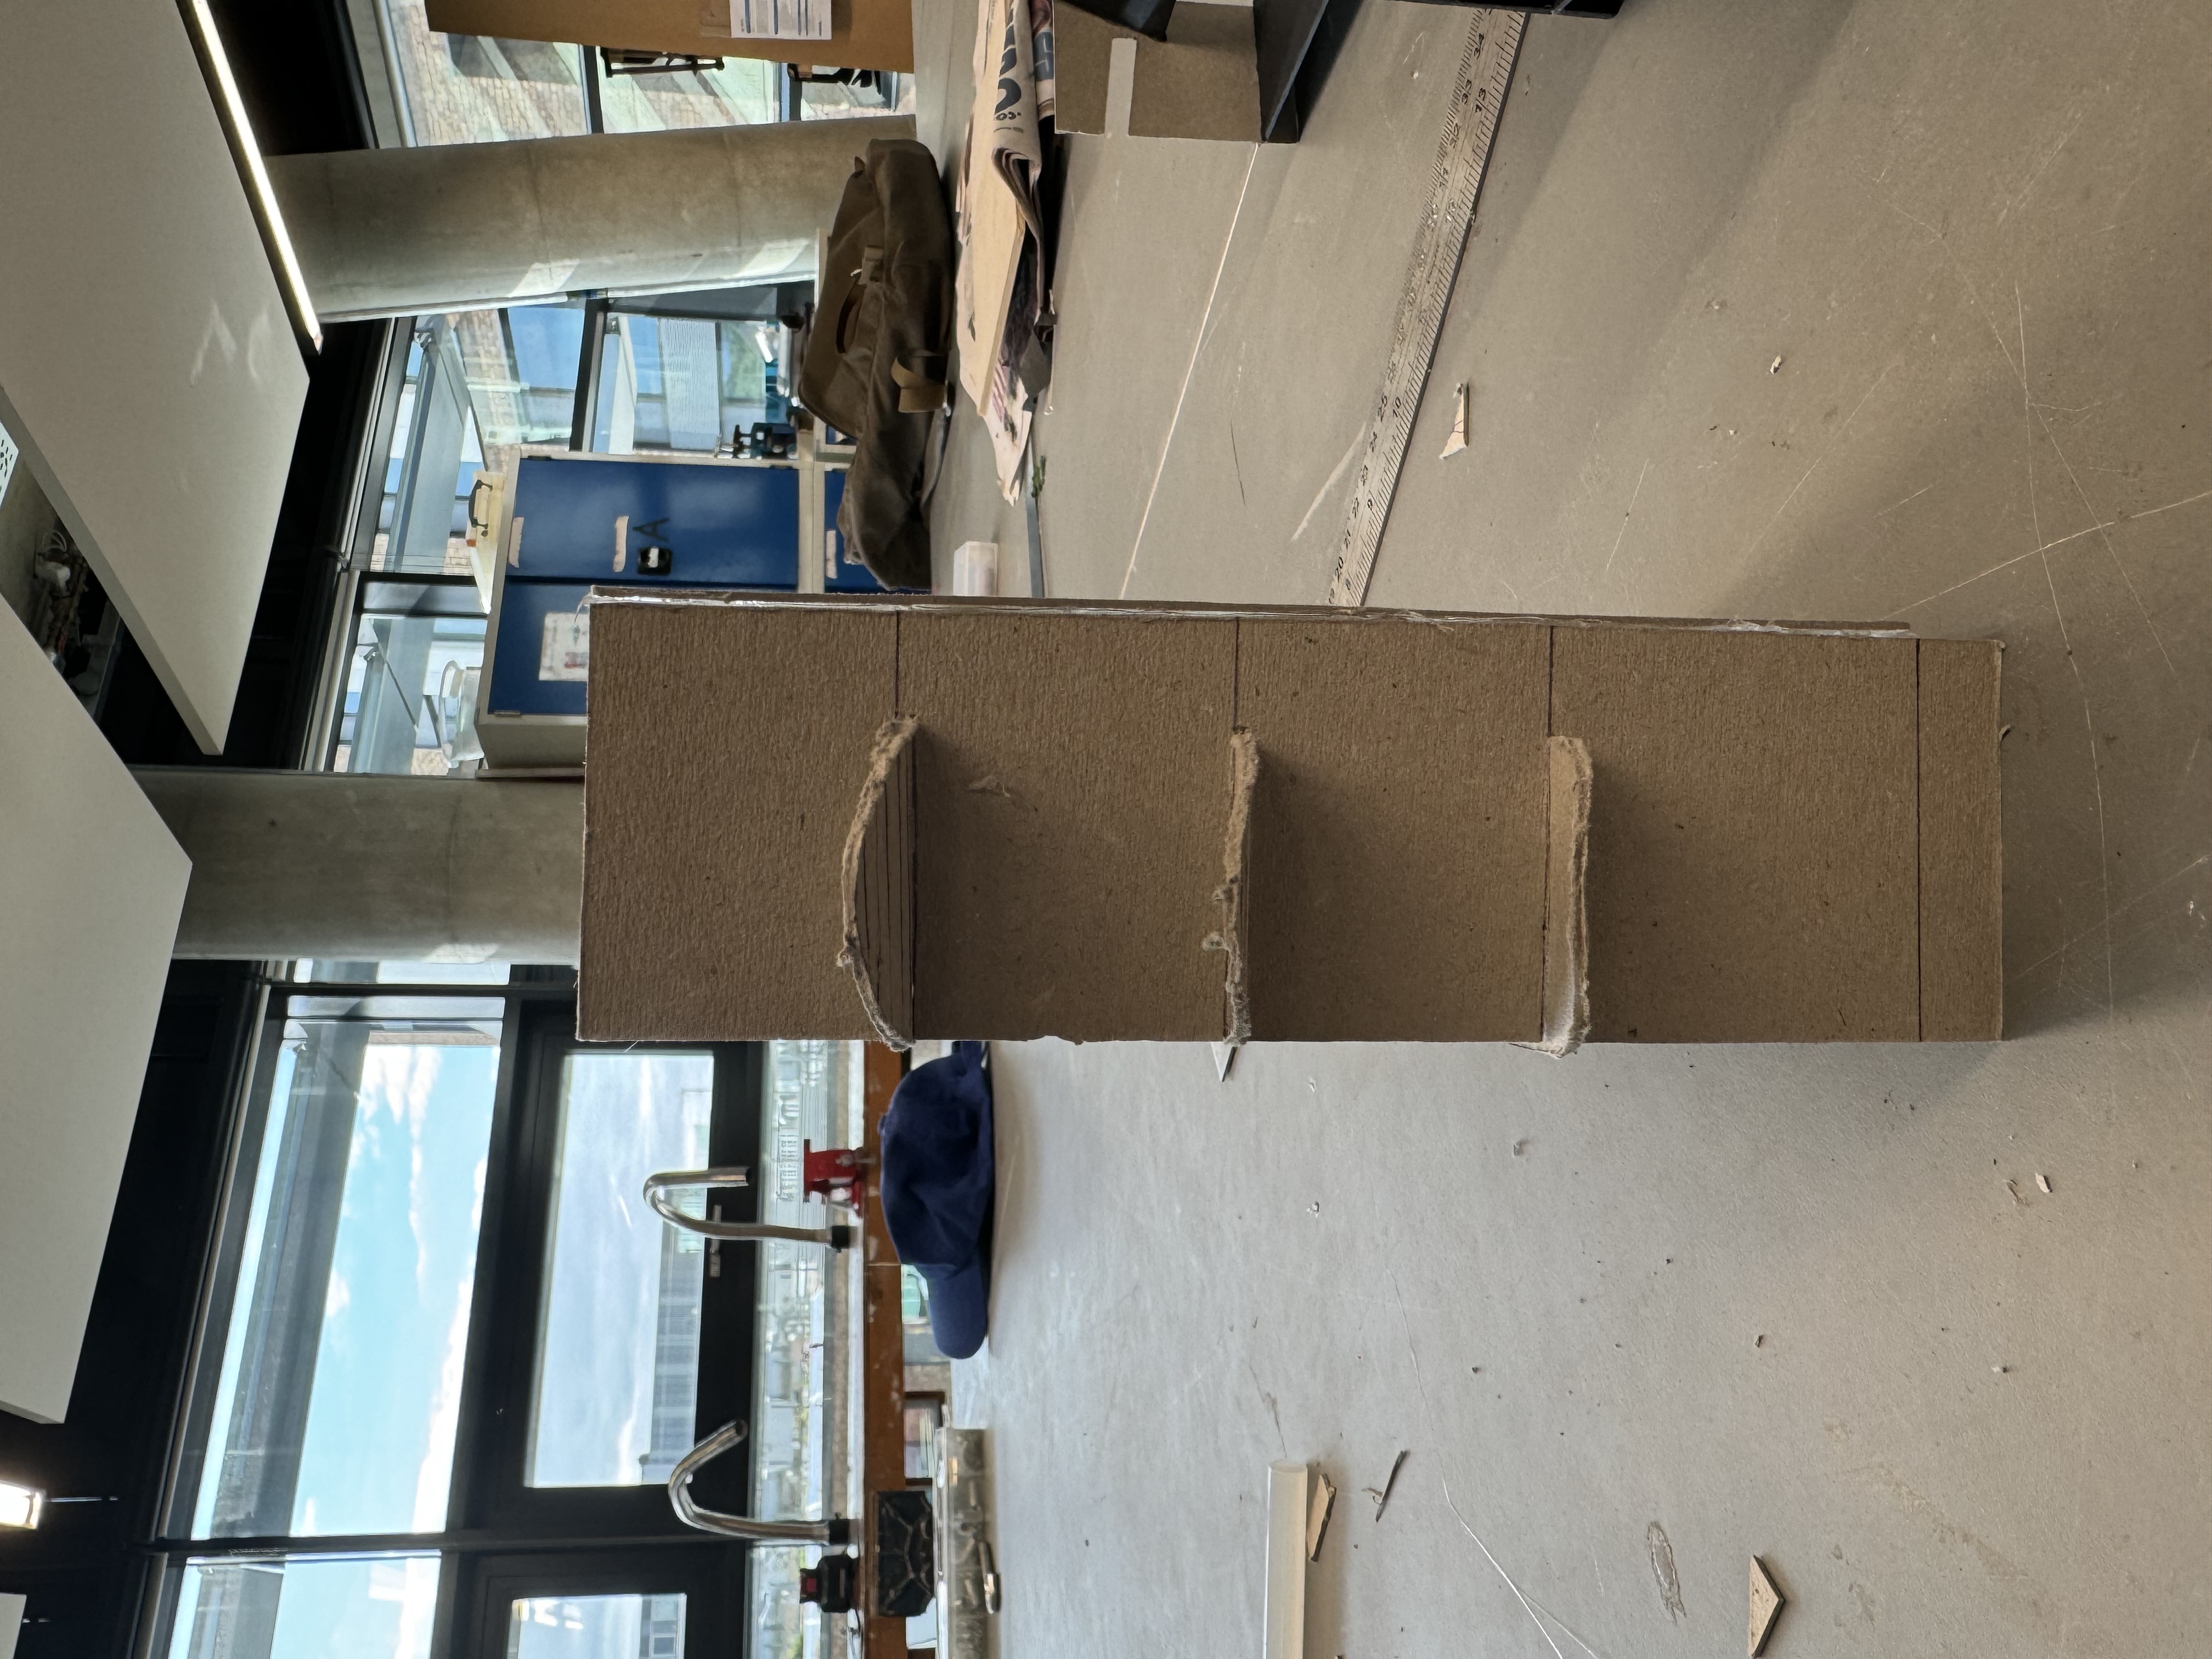
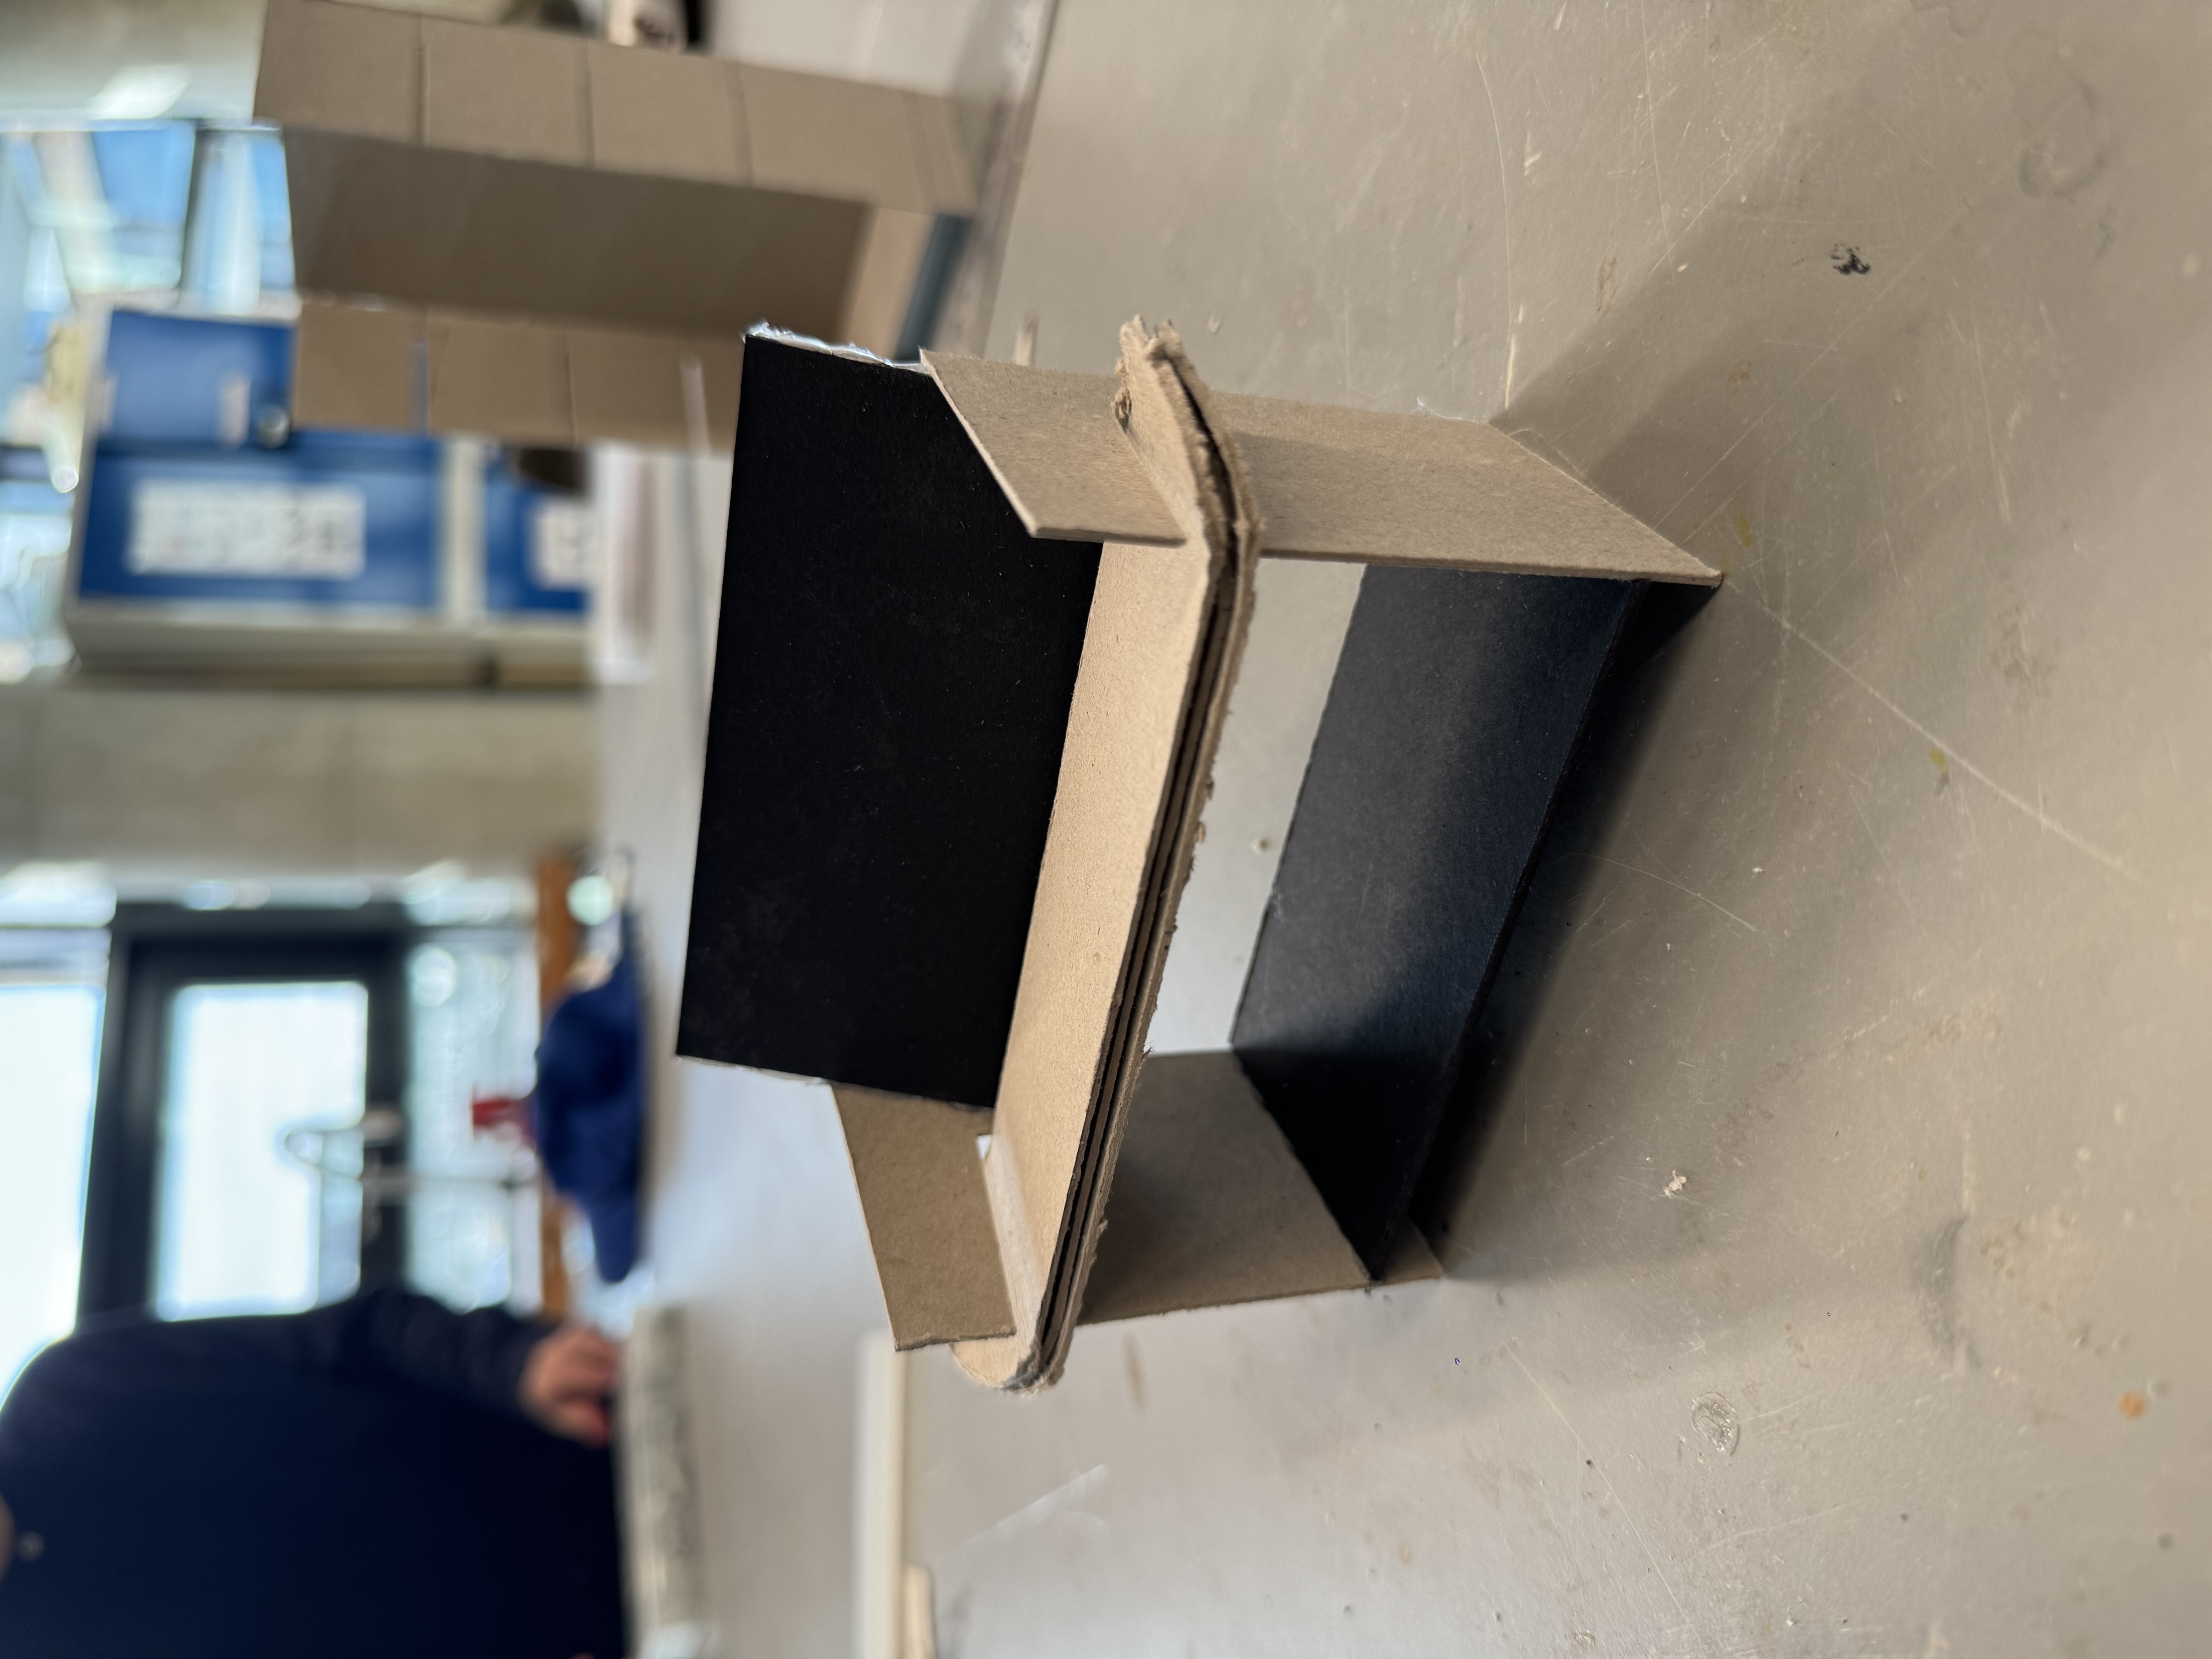
The first model idea is a shoe cabinet. I also iterated once and made the angle at which the board is inserted slightly tilted to ensure that the board is inserted into the deepest position. The top part was also beveled to echo the angle of the board.


The second idea is a small chair. Compared with the second-generation cabinet, I also increased the gap height, which can accommodate more boards. Users can put new boards on top and old boards on the bottom. I think the improvement point of my model can be to continue to optimize the insertion place, because people sitting on it will make the board slide, and even if it is made slanted, there is no guarantee that it will not slide out. If you add something to the armrests and back of the chair, it would make sitting more comfortable.
Personally I prefer the chair solution.

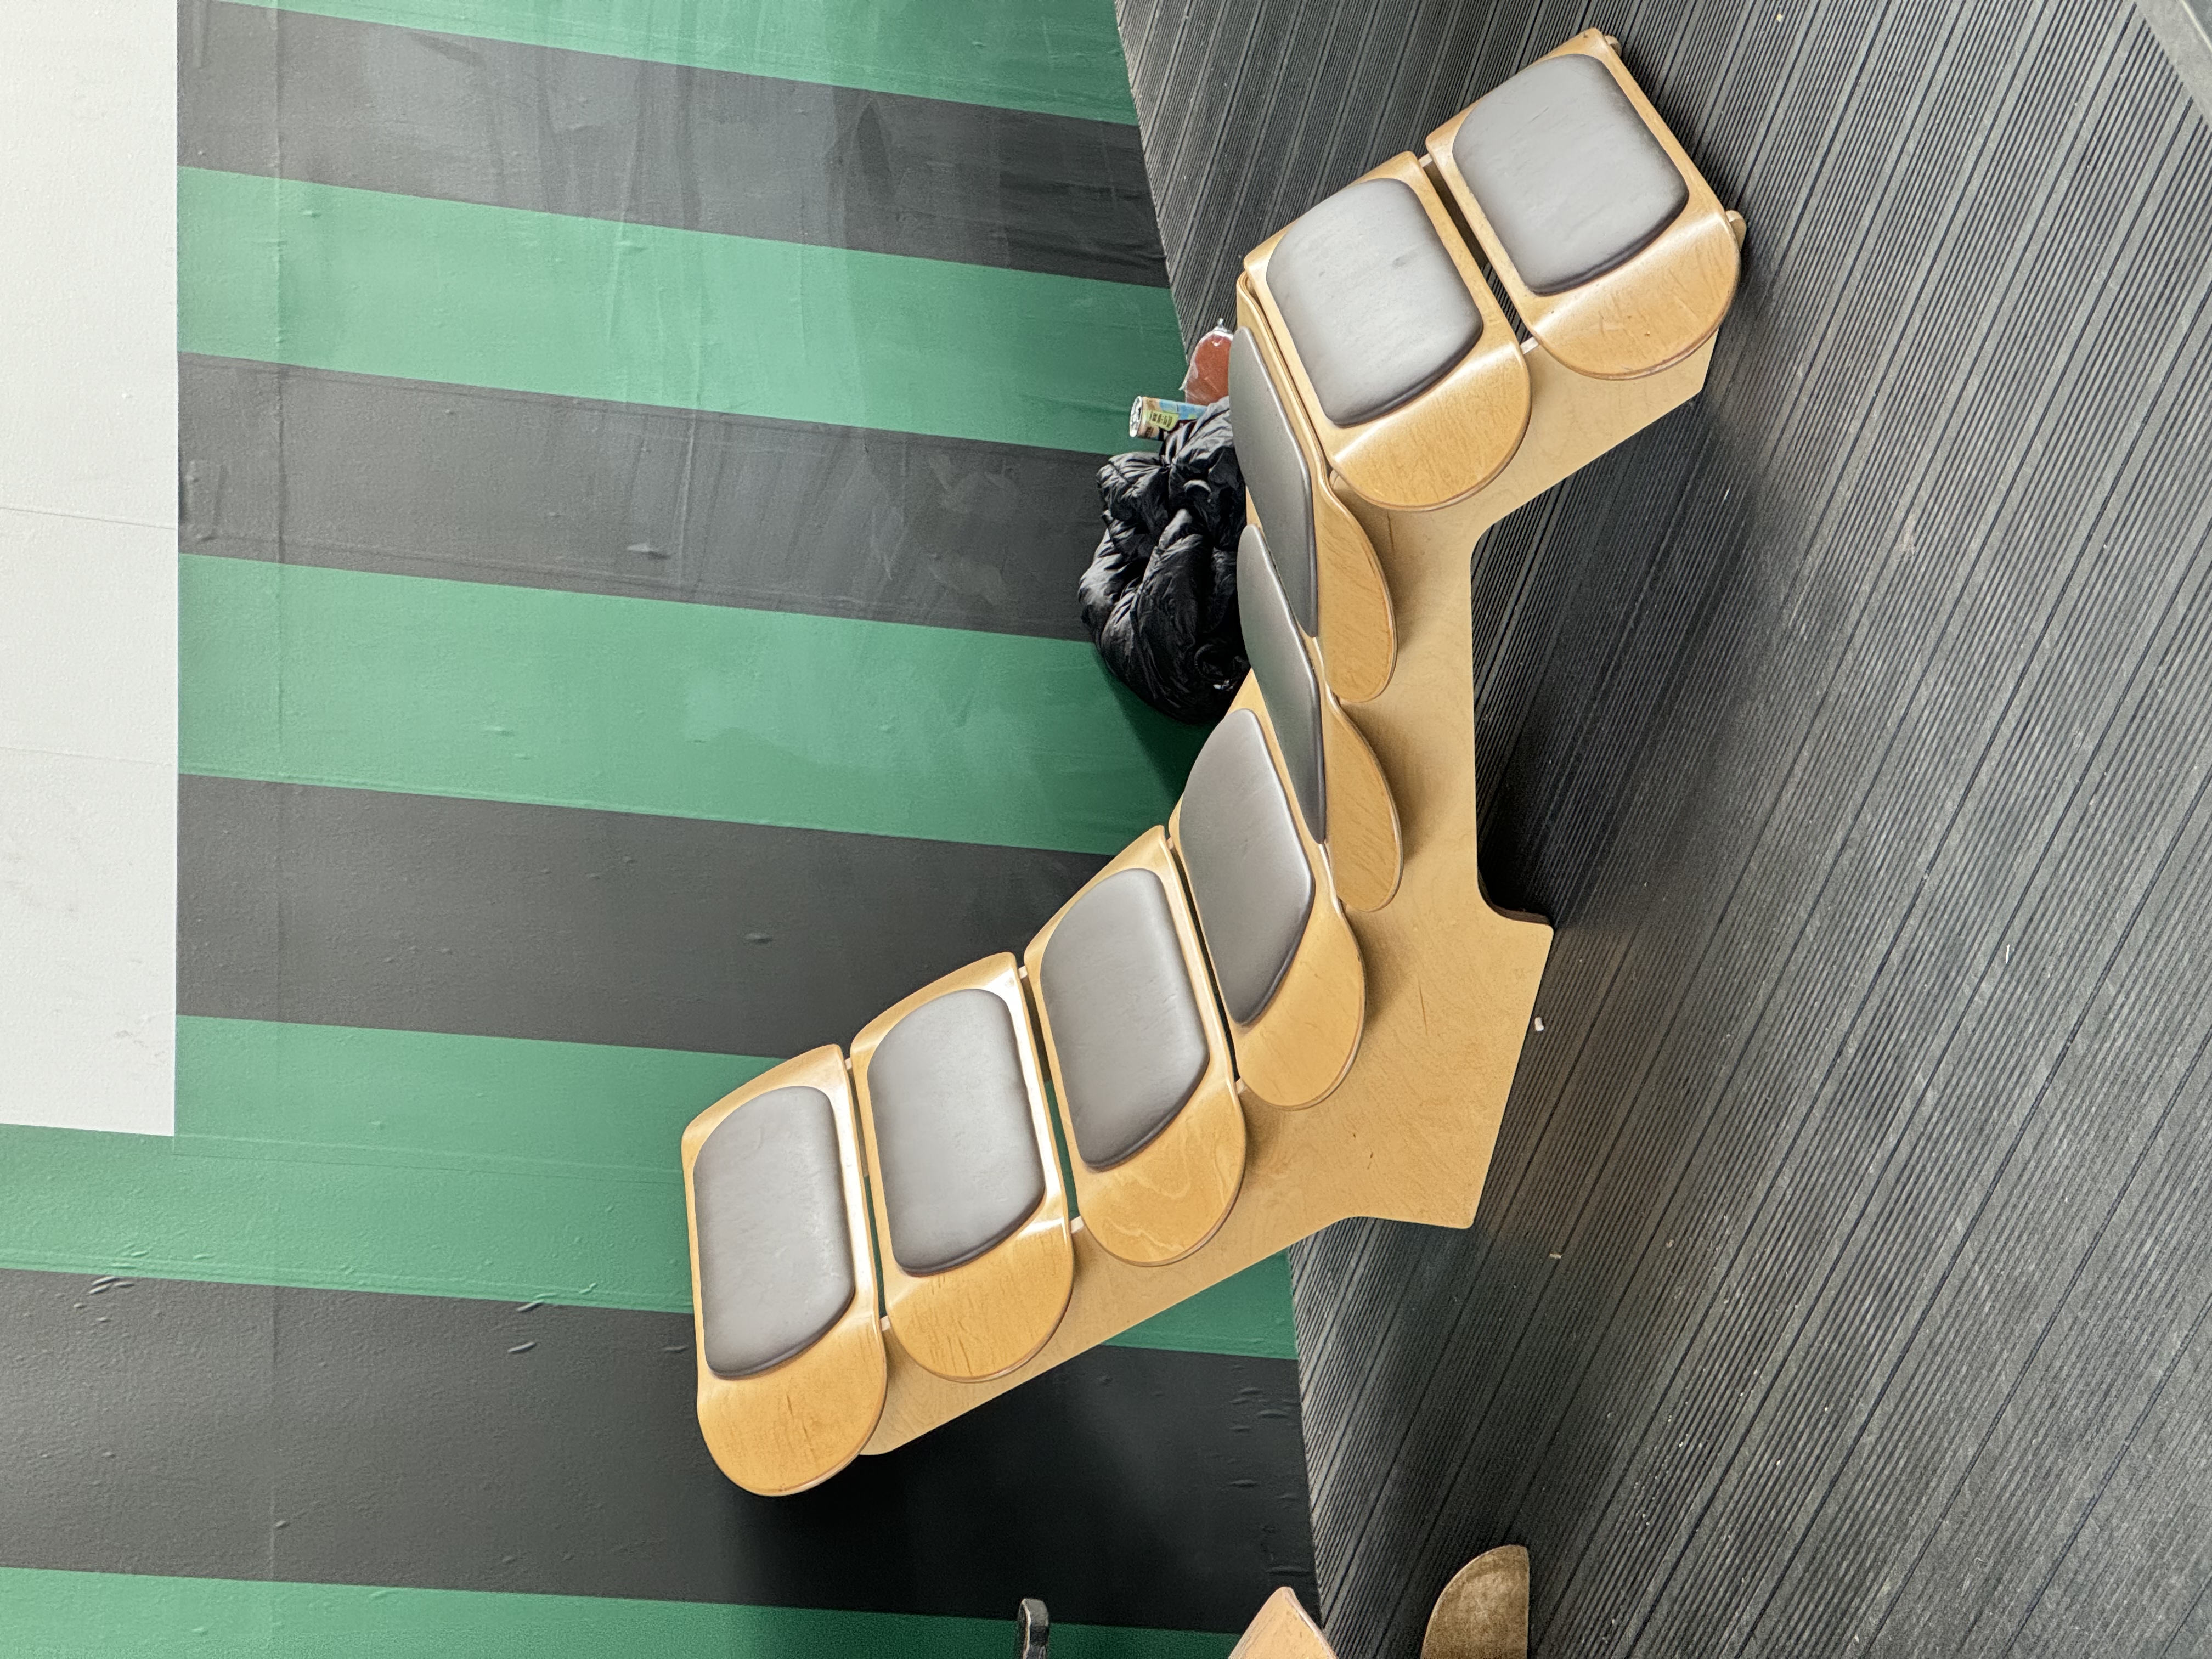
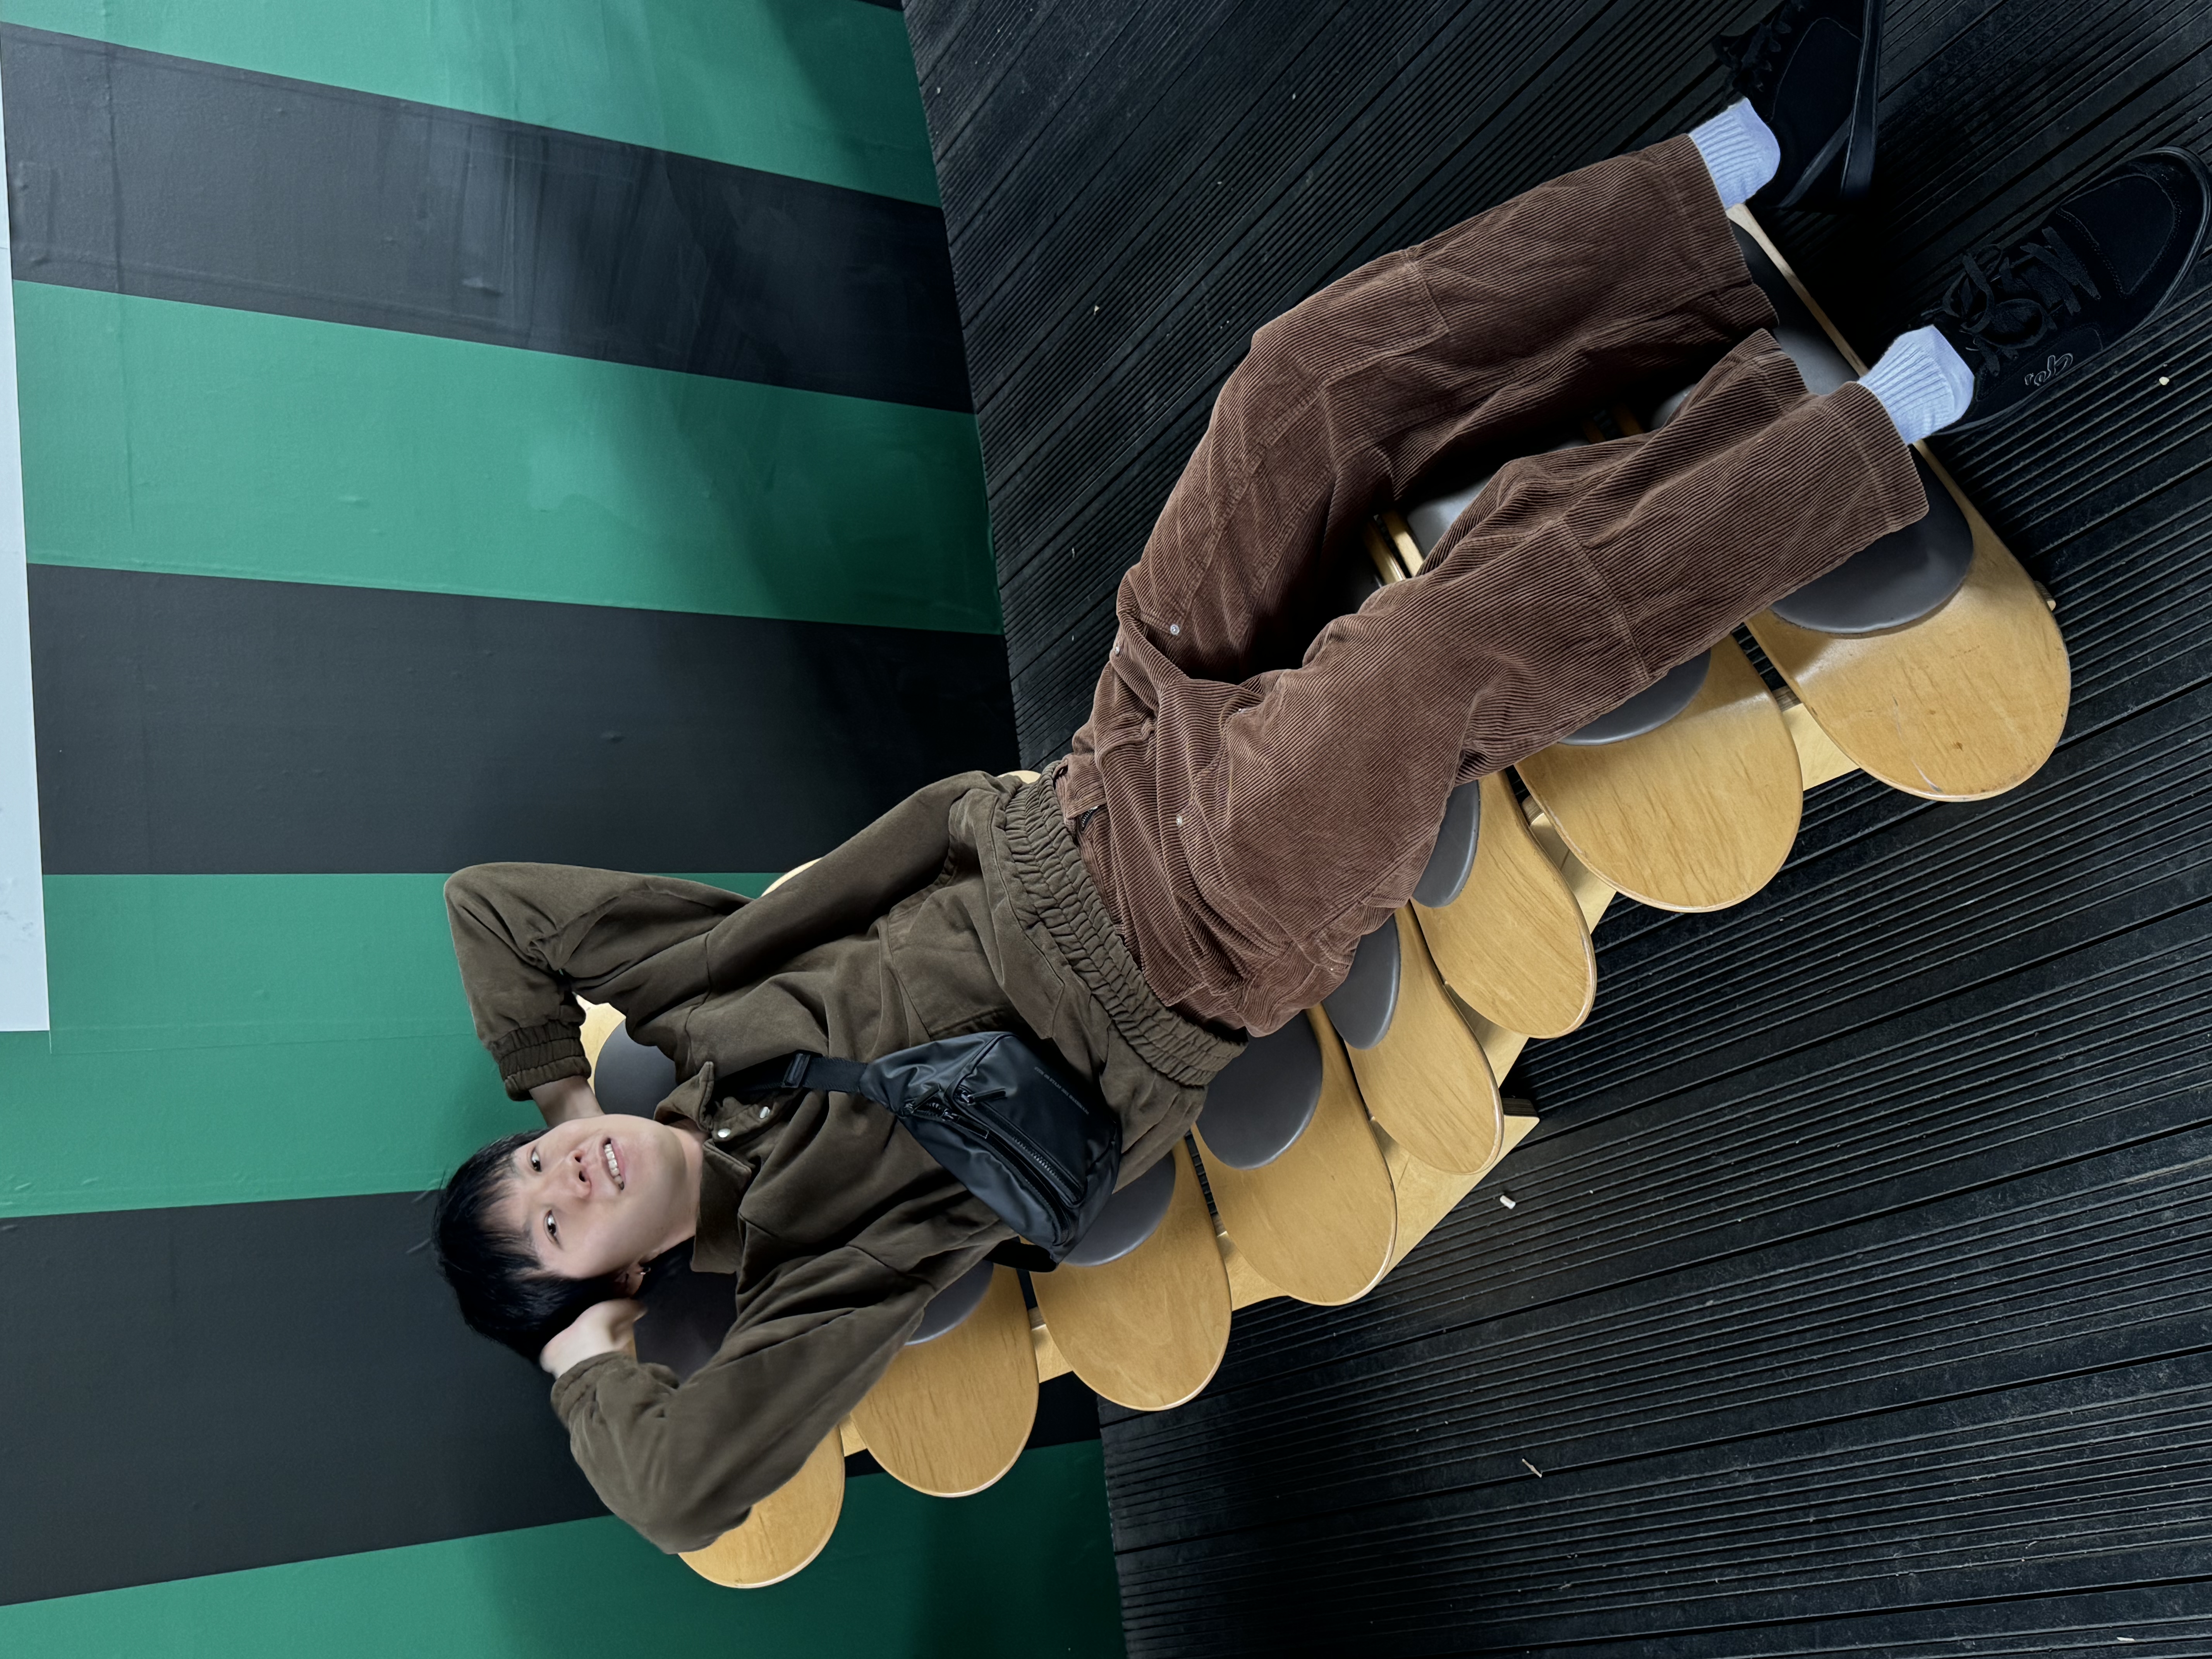
Maybe like the sofa I saw at the skatepark, I could add leather or suede to it.
01/05/2024


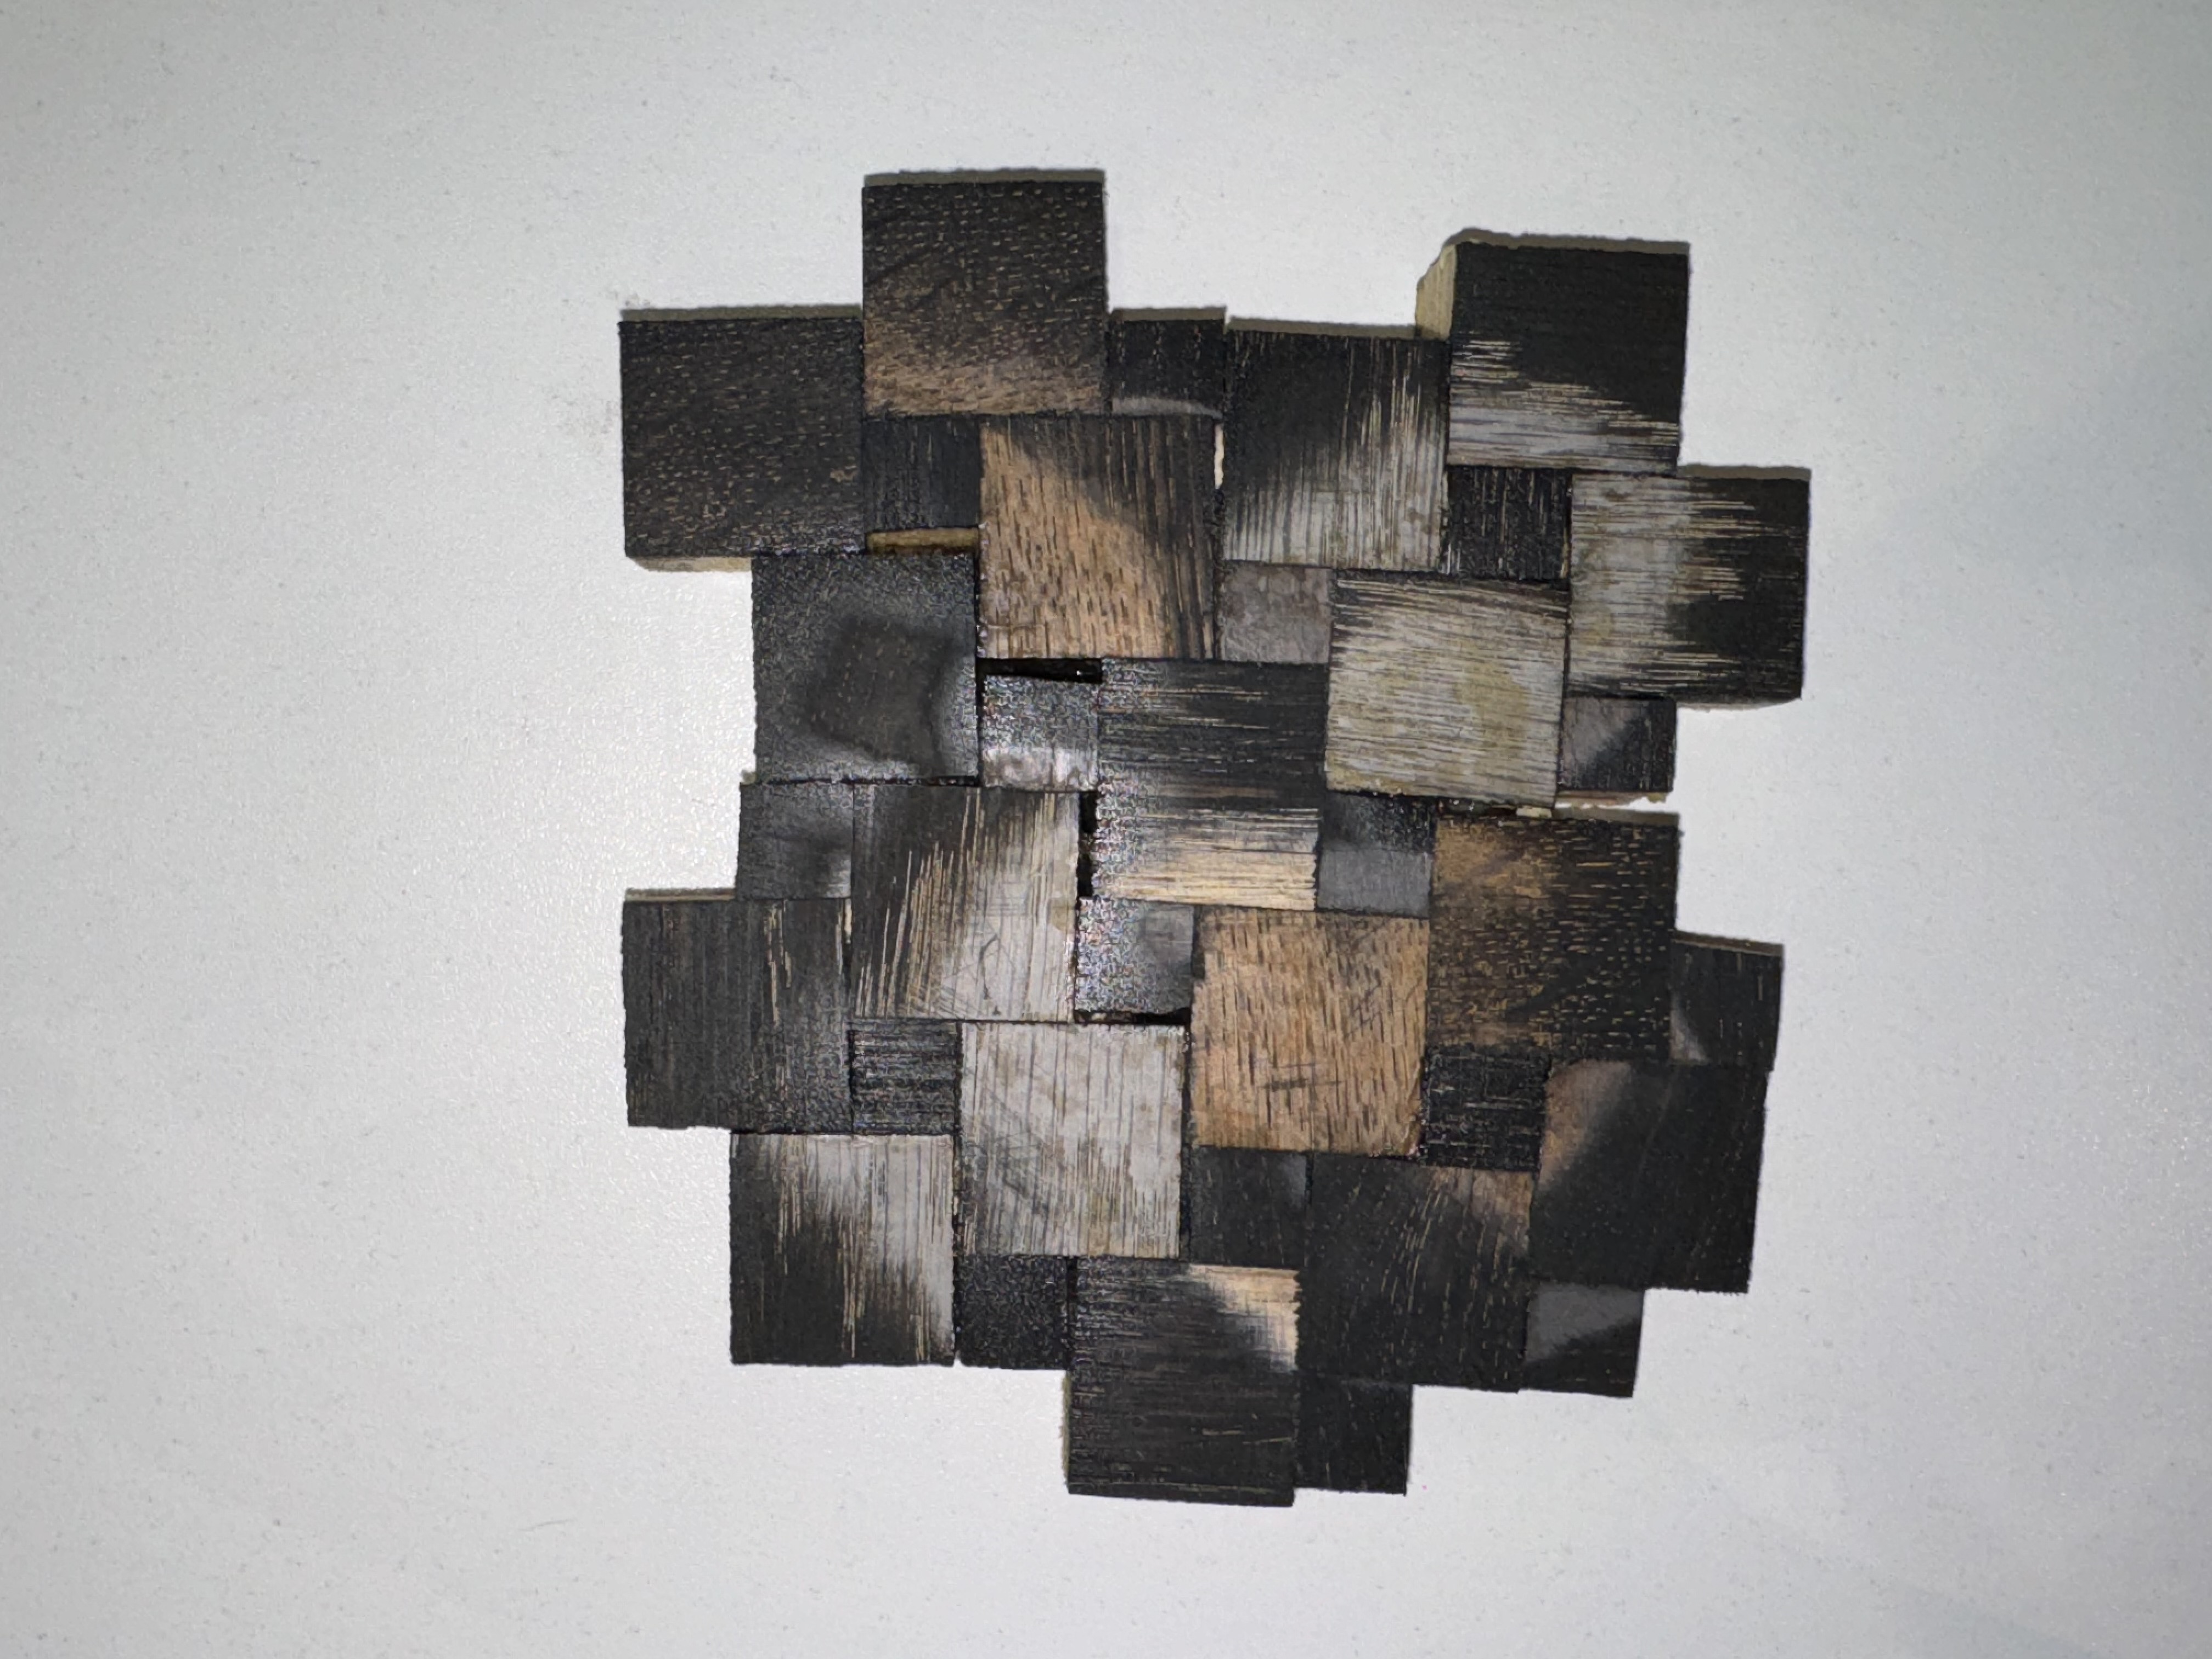
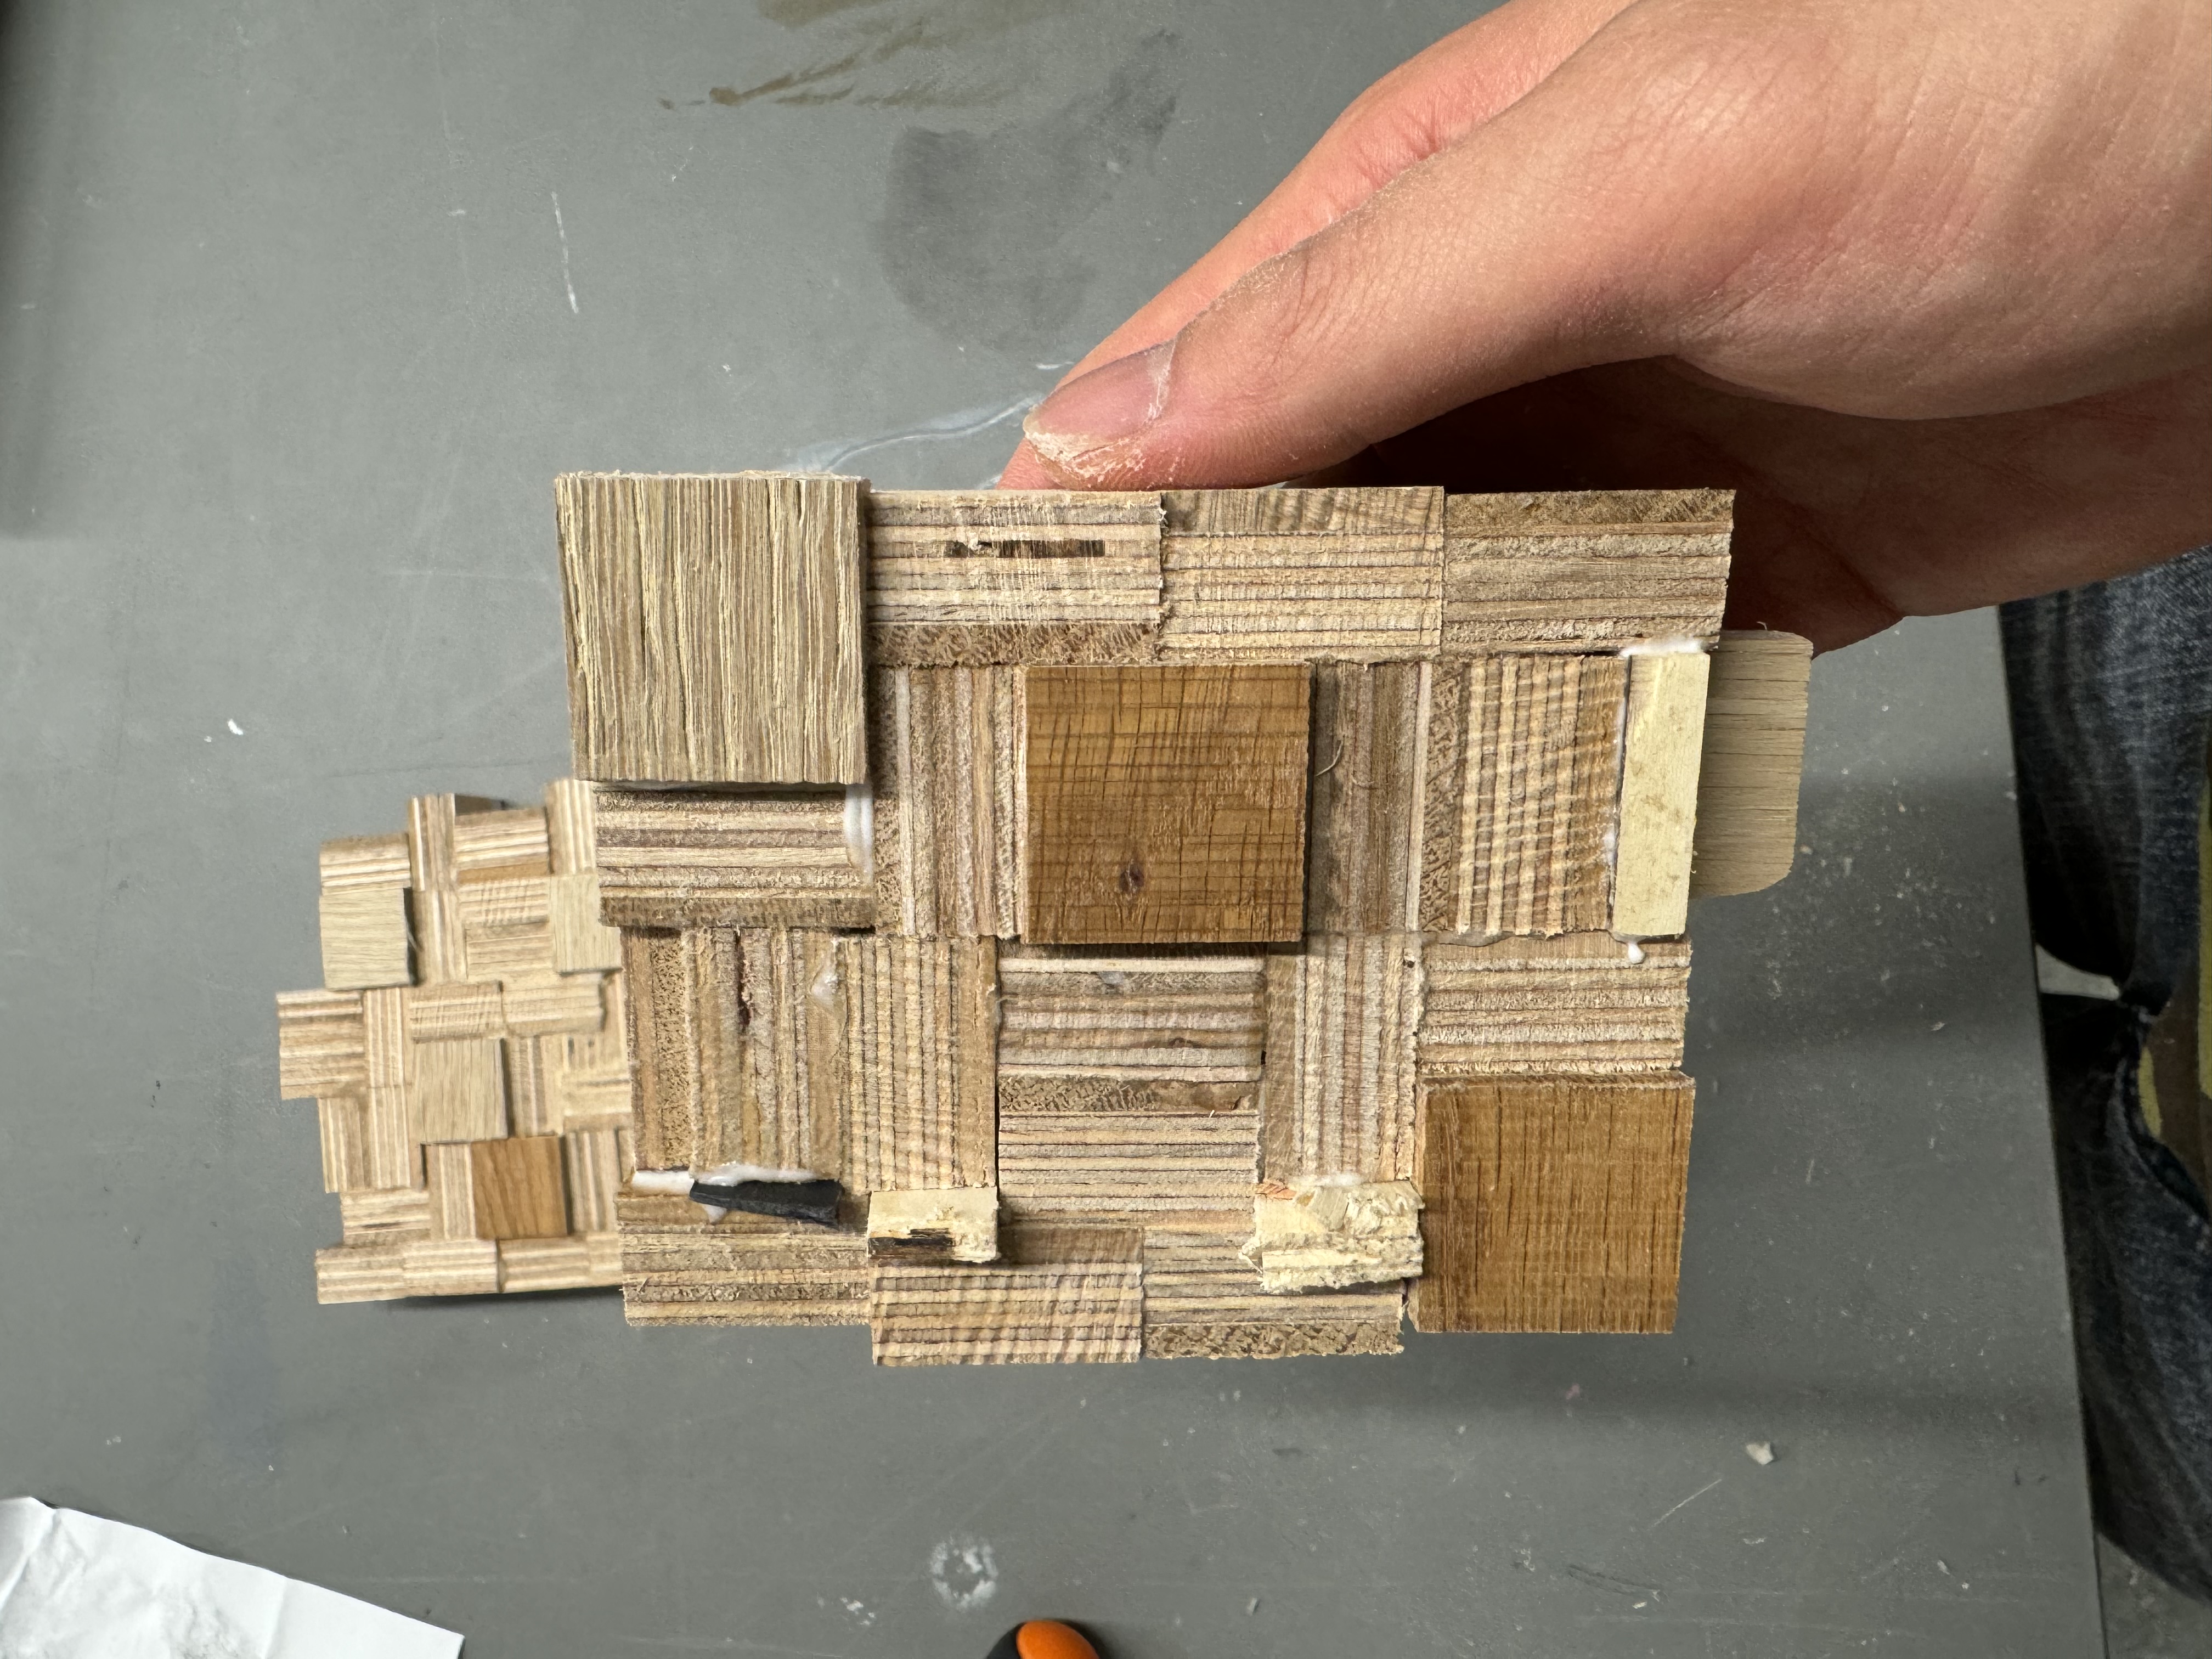
I wanted to emulate Amy Hunting's work to create this wood block effect. Therefore, I first went to the carpentry workshop to make a sample with this surface. It took me over an hour to make this sample, and it’s easy to see that if I were to make a larger version, I would have to spend a day doing it. And such molds are used to fix, squeeze and bond the wooden boards. Finally, there are paper scraps on it because I put the front and back sides wrongly. The solid color side should be in contact with the paper surface.
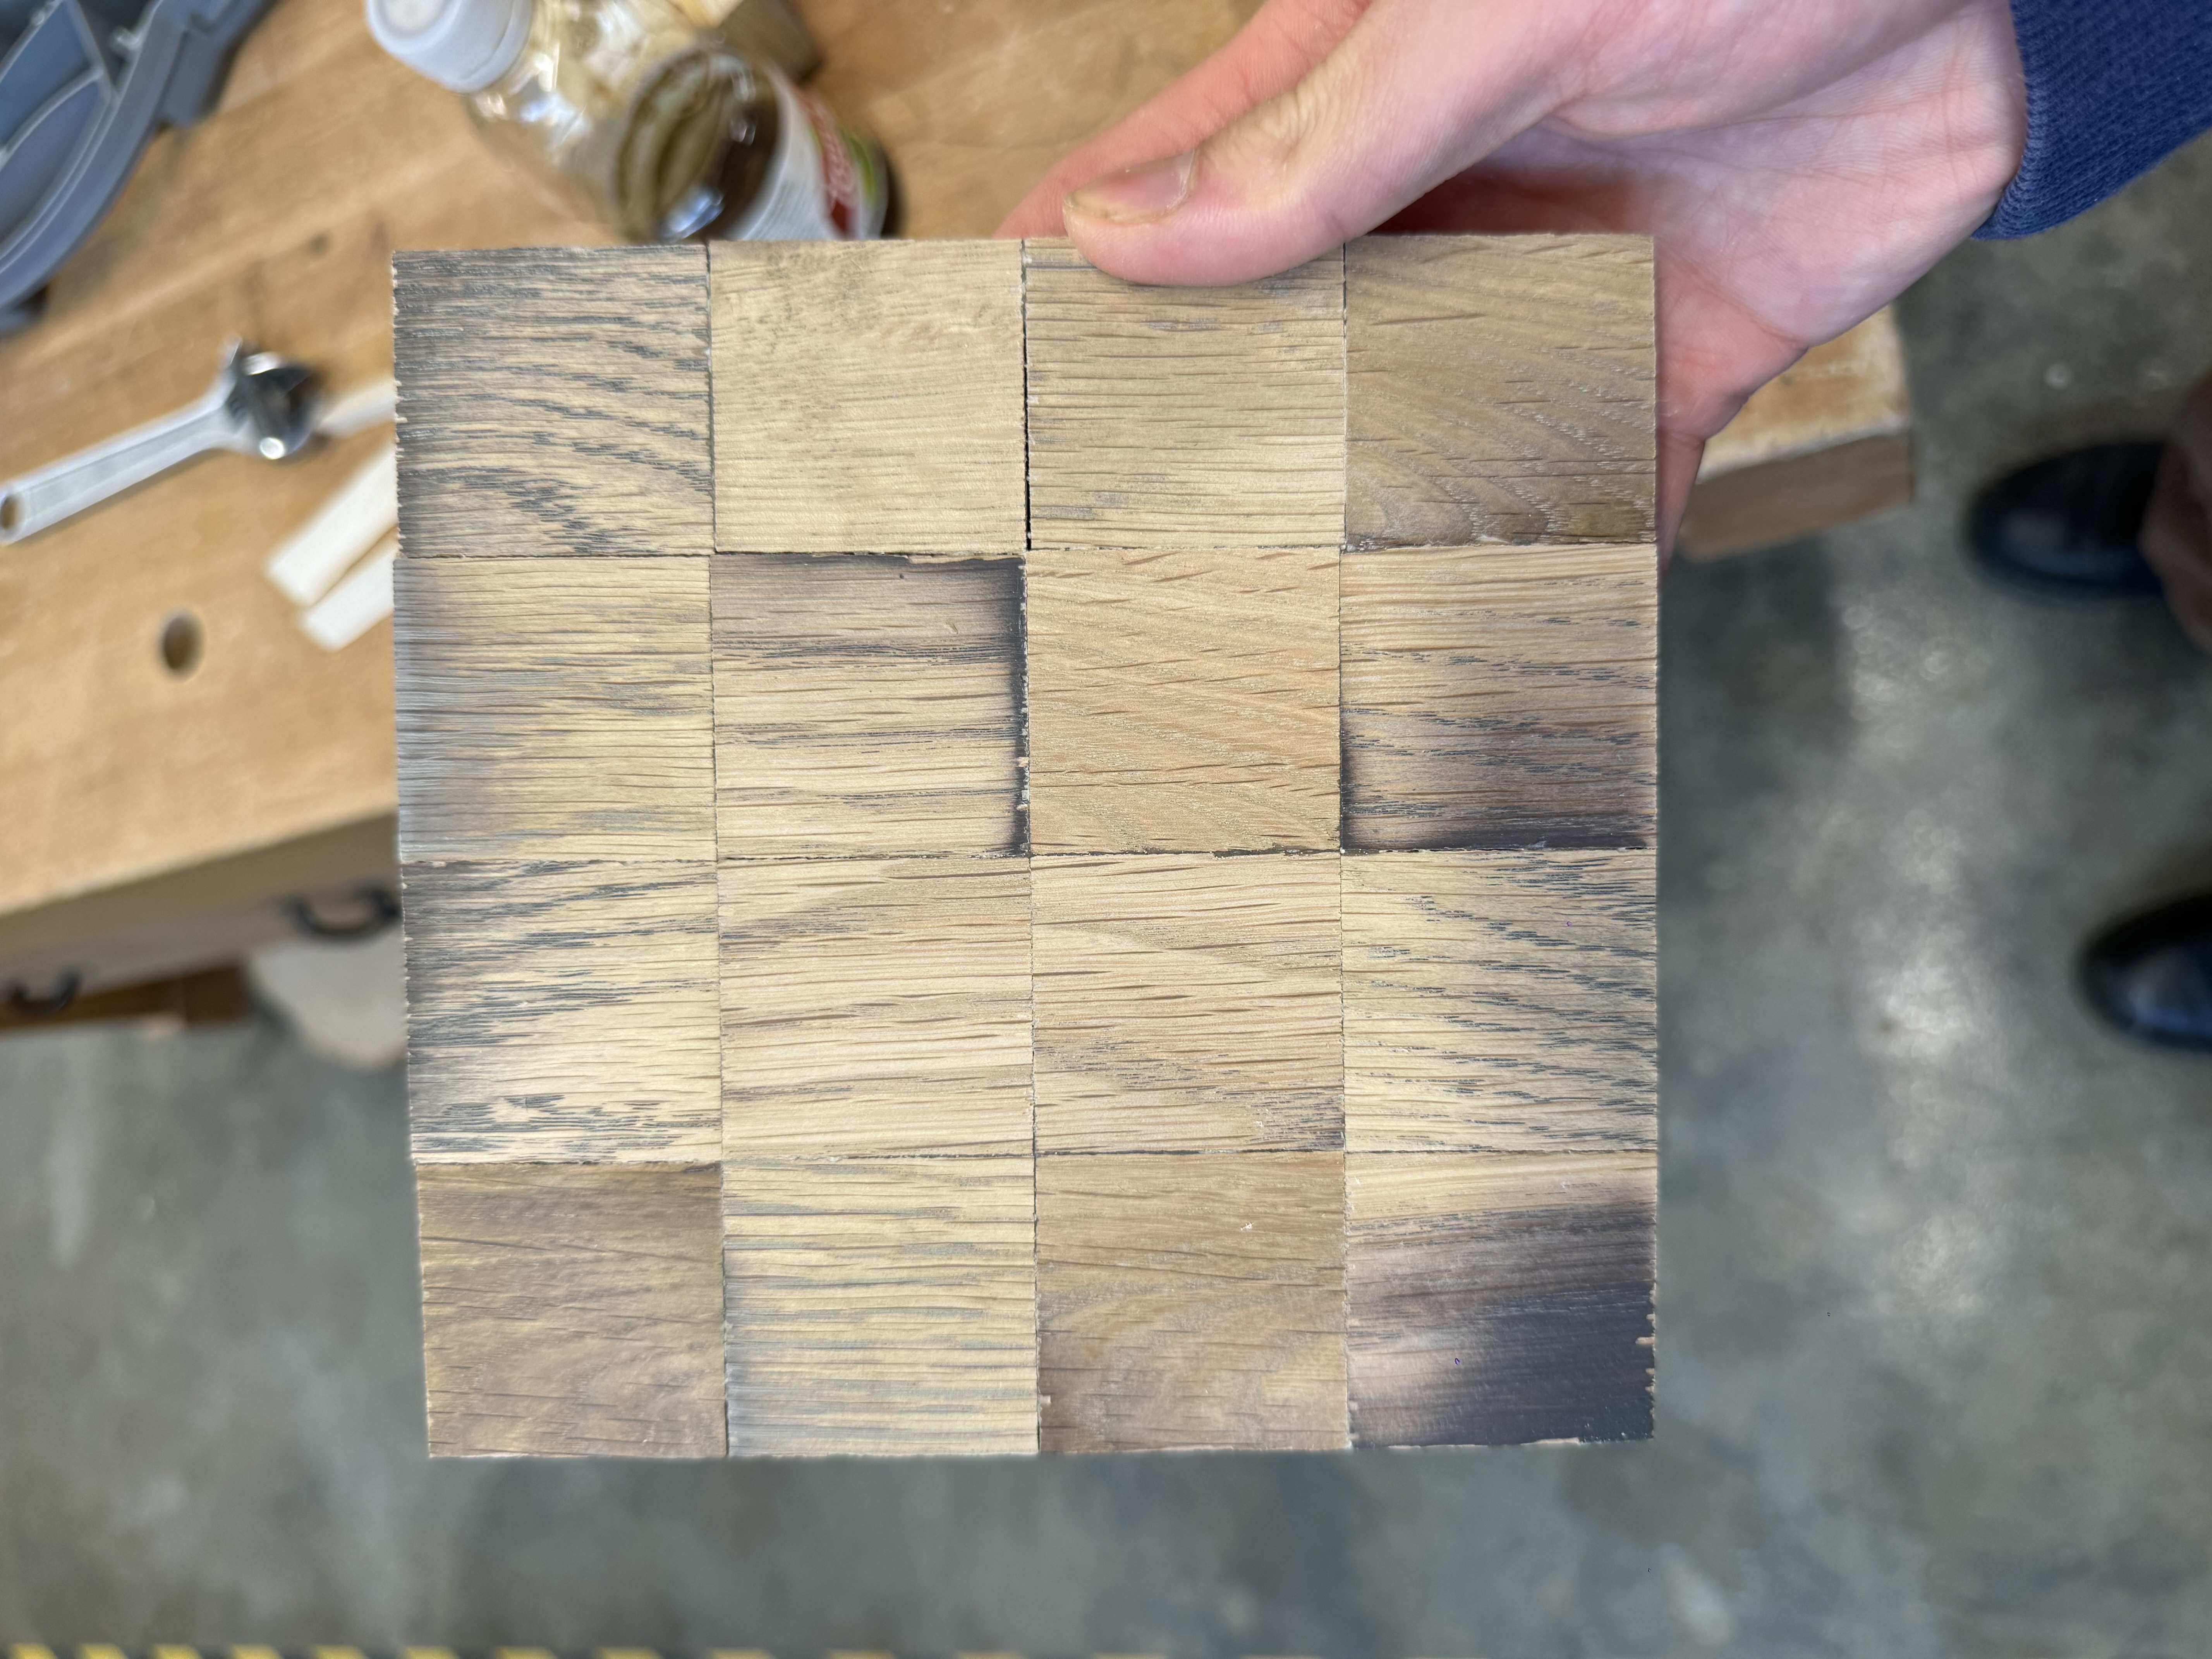 Later I sanded the surface and the wood took on this color and texture which I thought was pretty good too. And the broken parts and some gaps between the blocks become less obvious, and the wood chips will fill in some of them. But some still look obvious.
07/05/2024


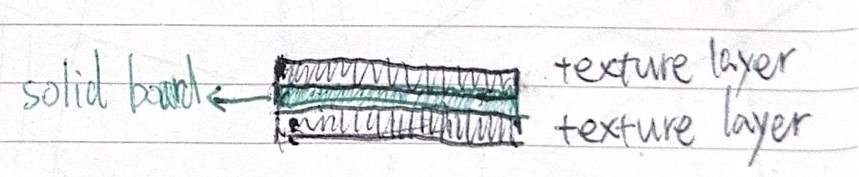
At the same time, I also tried ways to express the texture of different paint surfaces, that is, to express the texture of the layer. The one on the right is a combination of wooden blocks placed only vertically, and the one on the left is a combination of wooden blocks placed horizontally.
Since I observed different textures in Amy Hunting's works, I thought of the second method on the right.
Later, inspired by Oscar, I cut it diagonally to see what would happen. I couldn't be happier with the results. Only the vertical binding blocks don't change much, but the horizontal binding blocks show more texture. And after ebonizing, there are more color viarieties, and the oak layer of wood will be darker than the plywood layer. There is also red in the bonding blocks with horizontal.

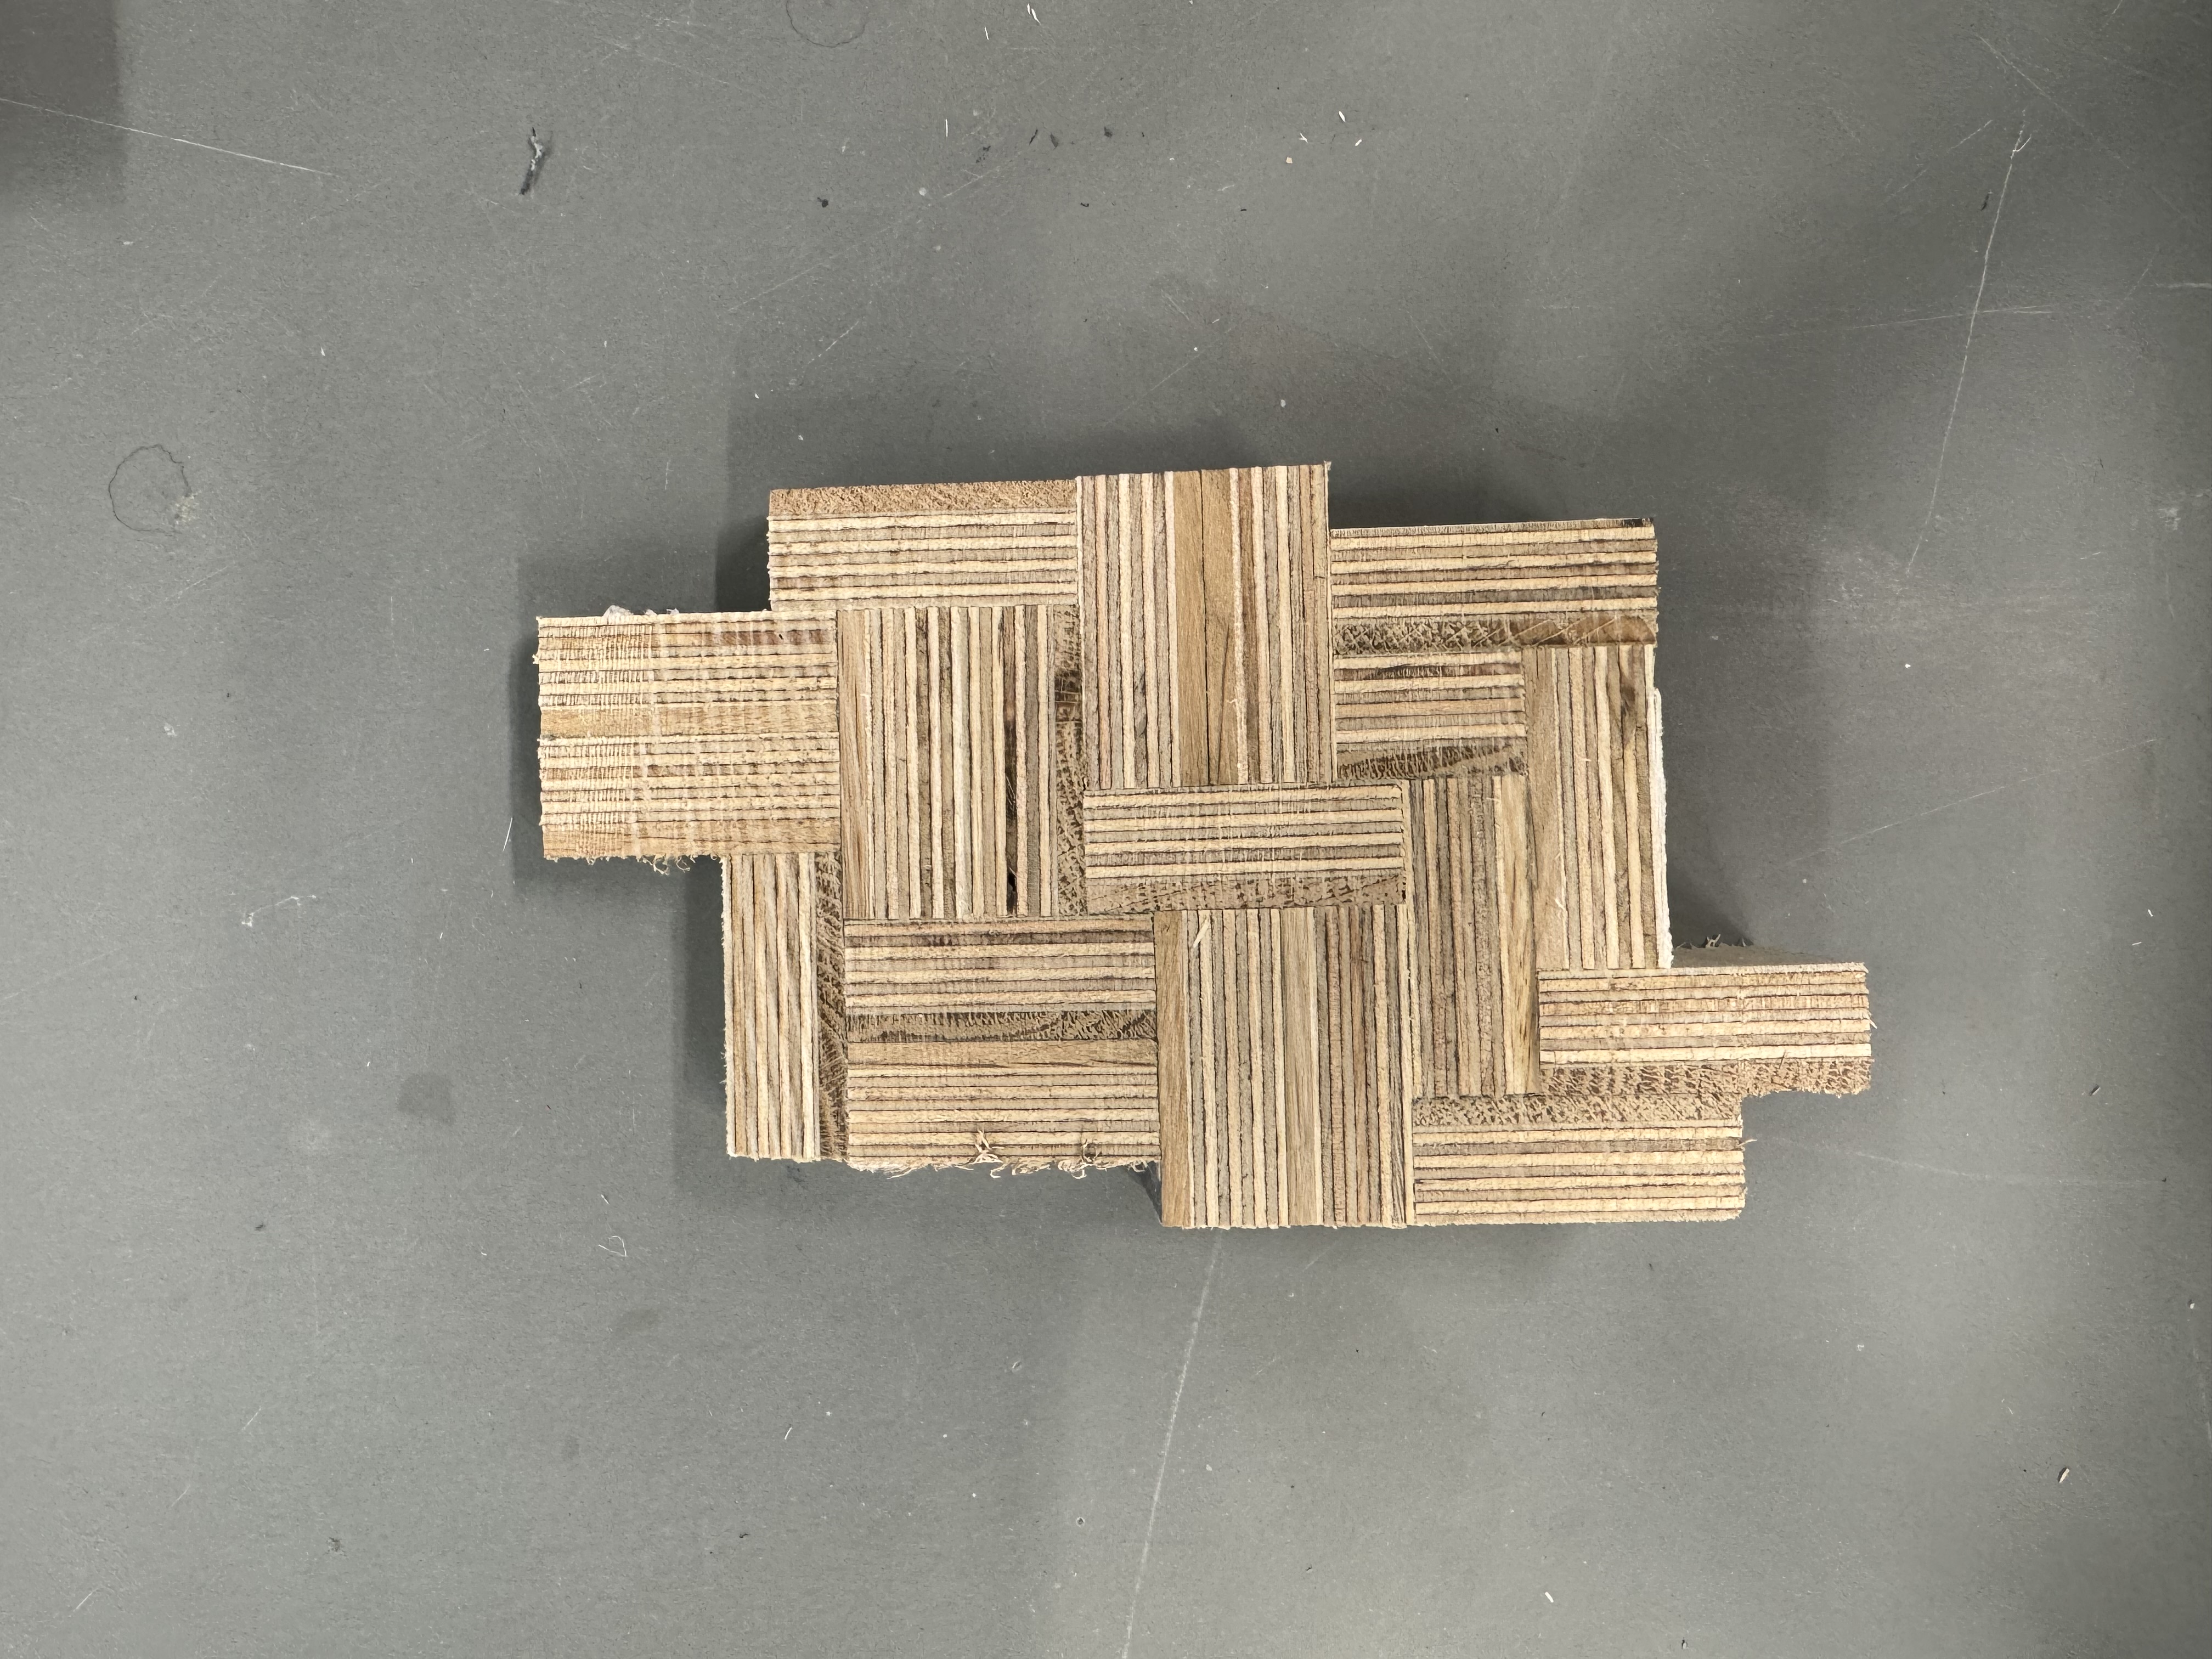


Finally, I will record how I cut such a piece of wood diagonally. I first use a protractor to cut out the pad wood, and then cut the raw material.


09/05/2024


Then, I searched for some simple pixel game characters, but found that more than 60 pixels are needed to form a character, which means that I need at least more than 60 squares to express it on the board. This is undoubtedly too complicated. If I wanted to keep trying this style of stuff, I'd have to find something simpler.


16/05/2024

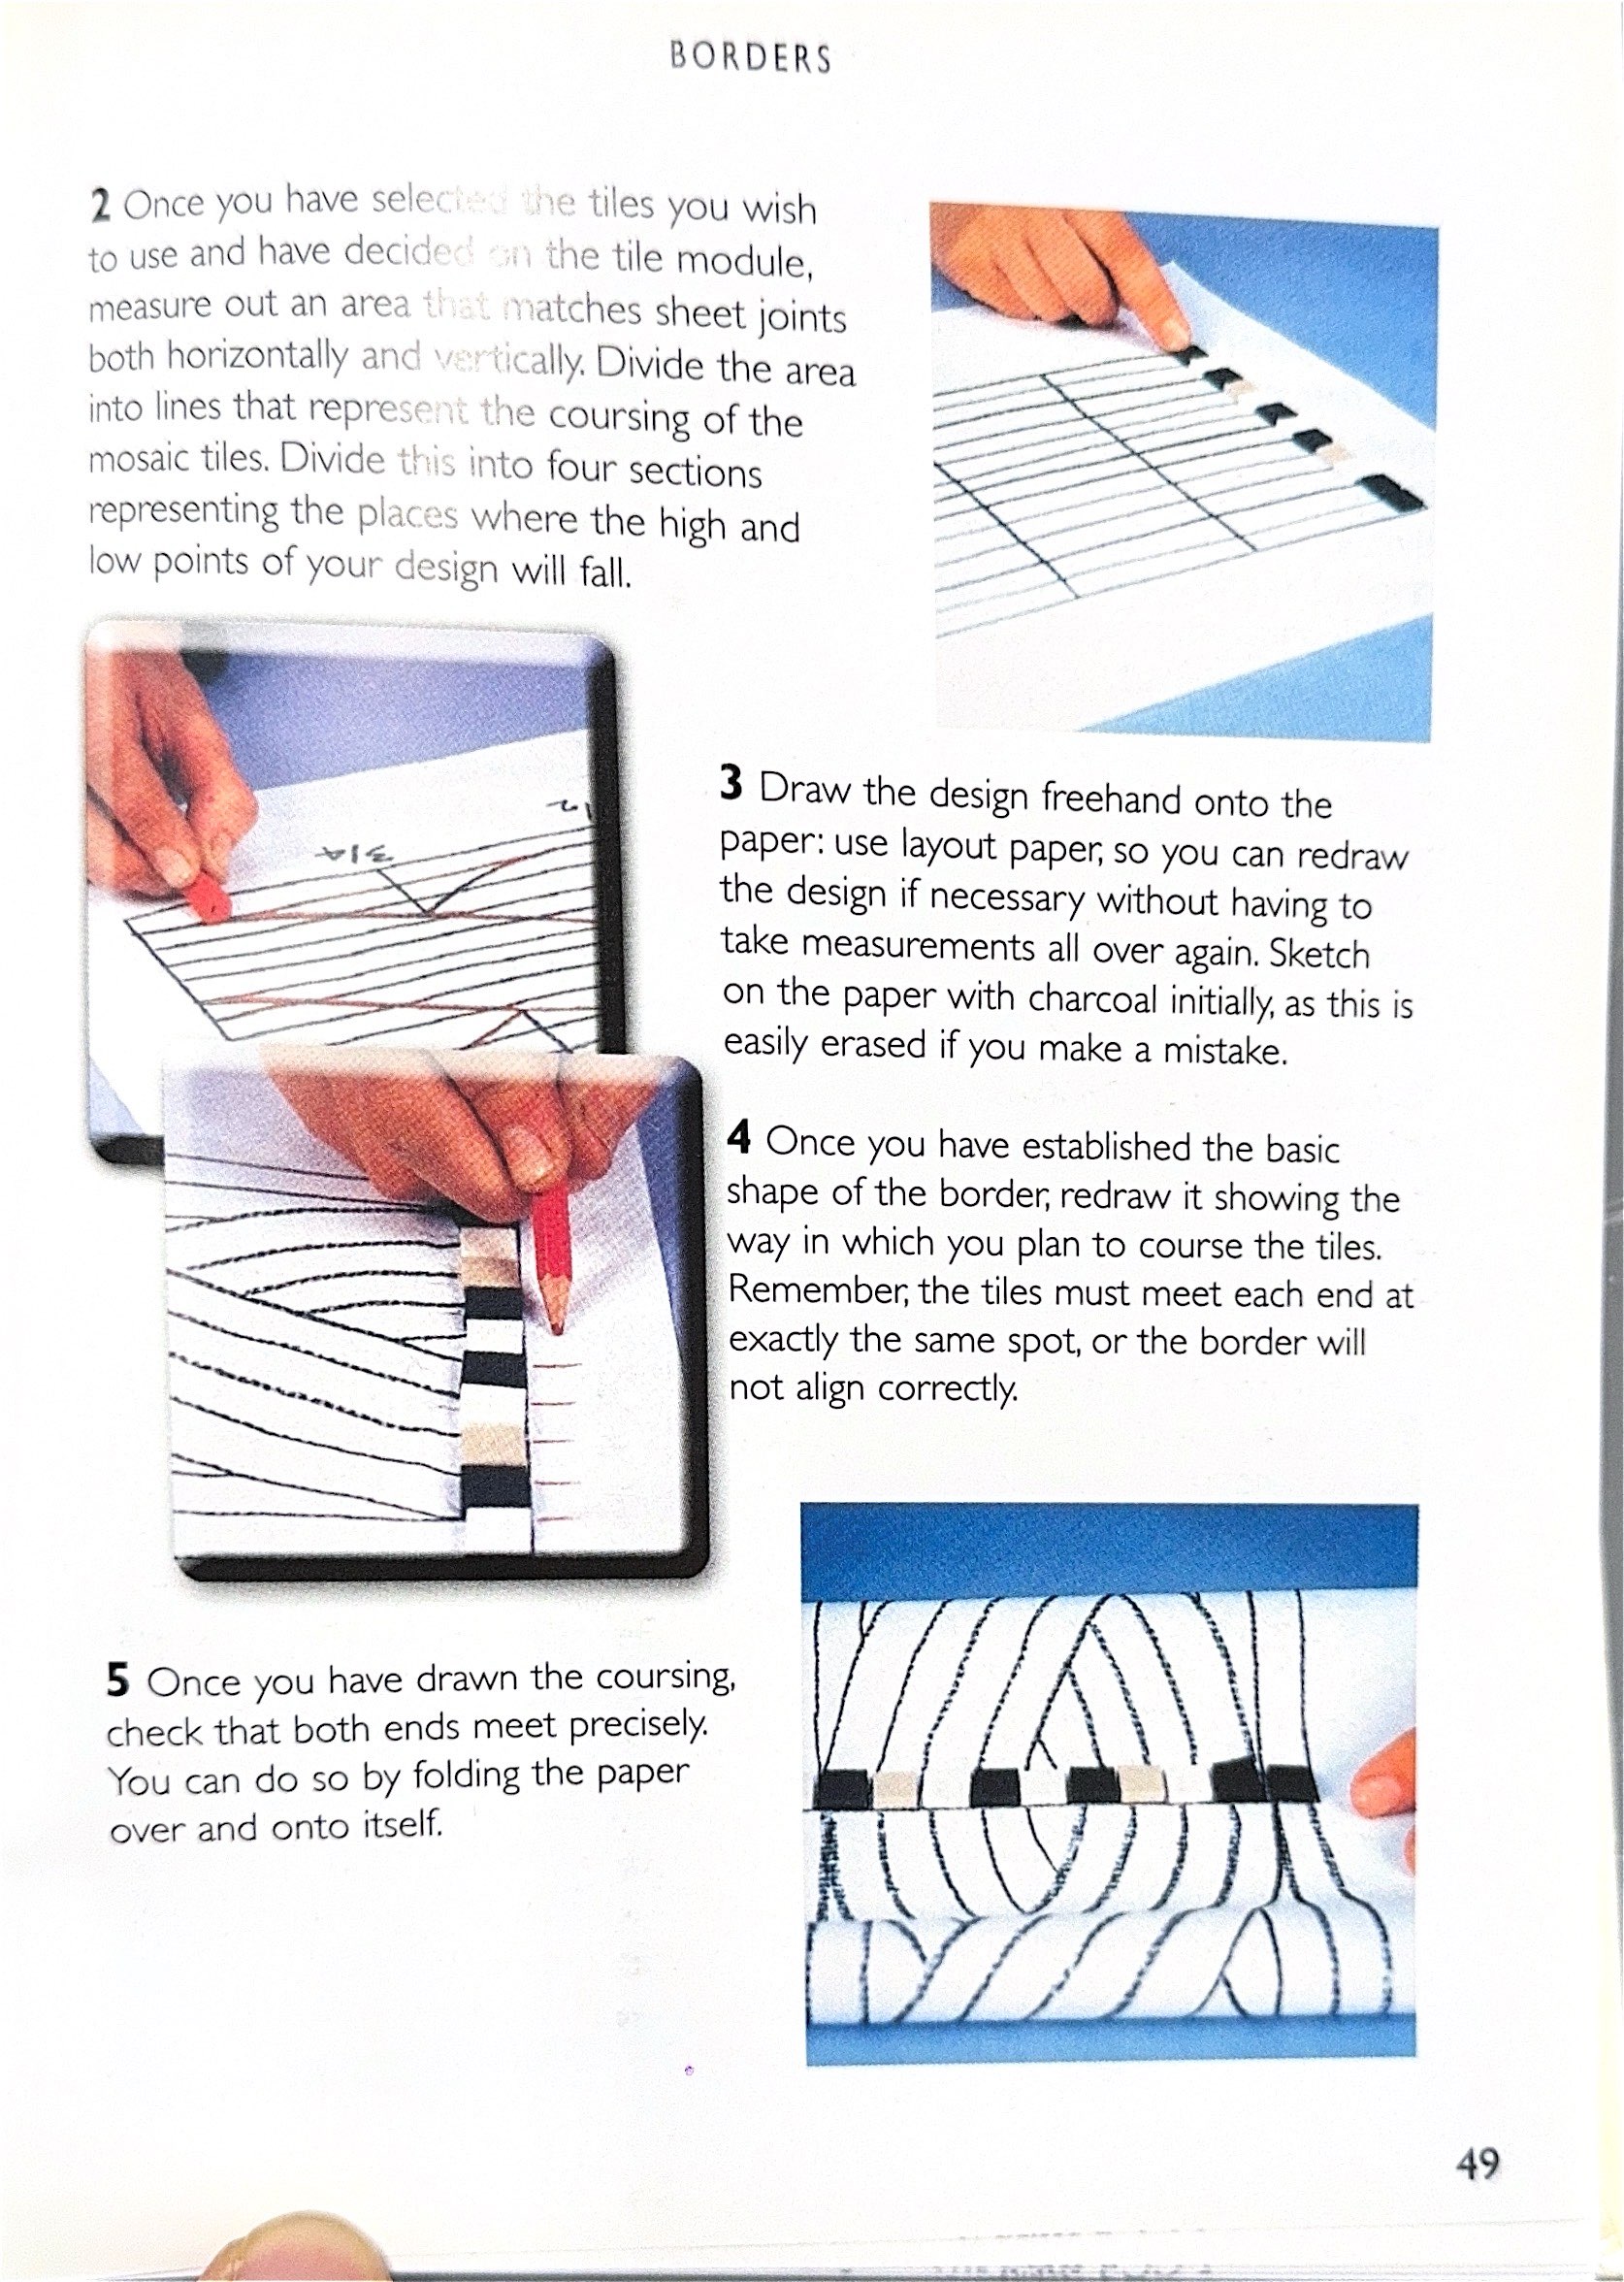
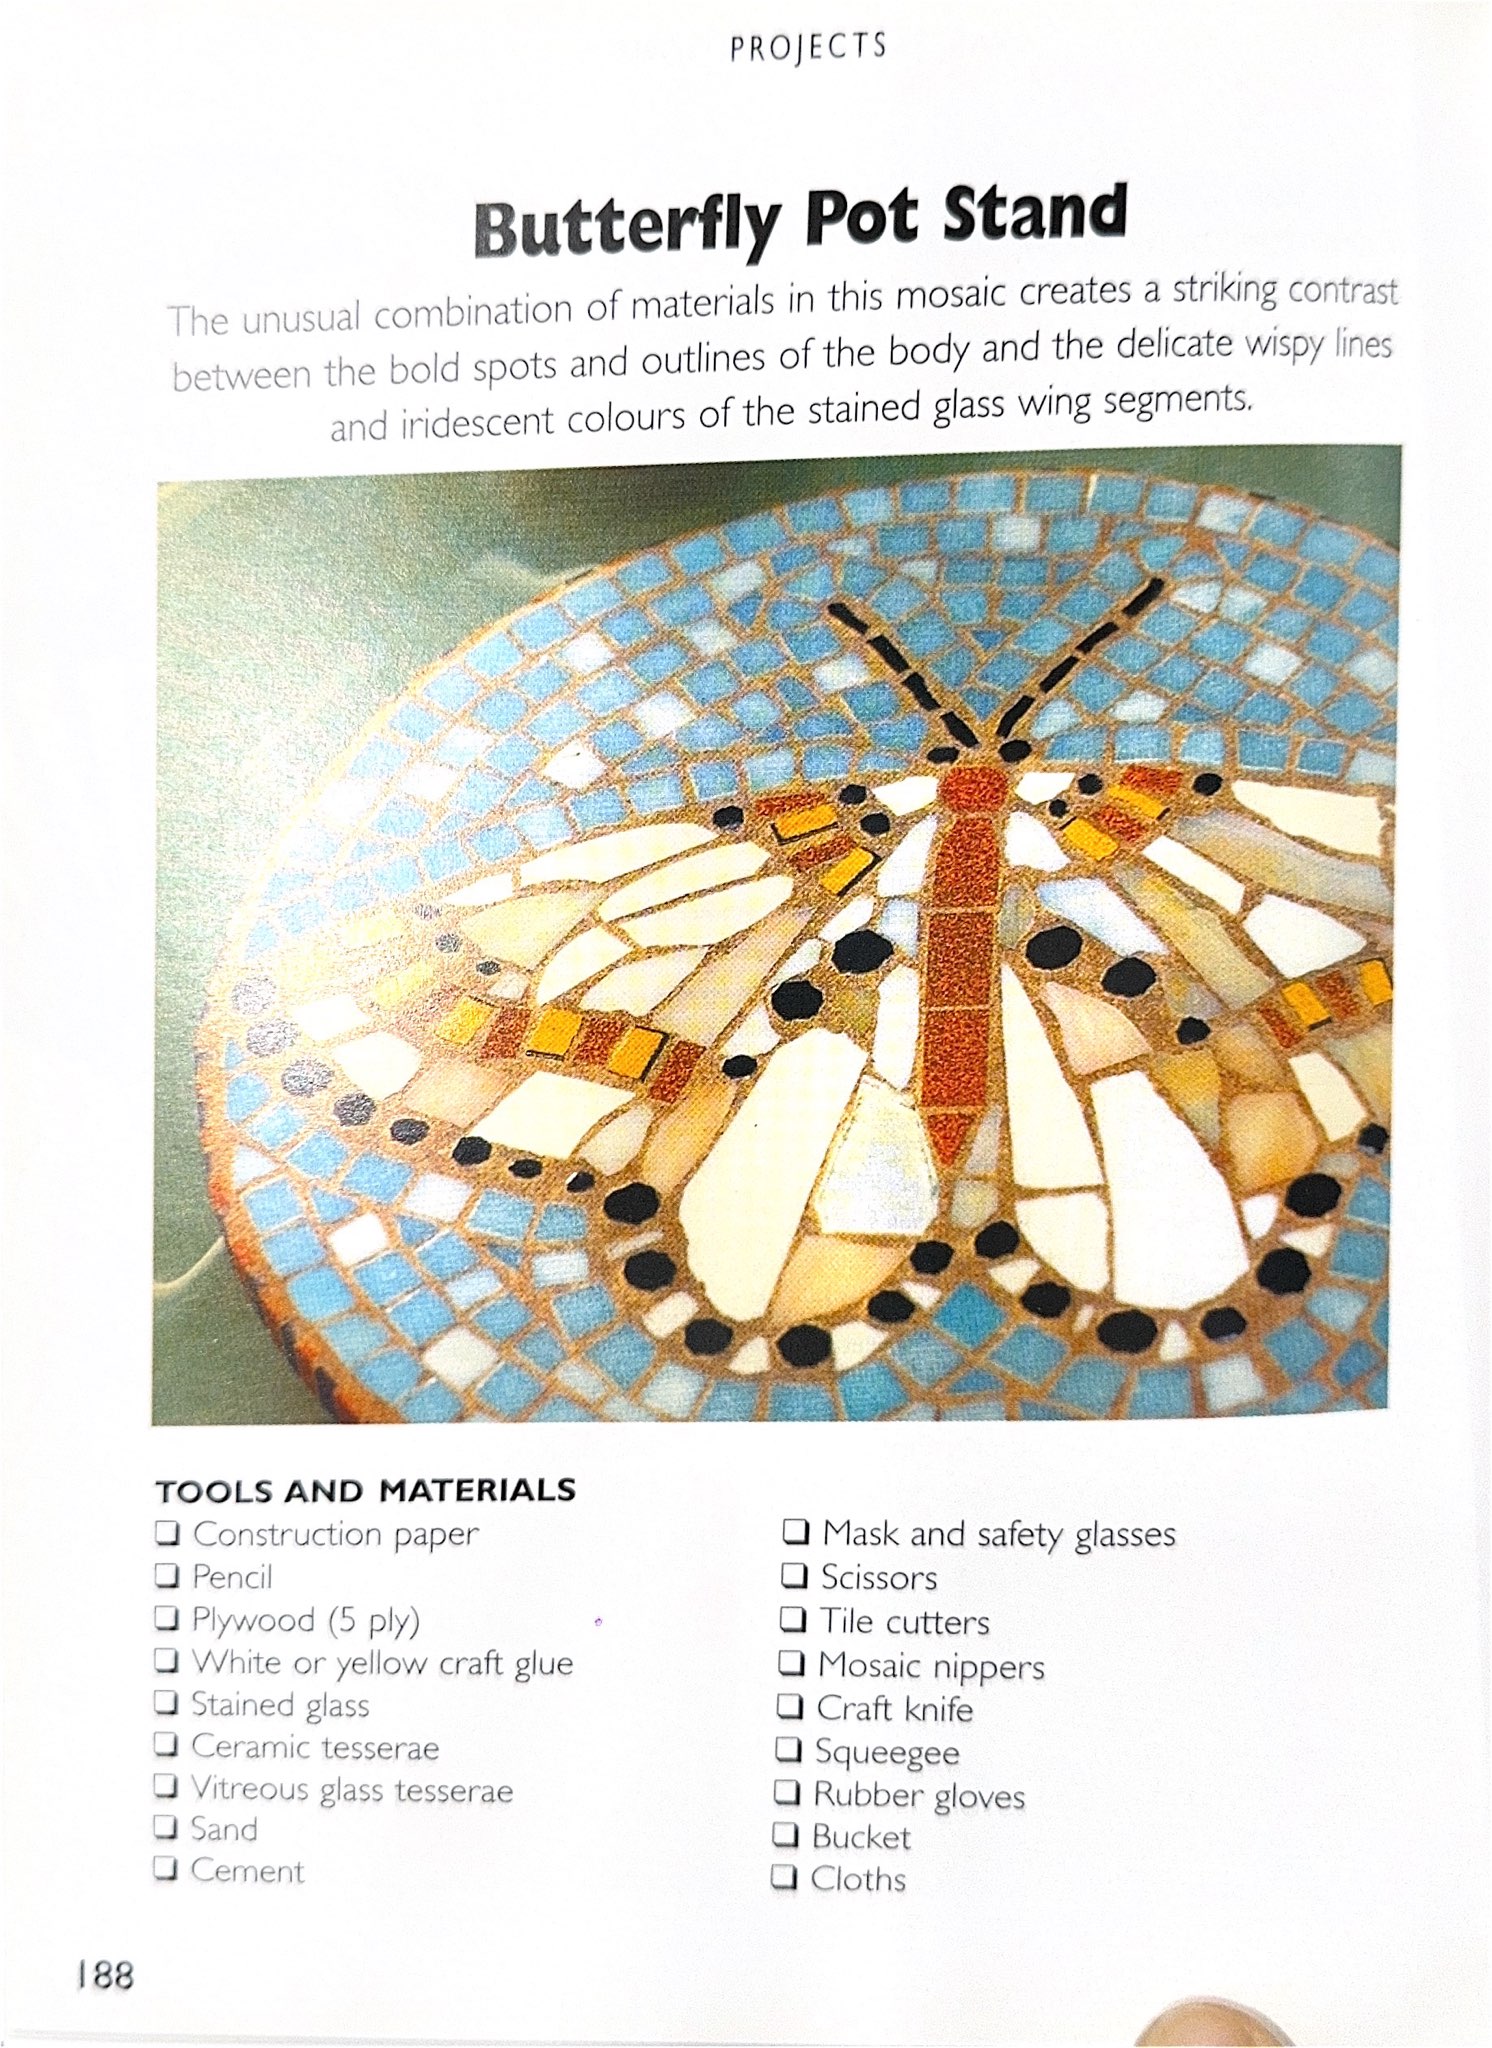


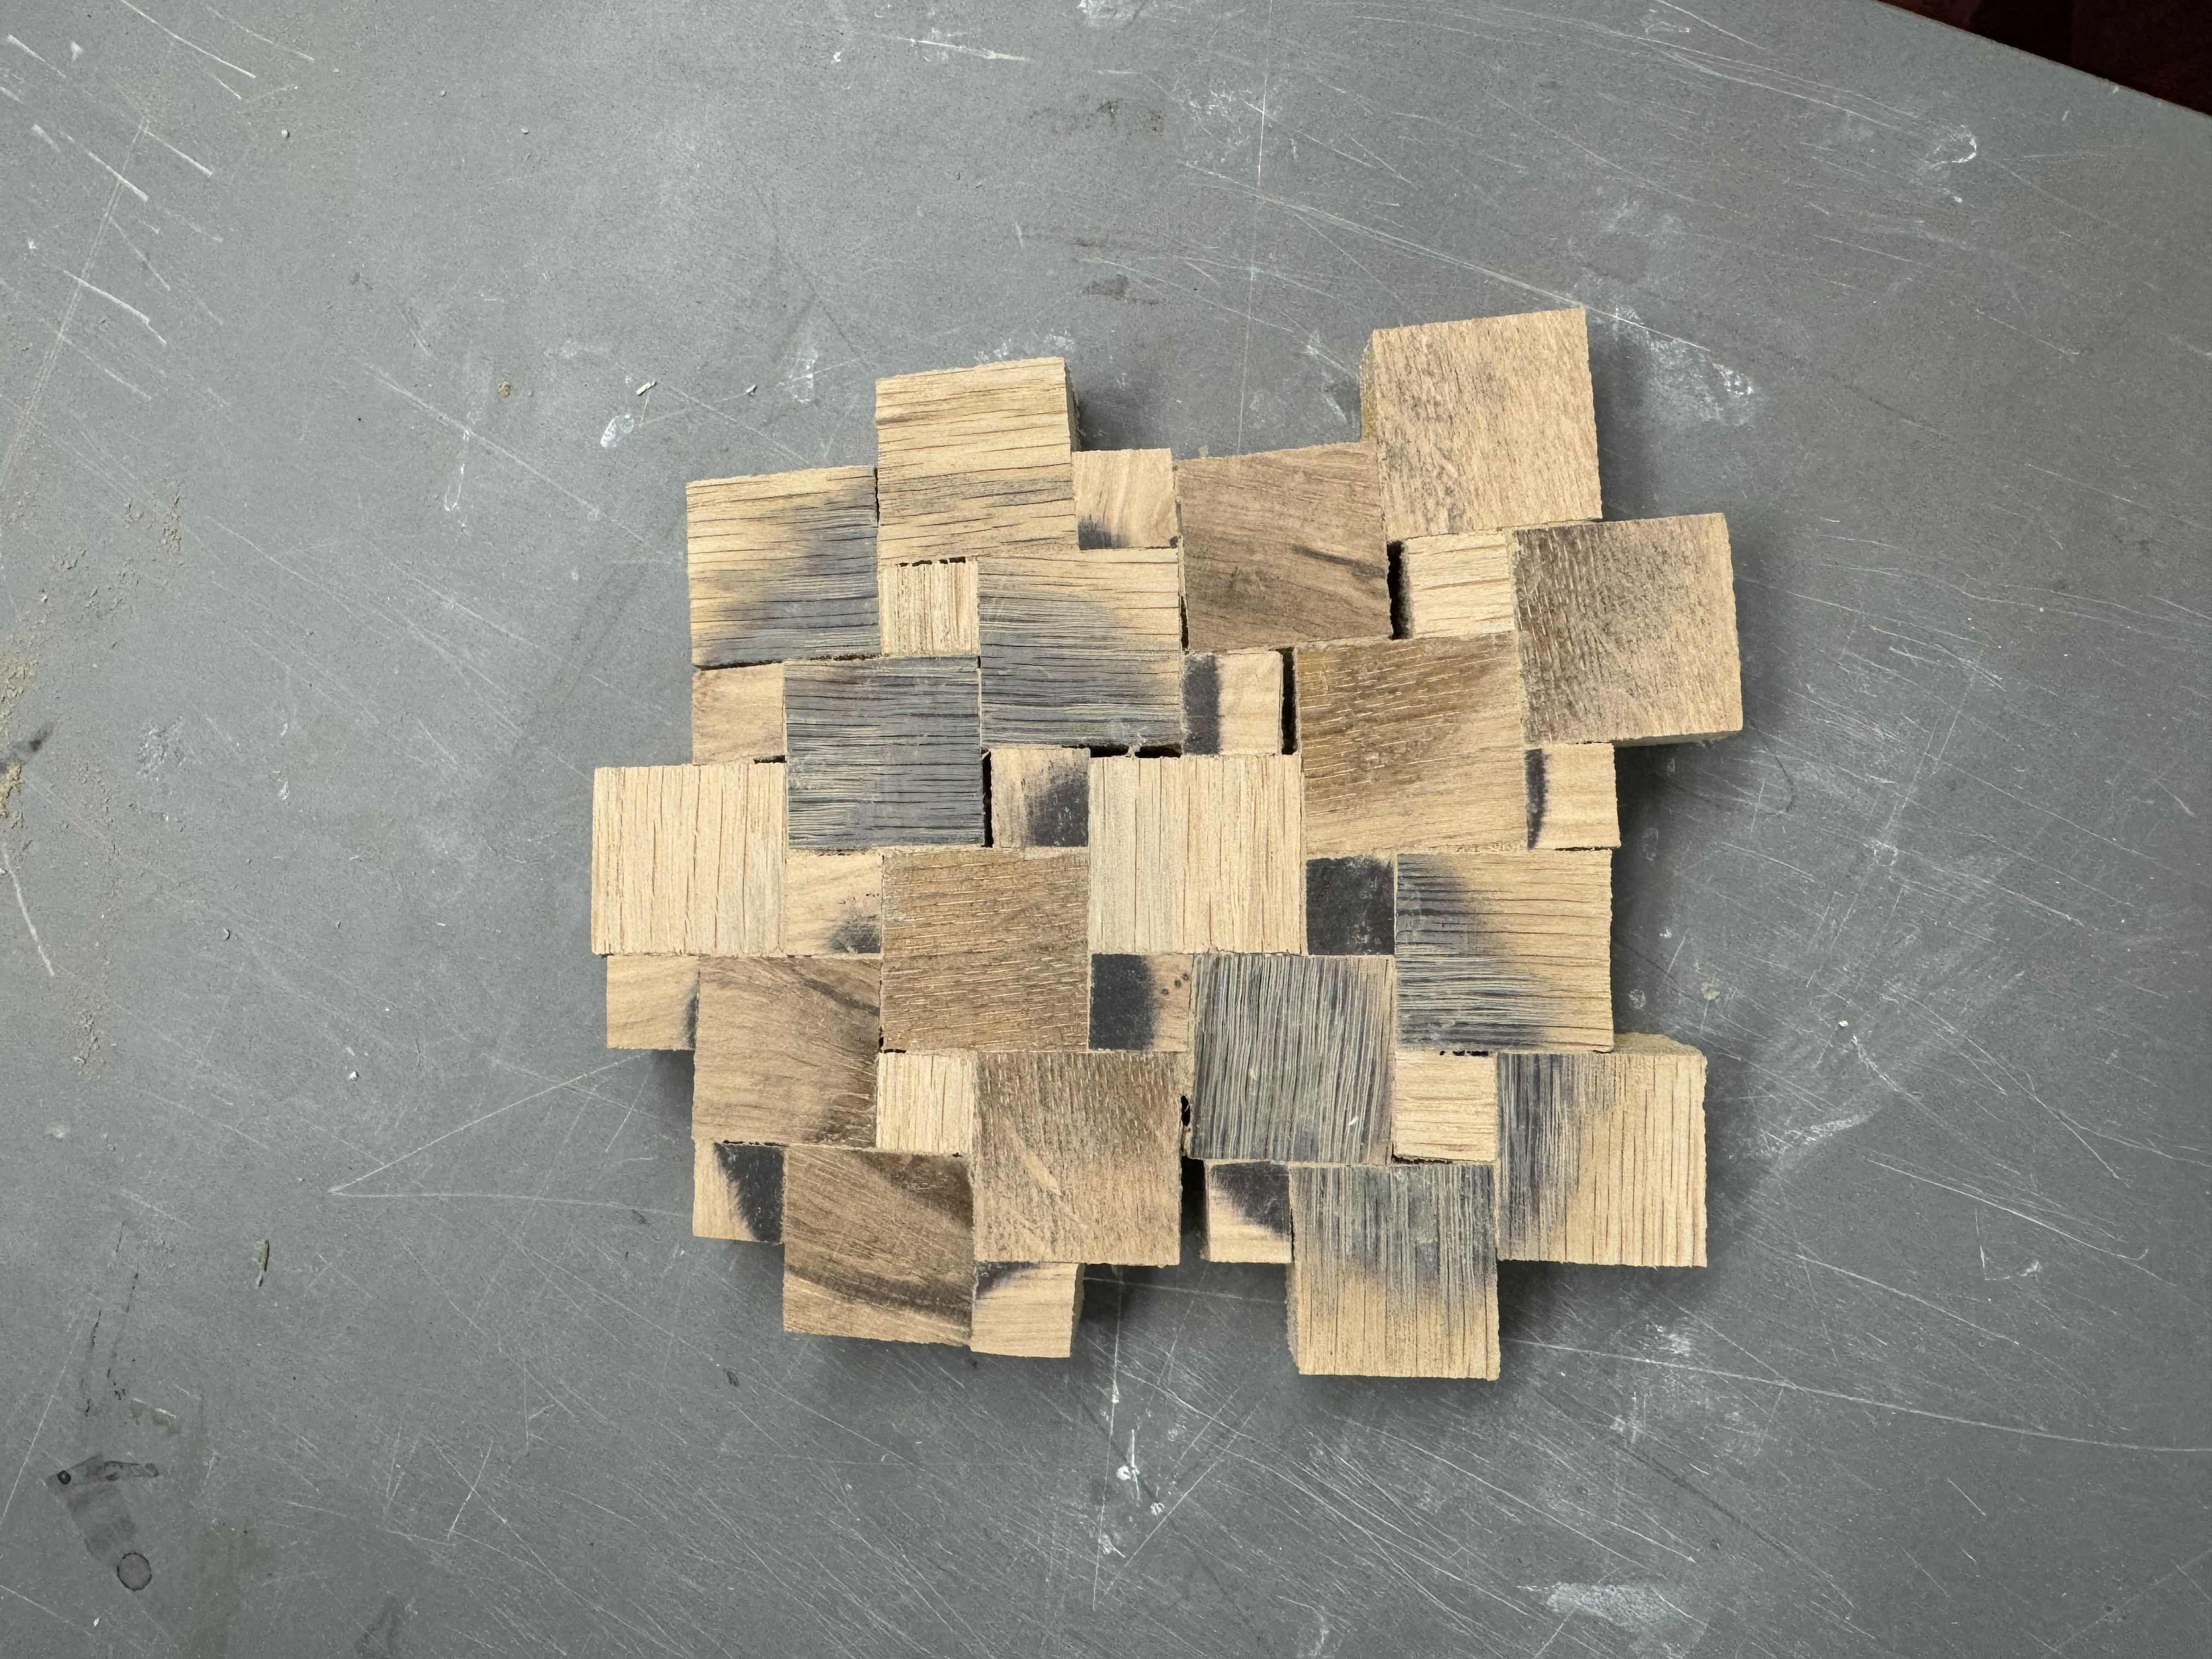
Through a search in the library, I discovered the mosaic art category and read about related techniques. I chose a pattern online and started piecing it together using wooden blocks. But I found that it was difficult to control the size differences of the wood pieces, which resulted in many large gaps that were difficult to cover up. The result after sanding and ebonizing is not pretty either. It is more distinctive before polishing, but the problem of glue overflow is difficult to solve.
In the end, I thought the previous texture scheme looked better, so I decided to make that texture.
In the end, I thought the previous texture scheme looked better, so I decided to make that texture.

At the same time, based on the size of ordinary chairs, I further improved the design. The armrest height is 60cm, the seat depth is the width of two skateboards, about 45cm, and the seat height is 45cm. I didn't determine the angle of inclination carefully, I planned to decide it based on the bearing capacity of the board. I think I'm almost done with my measurements now, the next thing I need to think about is how to make my chair look better, the current design is looking a bit bulky. It would be better if it fits the theme better or expresses something else. After drawing a good-looking shape, I plan to make a 1:1 cardboard model.

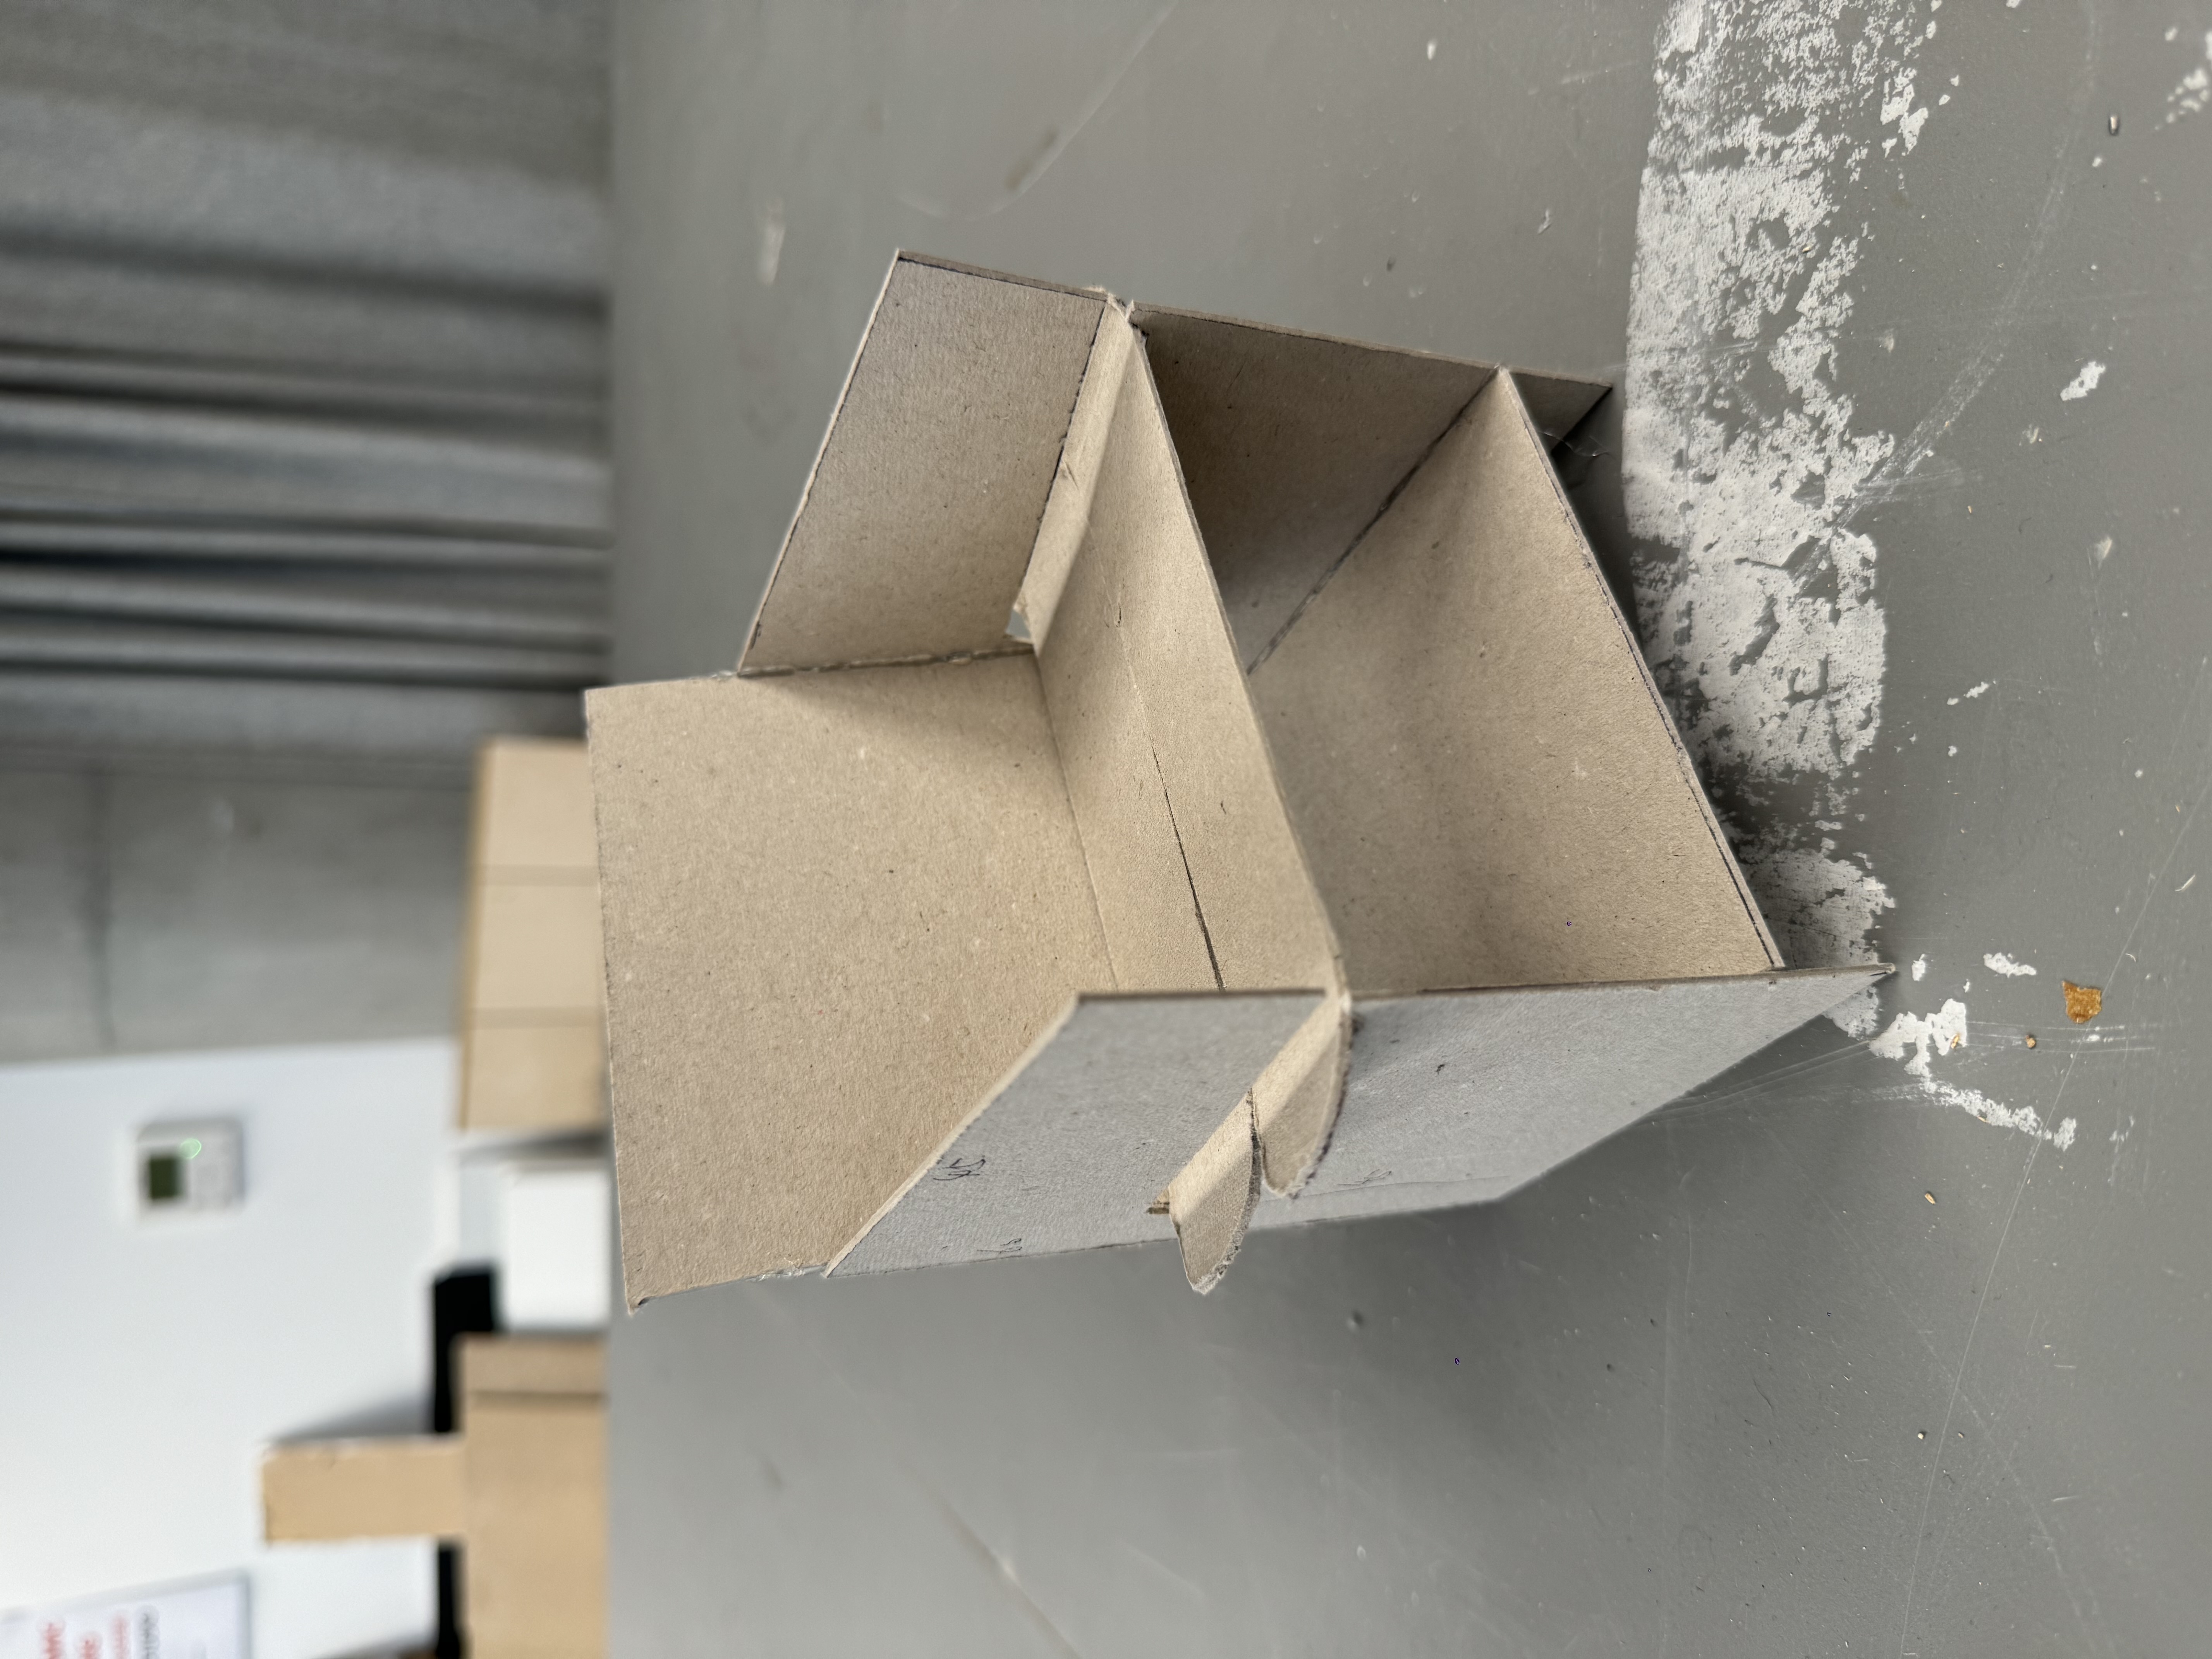
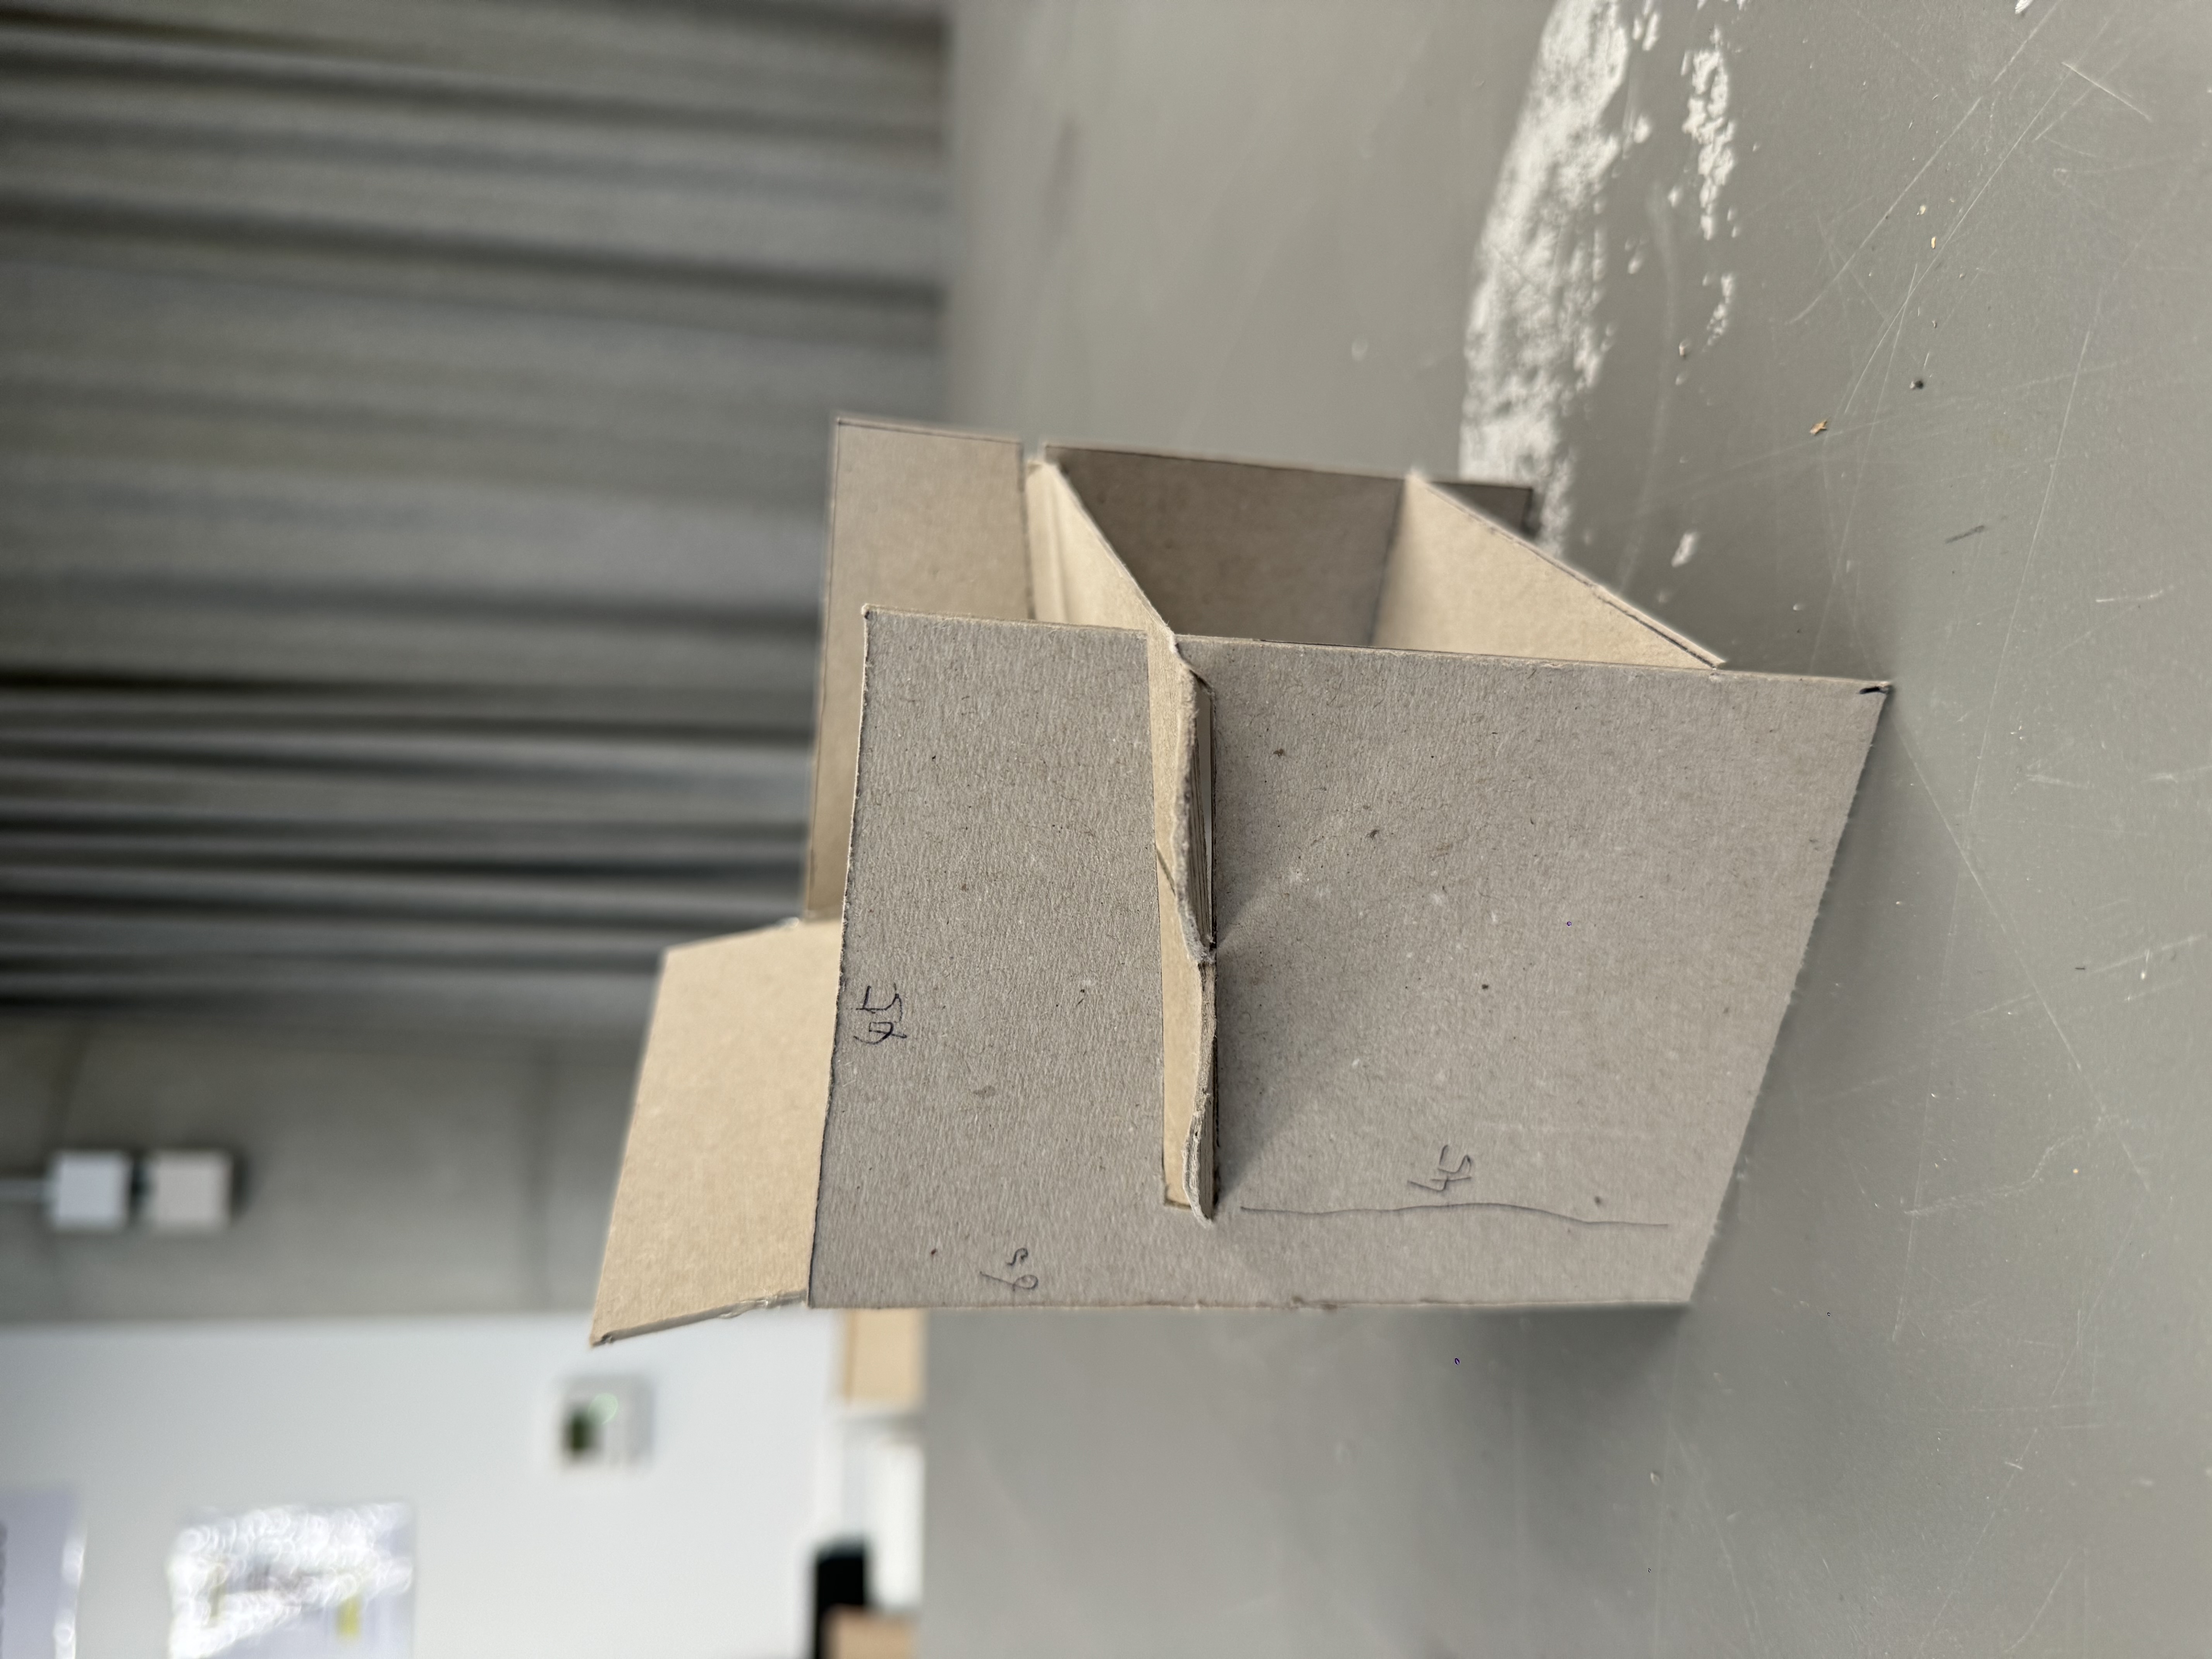
 This is just a ramdon test.
21/05/2024


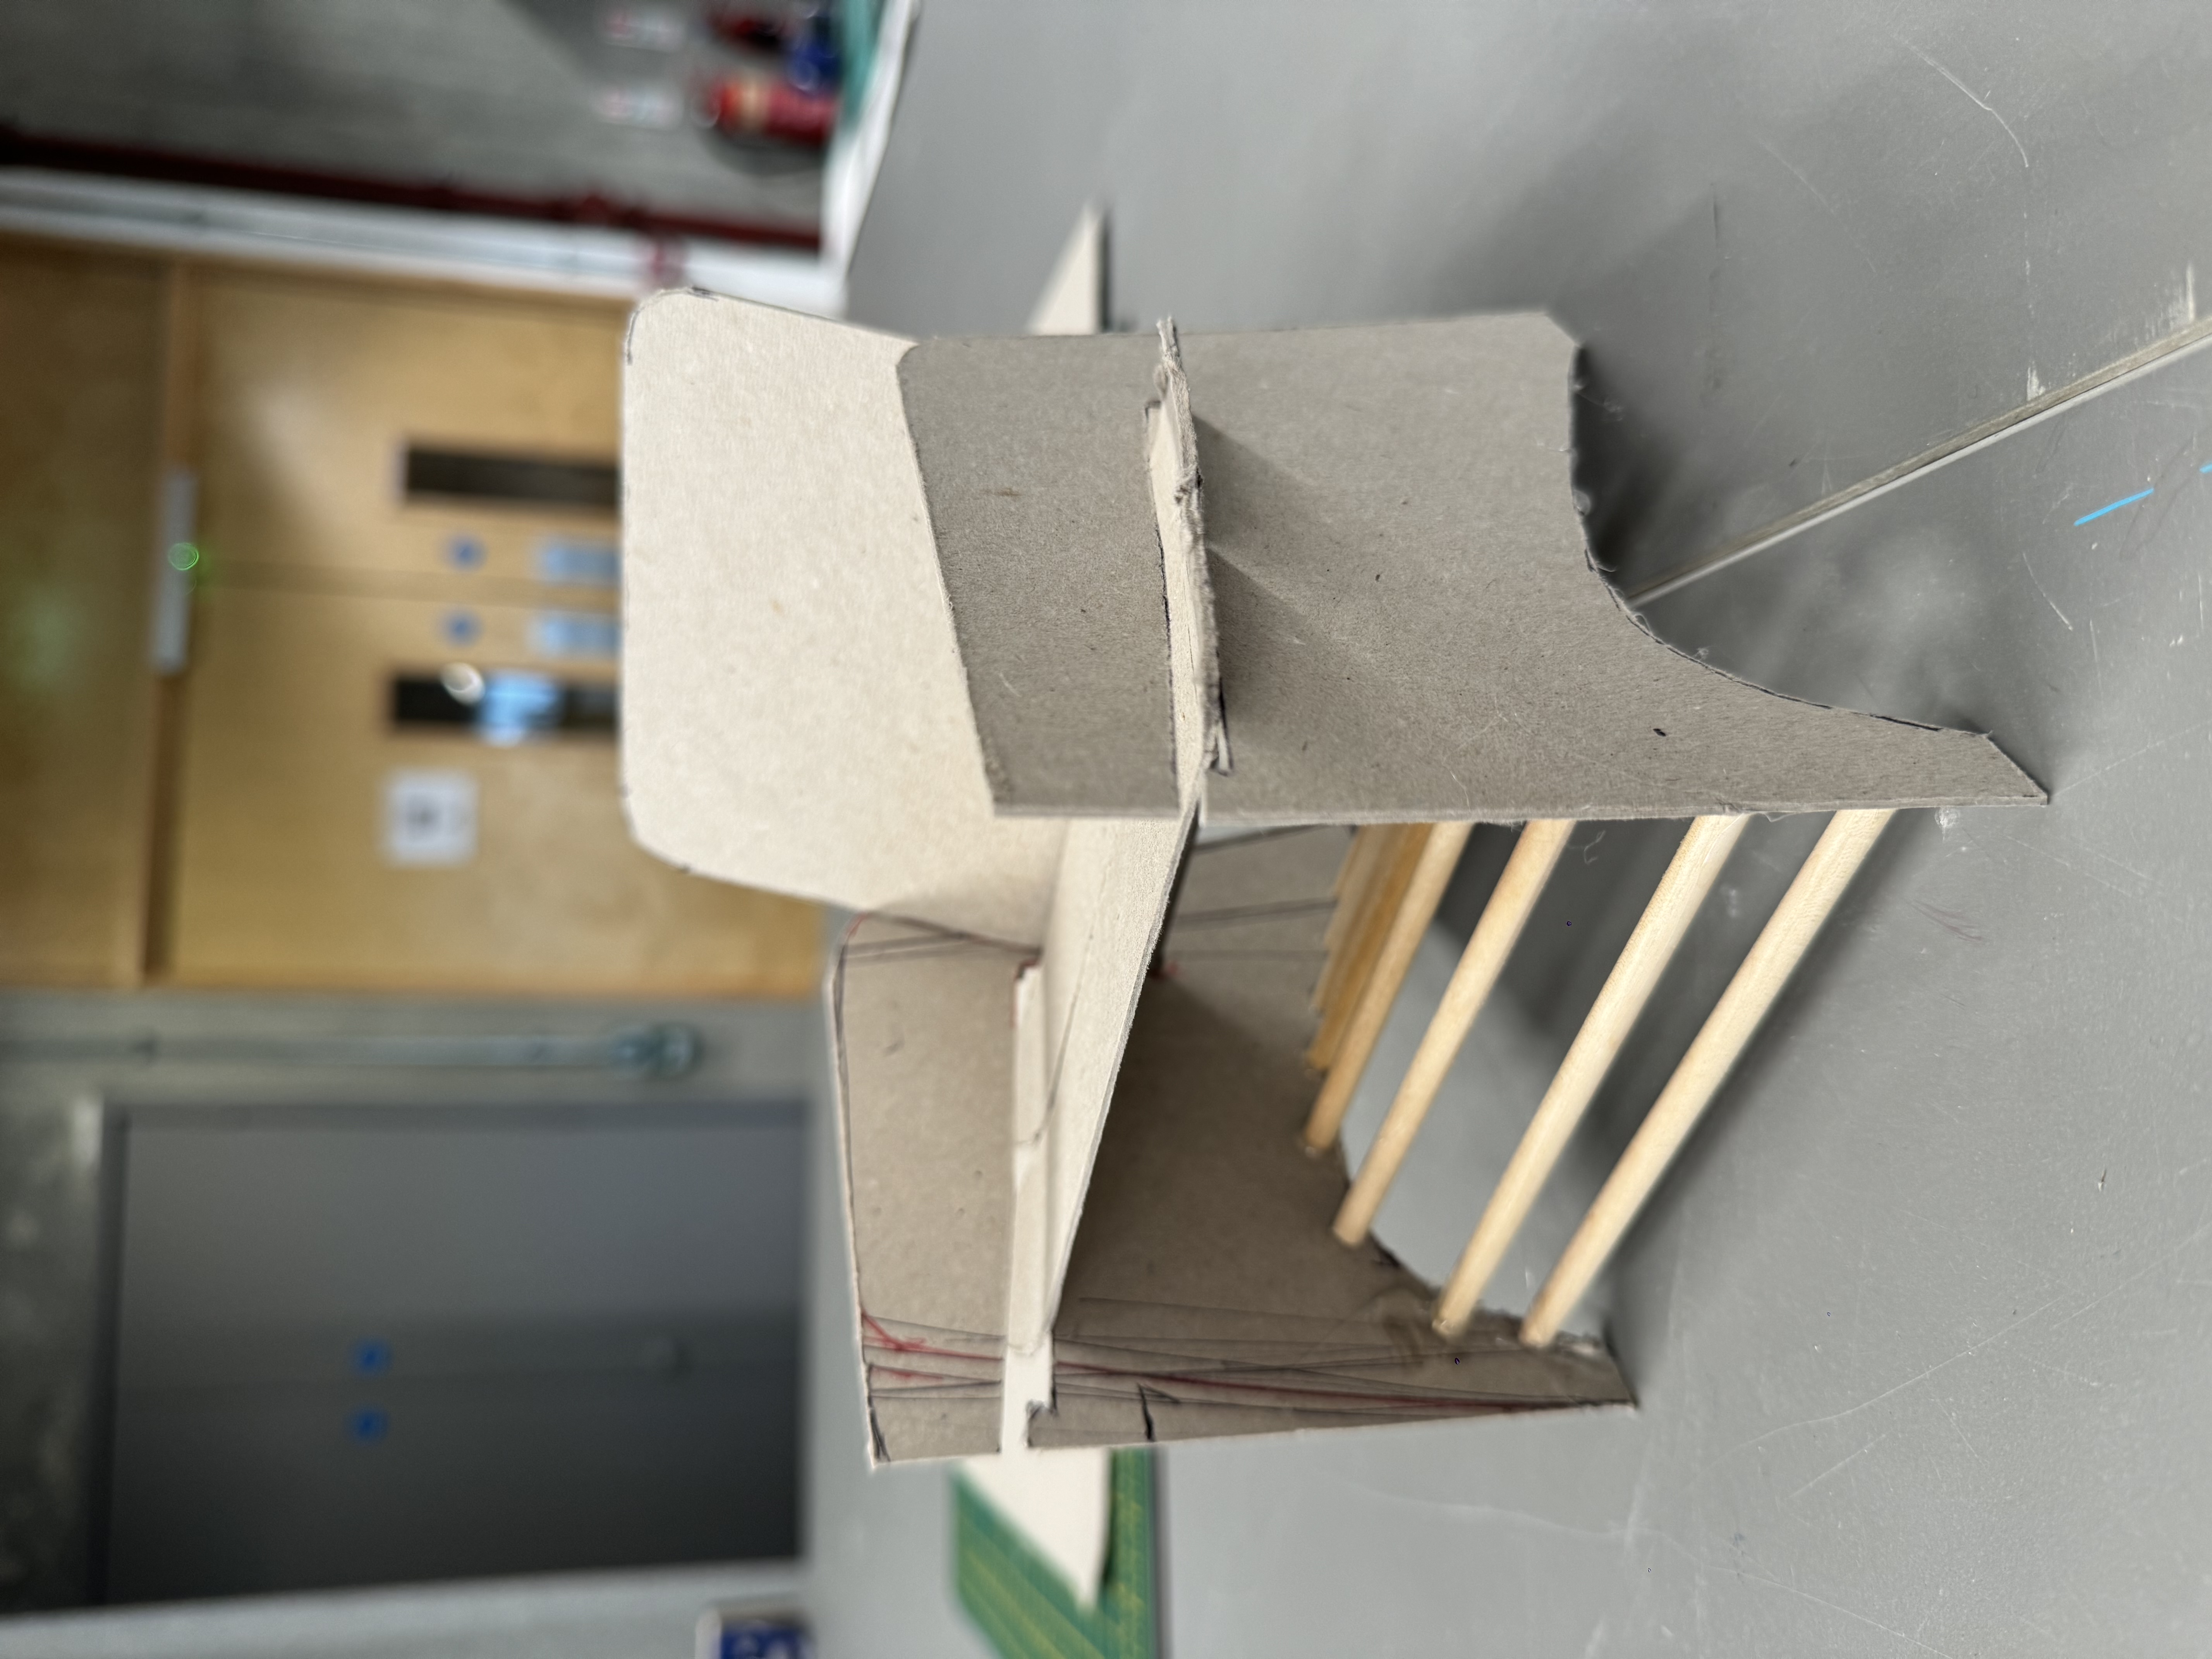


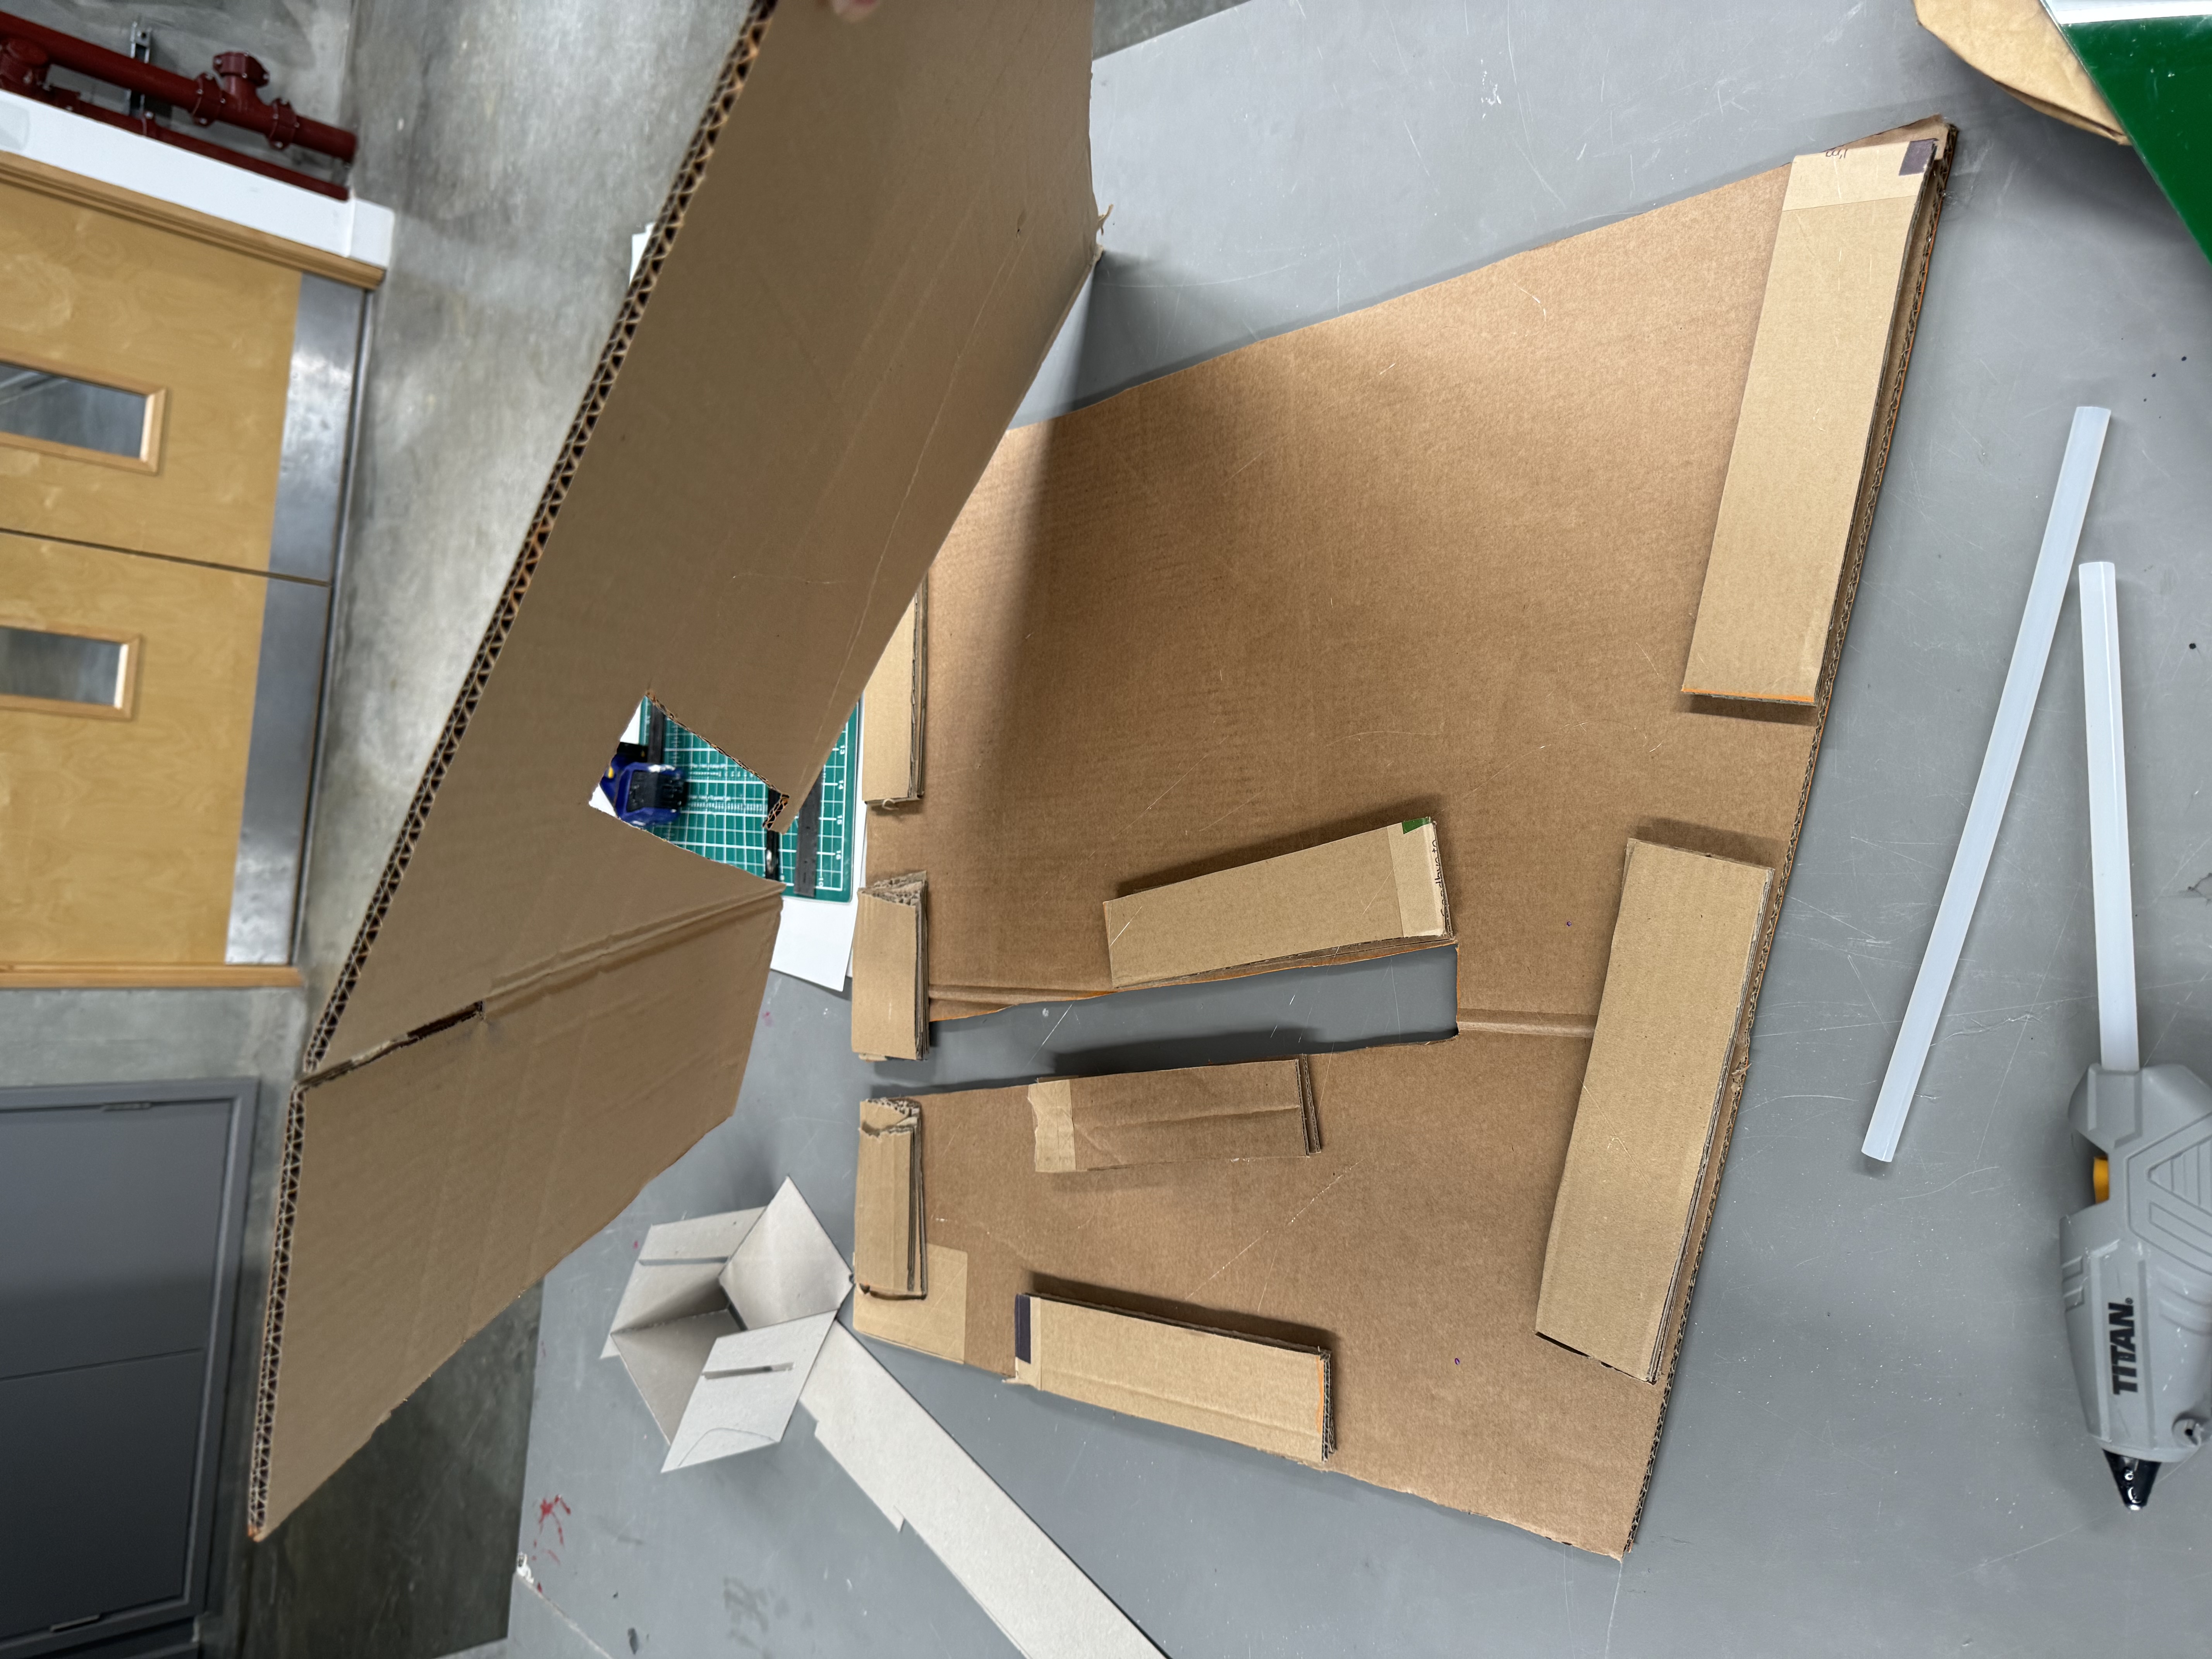

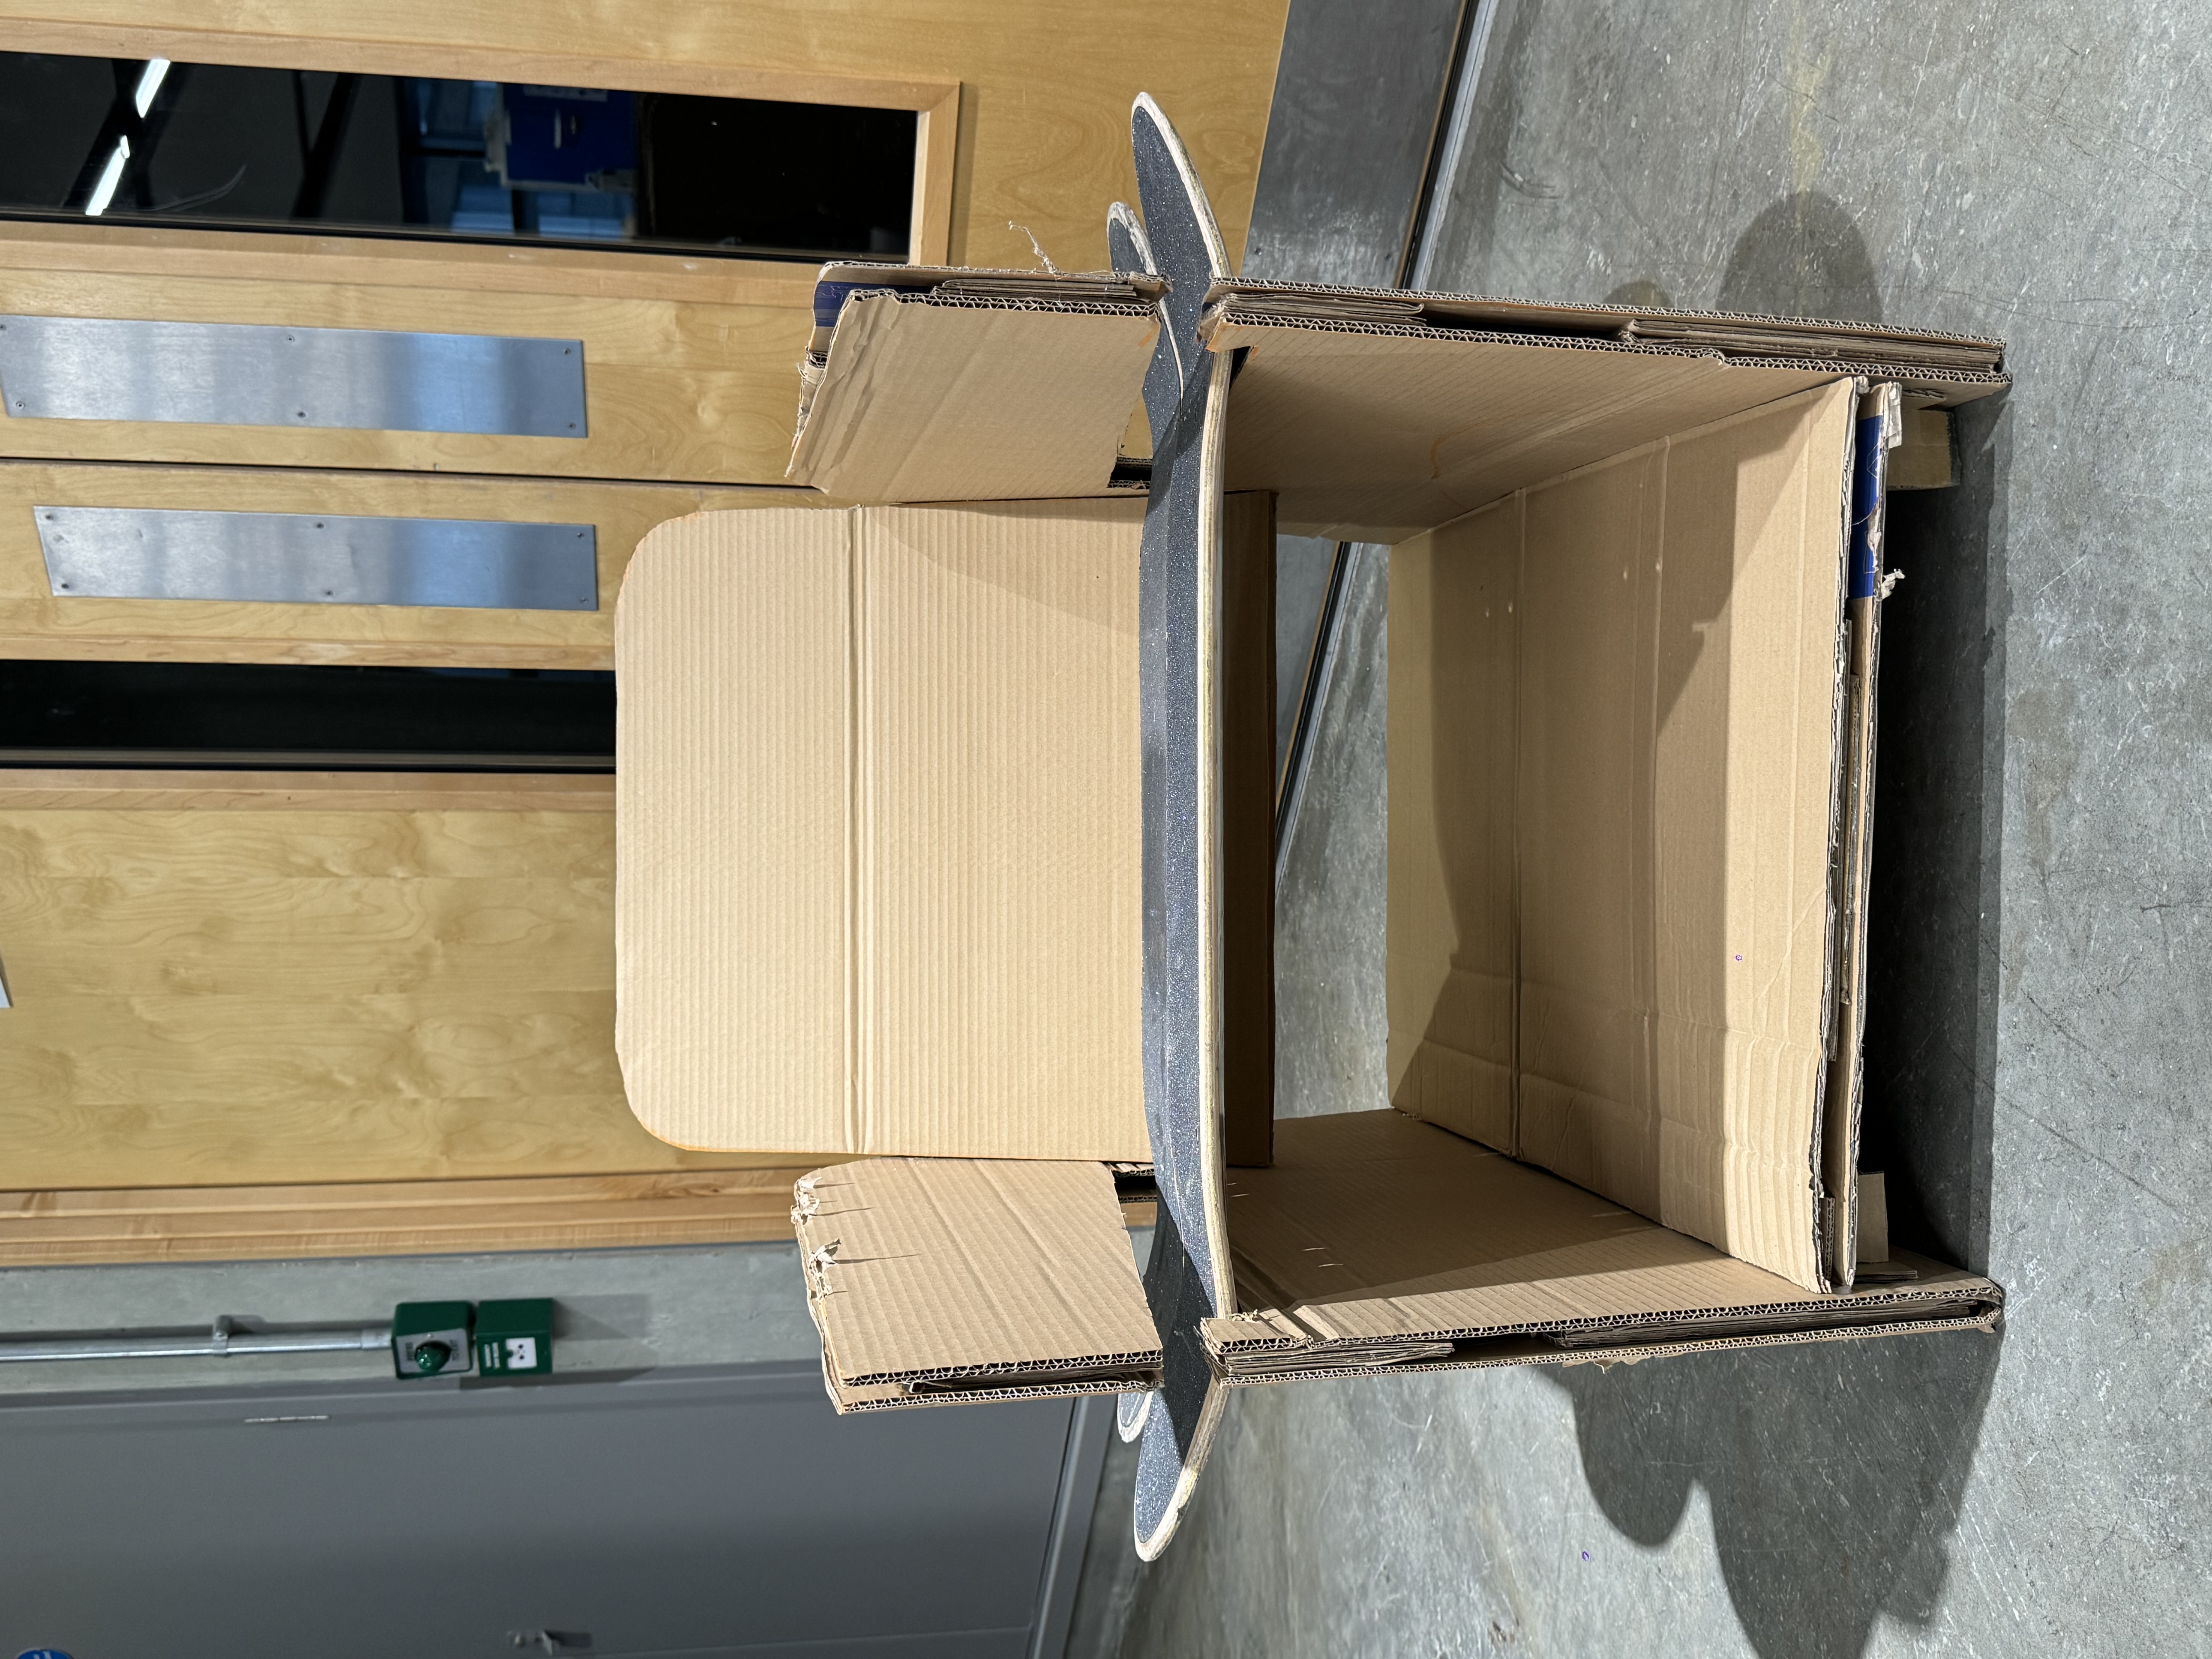

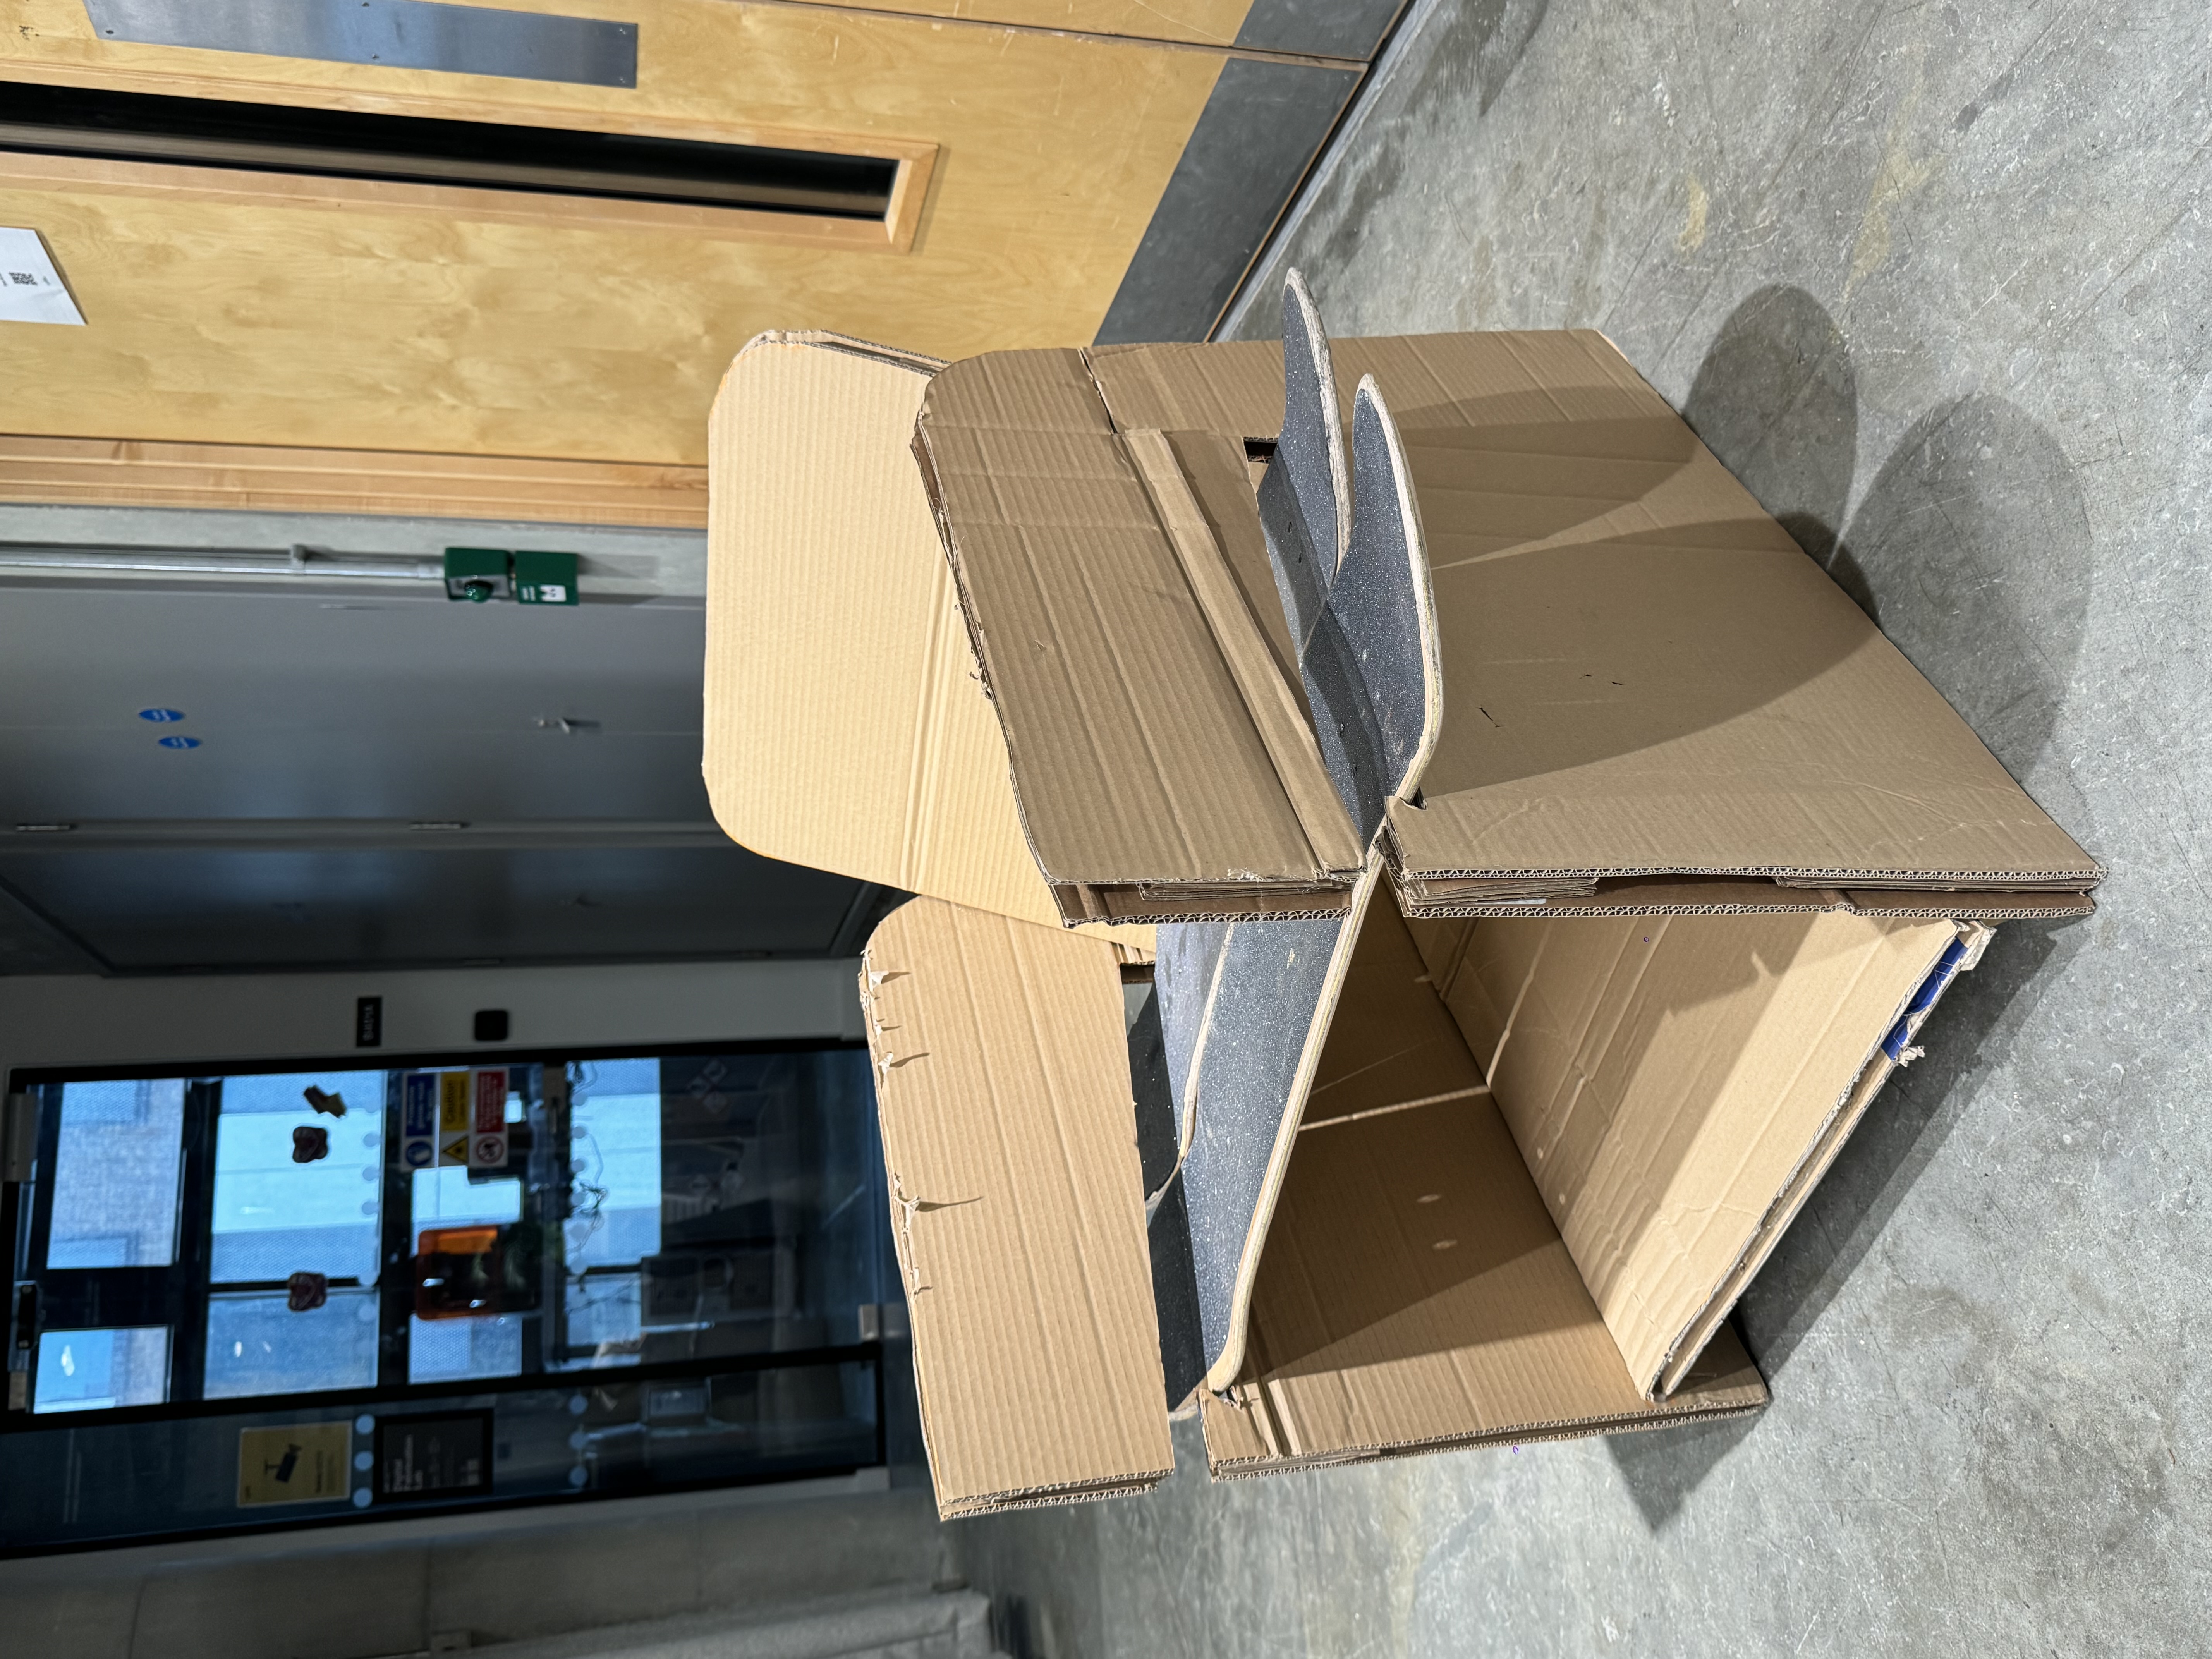


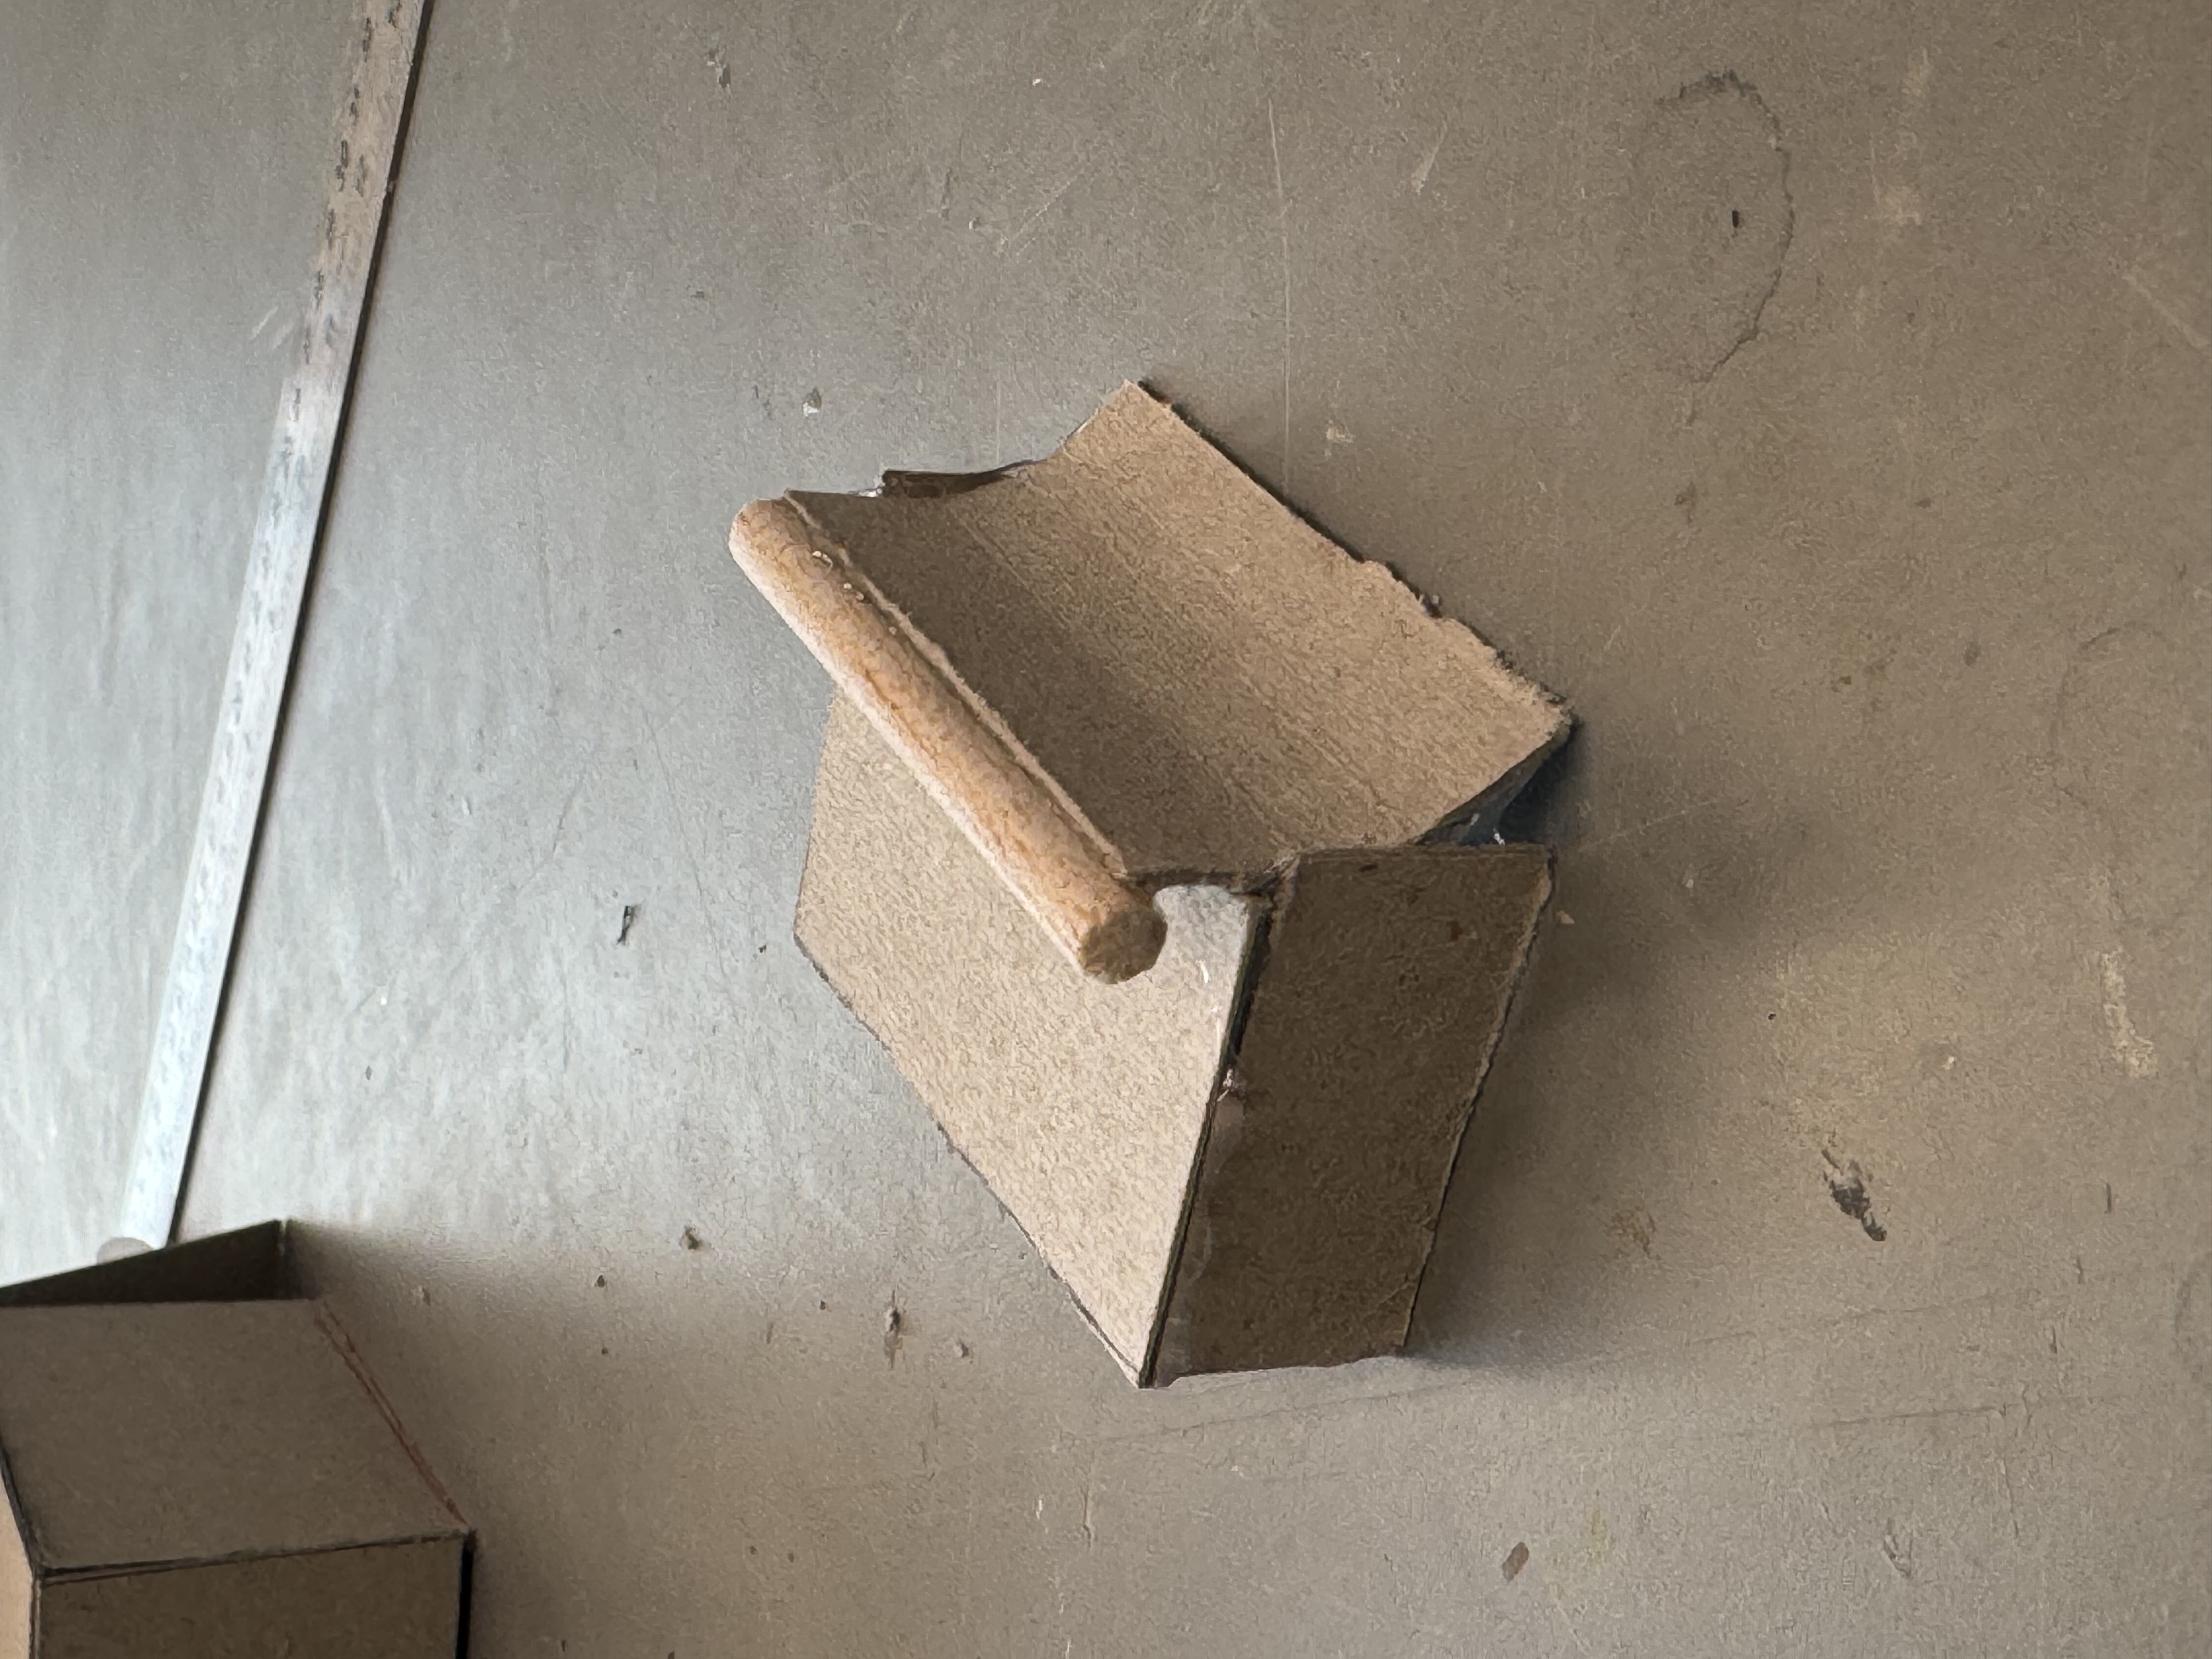
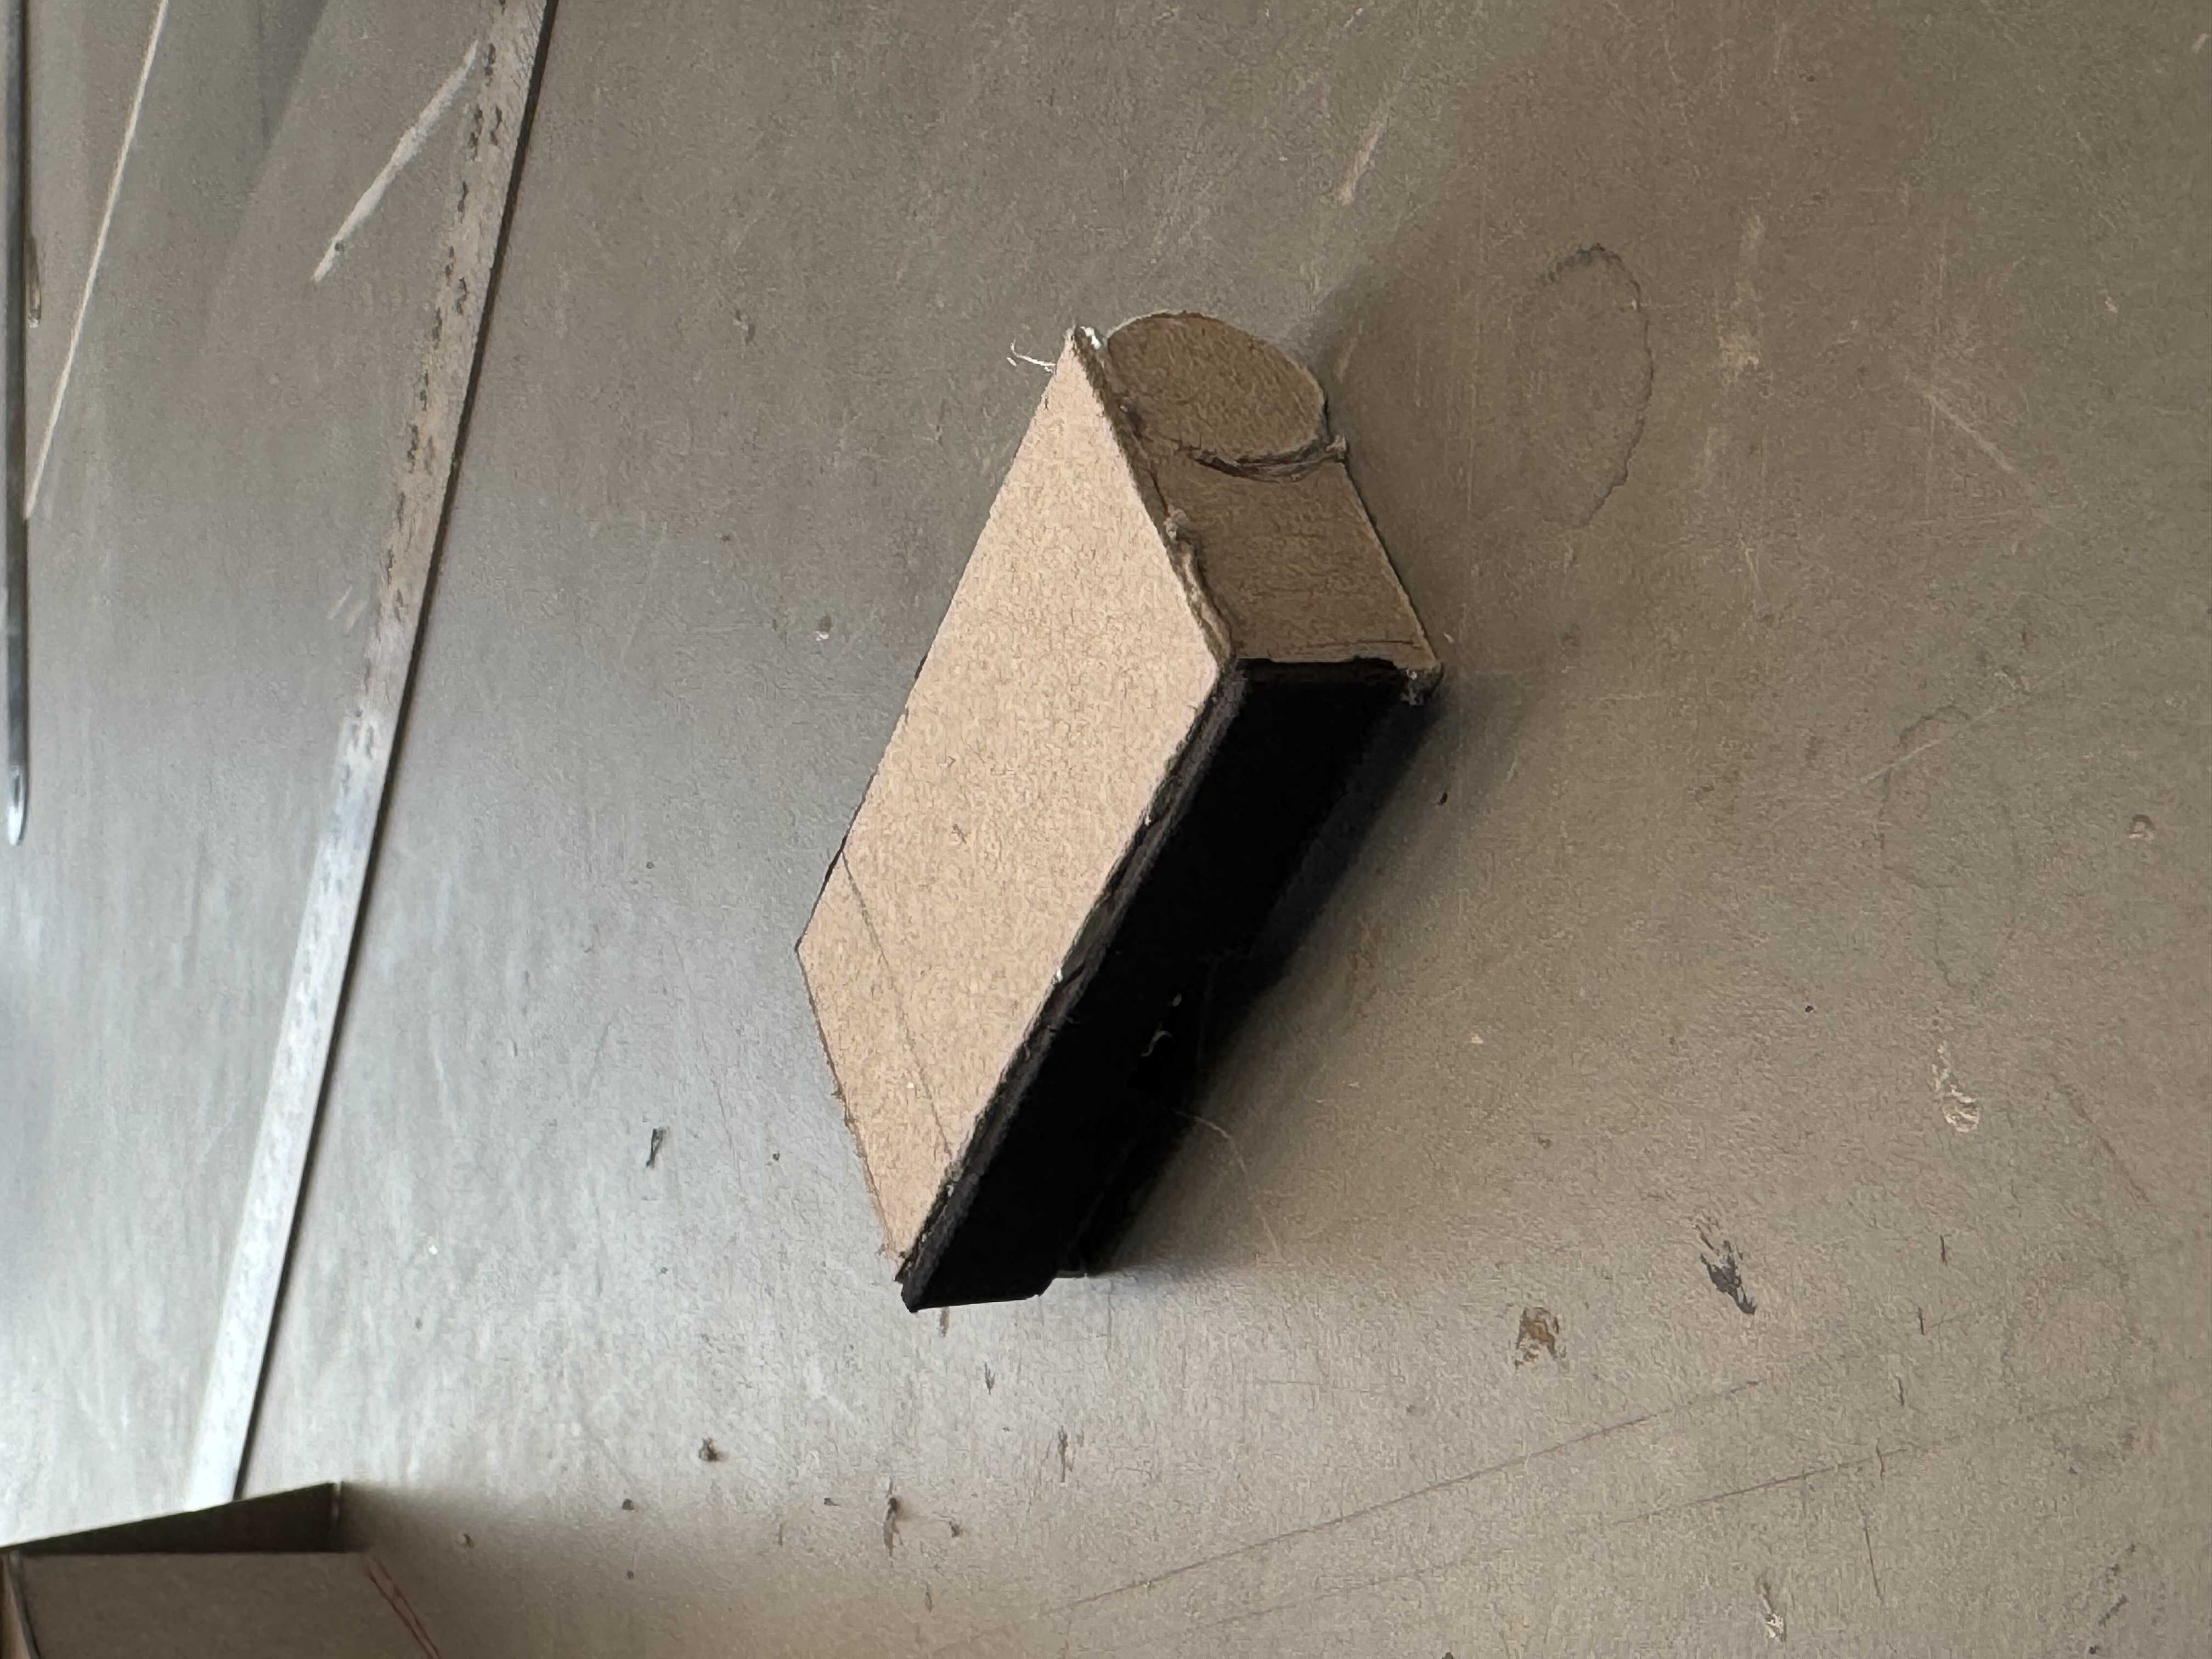
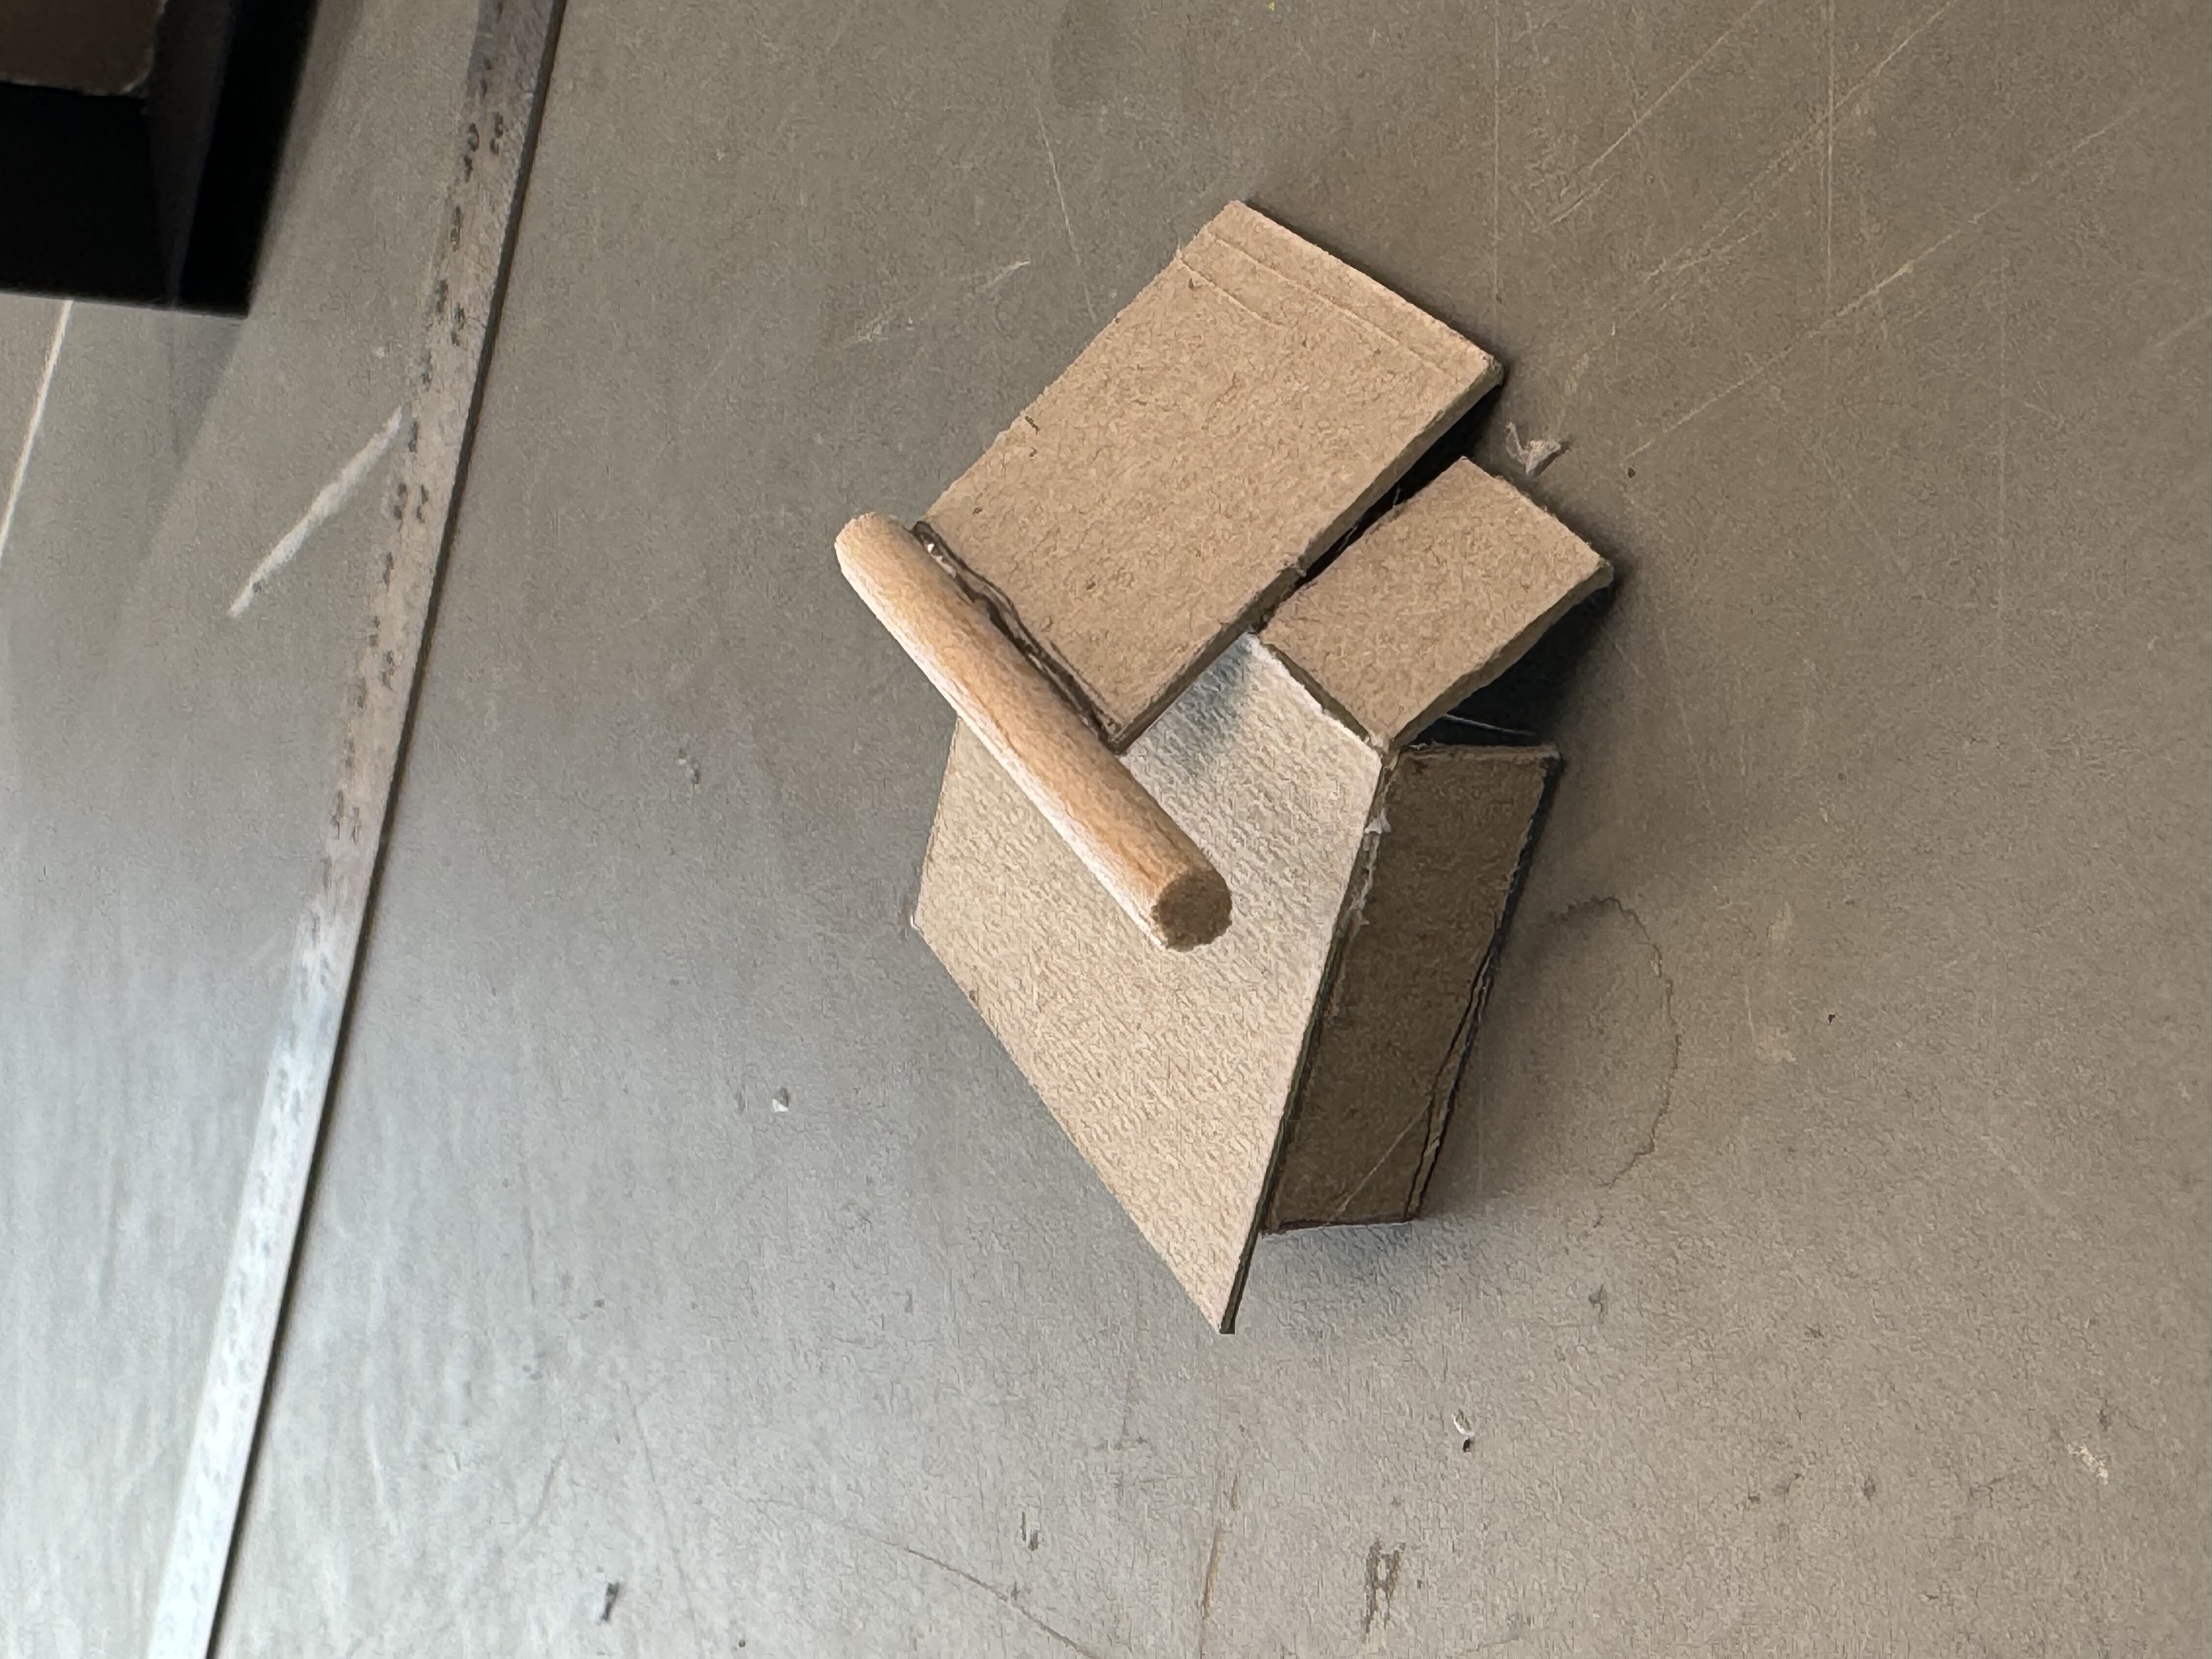
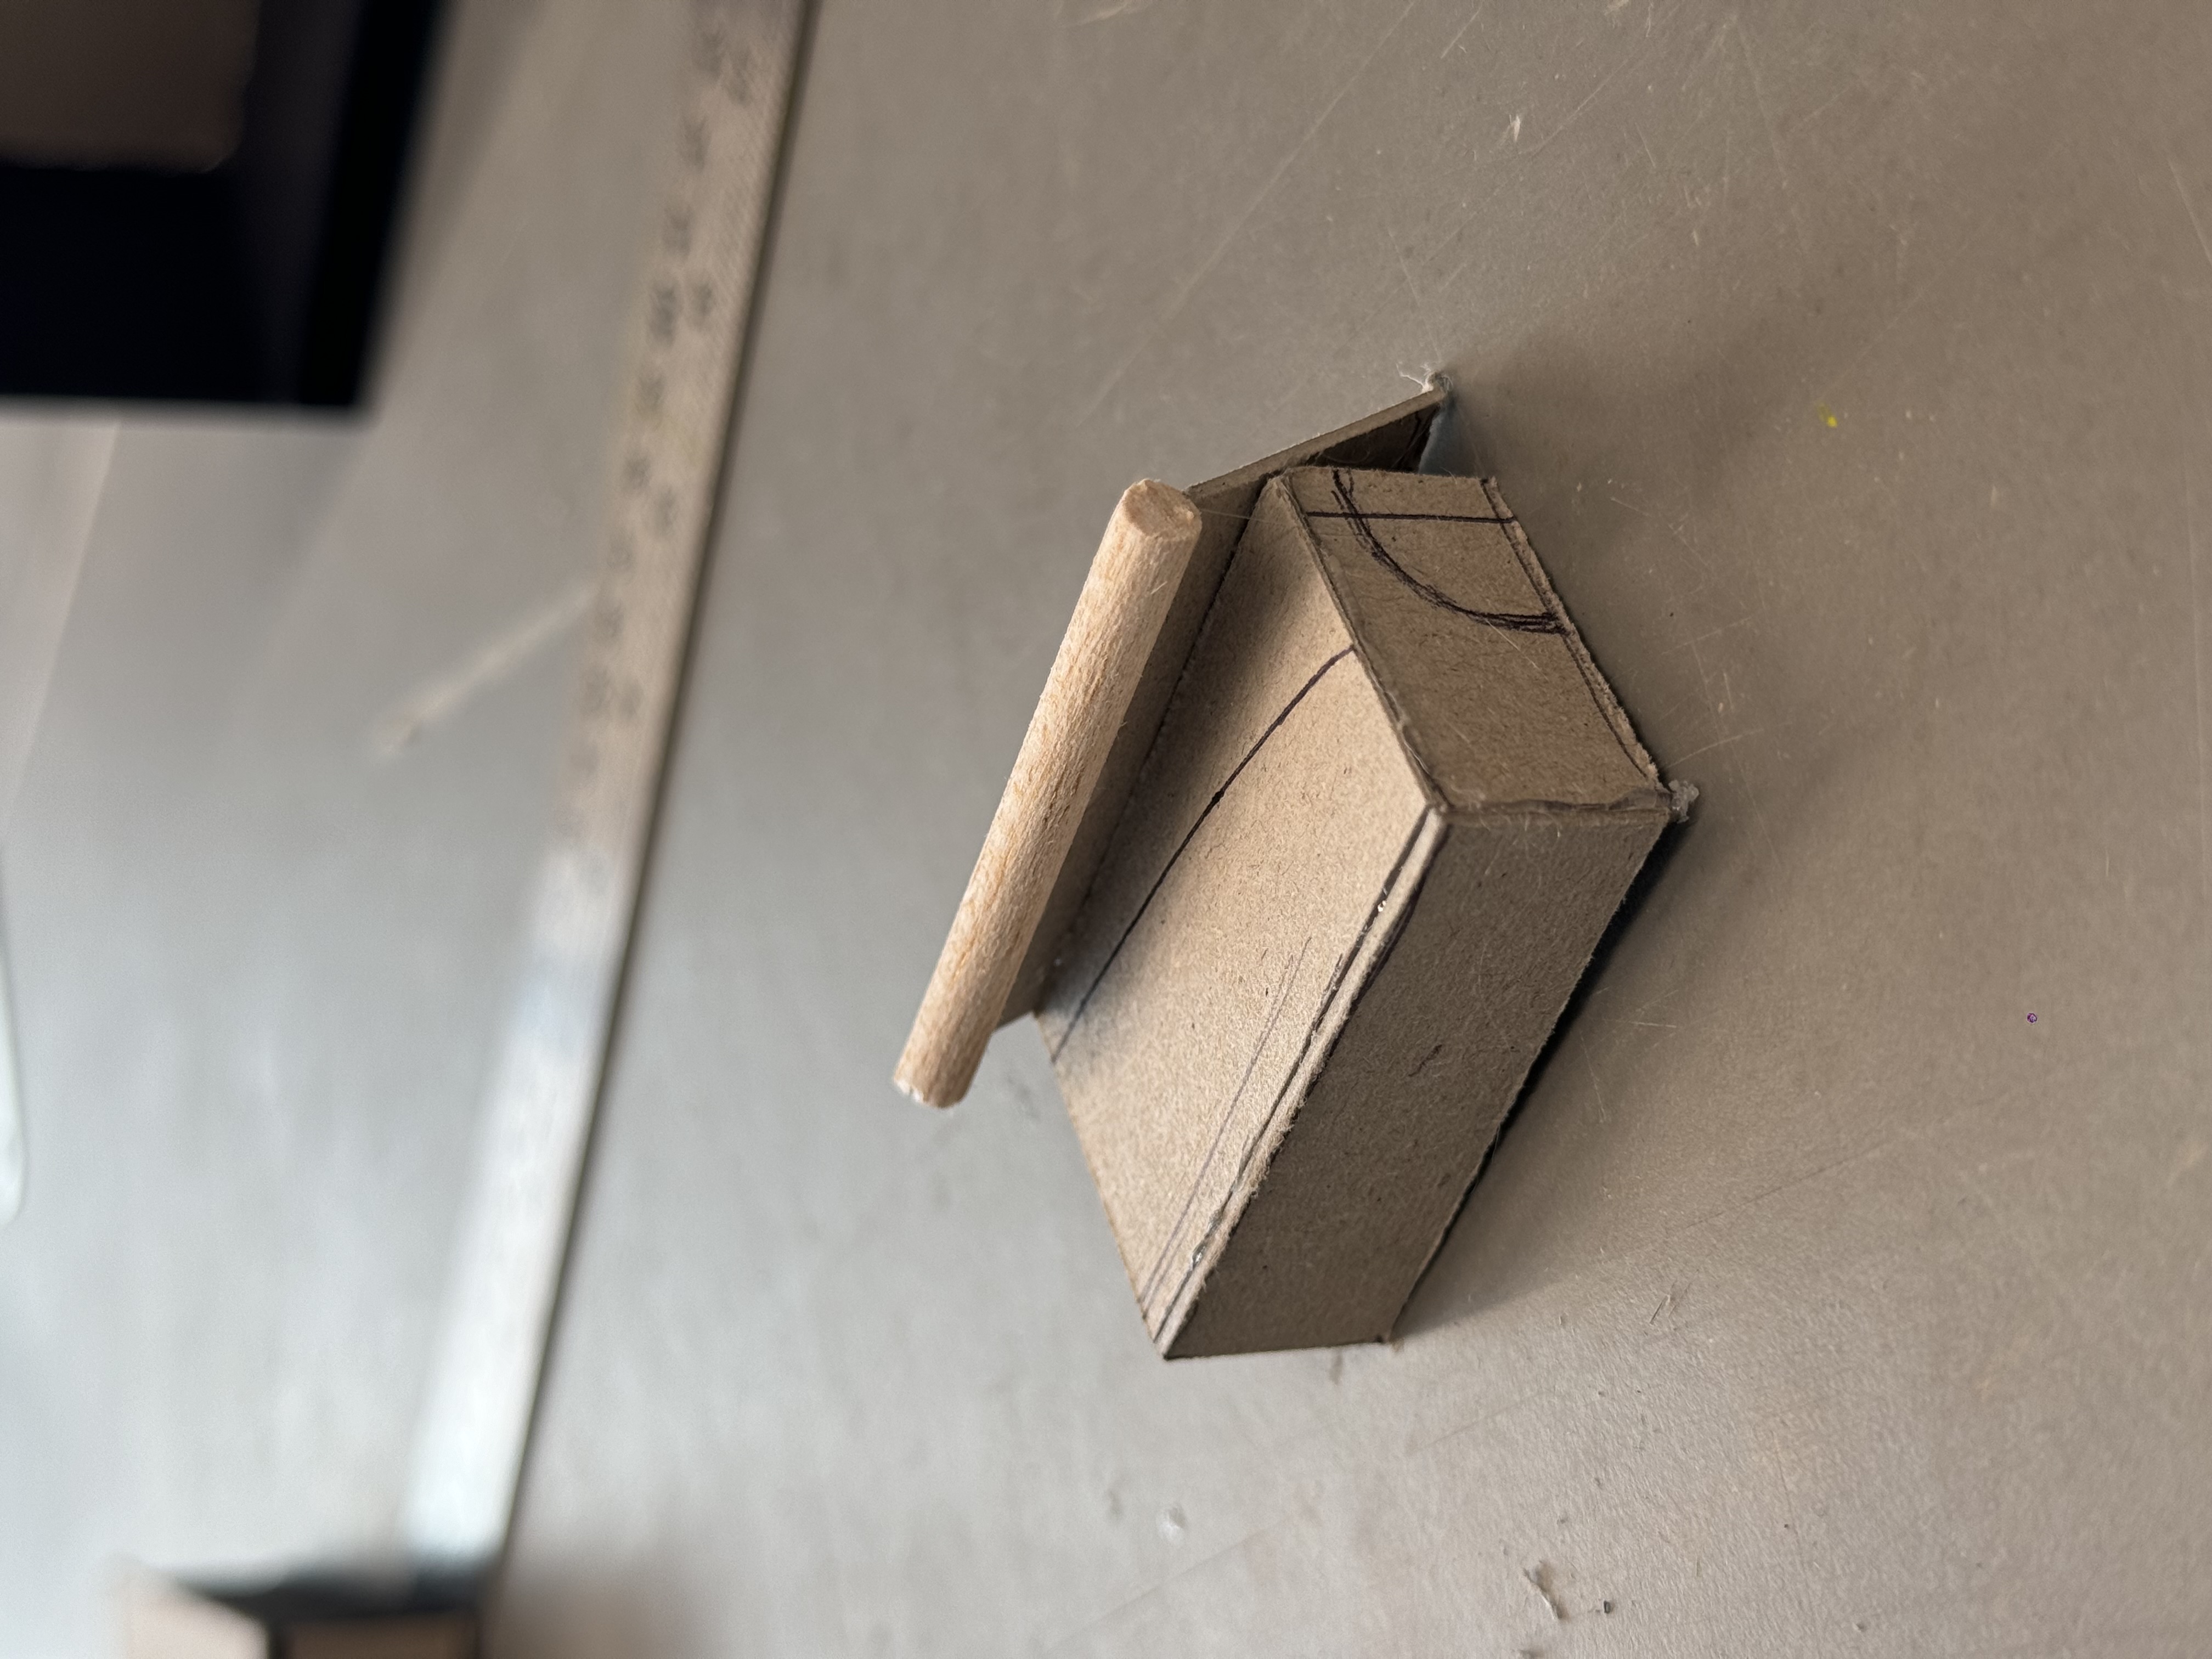
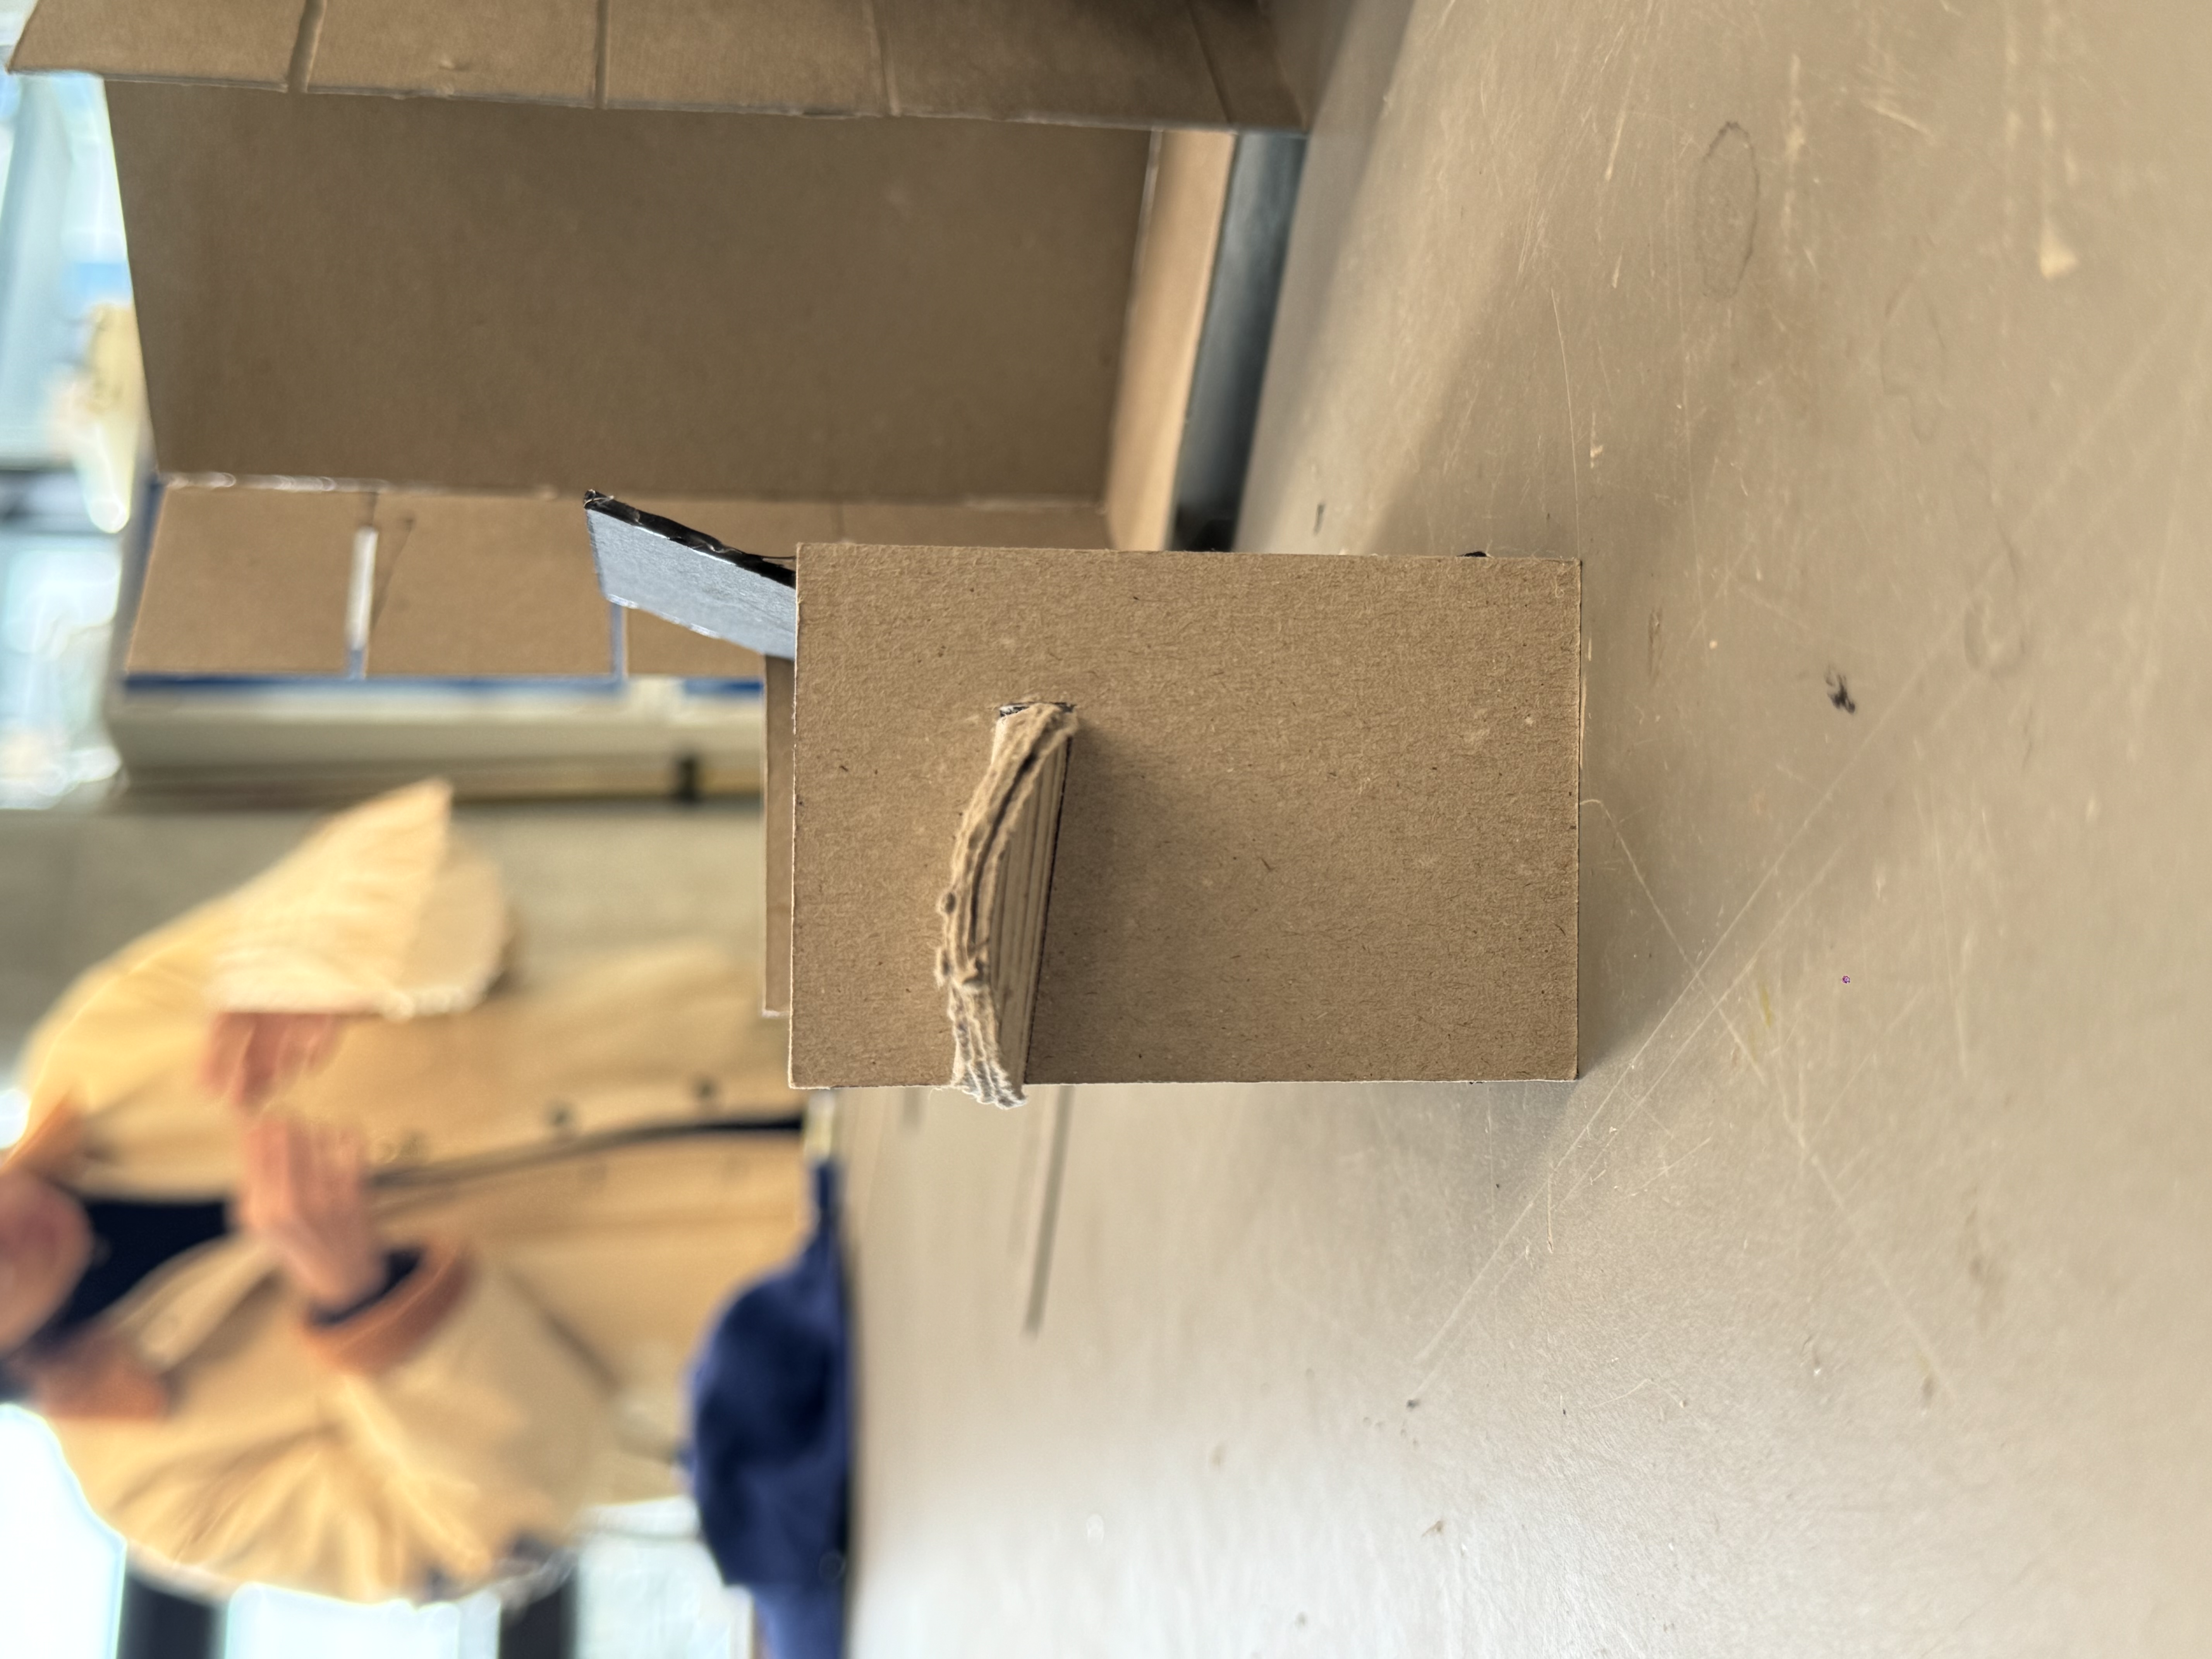
When making this chair, I add some small cardboard pieces between two boards to imitate the thickness of the real product. I found that the decks would be not so stable if the griptape side upwards unless with the truck underneath. I think I can add the rubber-like material on the groove to ensure that there is enough friction to fix the decks. Thus, for my next step, I will go to make a 1:5 scale model with real texture.
24/05/2024


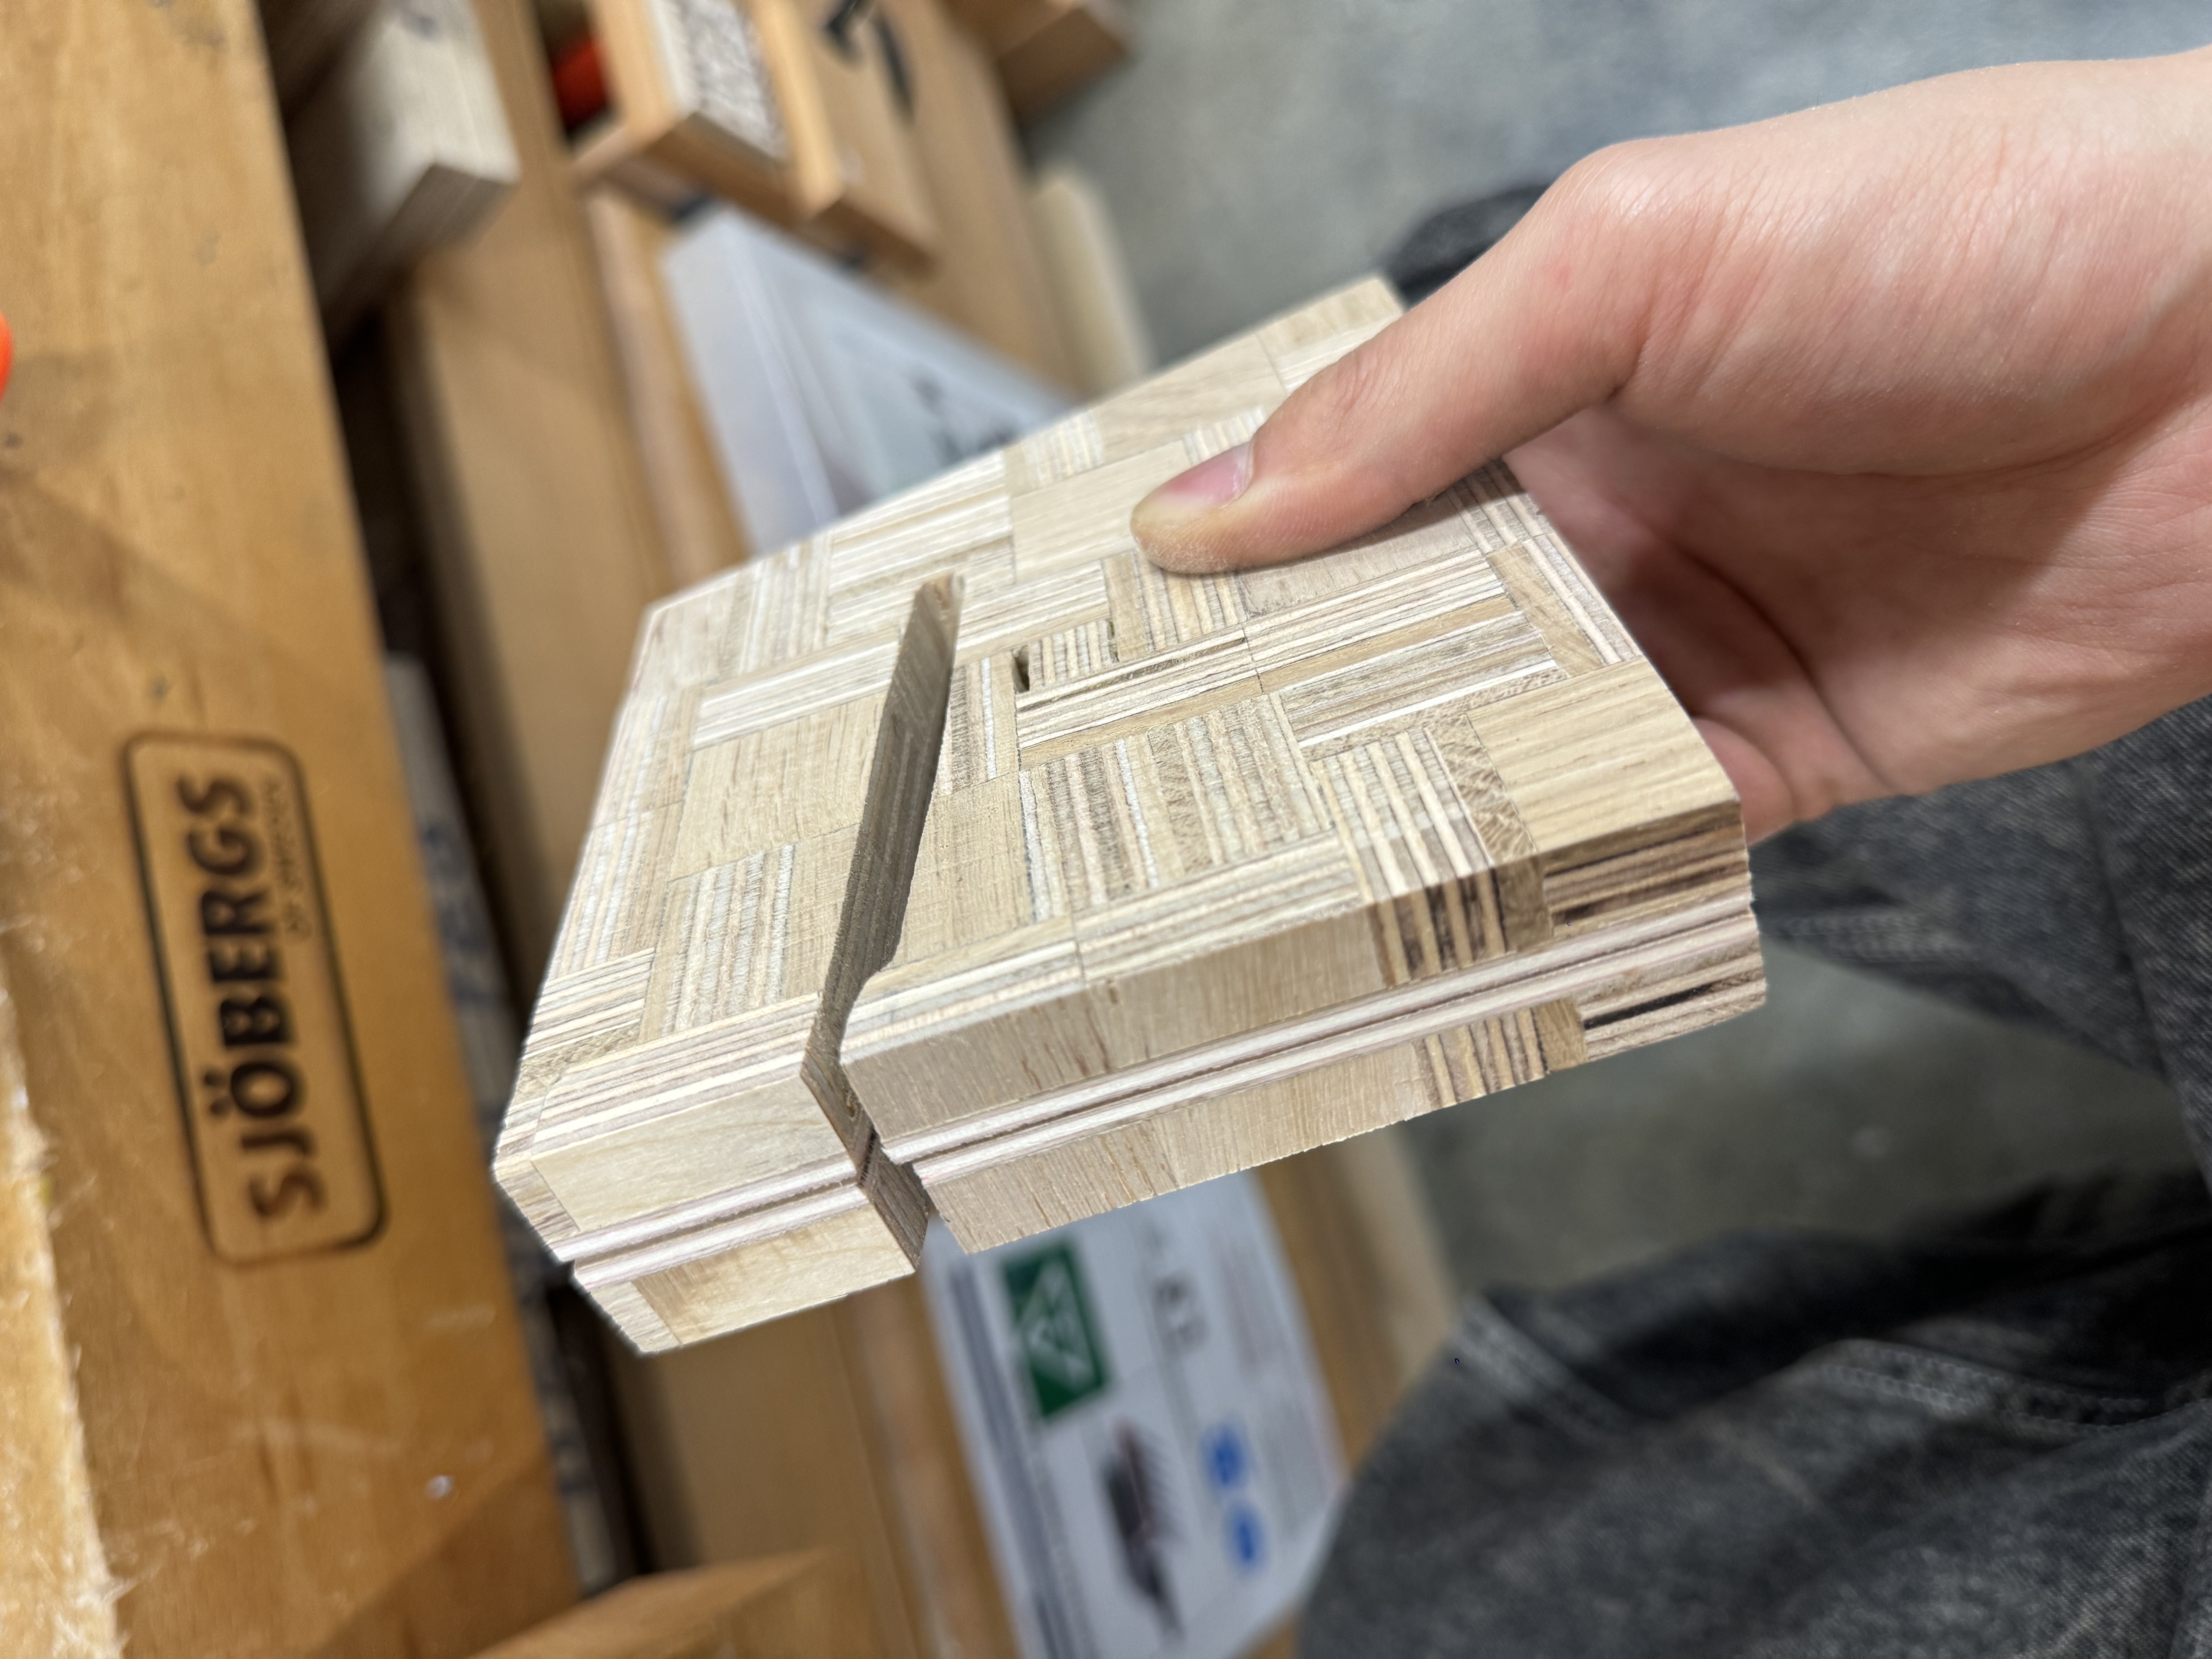
 I also thought about the making process of big scaled model.
 When I wanted to sand it with angle, I found it really hard and slow. It is right to use CNC for real scale. And manually sanding would cause the obvious and clean texture of horizontal blocks being rough.
I can see the rough texture from the picture below. I drew the pattern of chair on illustrator and printed it out to copy it on the wood.


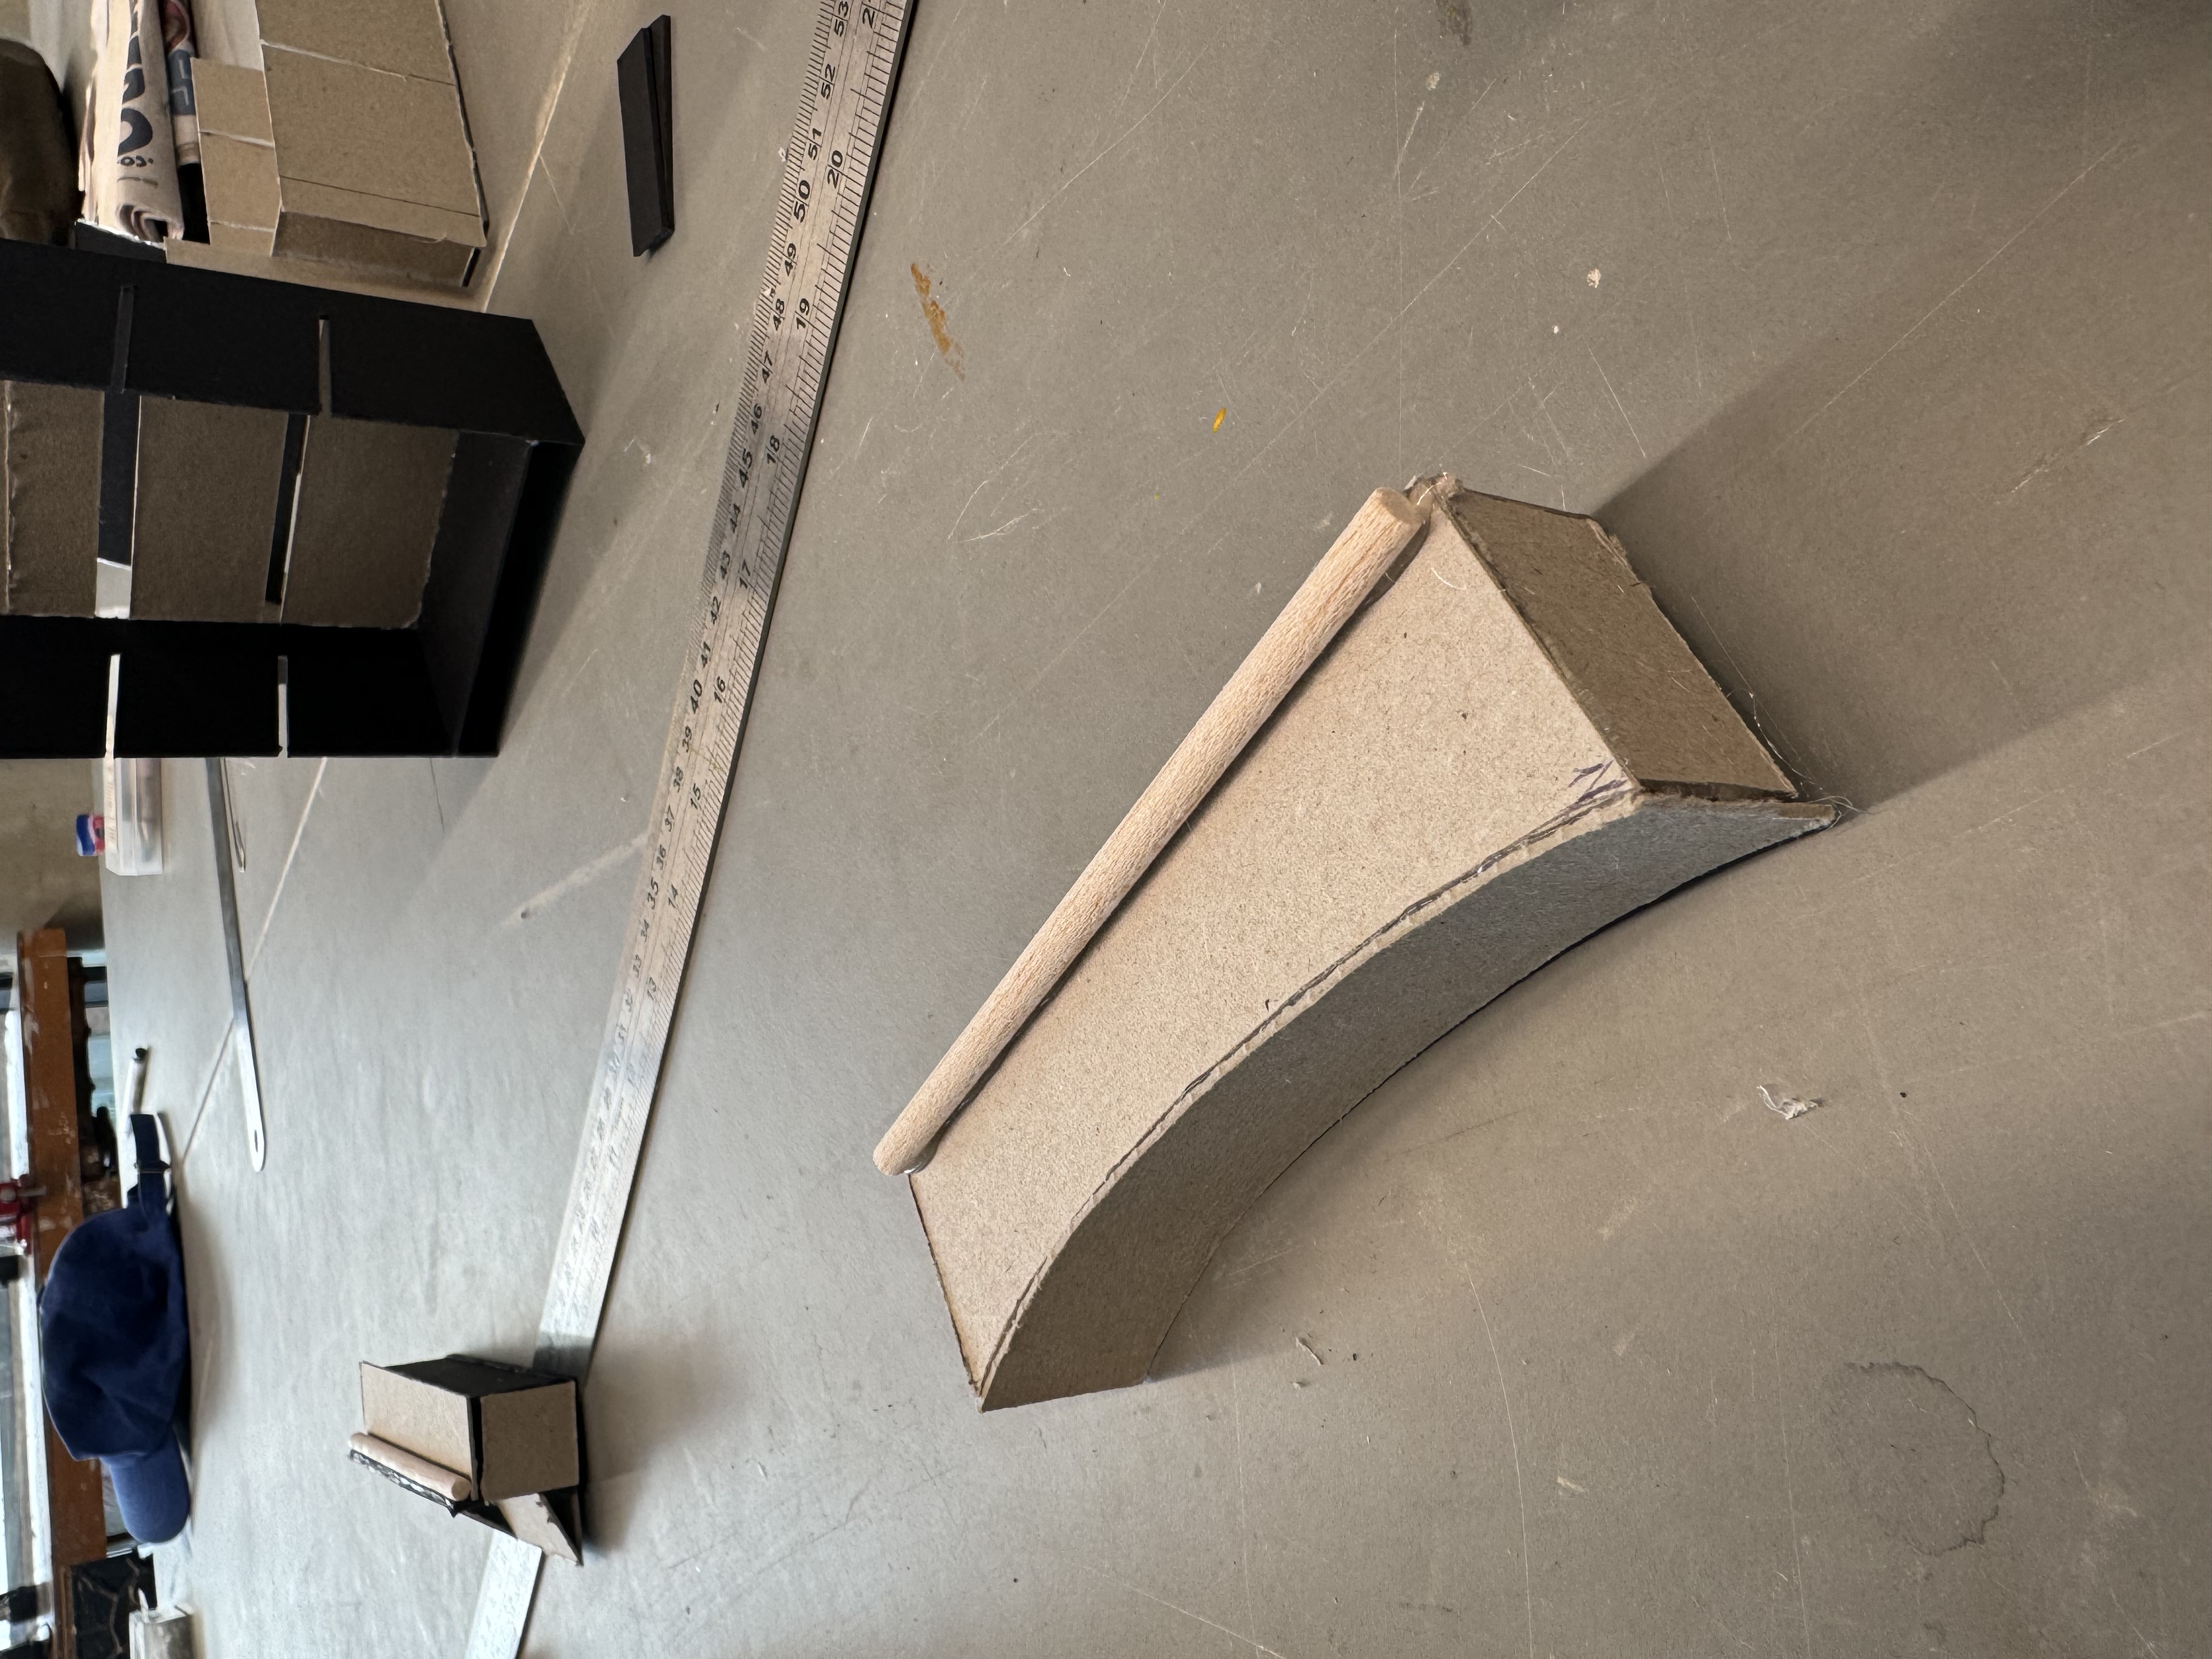
After angle sanding, I glued it with thin board to reinforce it. I want to make the strucure like sketch showing so that it would be seen with texture from both side.
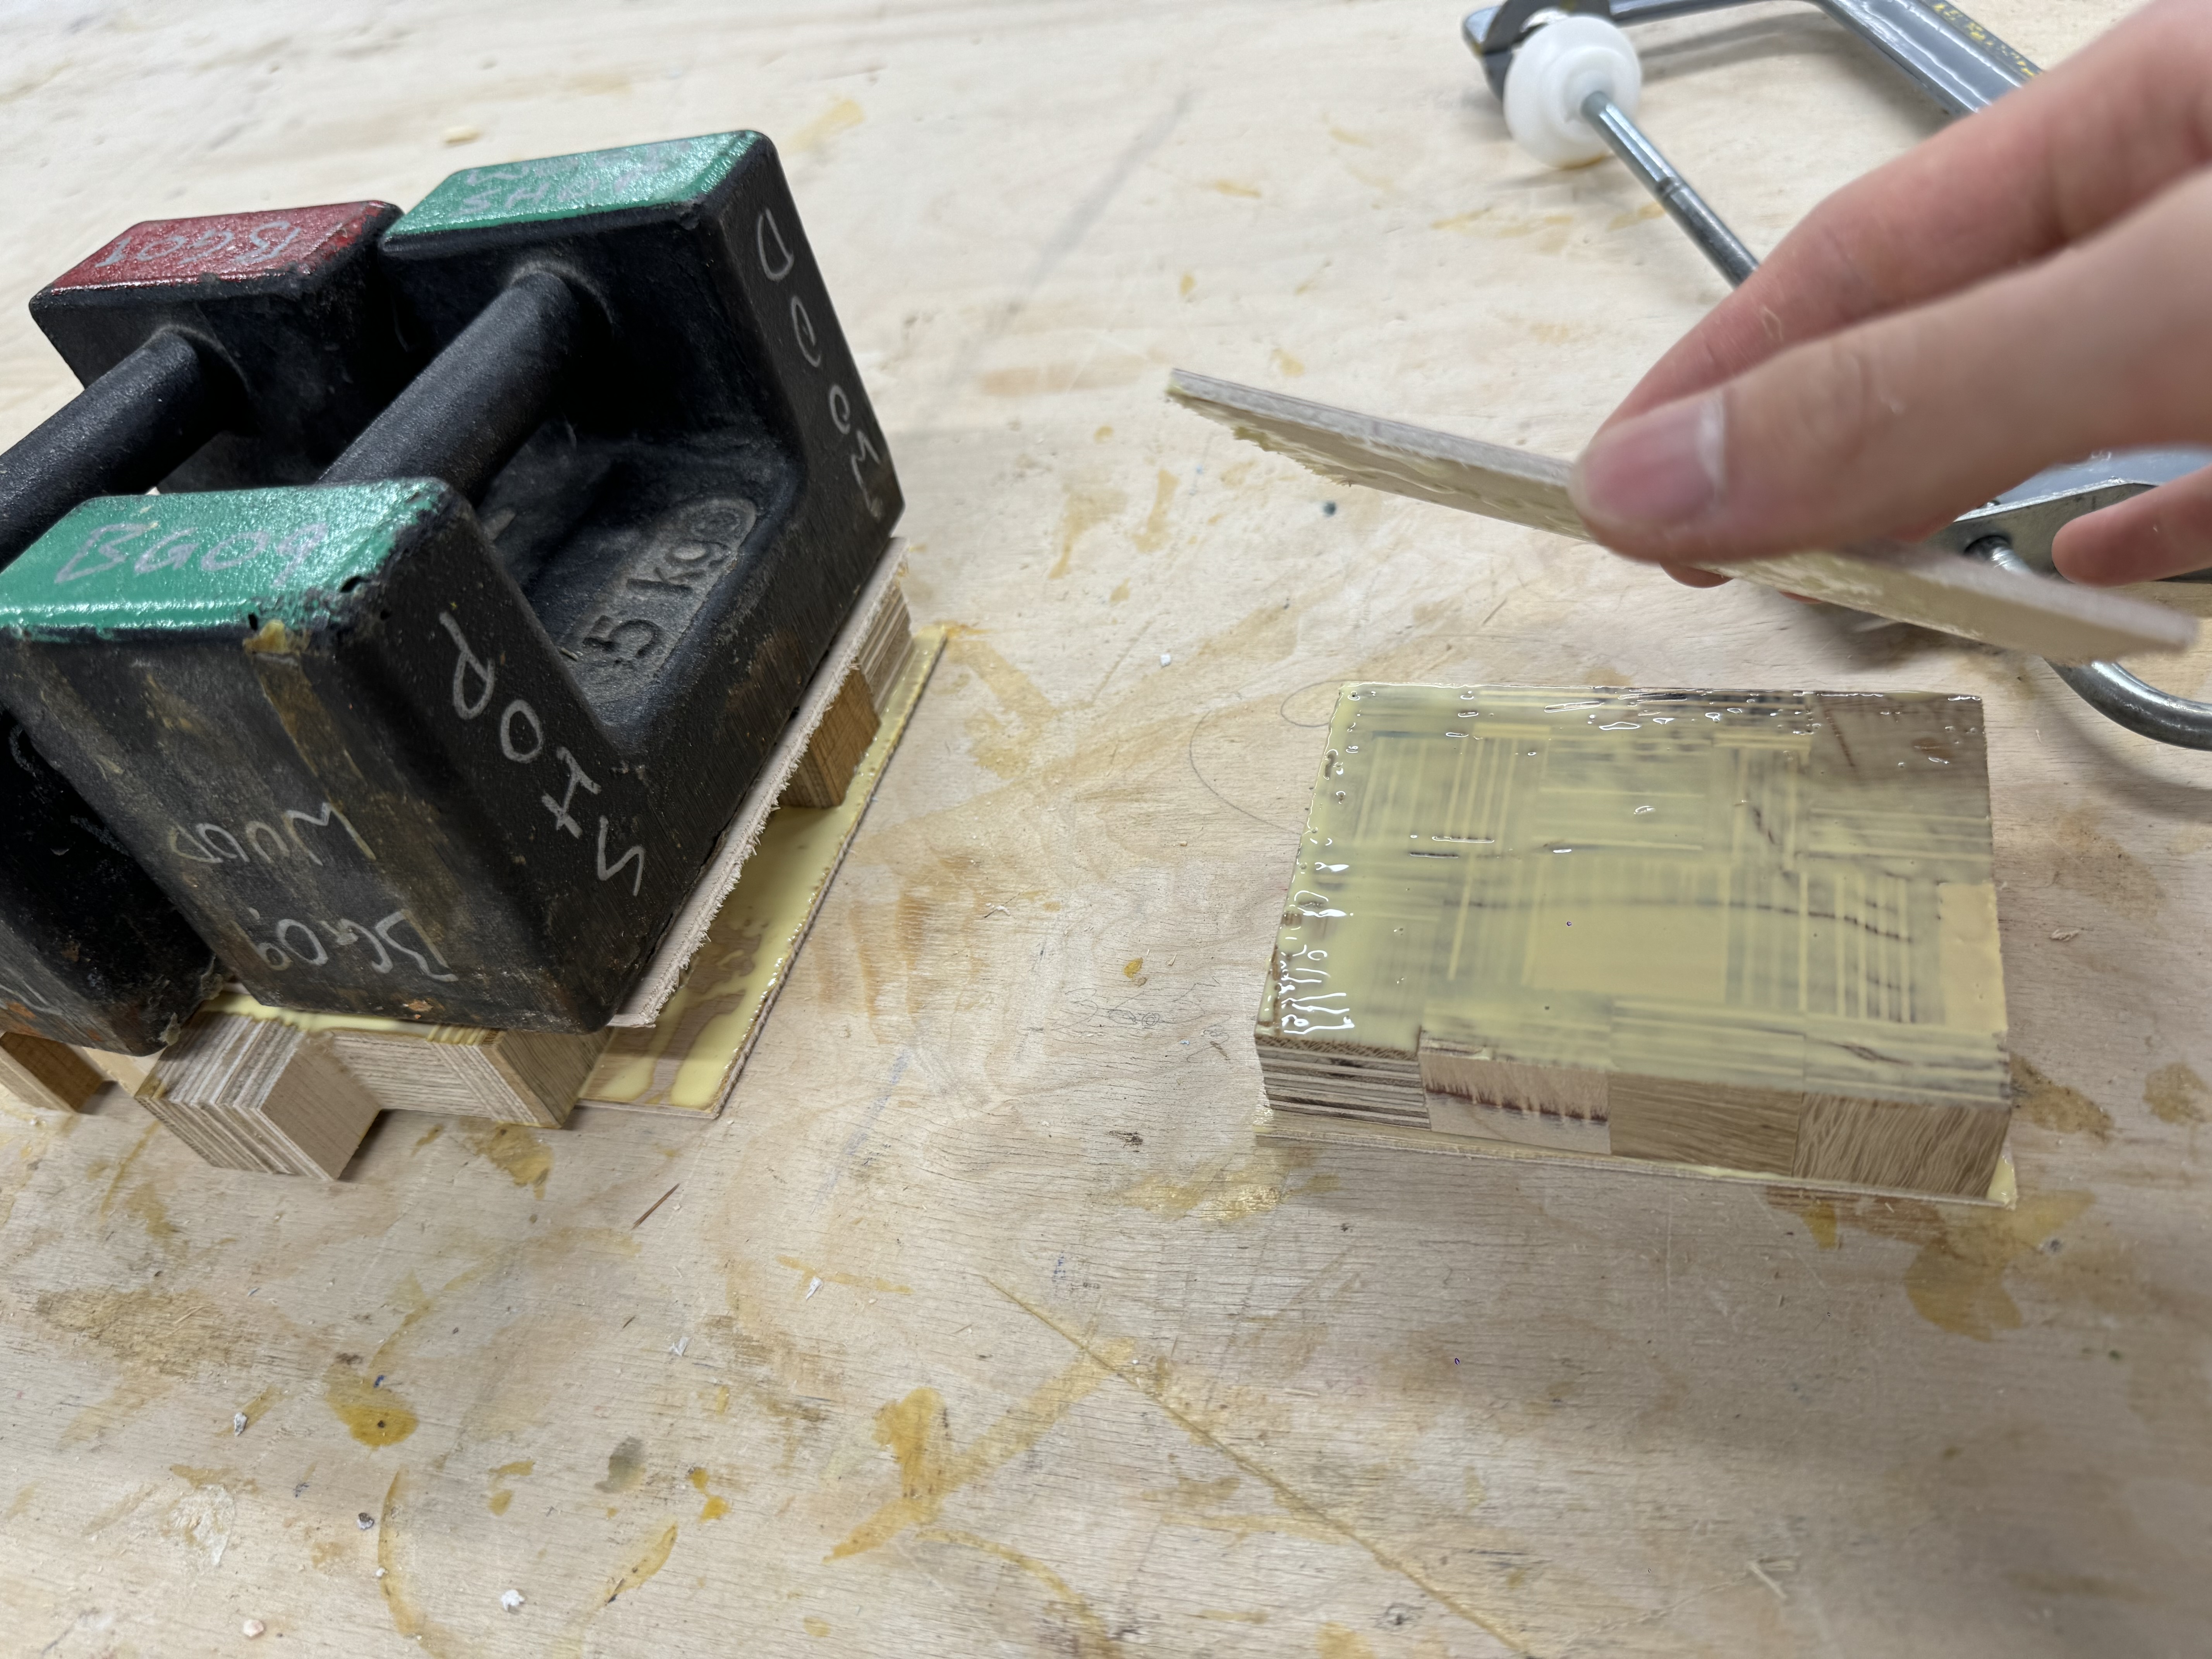
 Finally, I cannot continue to glue another solid board and cut it again, because this scaled model is too thin and the machine cannot do it. But for the real scale it is all right.
29/05/2024


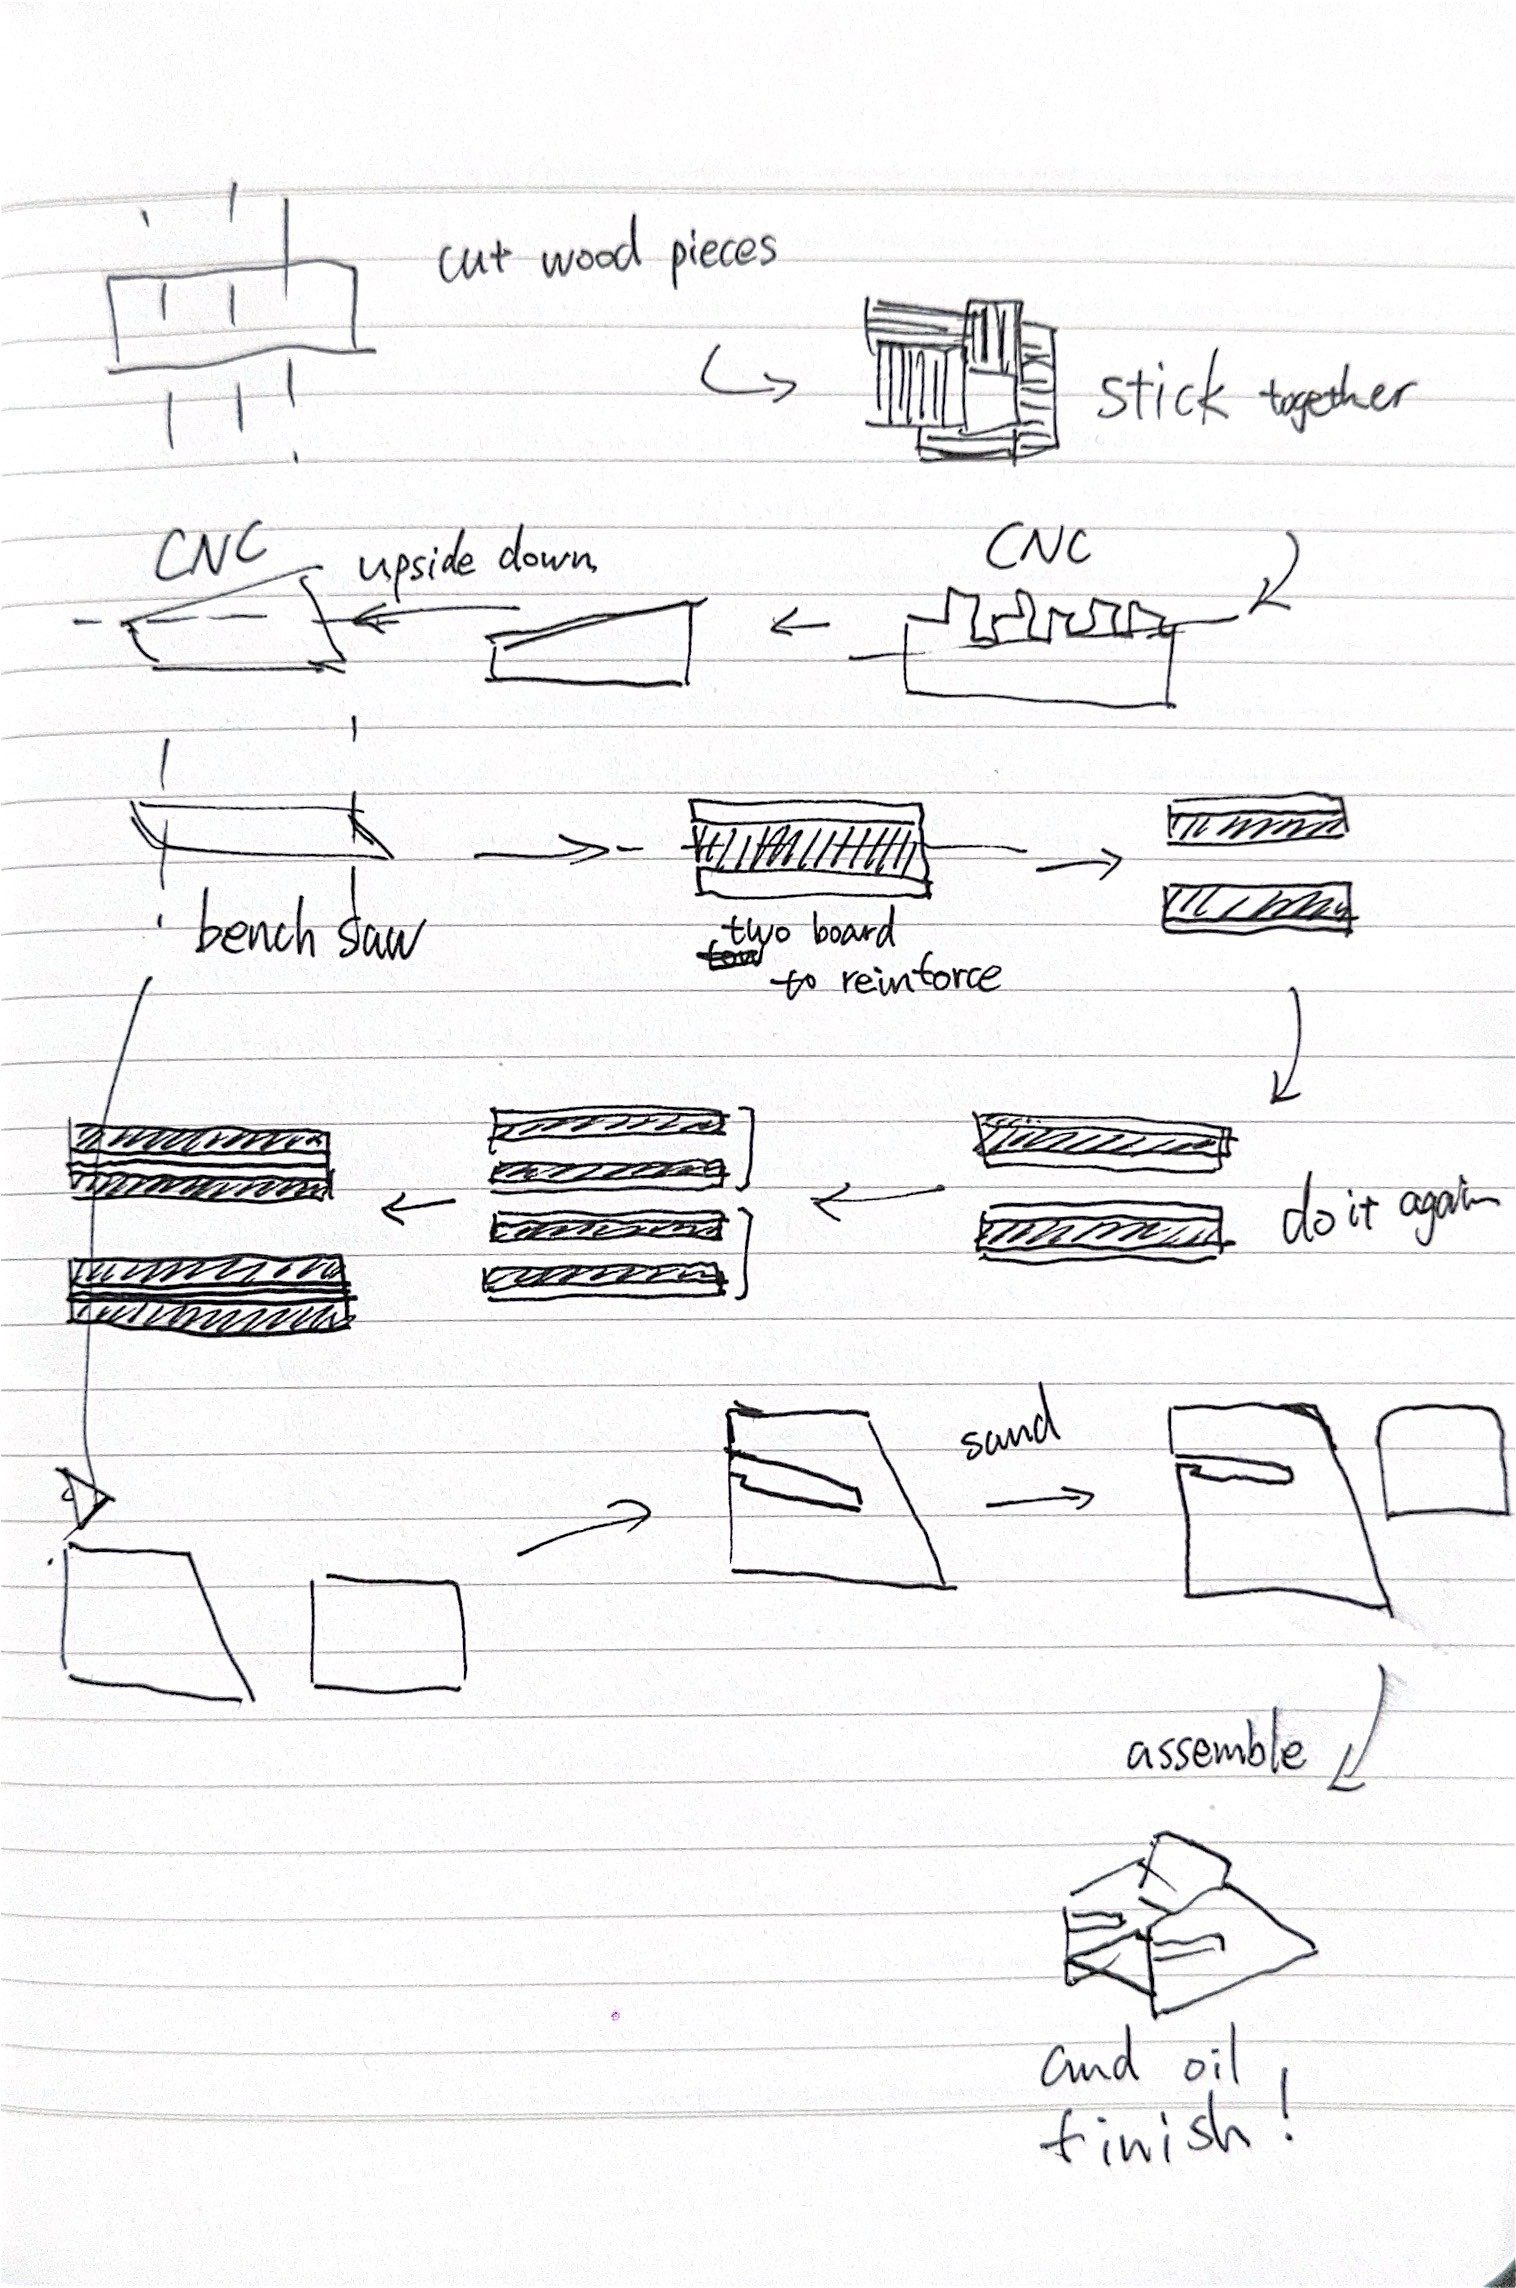 After I did this 1 of 5 scaled model, I learnt the process of the real scaled one and sketched it.
06/07/2024


First, when cutting into small pieces, I need to sand the small pieces to ensure that its corners are vertical. Otherwise, there will be gaps when gluing.
Second, Dry Rehearsal can help me reduce the gaps. I found that no matter how carefully I ensure the size of each piece, it is still a little different, which may be the limitation of manual work. Therefore, this step can save me the time needed to customize the blocks to fill the gaps later.
Third is the skill of woodworking caulking. Glue and sawdust can be mixed into filling. The formula with more glue is suitable for smaller gaps, and the formula with less glue is suitable for larger gaps. Smoothing out any filler that overflows outside of the surface will help save time on subsequent sanding.Fourth, the glue used to connect the wood blocks must be sufficient. I think I used too little glue, which caused the wood blocks to crack several times later.
Fifth, when making dominoes, you must first check the insertion depth. I made such a mistake once during the process. And the marking must be accurate enough.
Sixth, the stain must be applied in full at one time to ensure the color balance.

I thought that I spent the most time gluing the wood boards together, and if I made the boards using a process similar to laminated bamboo lumber and used a large cutting machine, perhaps I could achieve the goal of mass production.
 After this work, I reflected on the work I will do for my graduation project. It might be very difficult to carry out with my original theme. And I thought about the purpose of my graduate studies. Maybe if I try one more material, such as metal, to make a good work, it will help me understand the material. But I think there is no end to learning craftsmanship. The most important thing is the uniqueness of the work, perhaps the unique craftsmanship, the reflected content, the functionality of the design, etc.