Works
Blog
-
Ceramic ashtray
![]()
-
Shoes Rack
-
Jean Wallet
-
The Emotional Utilitarian
-
Design Museum
-
Christo early works Exhibition
-
Numeric Skate Demo
-
The British Museum
-
Pitt rivers Museum
- Flax craft central
- Kate lecture
- LCC stiching tutorial
-
BOX by Max Lamb
-
Sheila Hicks: infinite potential
- Instagram viewing 1
- V&A Museum
- CCW MA graduation exhibition
- Scarf knitting
- Natural History Museum
- Tate Morden Museum
- The British Museum 2
- The Egyptian Museum
- Banksy Exhibition
- Tea table
- Cap making
- Unit 1 exhibition
- Remake shoes
- Antony Gormley Exhibition
- Tate Britain
-
Newspaper Ceramic
![]()
- Aromatherapy tray
- Kettle’s Yard
-
Paper samples for unit 2
![]()
- The Fitzwilliam Museum
- How to analyze the case
-
Woodcuts
![]()
- Collect 2024
-
Ceramic extrusion
![]()
- Tony’s cardboard space
- Tony’s tour London
- Ceramic London 2024
-
Wheel-throw learning
![]()
![]()
- CSM shows 2024
- Tony’s tour East London
- Portland Carving tour
- FUMI Casa al mare
![]()
- Silicone Molding in summer break
- London Transportation Museum
- Dongyang Chinese furniture market
- Prototype redoing for previous work
- Jingdezhen visiting
![]()
- London Design Festival 2024
- Hang for Fun lamp
![]()
![]()
- Emotion Breaker stool
![]()
- Reverse Grind table
![]()
Yusen
Info
Previous works by Yusen have delved deeply into themes of functionality, sustainability, and humanization. Yusen’s practice highlights a curiosity about cultural influences and their potential to inform modern design approaches, blending cultural resonance with innovative environmental solutions.
53. Hang for Fun lamp
Plaster mold


Silicone Mold


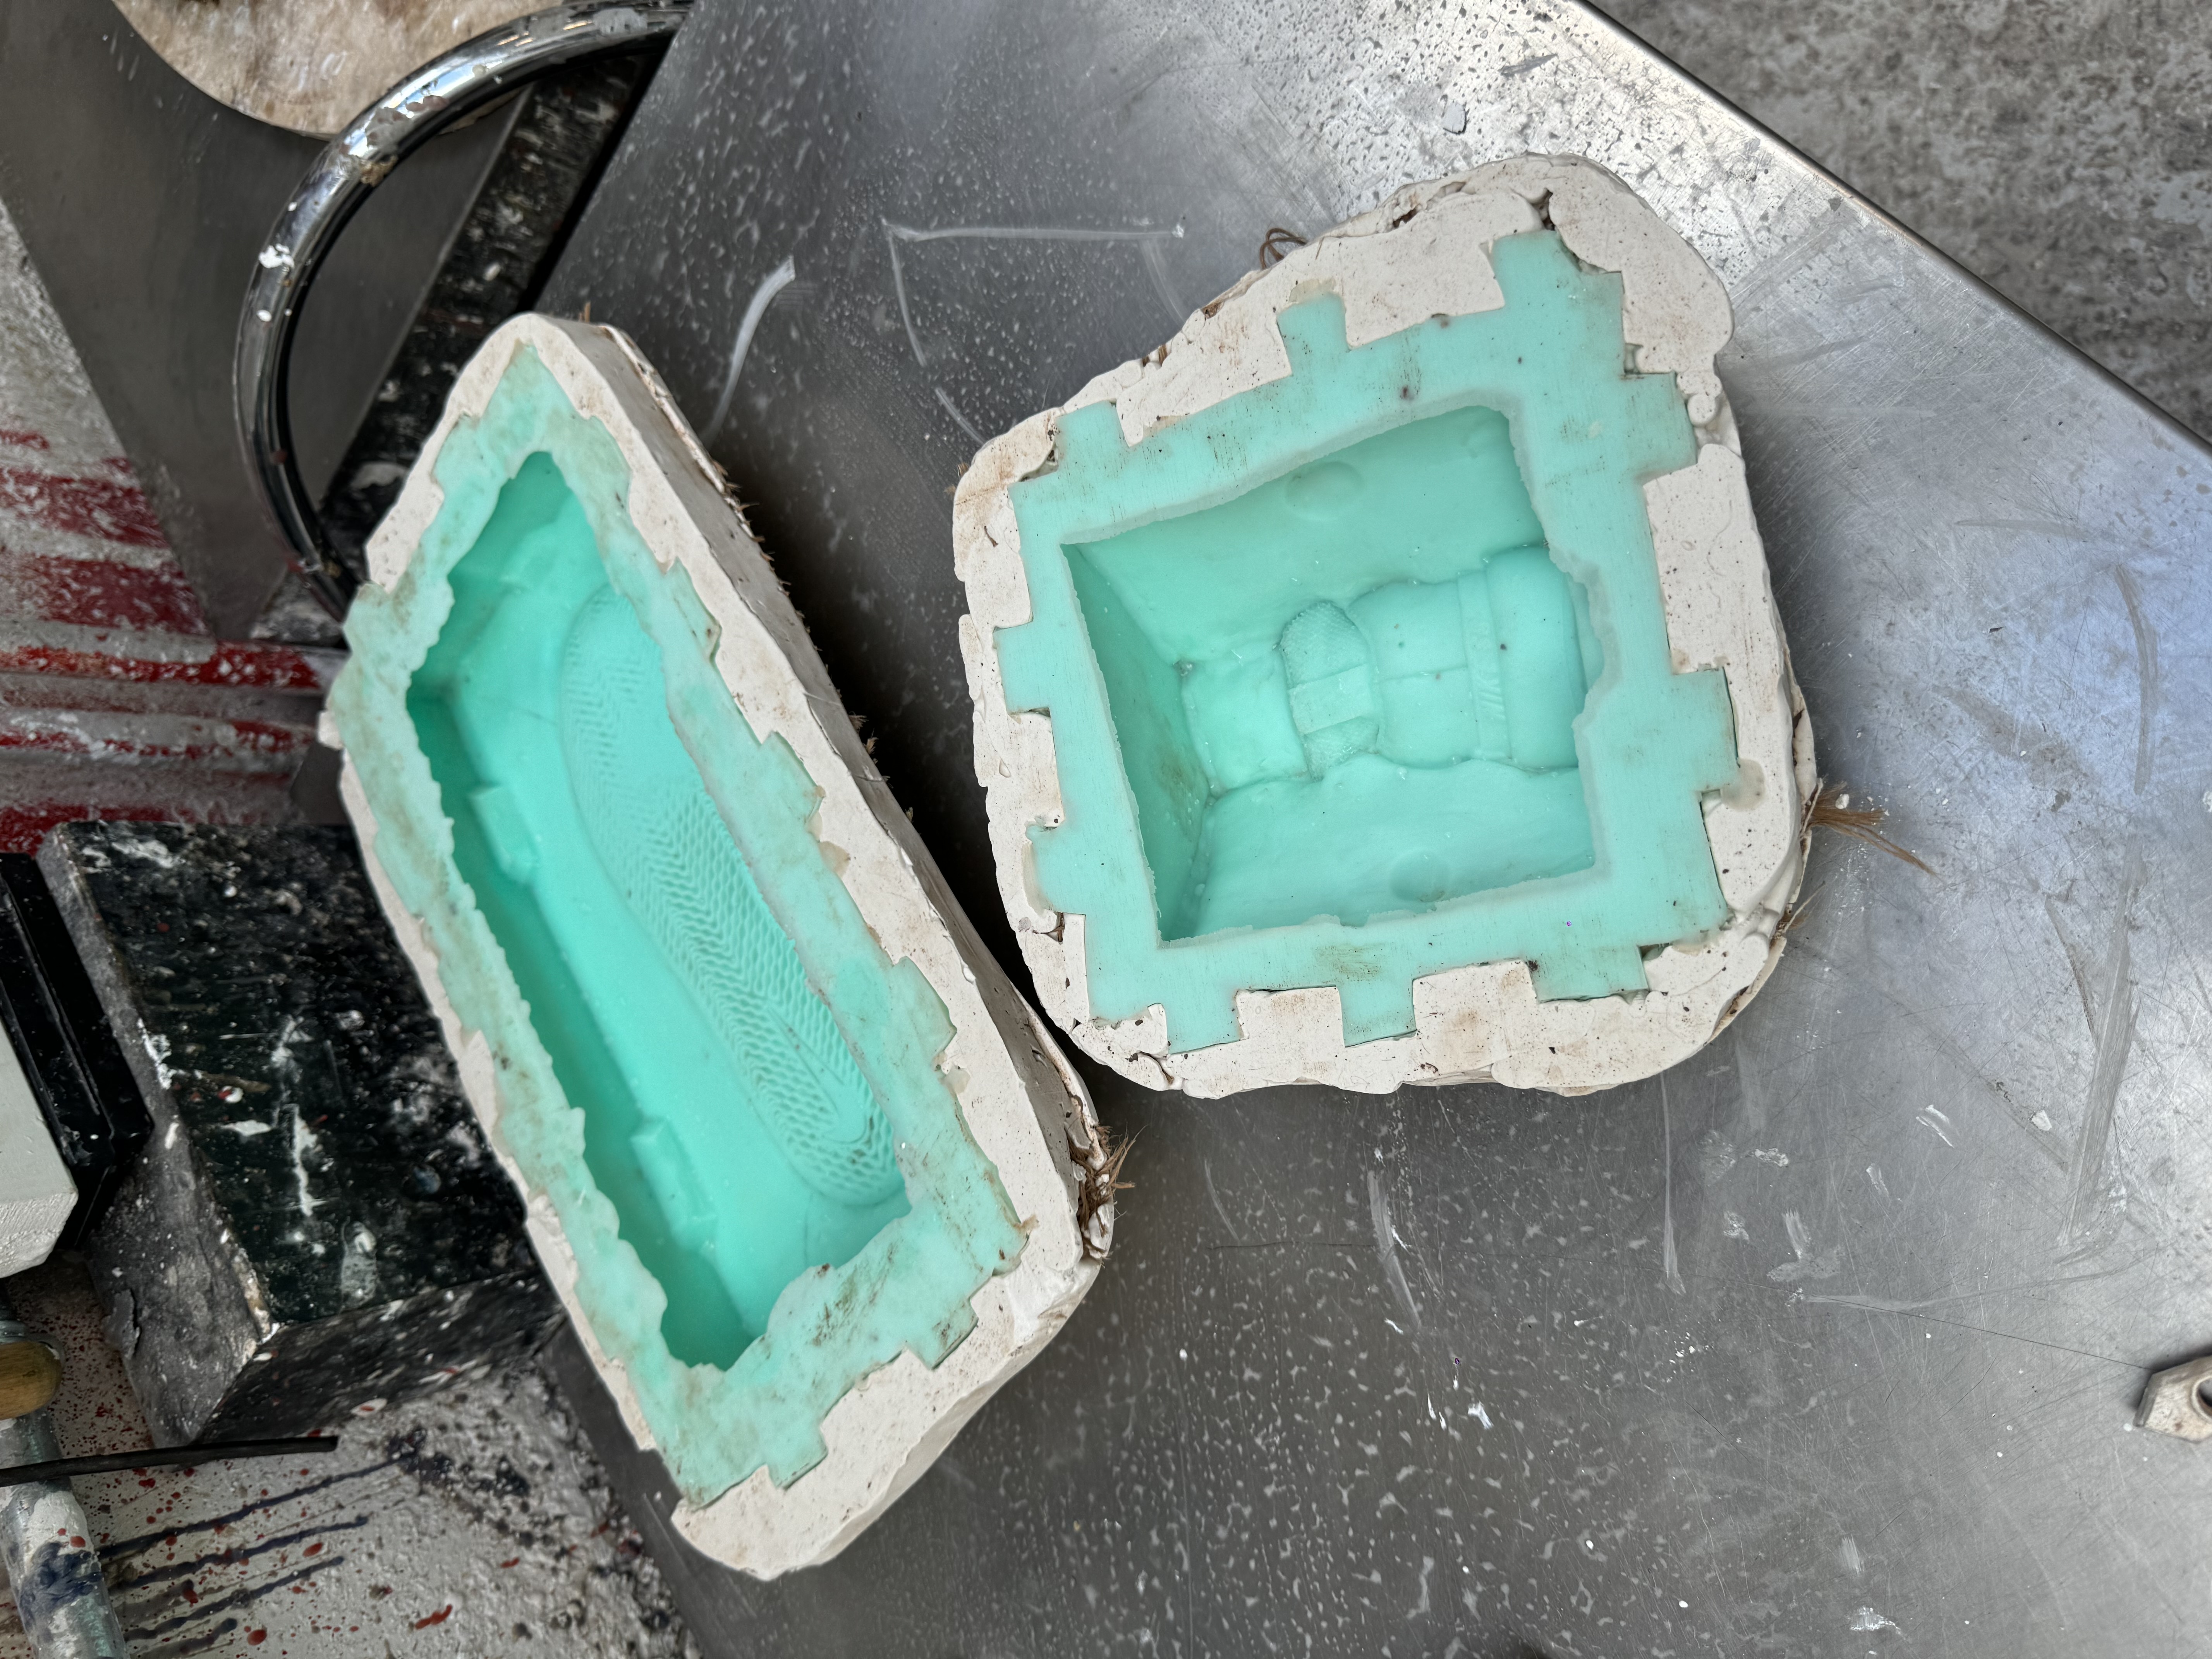

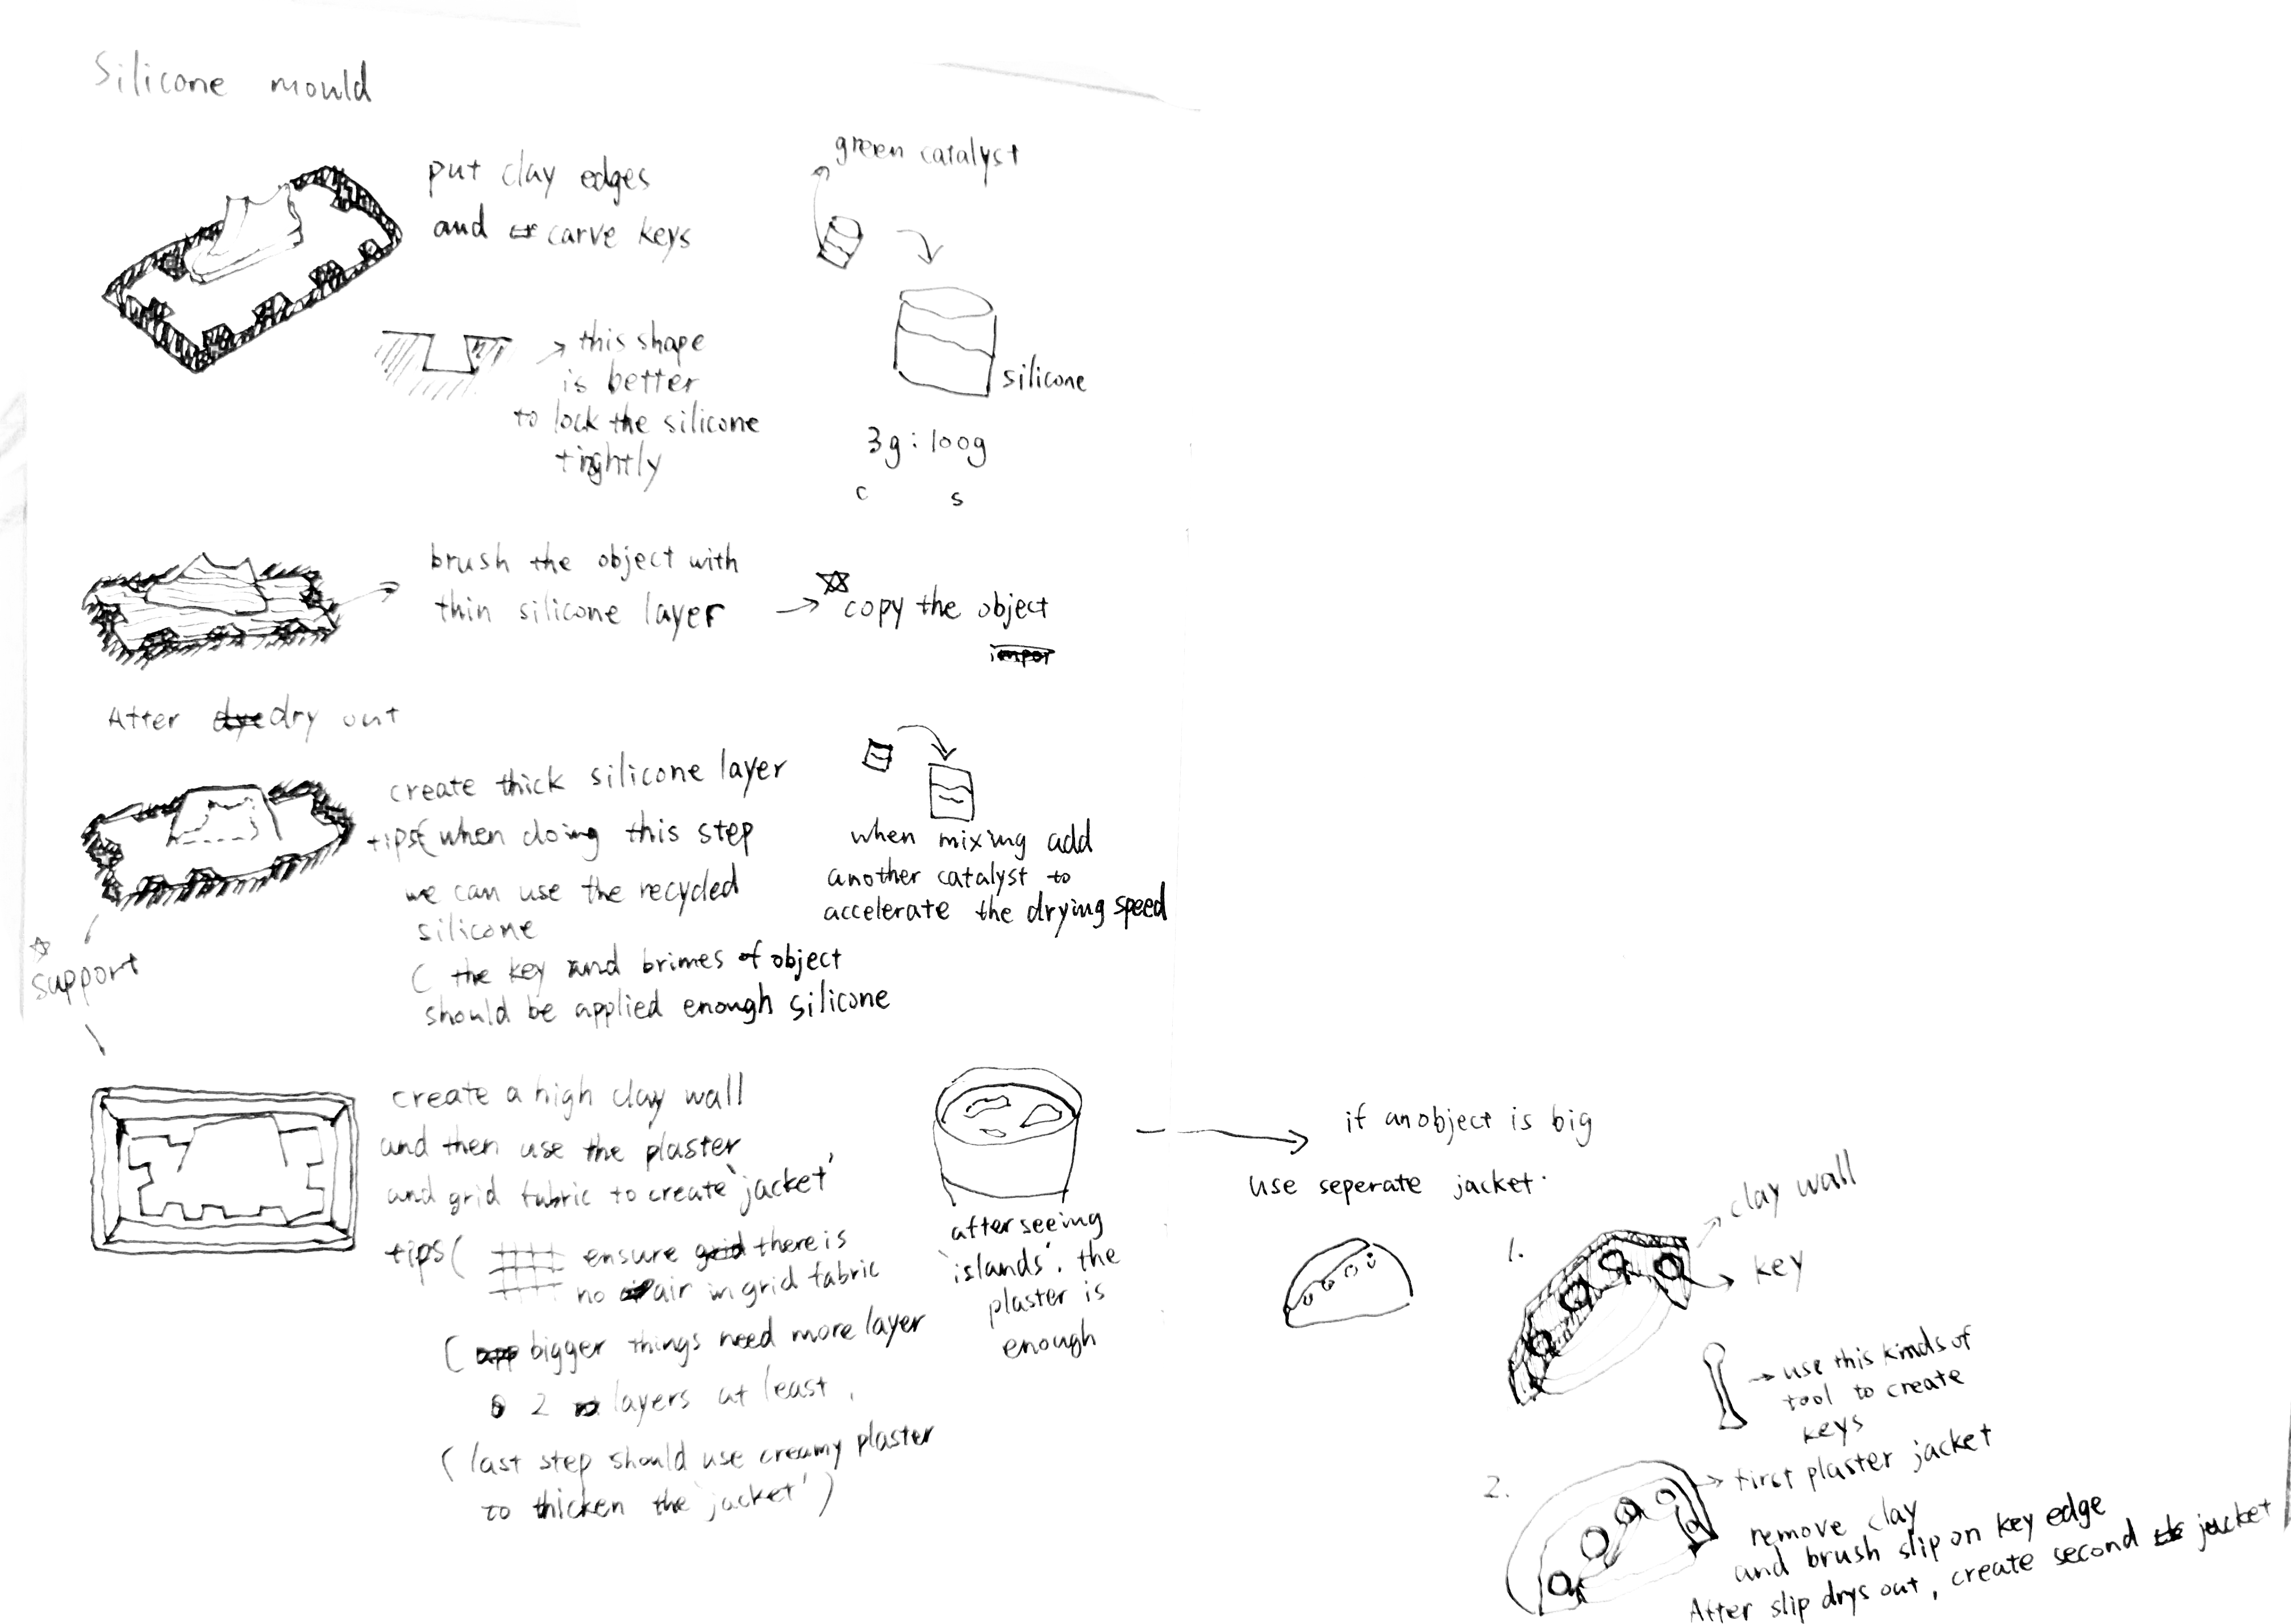
The main reason I made the silicone mold was to quickly replicate the plaster mold. This allowed me to quickly generate samples, and also to replicate the special type of plaster mold required for glass. I did not take photos of the plaster casting. This is almost the same technique as the previous page. However, I found that some of the cast plaster was very difficult to remove, mainly because the surface of the silicone mold was not flat and then stuck to the jacket. During the casting, I found that the plaster mold must be a certain thickness, otherwise it will break due to the elastic cord and cause the slip to flow out.
Crystal Palace antique market
06/10/24


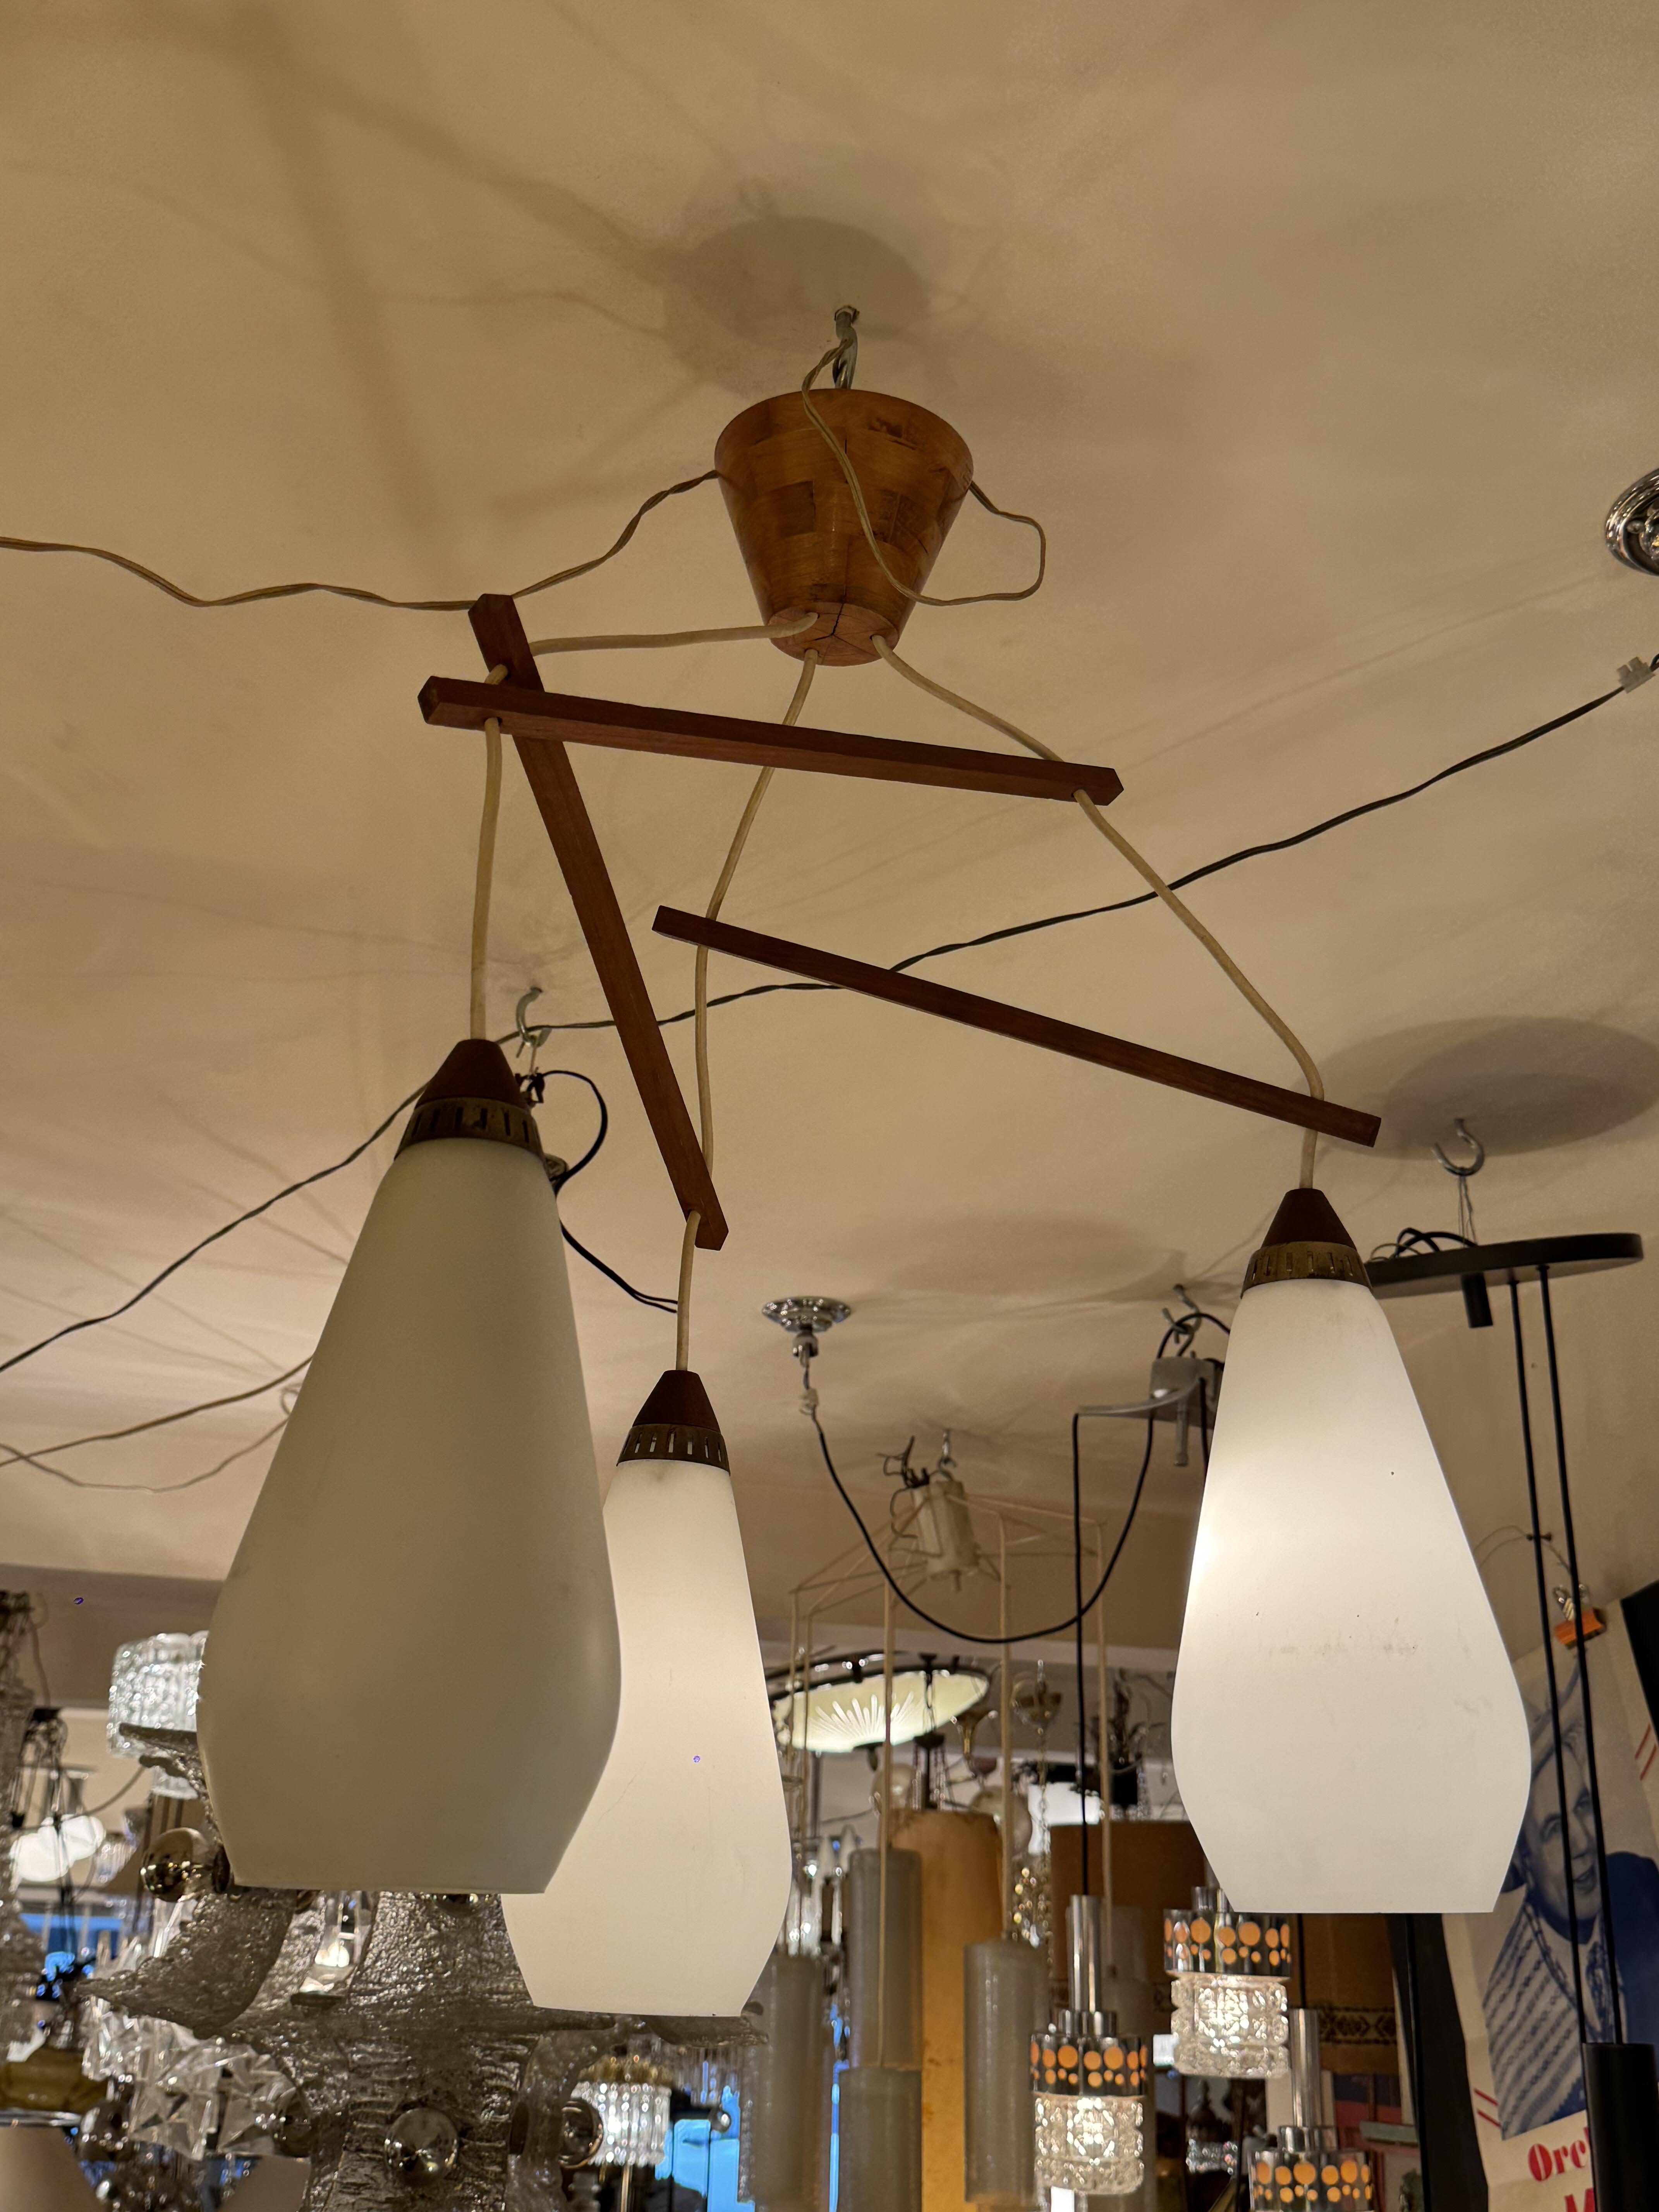
Crystal palace antique market. Before I visit this shop, I am quite confused and uncomfident about my lamp. I dont know how it will be and how can I make it. The lamp are mainly made of lampshade, bulb, bulb holder, cable, (optional: base). The bulb, bulb holder, cable could be bought in market and choosing the bulb and cable are really important. These two things define the vibe a lot. But the most important is the lampshade. Most design are from the lampshade for the ceiling lamp. The standing lamp would be a bit more complex. It needs to consider about the base design and how to arrange the cable. The hanging way of ceiling lamp is simple, almost all are hang with a metal tube or directly with the cable.
I was suprised that the lampshade could be made by almost all materials, even like finishing wire and acrylic. Even most comon metal, with different finishing and style the lamps have different vibes.

For my object, I think my bulb should be as small as it can be. Because there is not much space in the shoe lampshade. After researching, I choose the E14 LED for small size and energy-saving reason. And I will choose the fabric cable to be imitate the shoe lace. But with color, I need to render it to see.

With this visiting, I make my idea more detailed.
Alfies Antique Market
12/10/24


Weld learning and Rendering
13/10/24
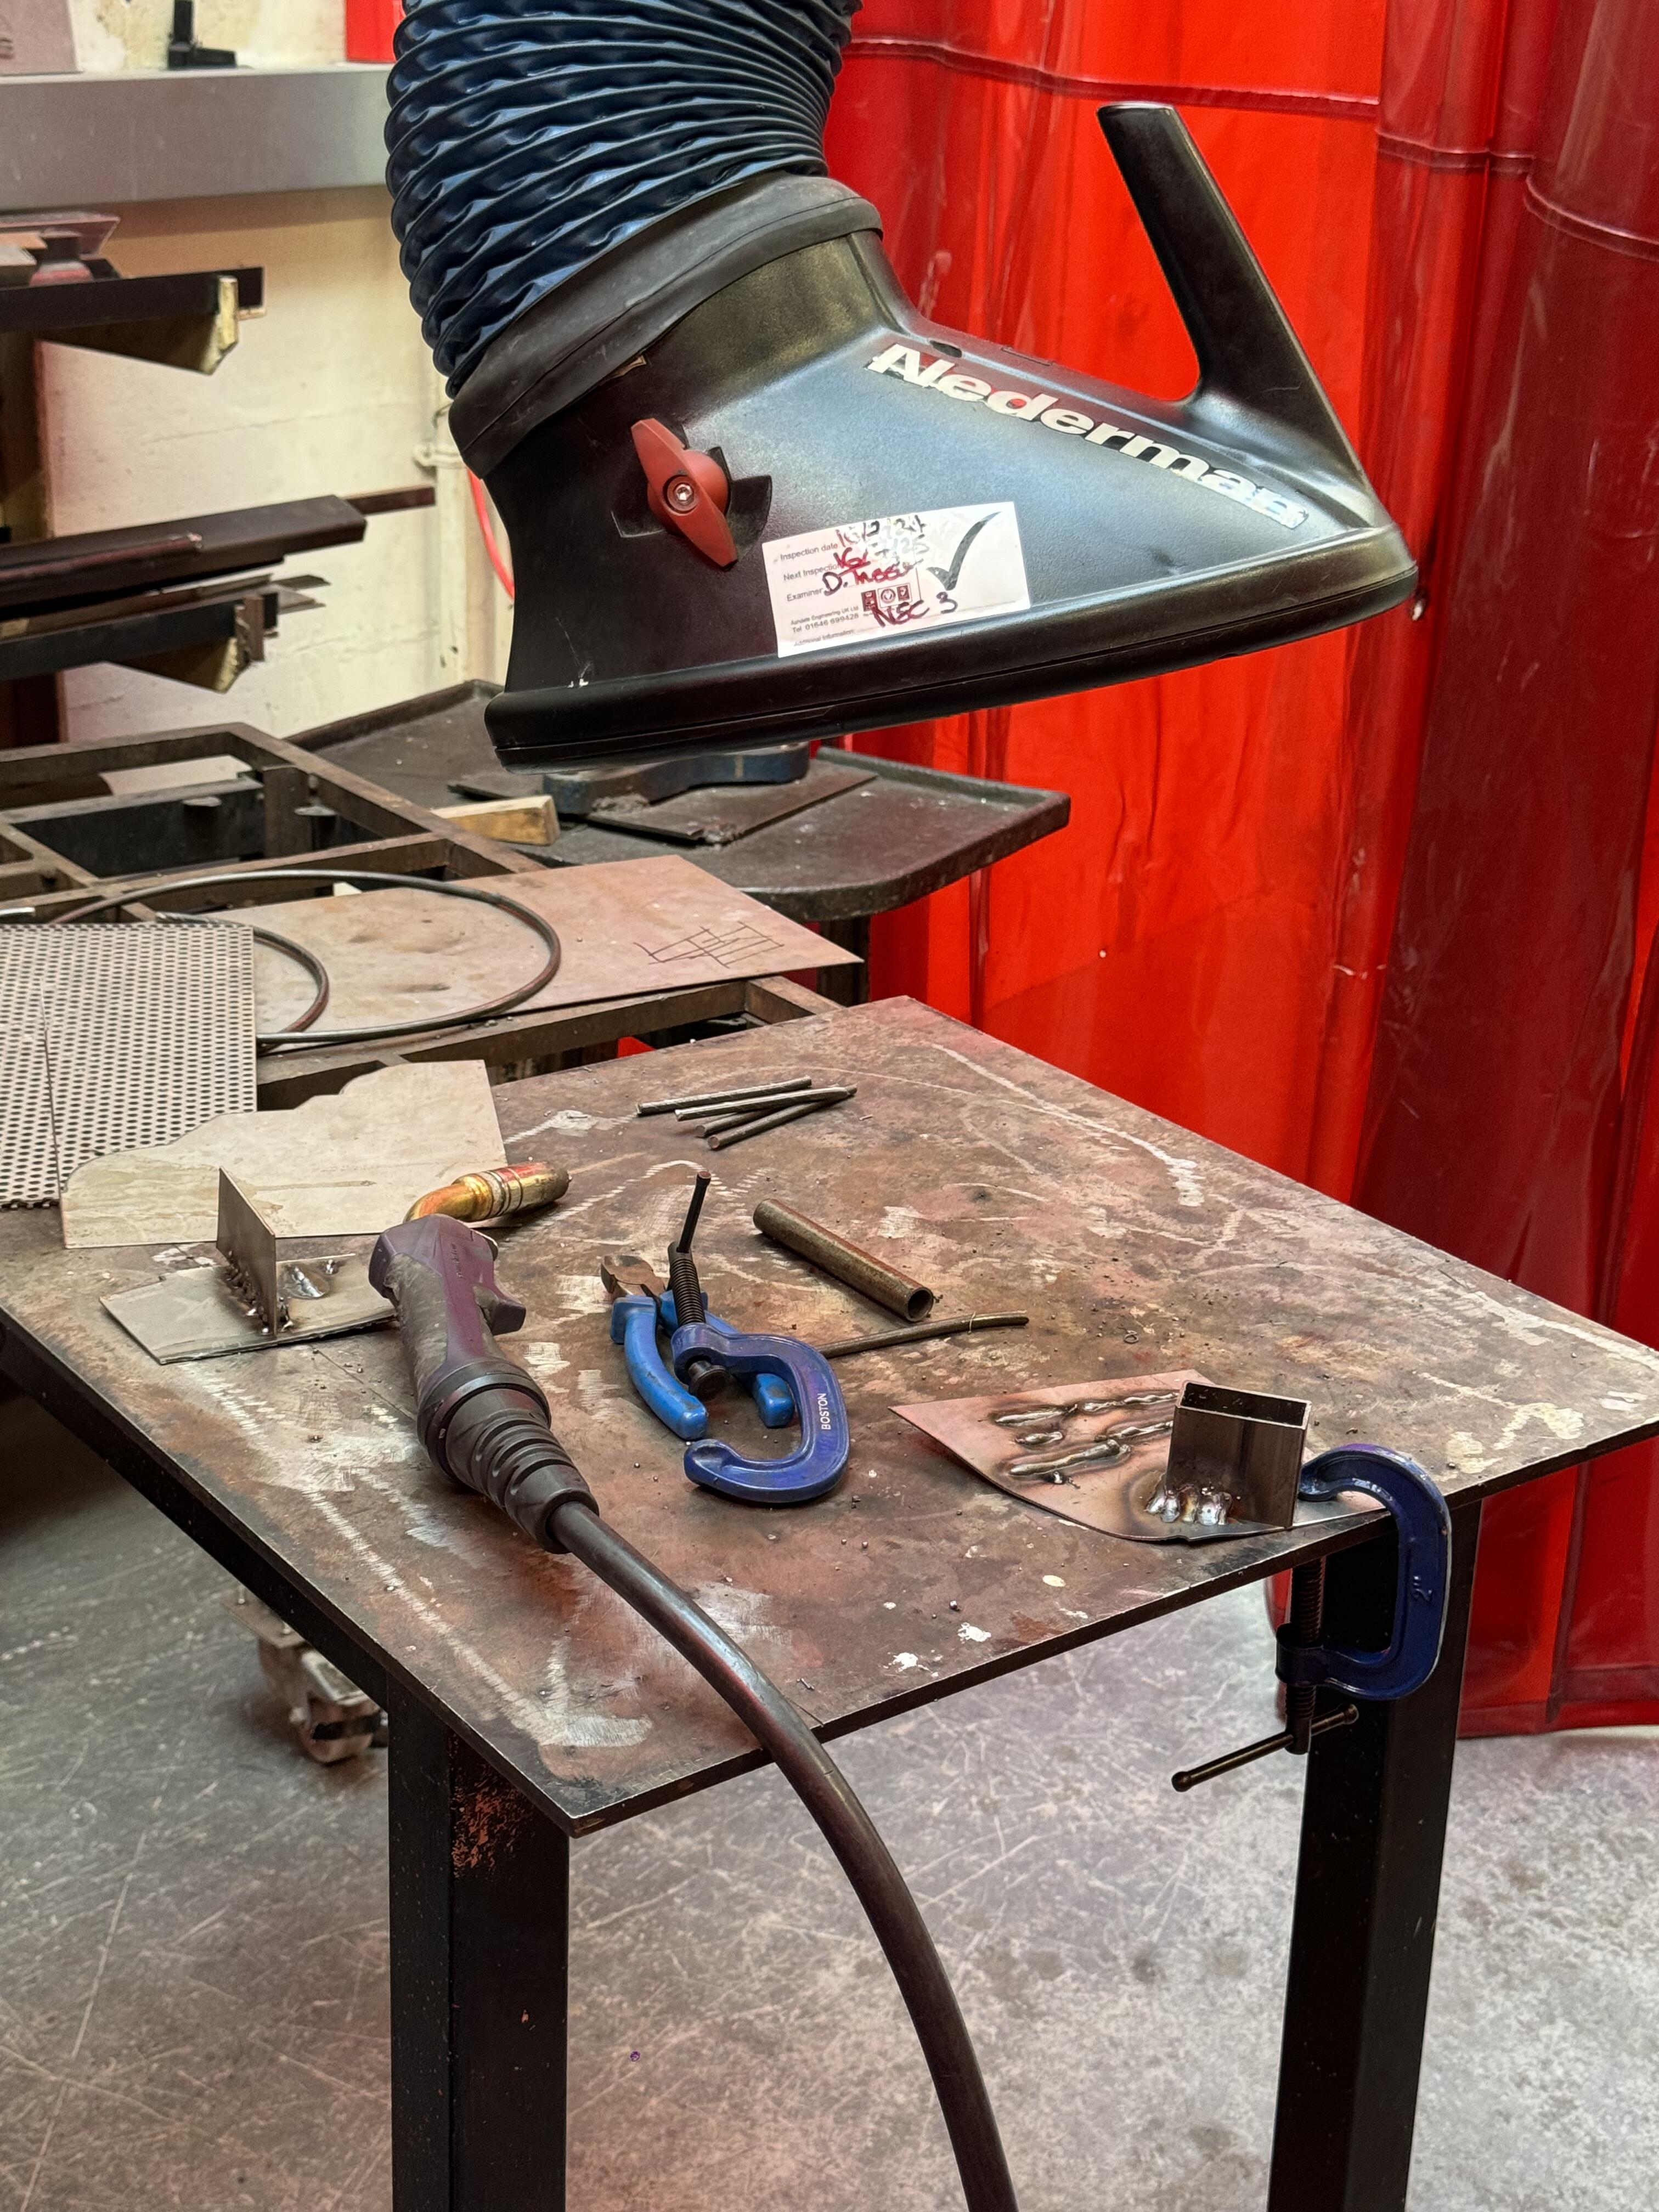


Last week I learnt welding. It is really difficult to control. The welding spatter is quite ugly. Even the master chef can't do it so good-looking, let alone me.
So according to Oscar's suggestion I plan to joint them with scews.
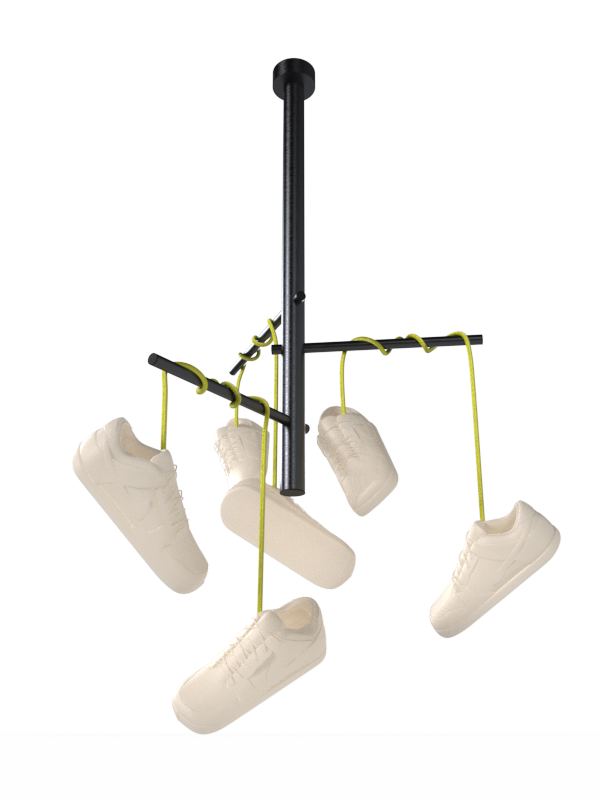
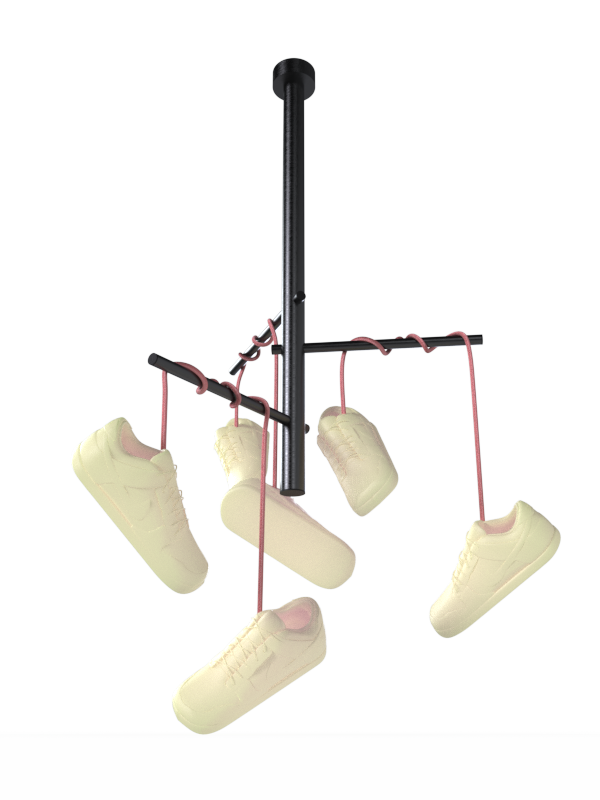
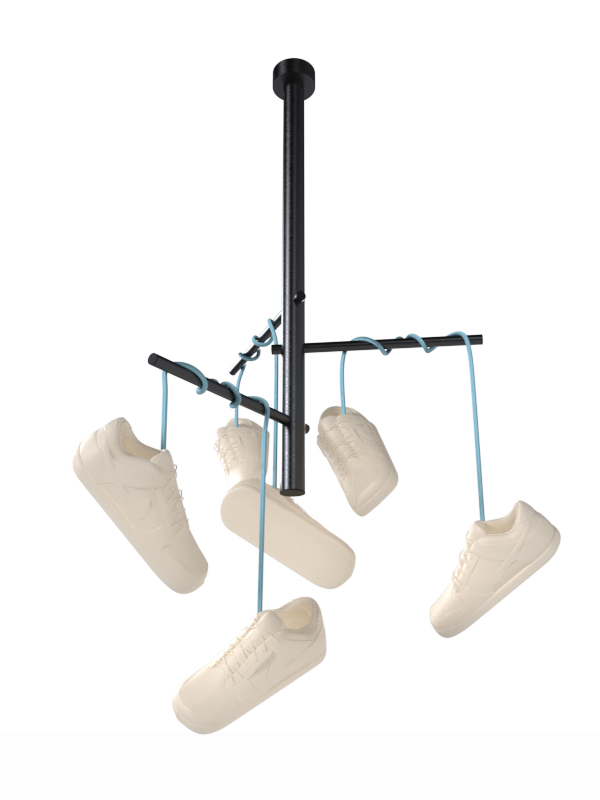

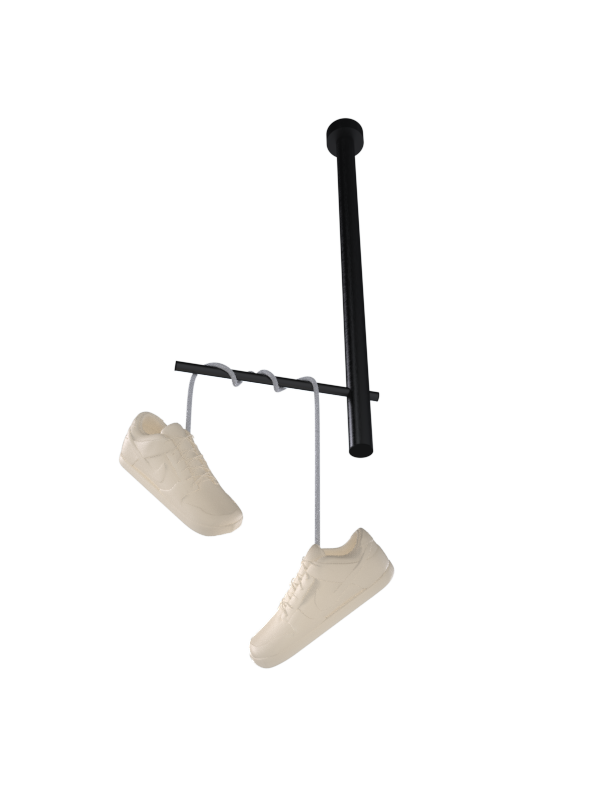

Then I did the rendering and found that indeed it has the effect. But I think it should match the environment used. Like if it is in the corner or a darker room, I think the single pair would be better. Maybe in a bigger space the multiple one would be better. And it should matches my collection show for this final year.
Glass research


 The plaster for glass is normally mixed
with silica. From different formulas, they have different names.
The plaster for glass is normally mixed
with silica. From different formulas, they have different names.

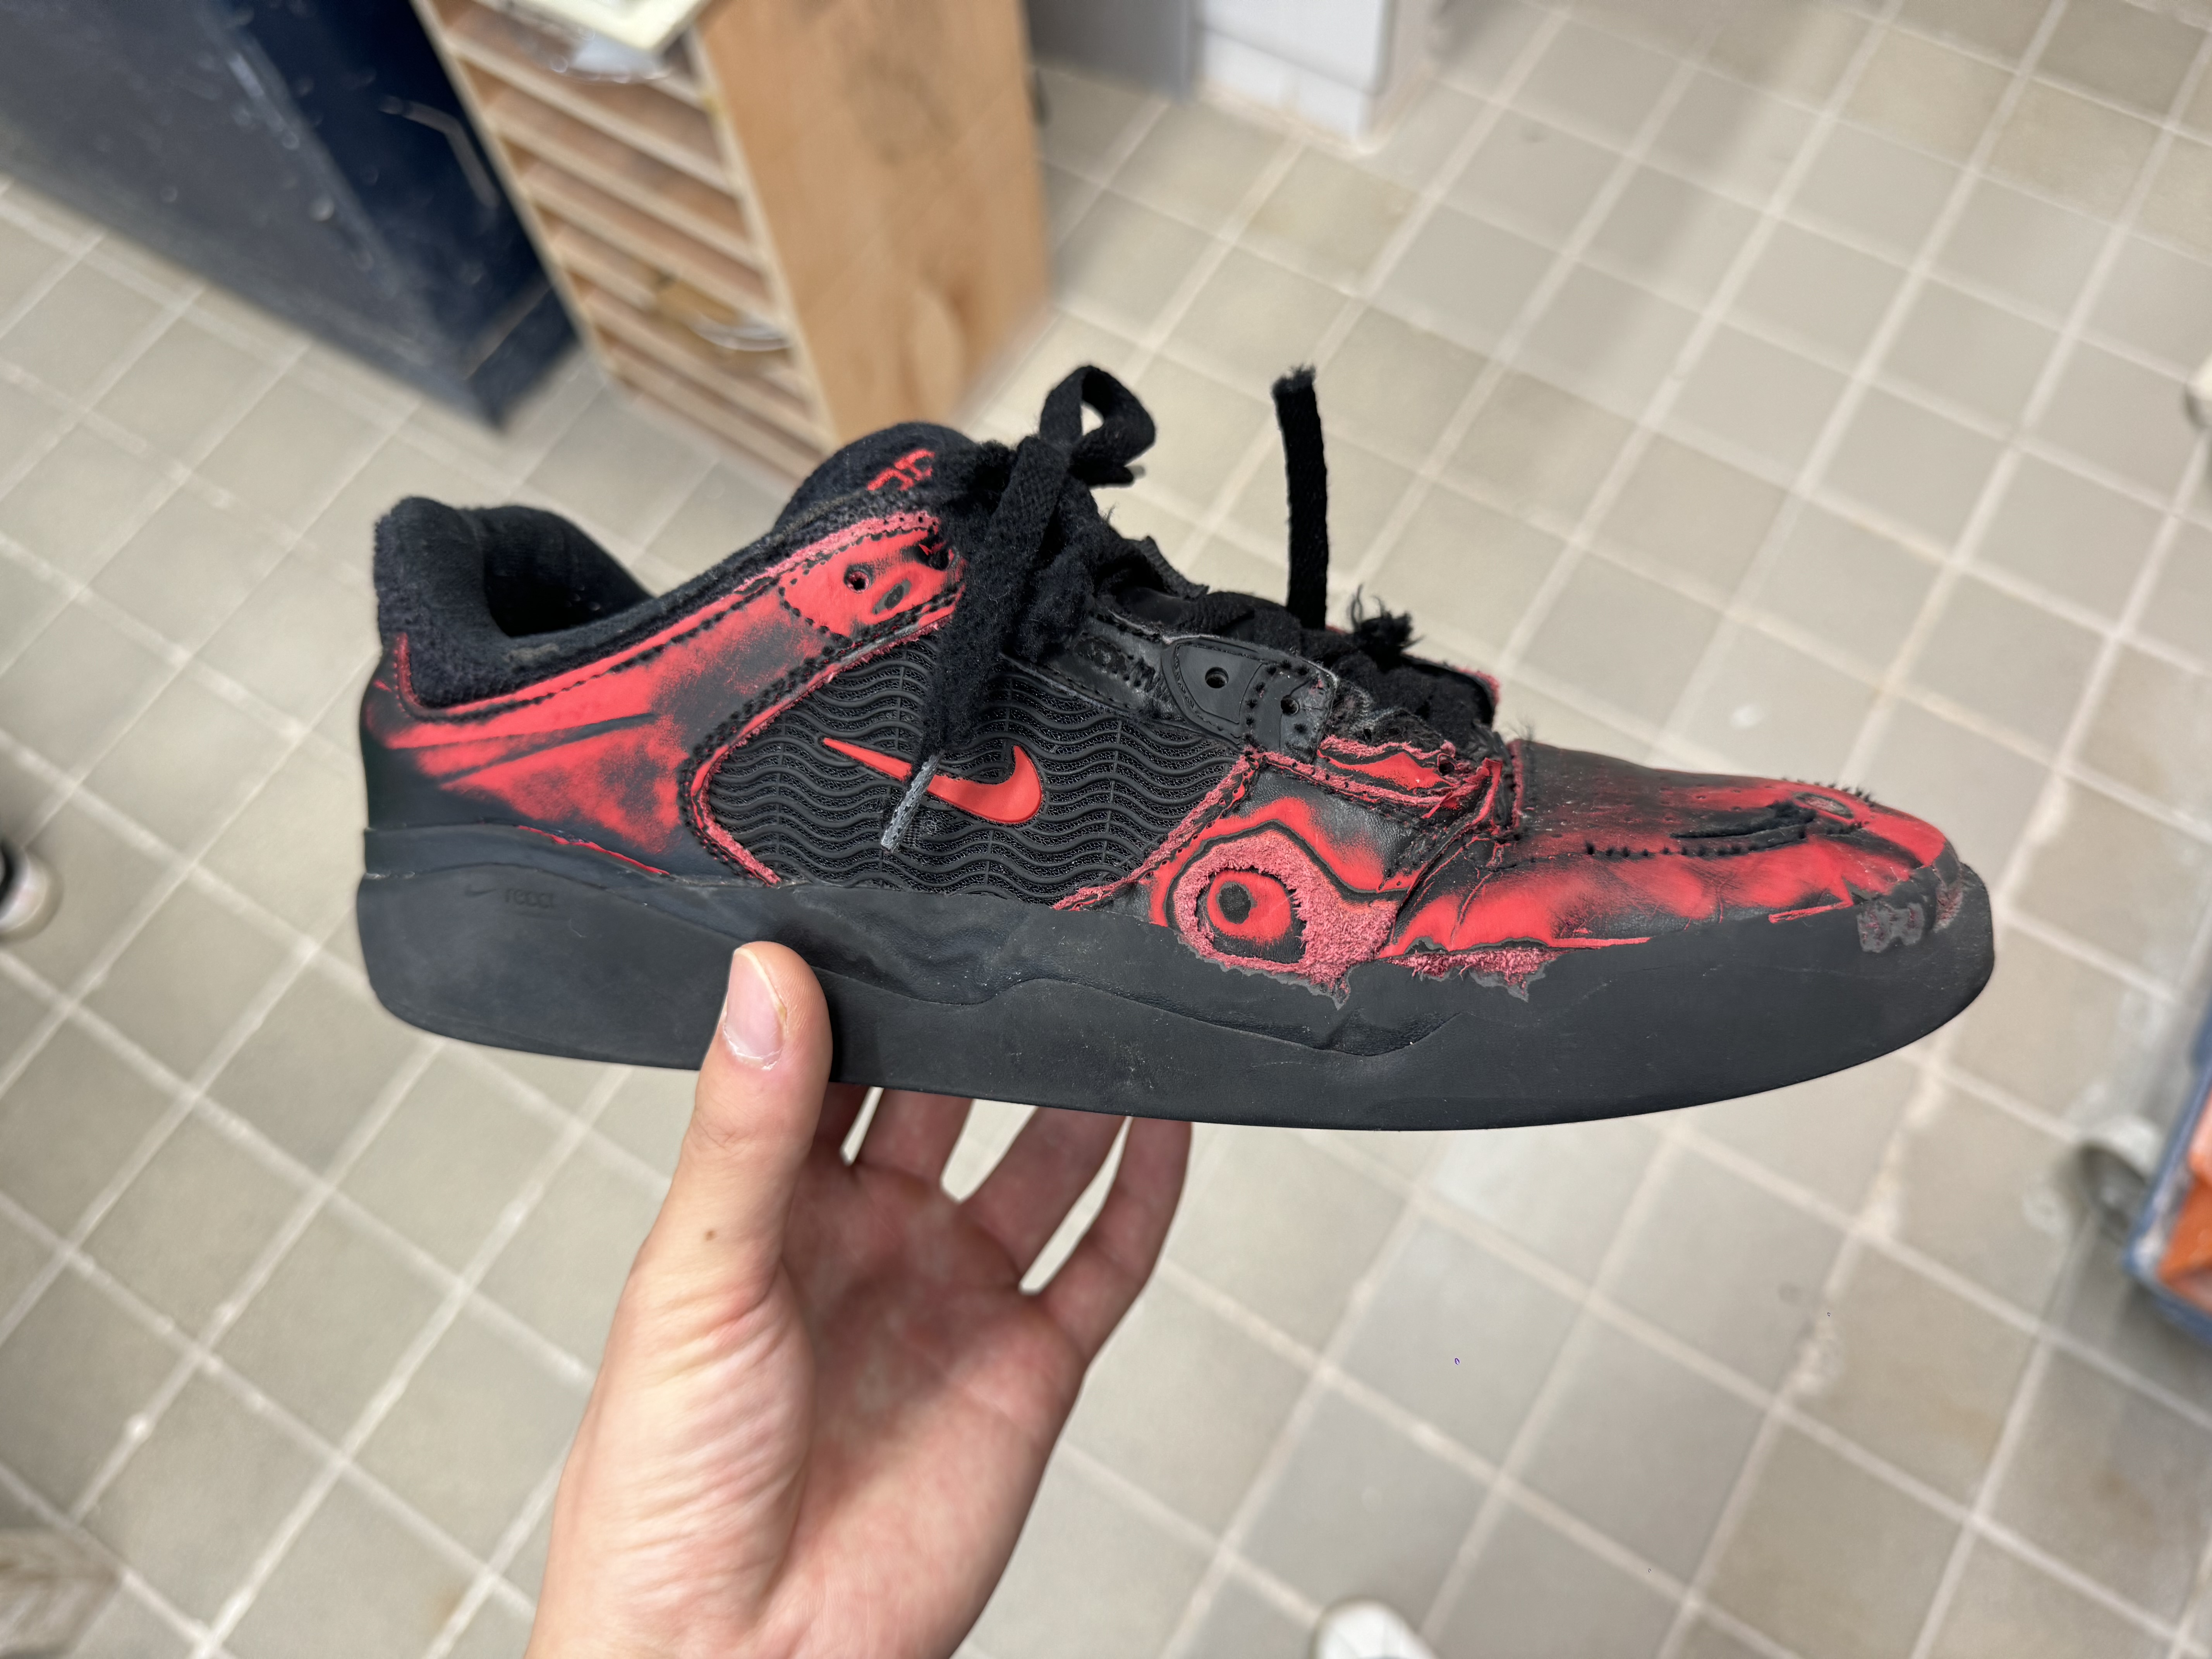
Because I didn't decide whether to use glass or ceramic. Then I did some research on glass and found that glassblowing was more suitable. But I consulted a professional and she told me that it was difficult to reproduce the details of the shoes, so I lost my original idea (hanging worn-out shoes on a pole). So I finally decided to use ceramic.
14/10/24


18/10/24
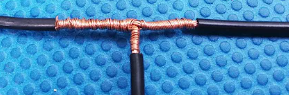
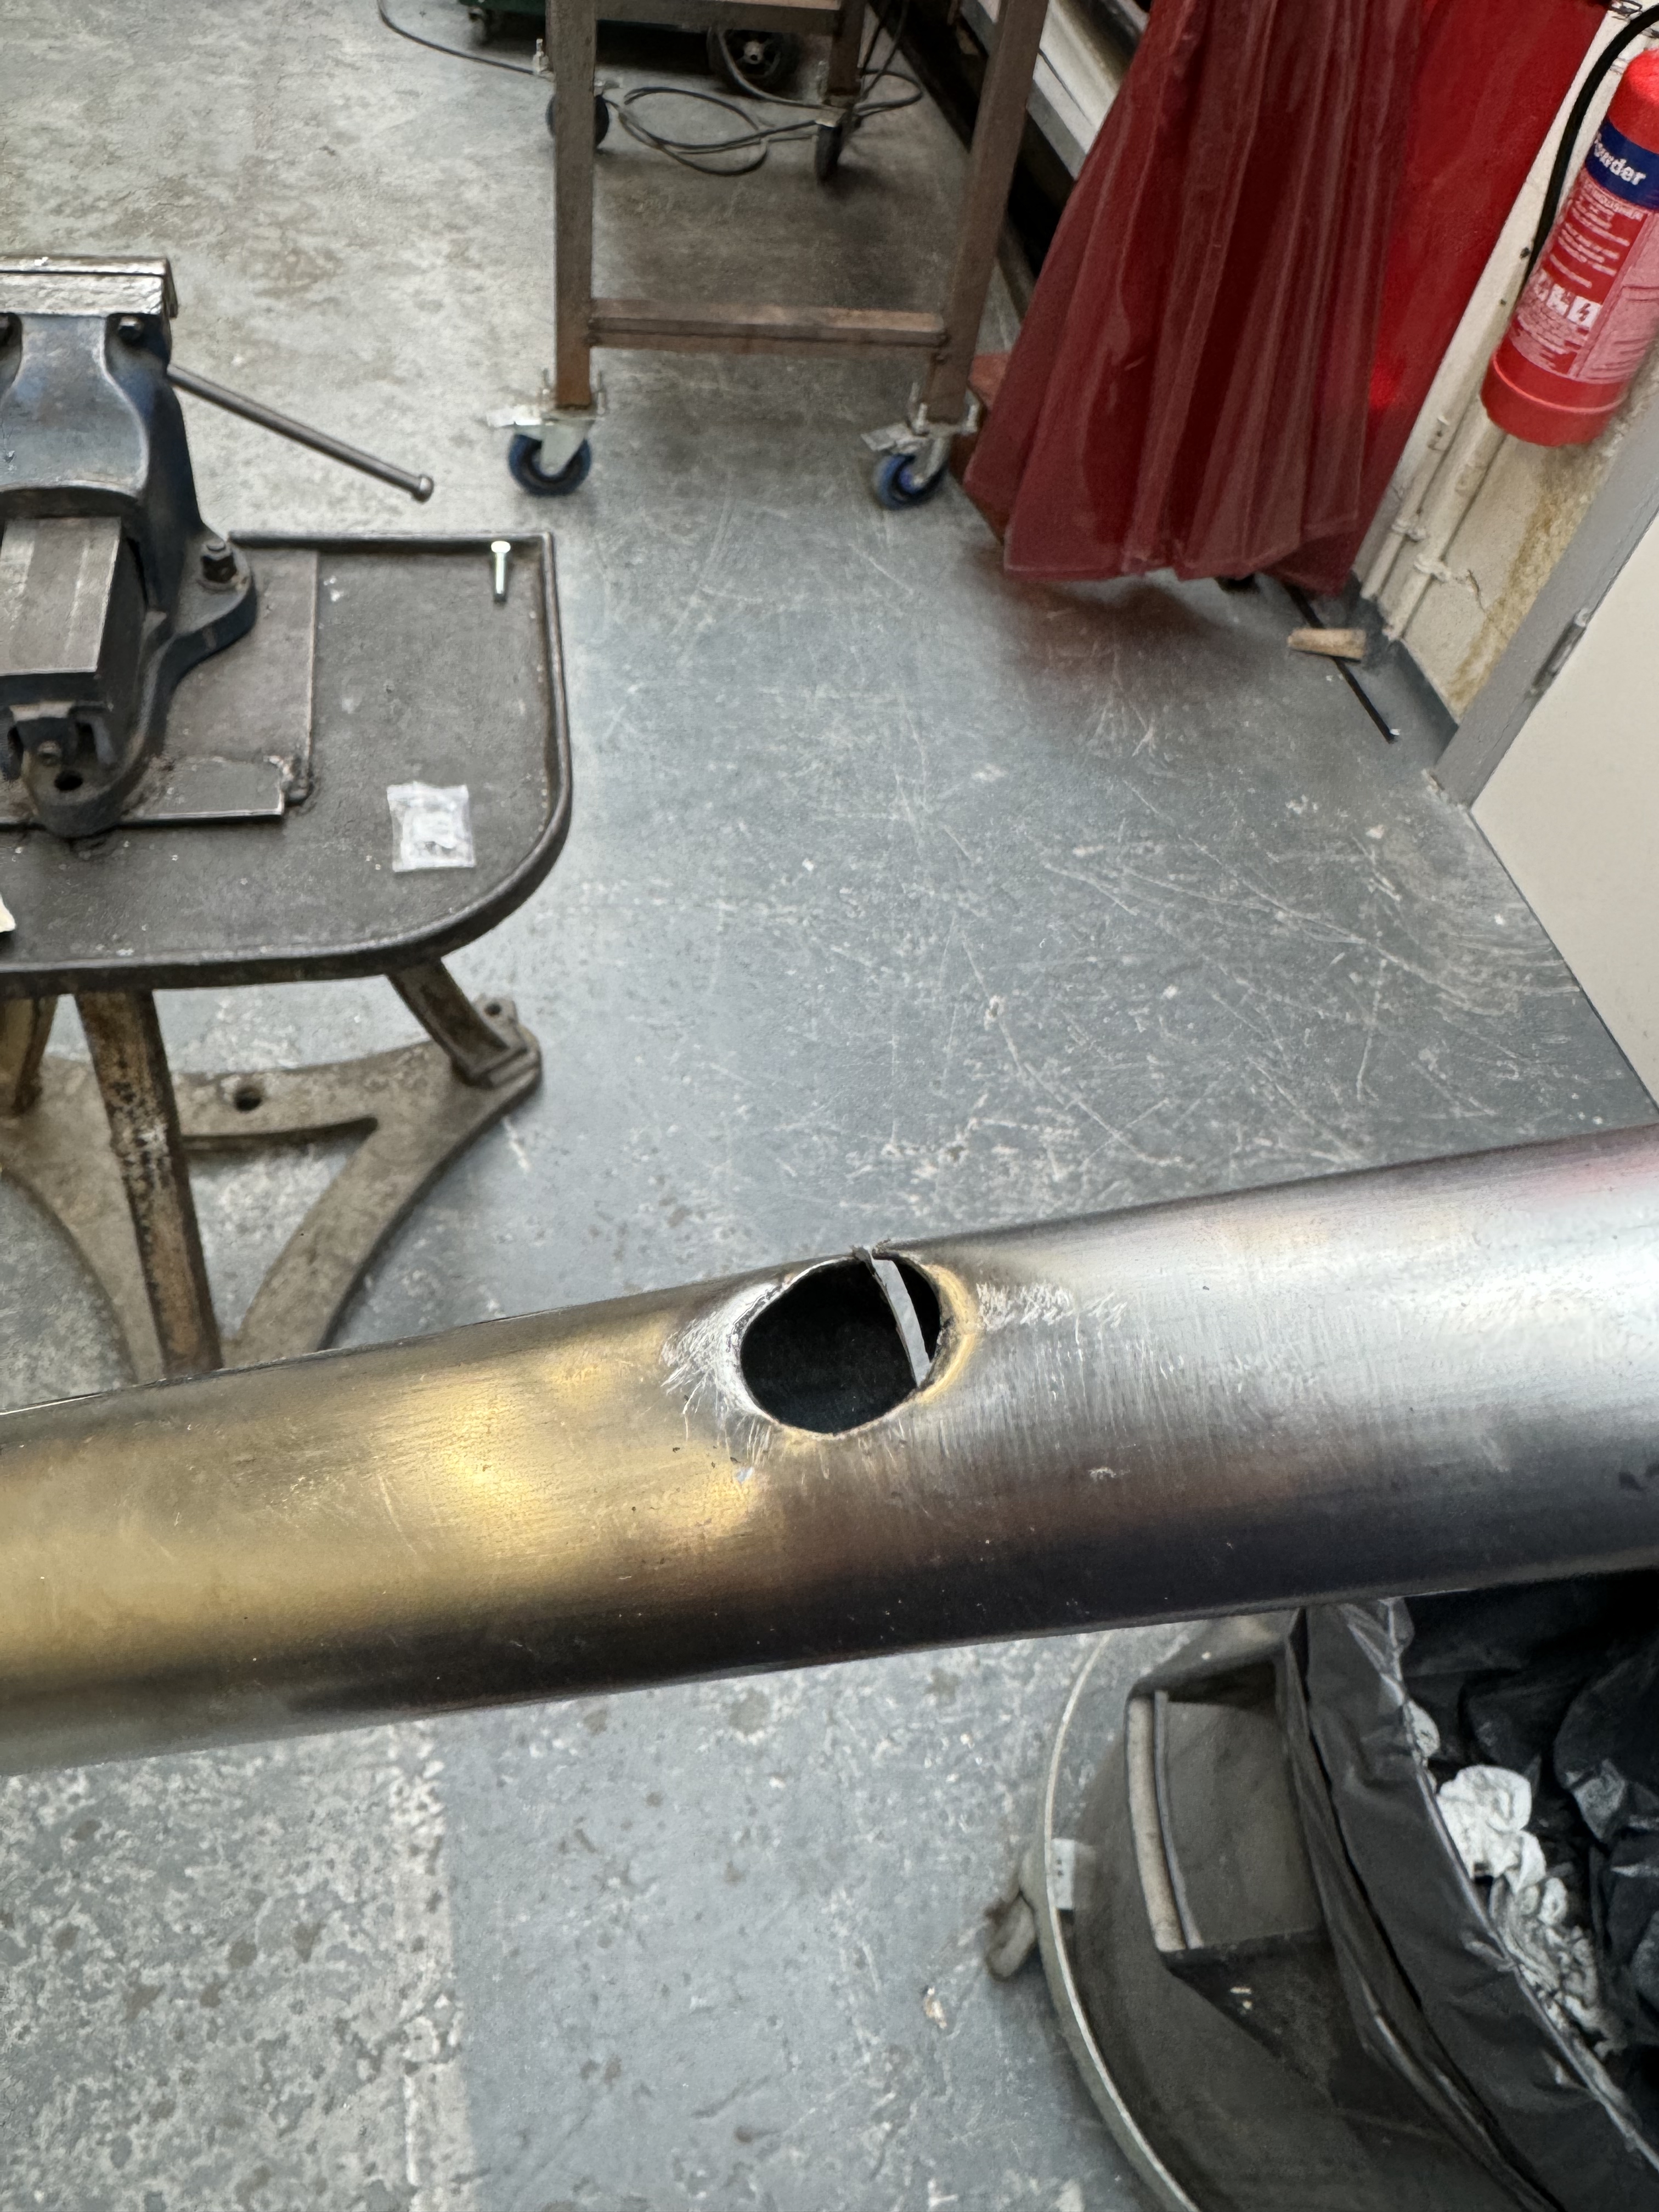
At first, I found that the big tube is not wide enough for the small tube and two wires. And then, I replace the rubber coating that pass by the hole with electrical tape to turn it into flat. Then it is good to allow the last horizontal small tube to go through. But the strength of the wire will decrease and when I tried to let the wire go through the hole in small tube, it is harder because the rubber coating is stronger. I found there is some scratchings on the wire when it going through the holes but without influence for copper wires. It is acceptable I think. But if I grind the hole more carefully I can avoid that.


 I think I can do a cable guider to guide the cable to the hole of small tube.
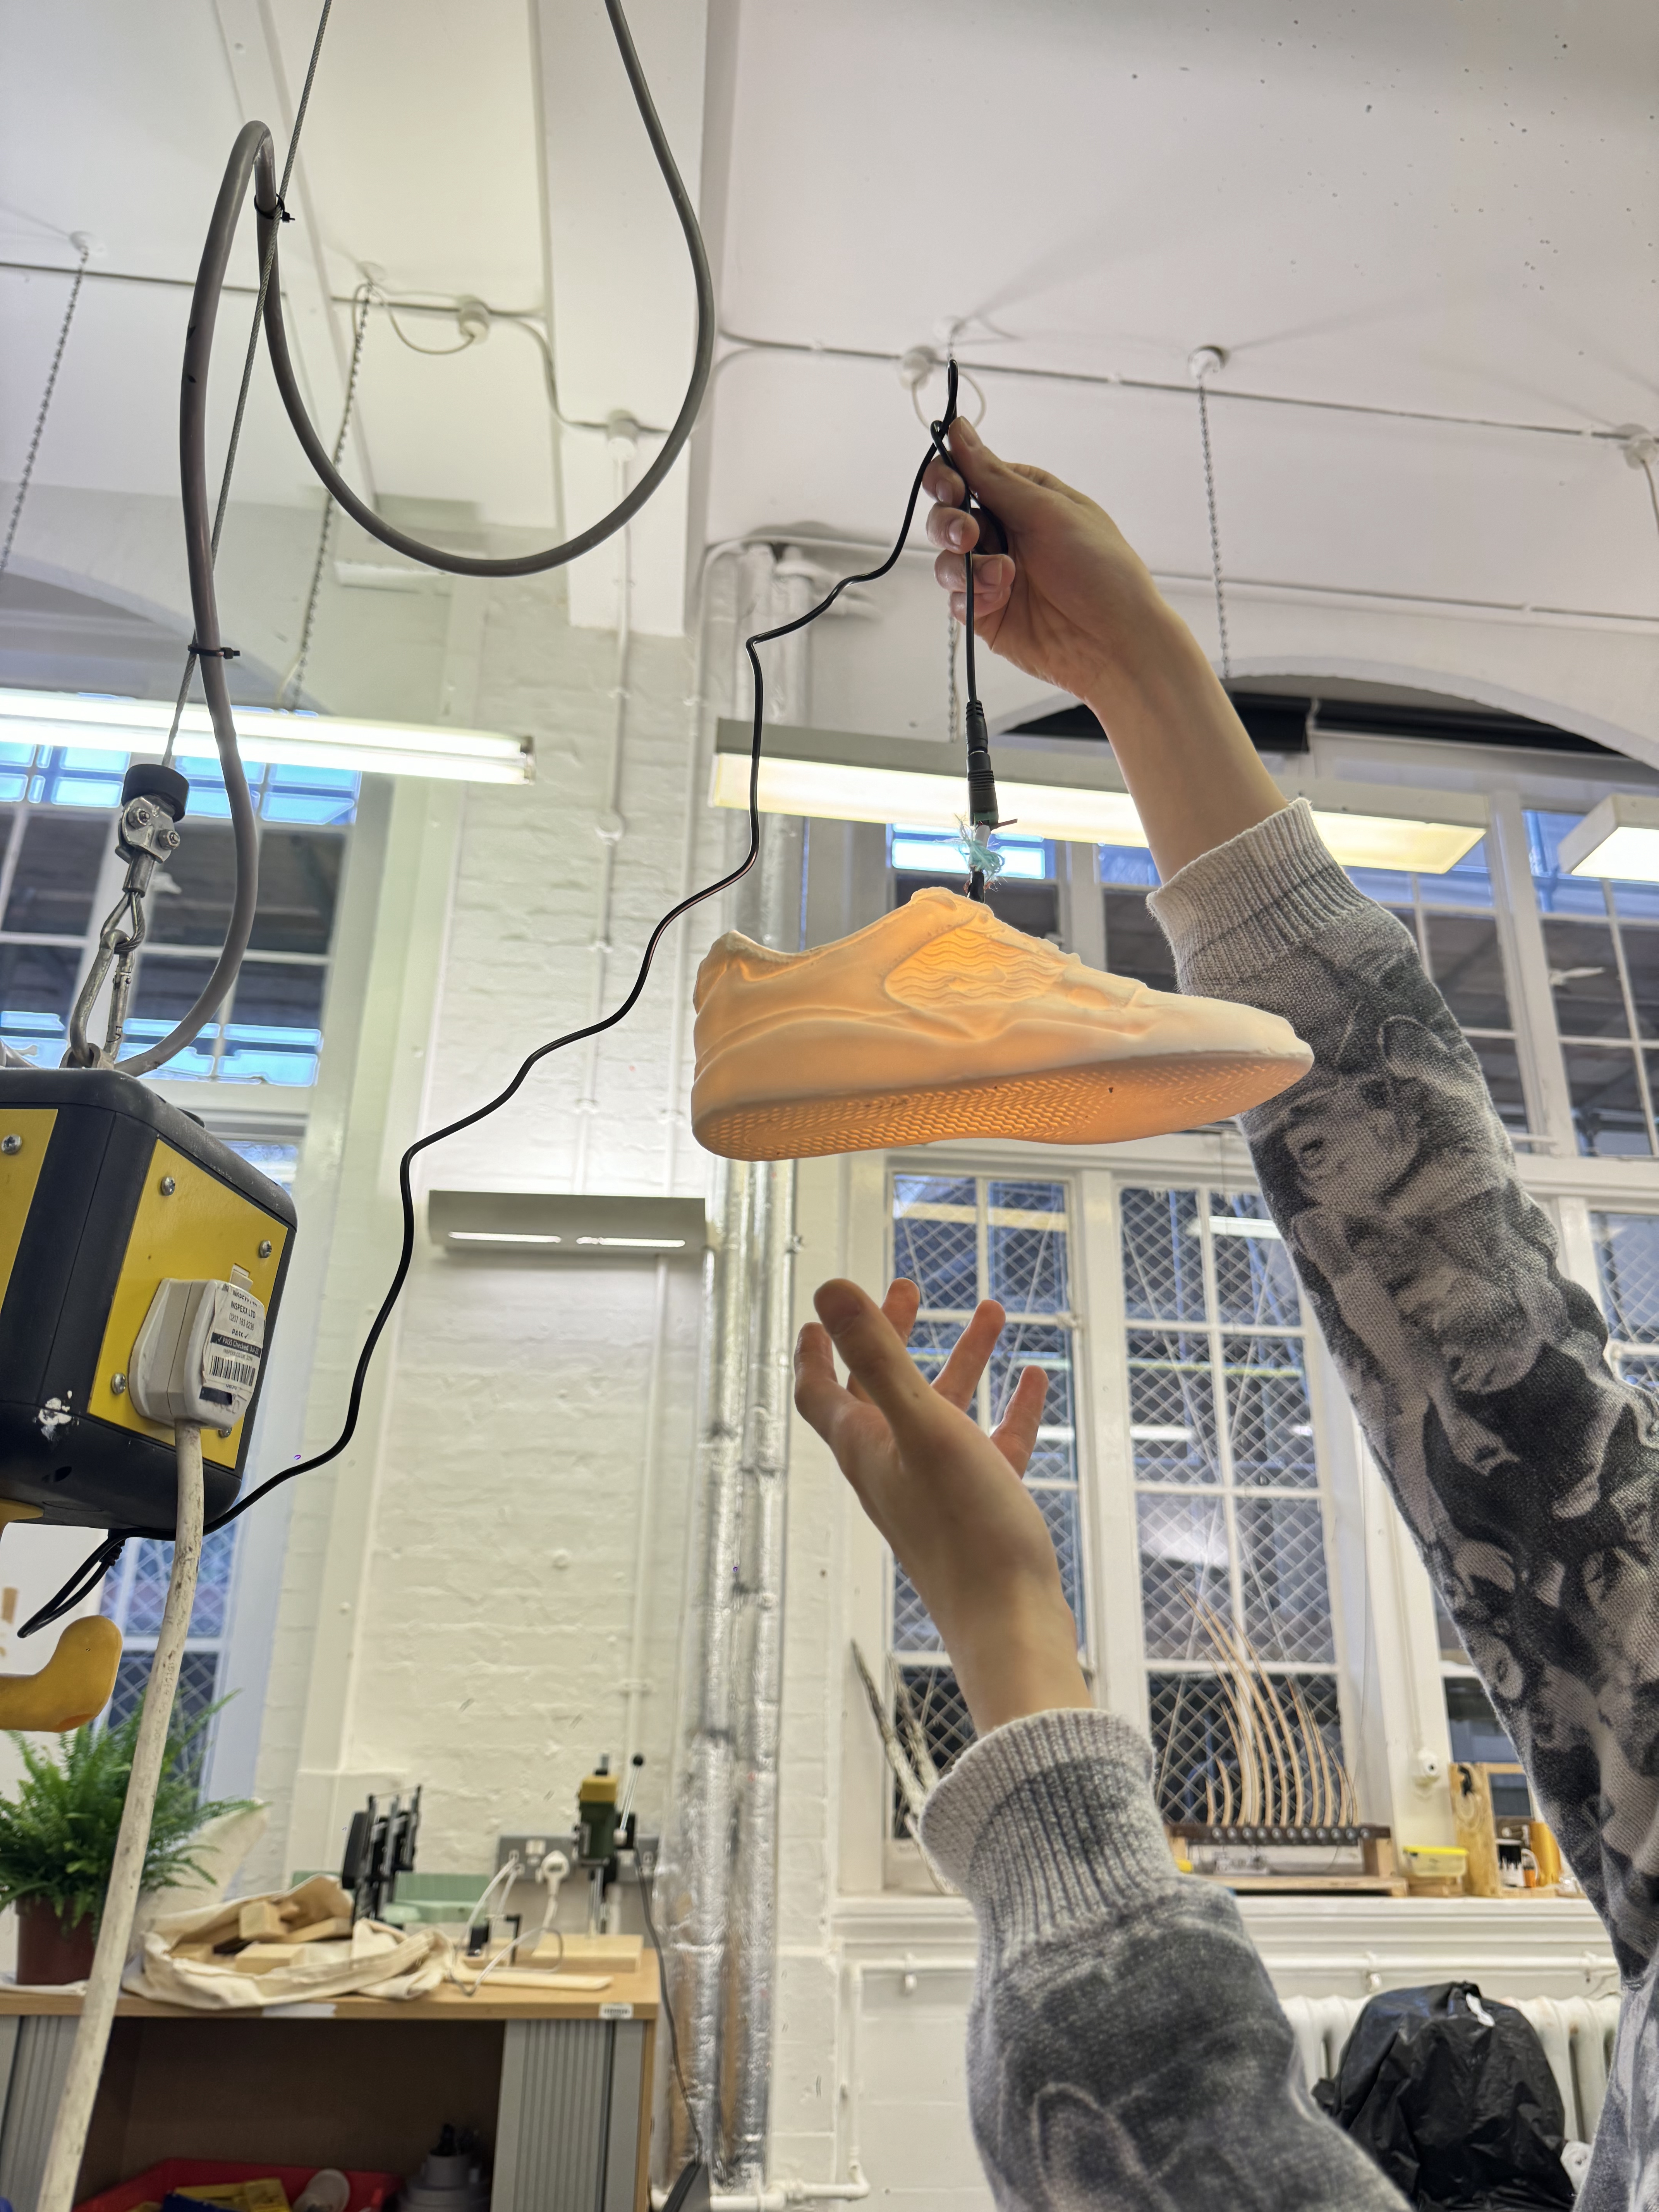
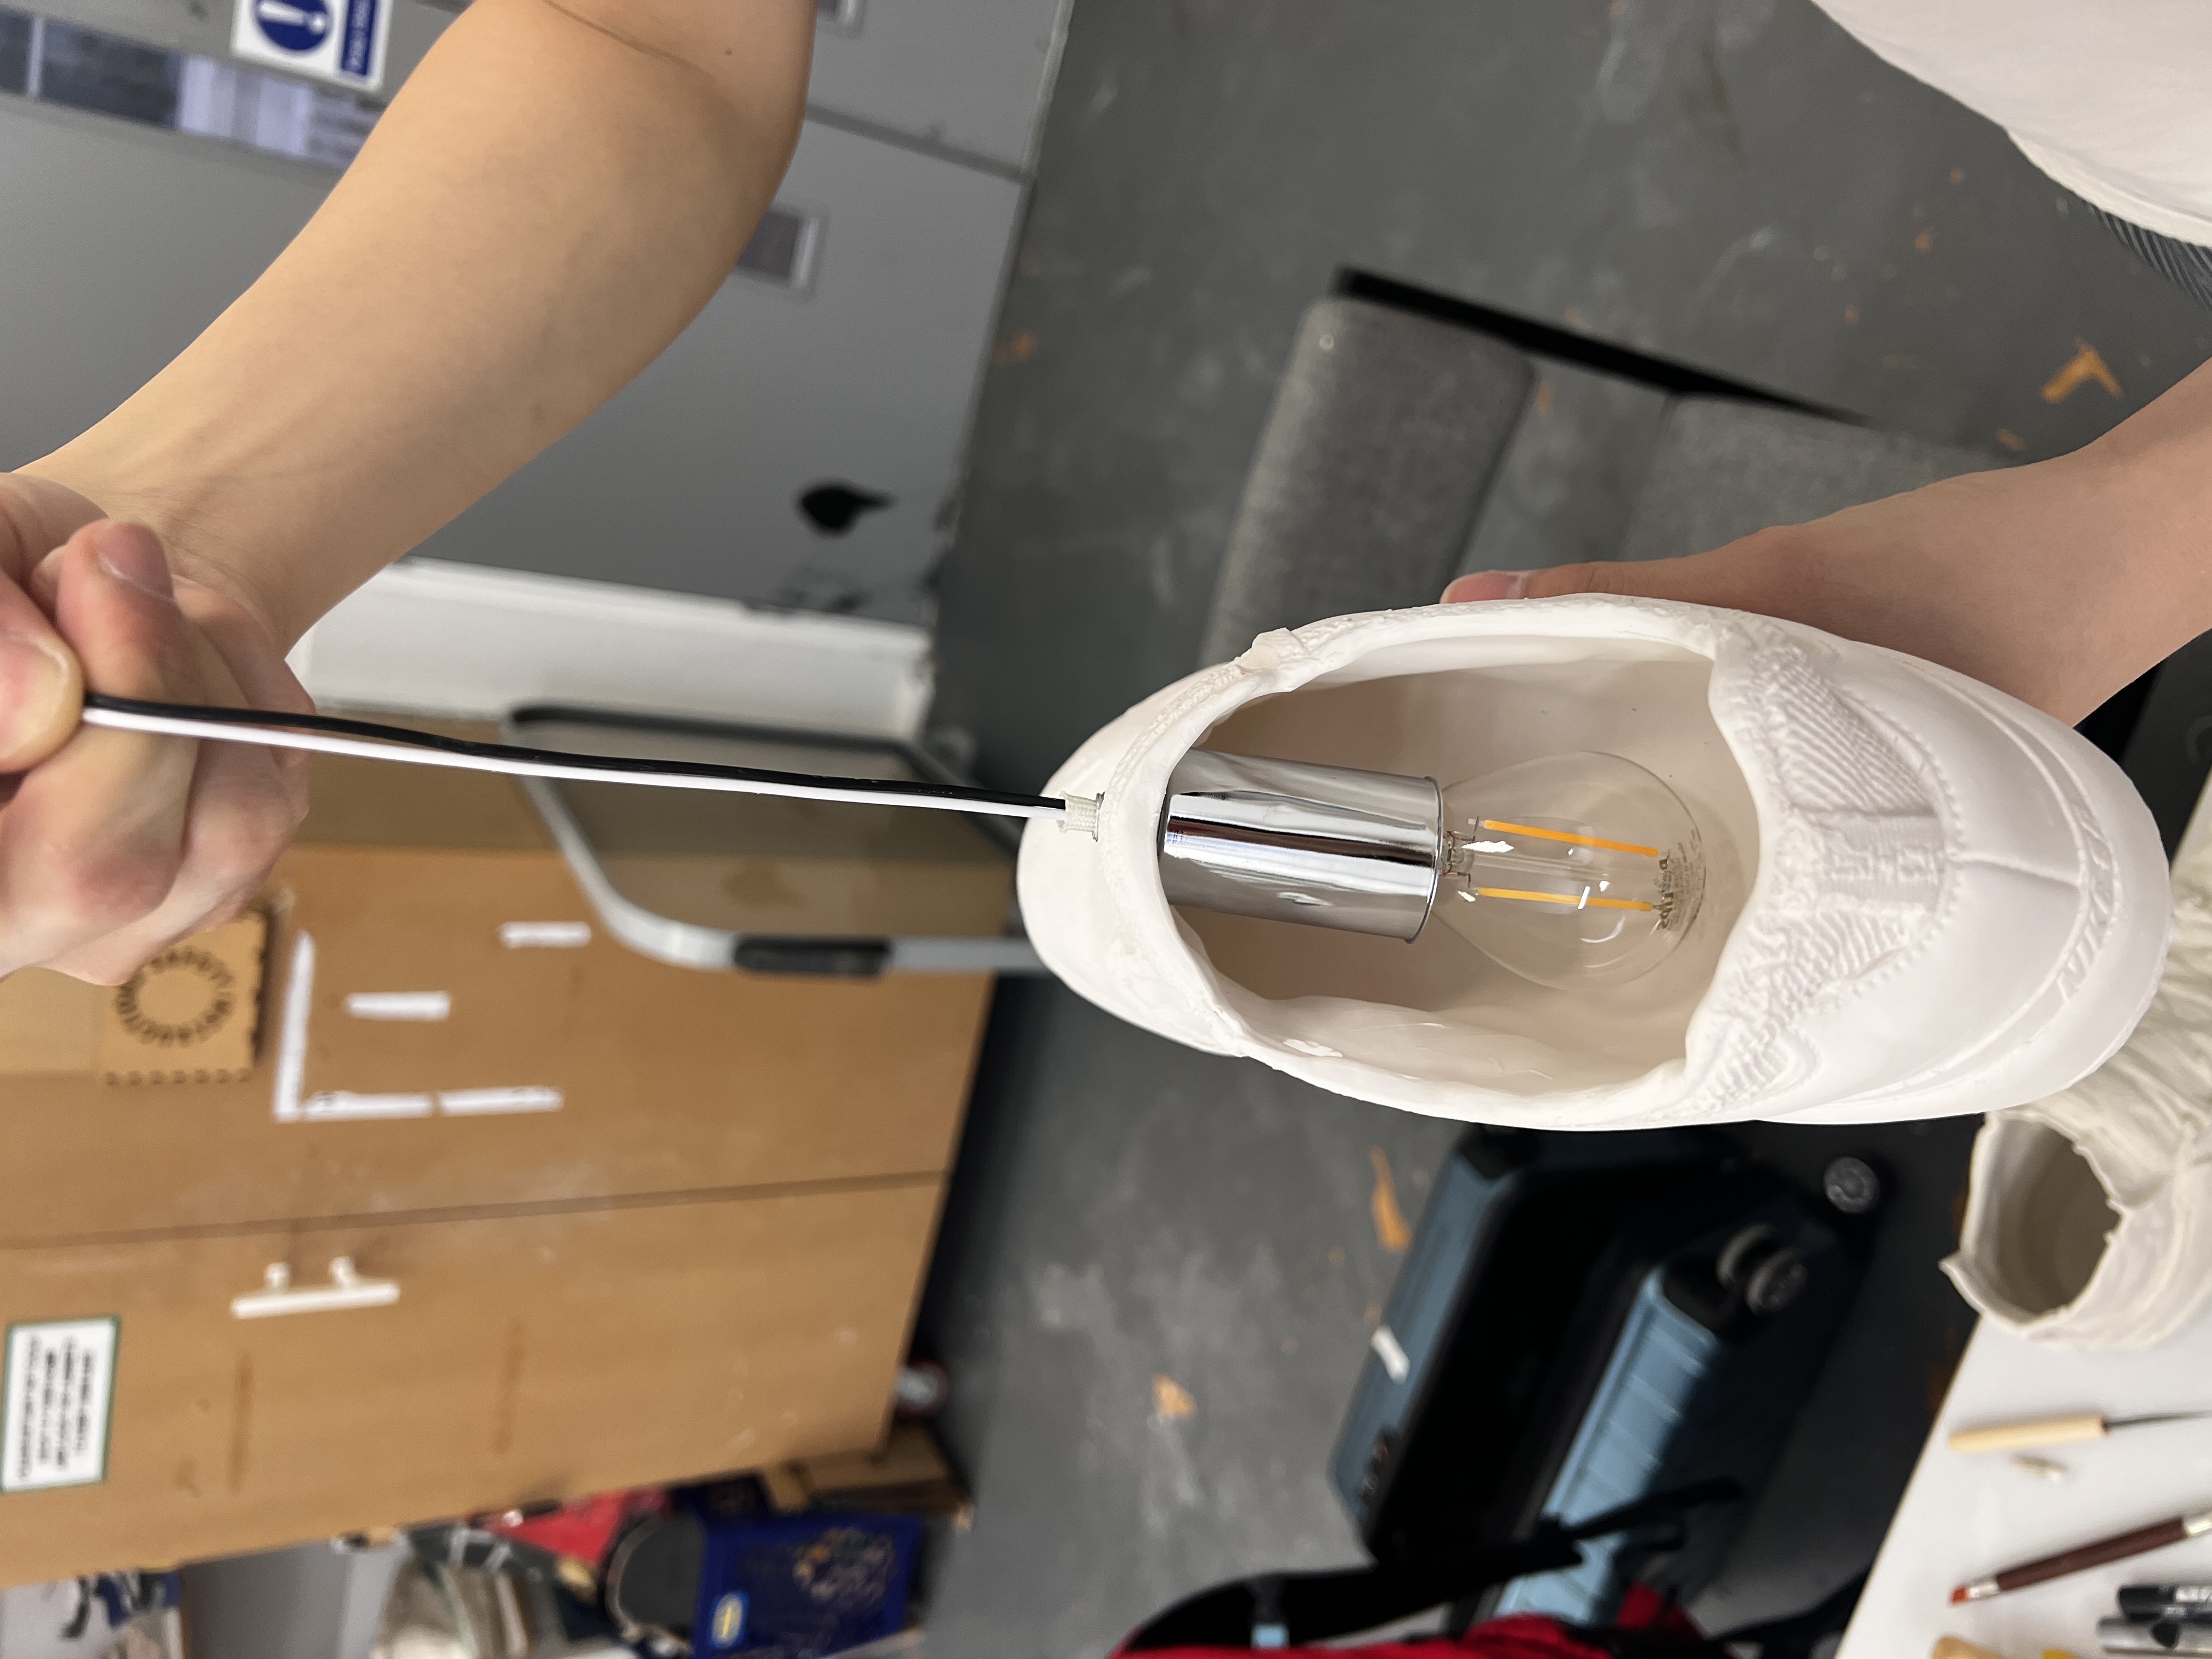
I tried three different ways to locate the hole for bulb. The backside and top bulb won't touch the lampshade, but the side one will. The backside one will expose the bulb outside. I dont like this effect because I want more natural like the scenes in real life. The side one will be expose the flaw of shoe lace but can show more things and with a good stance. Probably I can arrange side one on higher position or side one for good shoe lace detailed one and the lower one could be the top hole one.


22/10/24
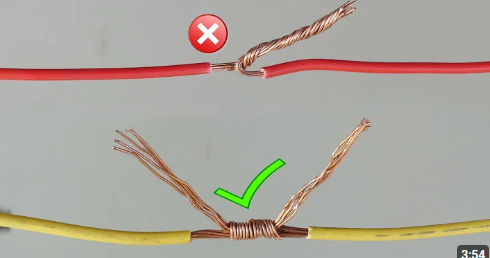

I tried to convert two cable to one. But my method is not firm enough. So I learnt it from youtube. I think after the binding way of Youtube soldering it would be more firm.


The outcome is pleasing. Even with 50 lumen of phone torch, its effect is good. And I searched lumen for the rooms. I think for each shoe lamp unit, it is enough for 300 or 400 lumens.
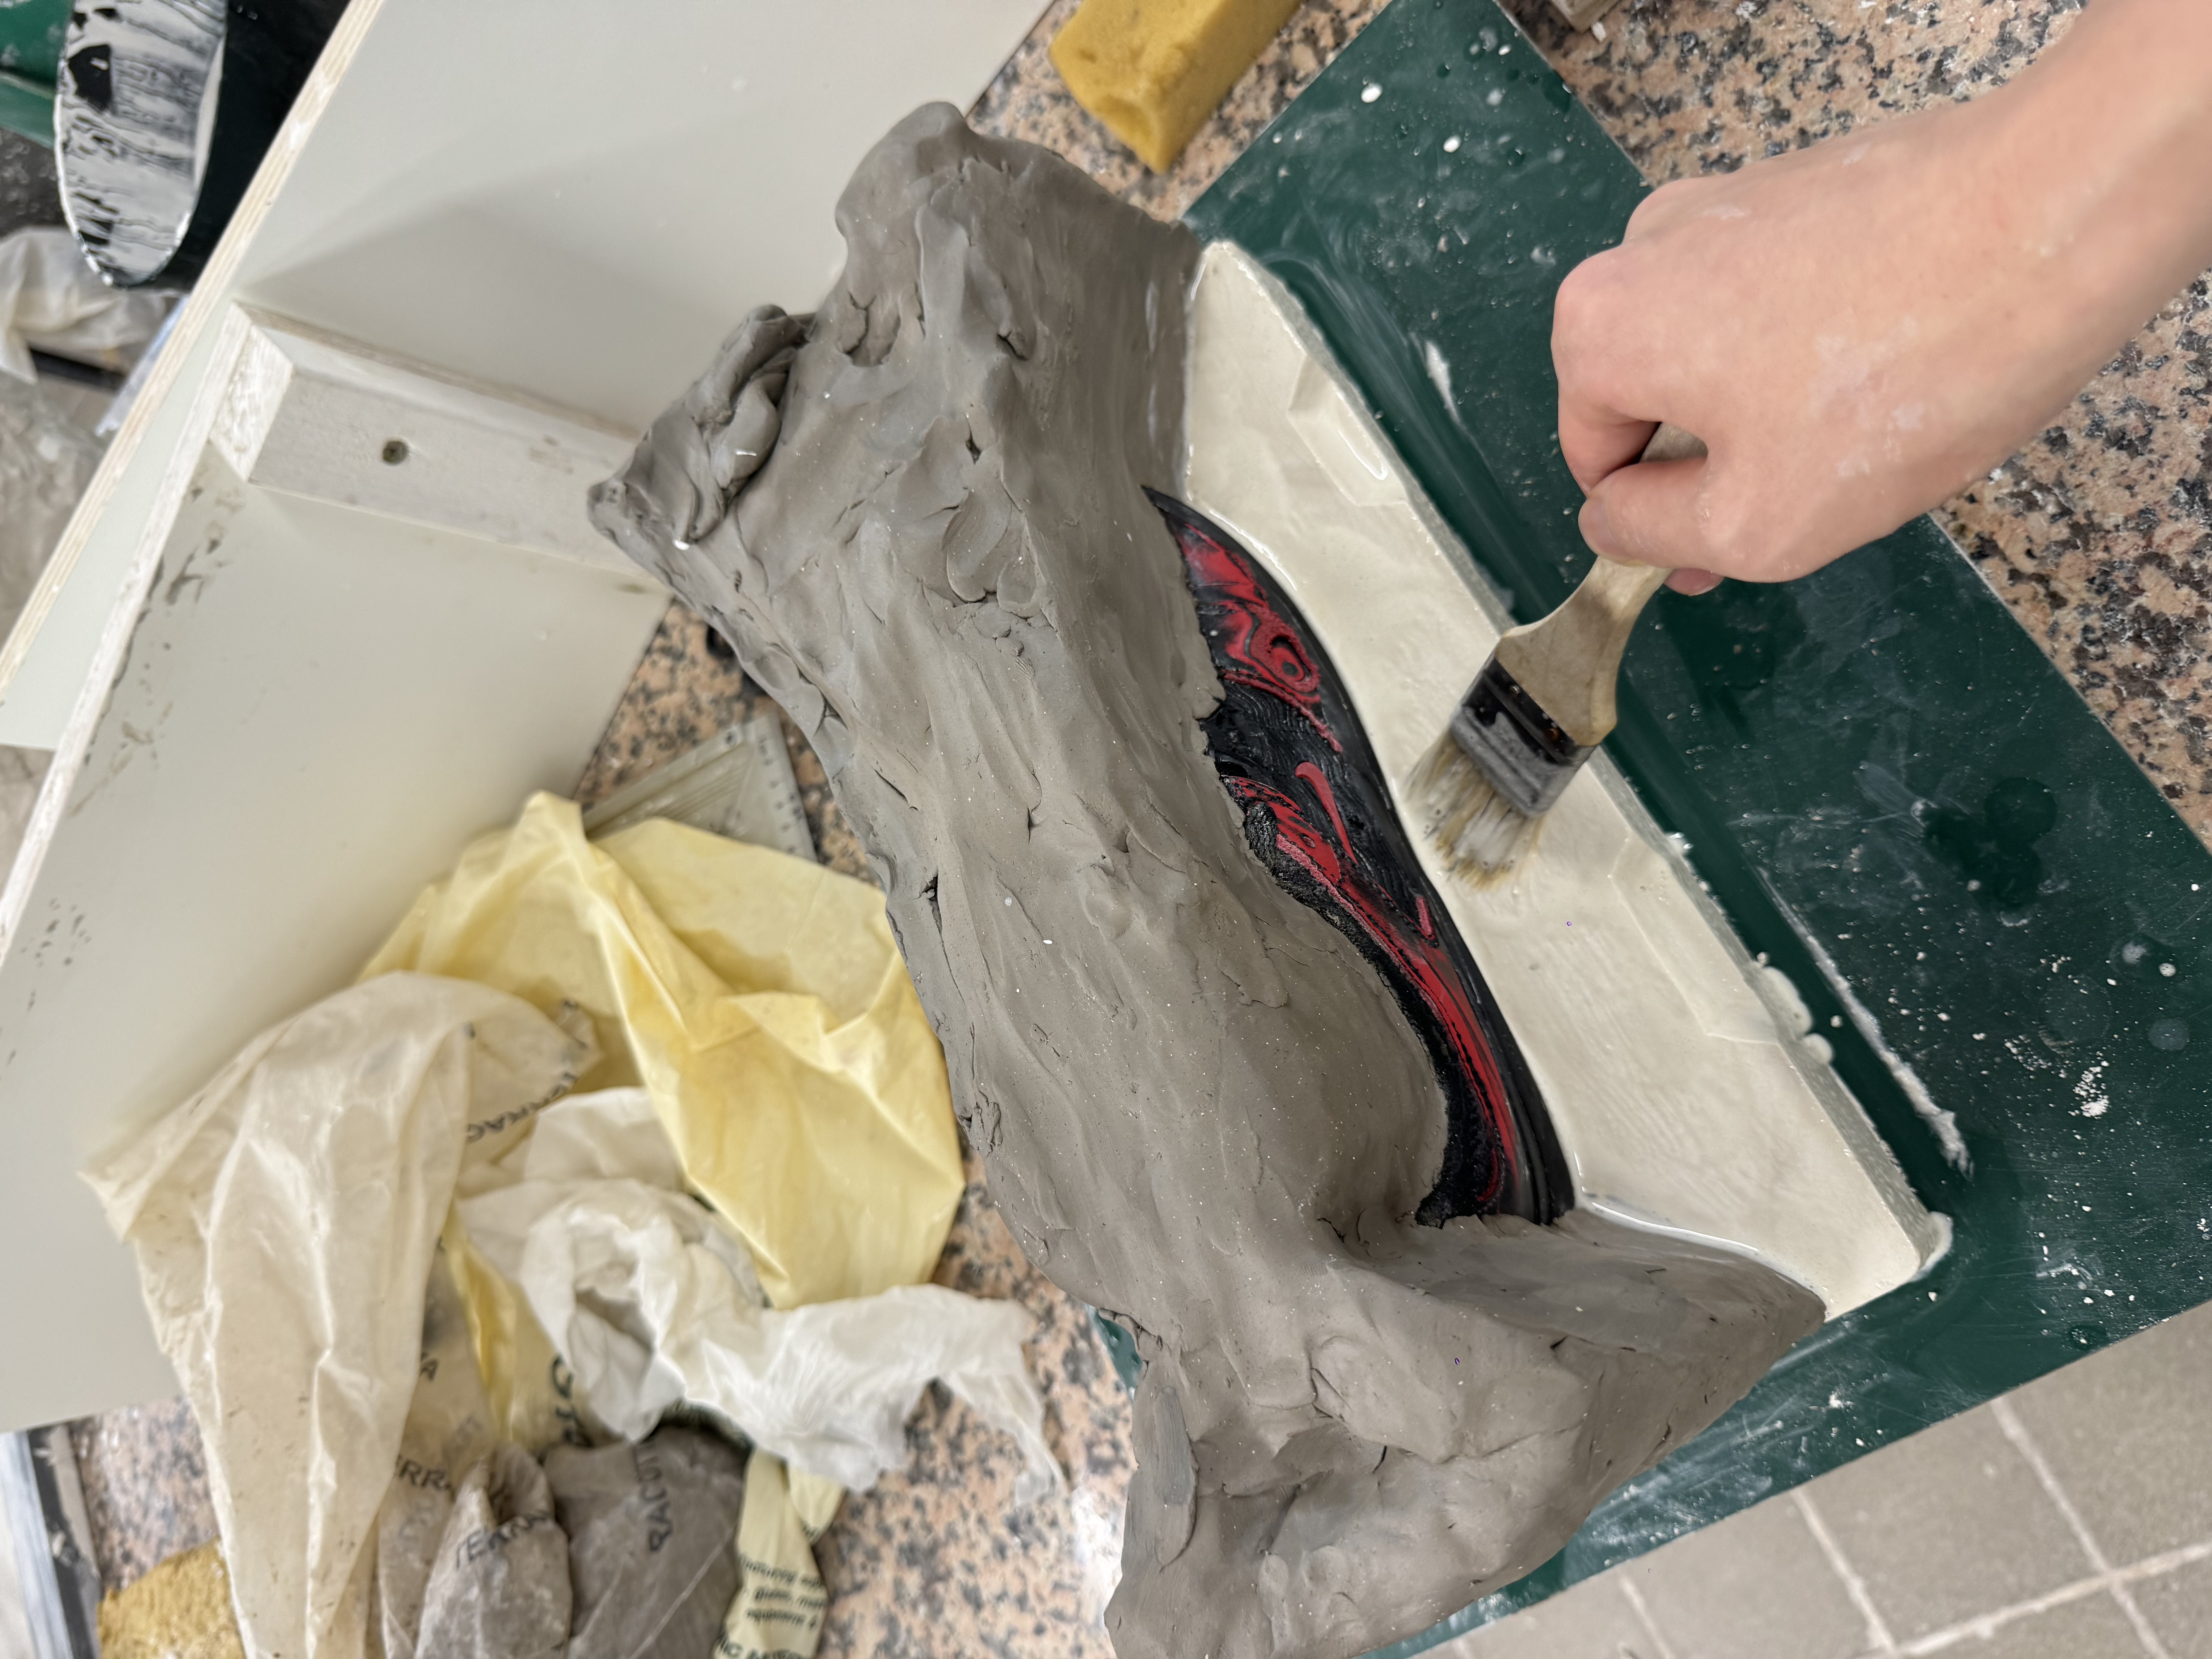
 But the bottom of tongue is a bit collapsed which lead to a small crack. So I think next time I fire it, I should put some ceramic fibre in it for support.
23/10/2024

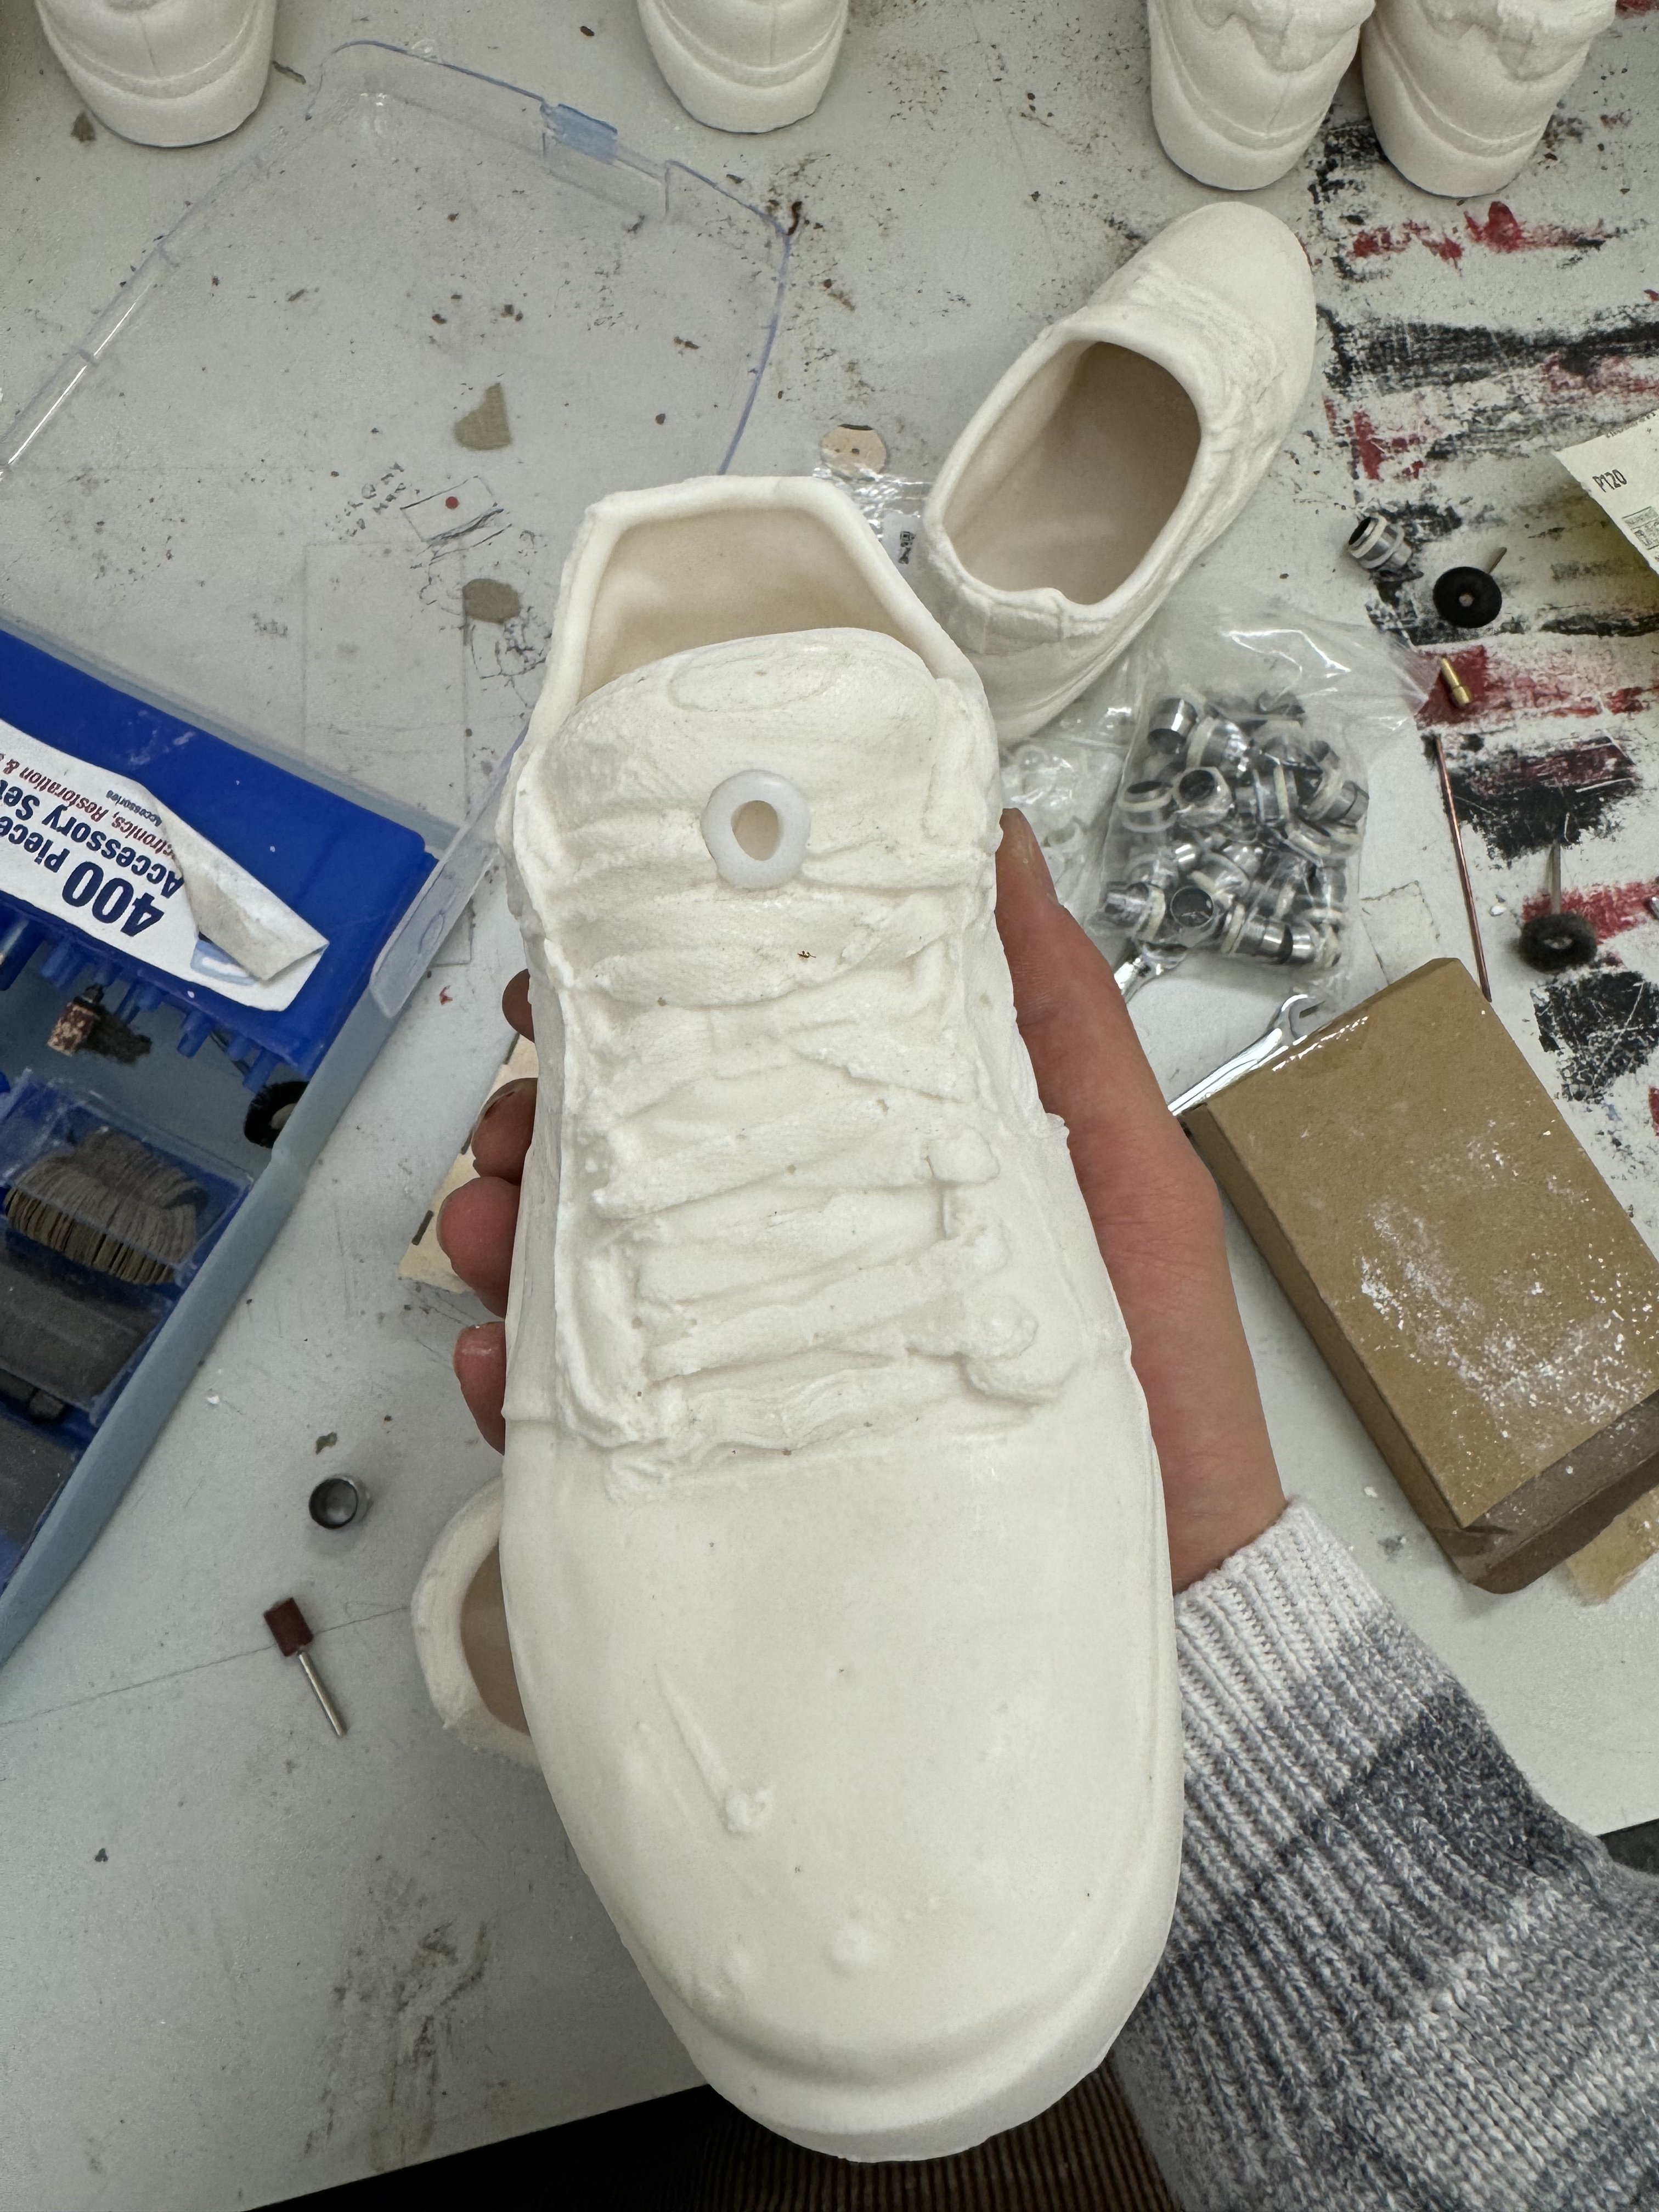
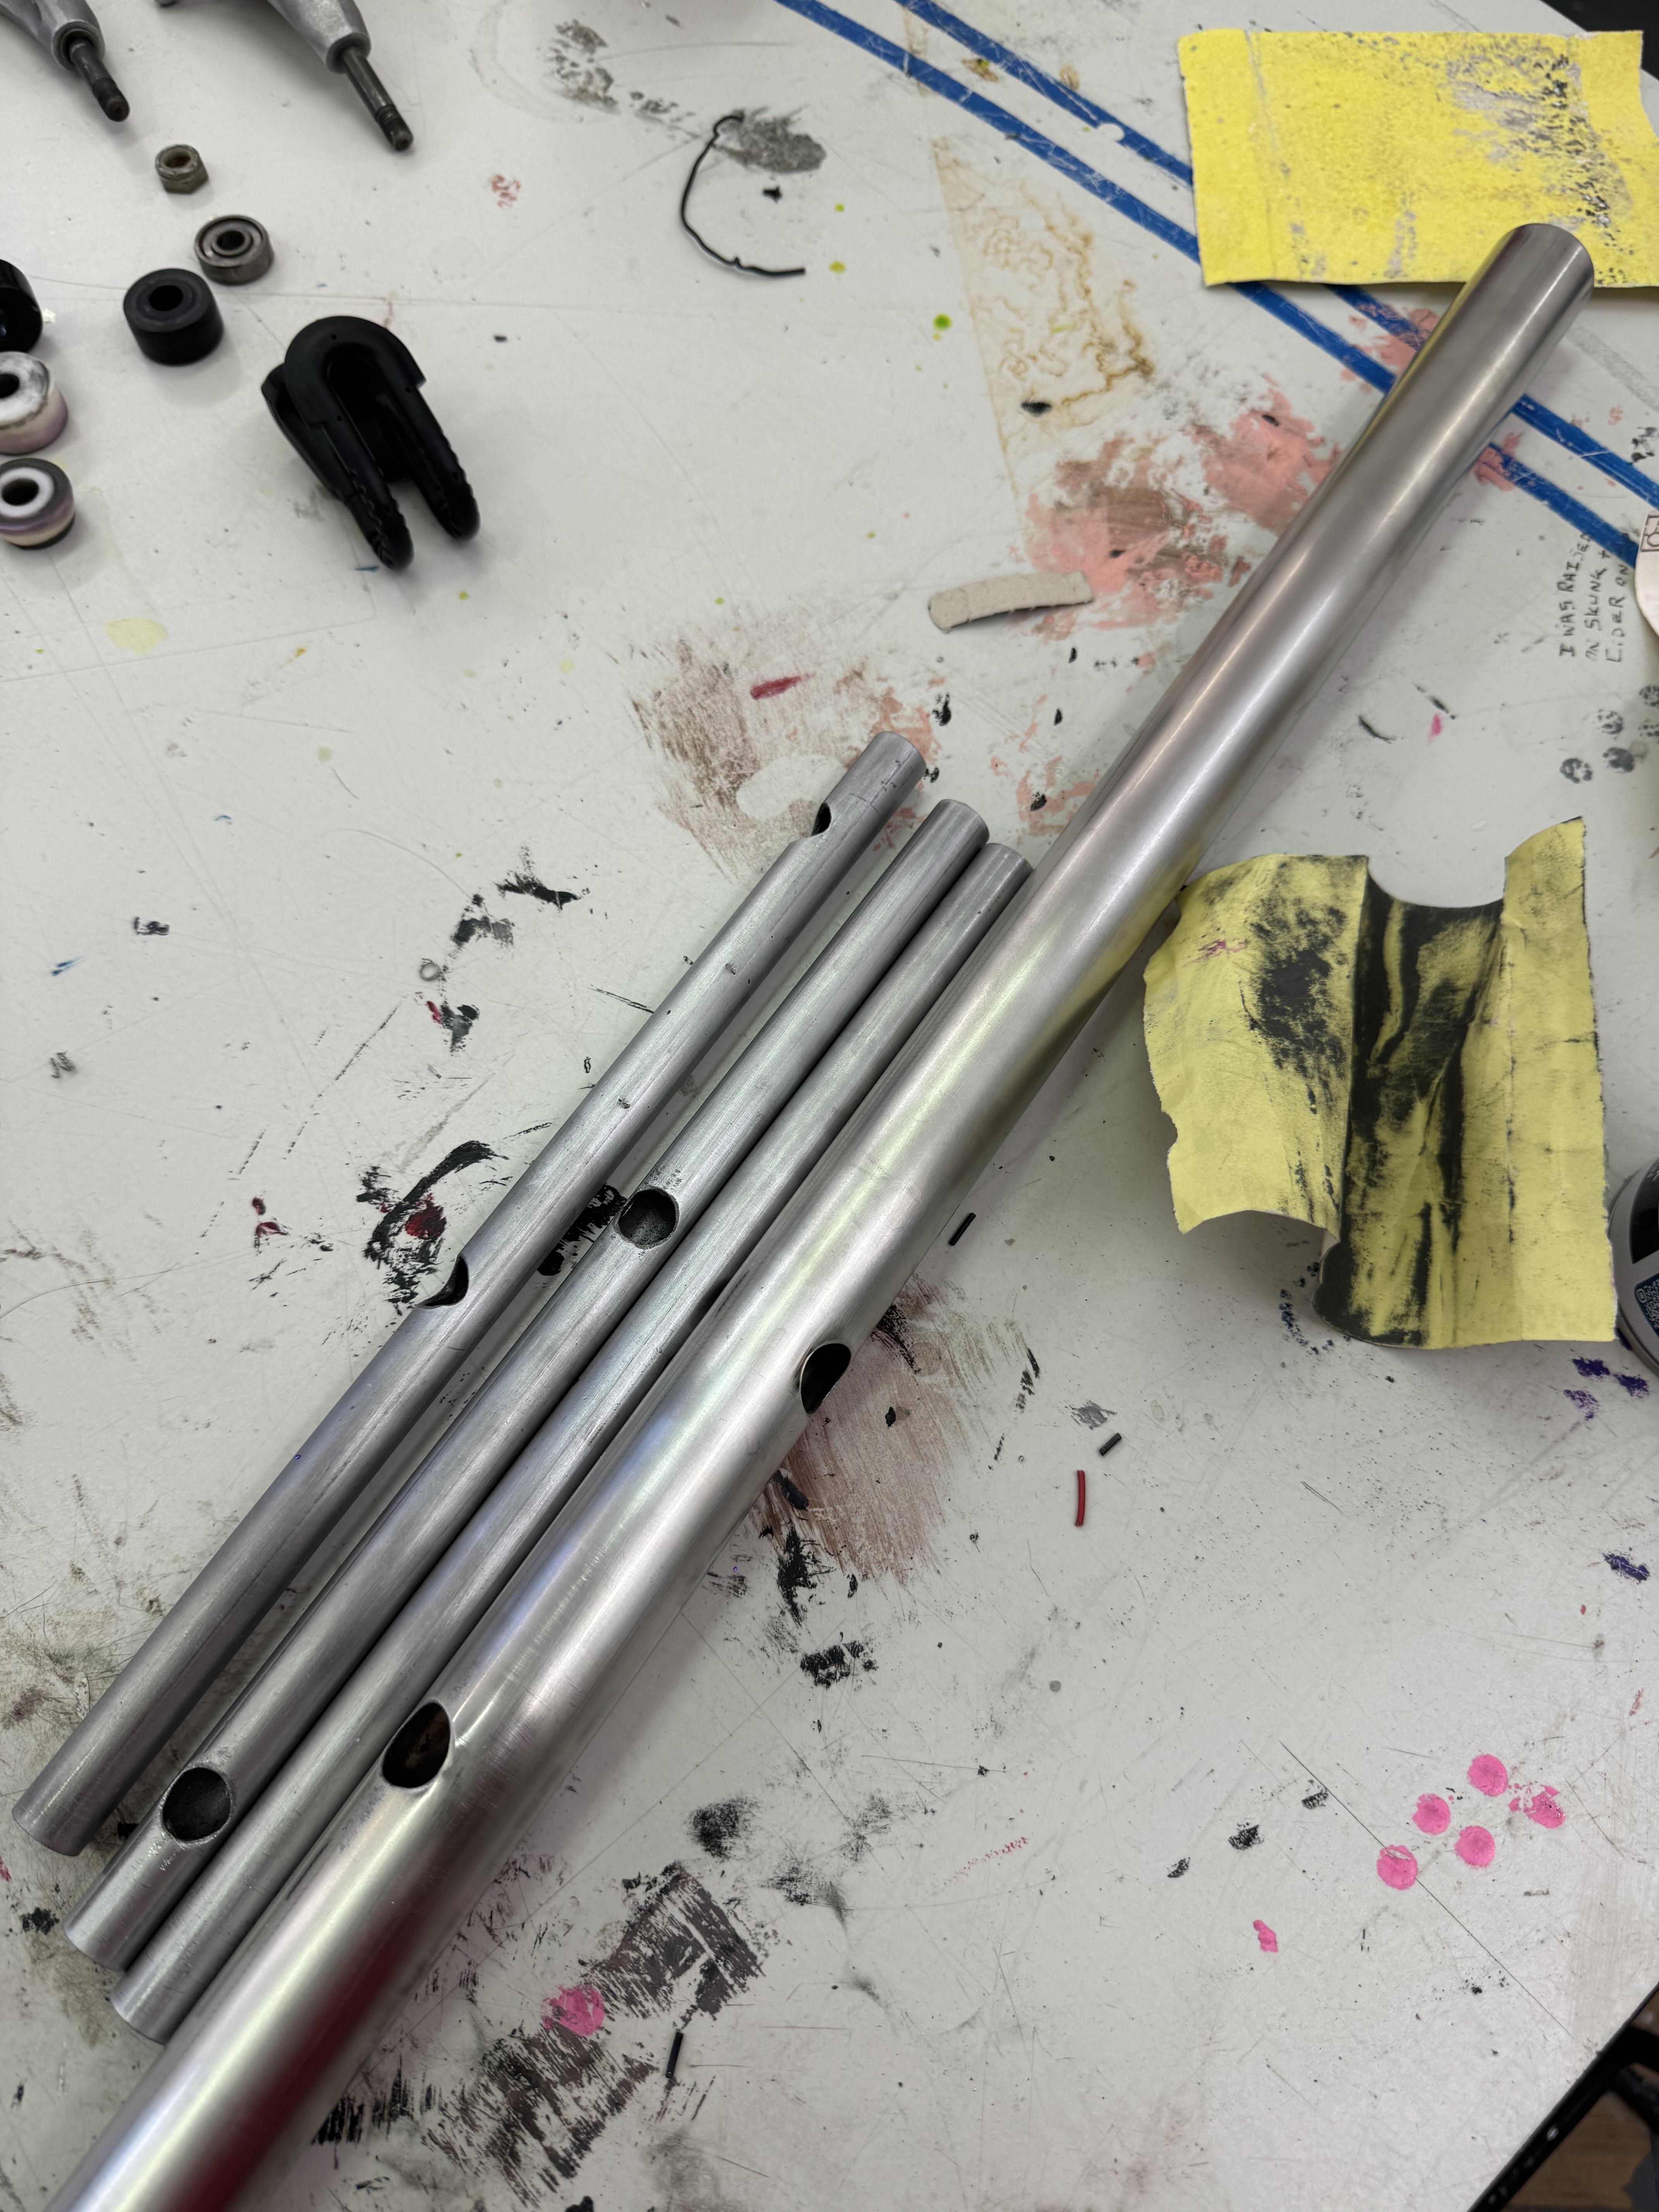
I found Parian porcelain is much weaker than the stoneware with porcelain. After many failures, I found that the reason why my shoes would be easily broken when picking it from the mold. That is because the upper tongue is too thin. The slip would be absorbed by plaster and then the level would decline so that the upper part tongue would be thinner than average and weaker. So, during the first 30 mins of waiting, I need to watch the level and add whenever it needs. And the best time for demolding would be 2 hours around. If the mold is used in the same day, the absorption time and drying time would be longer.
Because the mother mold is the thickest one and water is harder to escape, I failed all the two times of casting in it. When I put it upside-down, the sole collapsed.
The absorption time also depends on the density of slip. If the density is thicker, the absorption time should be shorter.
For first test, the bottom of tongue was a bit collapsed which led to a small crack. So, next time I fire it, I put some ceramic fiber in it for support.
29/10/24
When I moved the shoes to fire room. I found that the thicker slip one becomes smaller and heavier.
I can use the soldering iron to melt the fabric and rubber shell of cable.
07/11/24
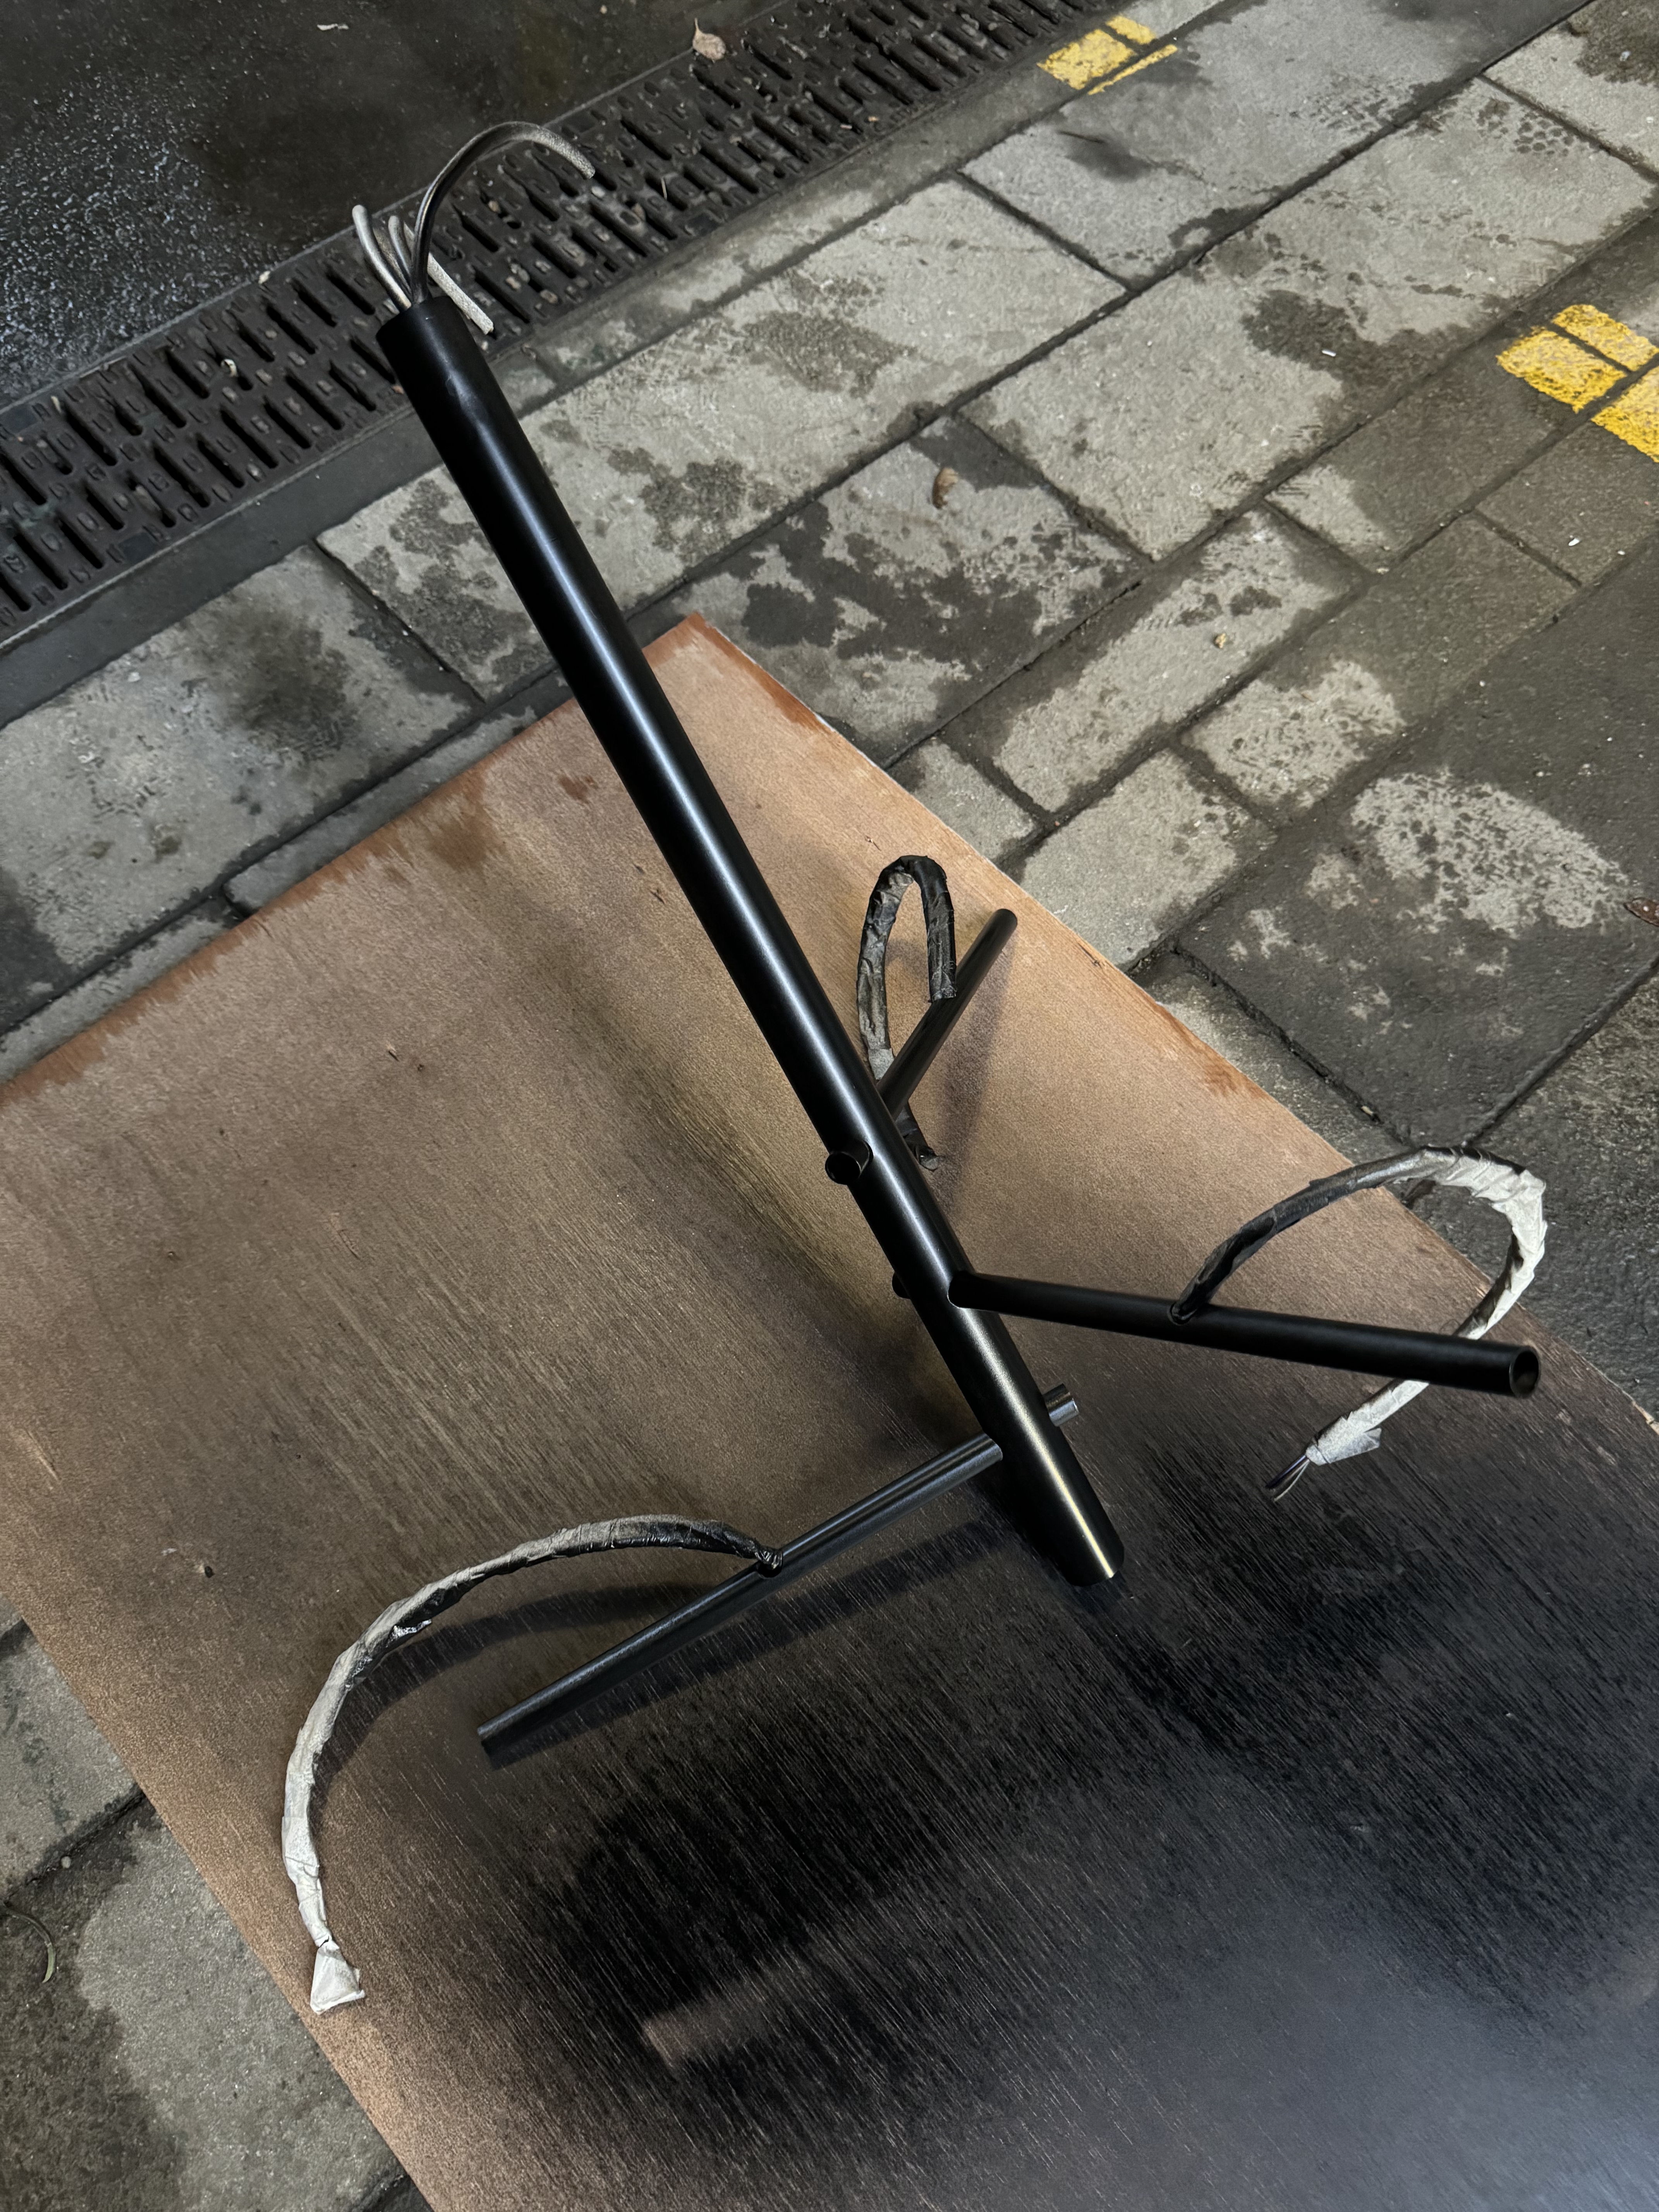
I sprayed the metal frame. During this process, I made mistake. I know I should hang it to spray but I dont know that with the spraying going, the paint liquid reduces and ejection force reduces. So this cause the uneven surface even with water wave. I have to sand out the water wave to do the second time painting. But the effect is not good if seeing it closely. From the far distance, it cannot be tell.

08/11/24
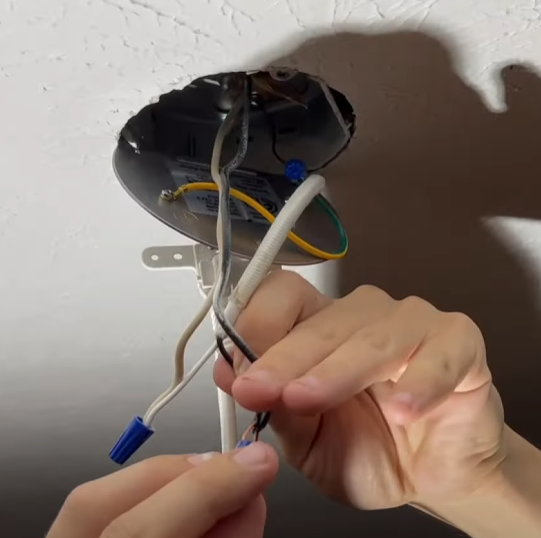
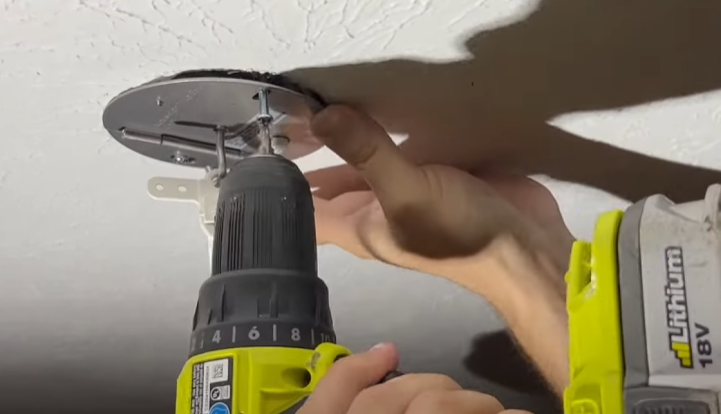
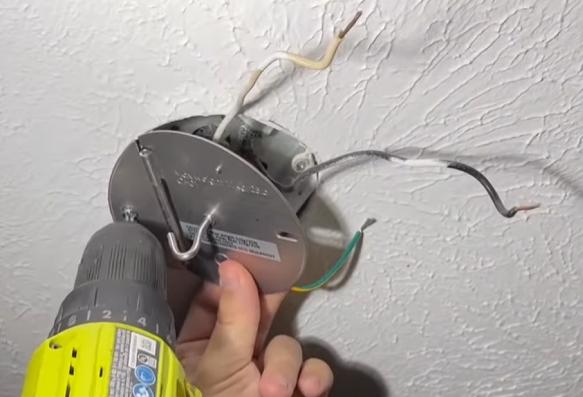
I searched for two ways to hang it, but both of them were not feasible for the existing venue, because the ceiling of the exhibition was ceiling tiles.
So I searched how to hang it on rental appartment and found this kind of hook.
Sometimes when searching for something I can think about it from other perspectives. For example, in this case the essence is that you can't punch holes in fragile places, so I chose this way.


18/11/24
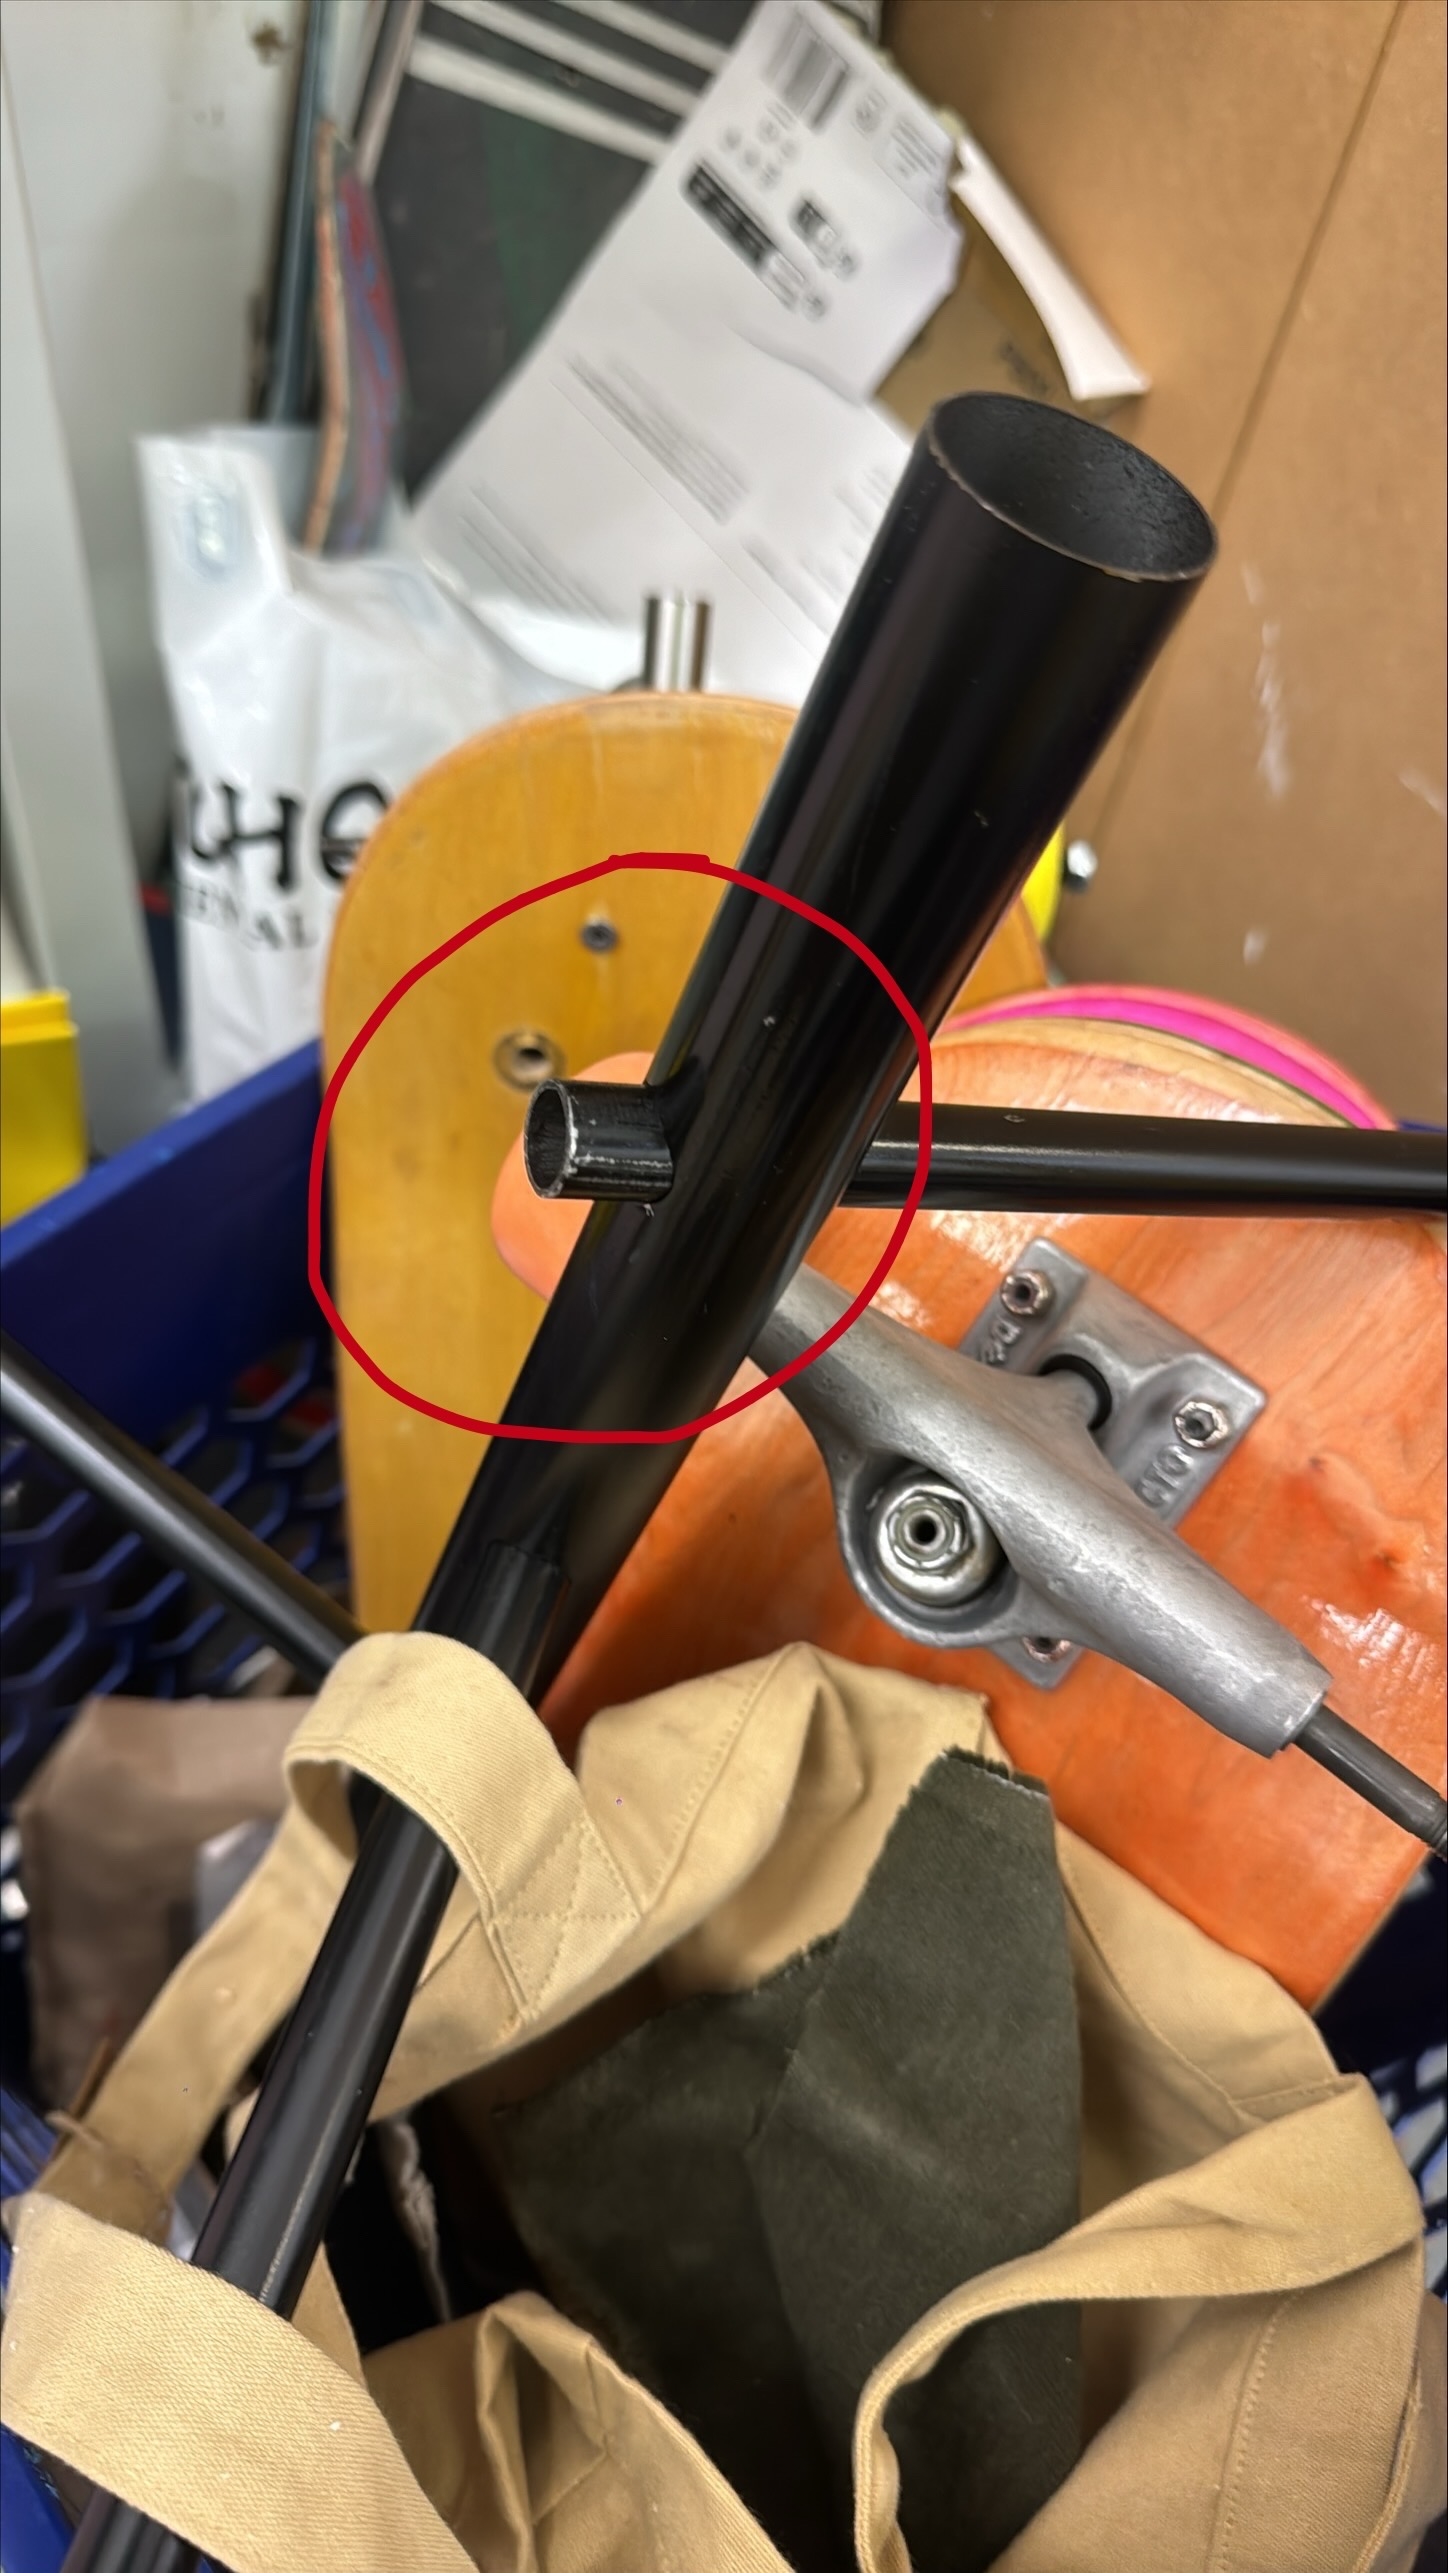
After assembly, I found that the tail of the small tube would have scratches. And the first spray painting was not even, so I decided to remove the paint and change the spray painting scheme. Because the inner diameter of the tube I bought was just enough to fit the small tube and two wires, once assembled, the wires were very difficult to move. So I assembled the wires first, wrapped them with masking tape, and finally sprayed them.
After disassembling, I found that my tube was deformed, so the small tube could no longer be inserted. This proved that the tube I bought was too thin, and I needed to buy a thicker tube. Due to time constraints, I could only use the extra material bought by my classmate. The tube was 32mm*1.5mm, which was just enough to fit the wire. If conditions permit, I would choose 35mm*1.5mm.
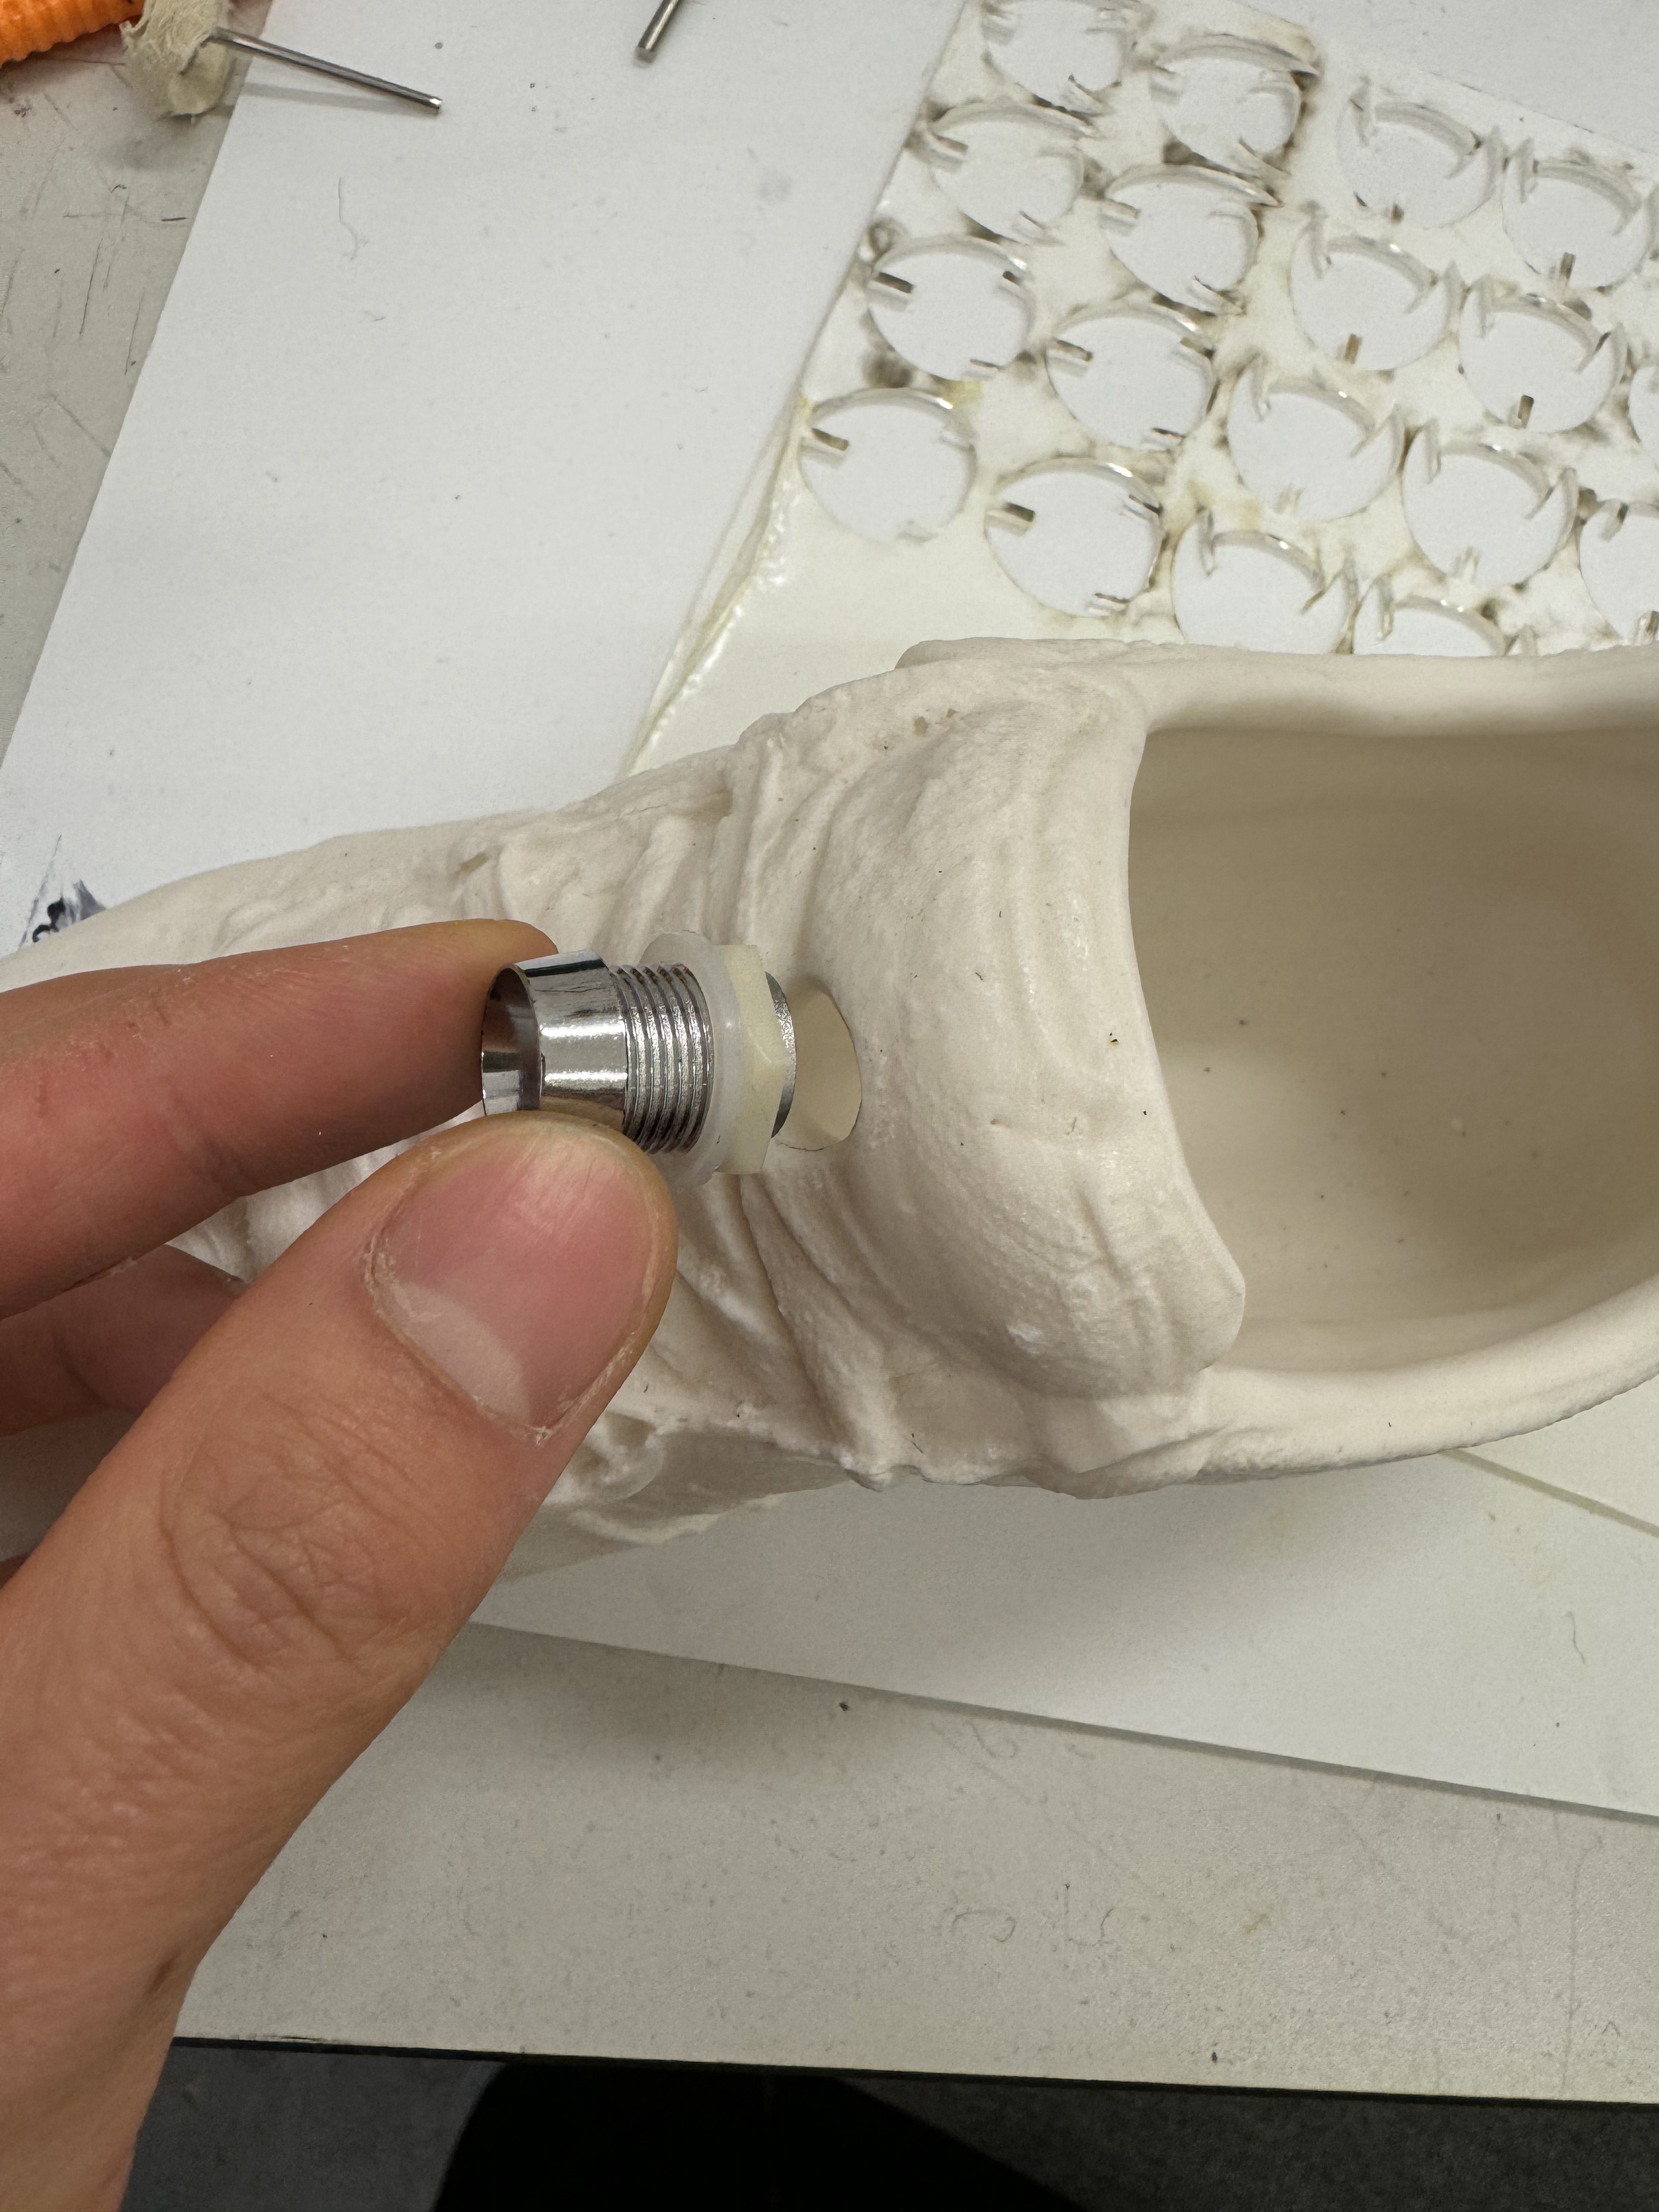
19/11/24
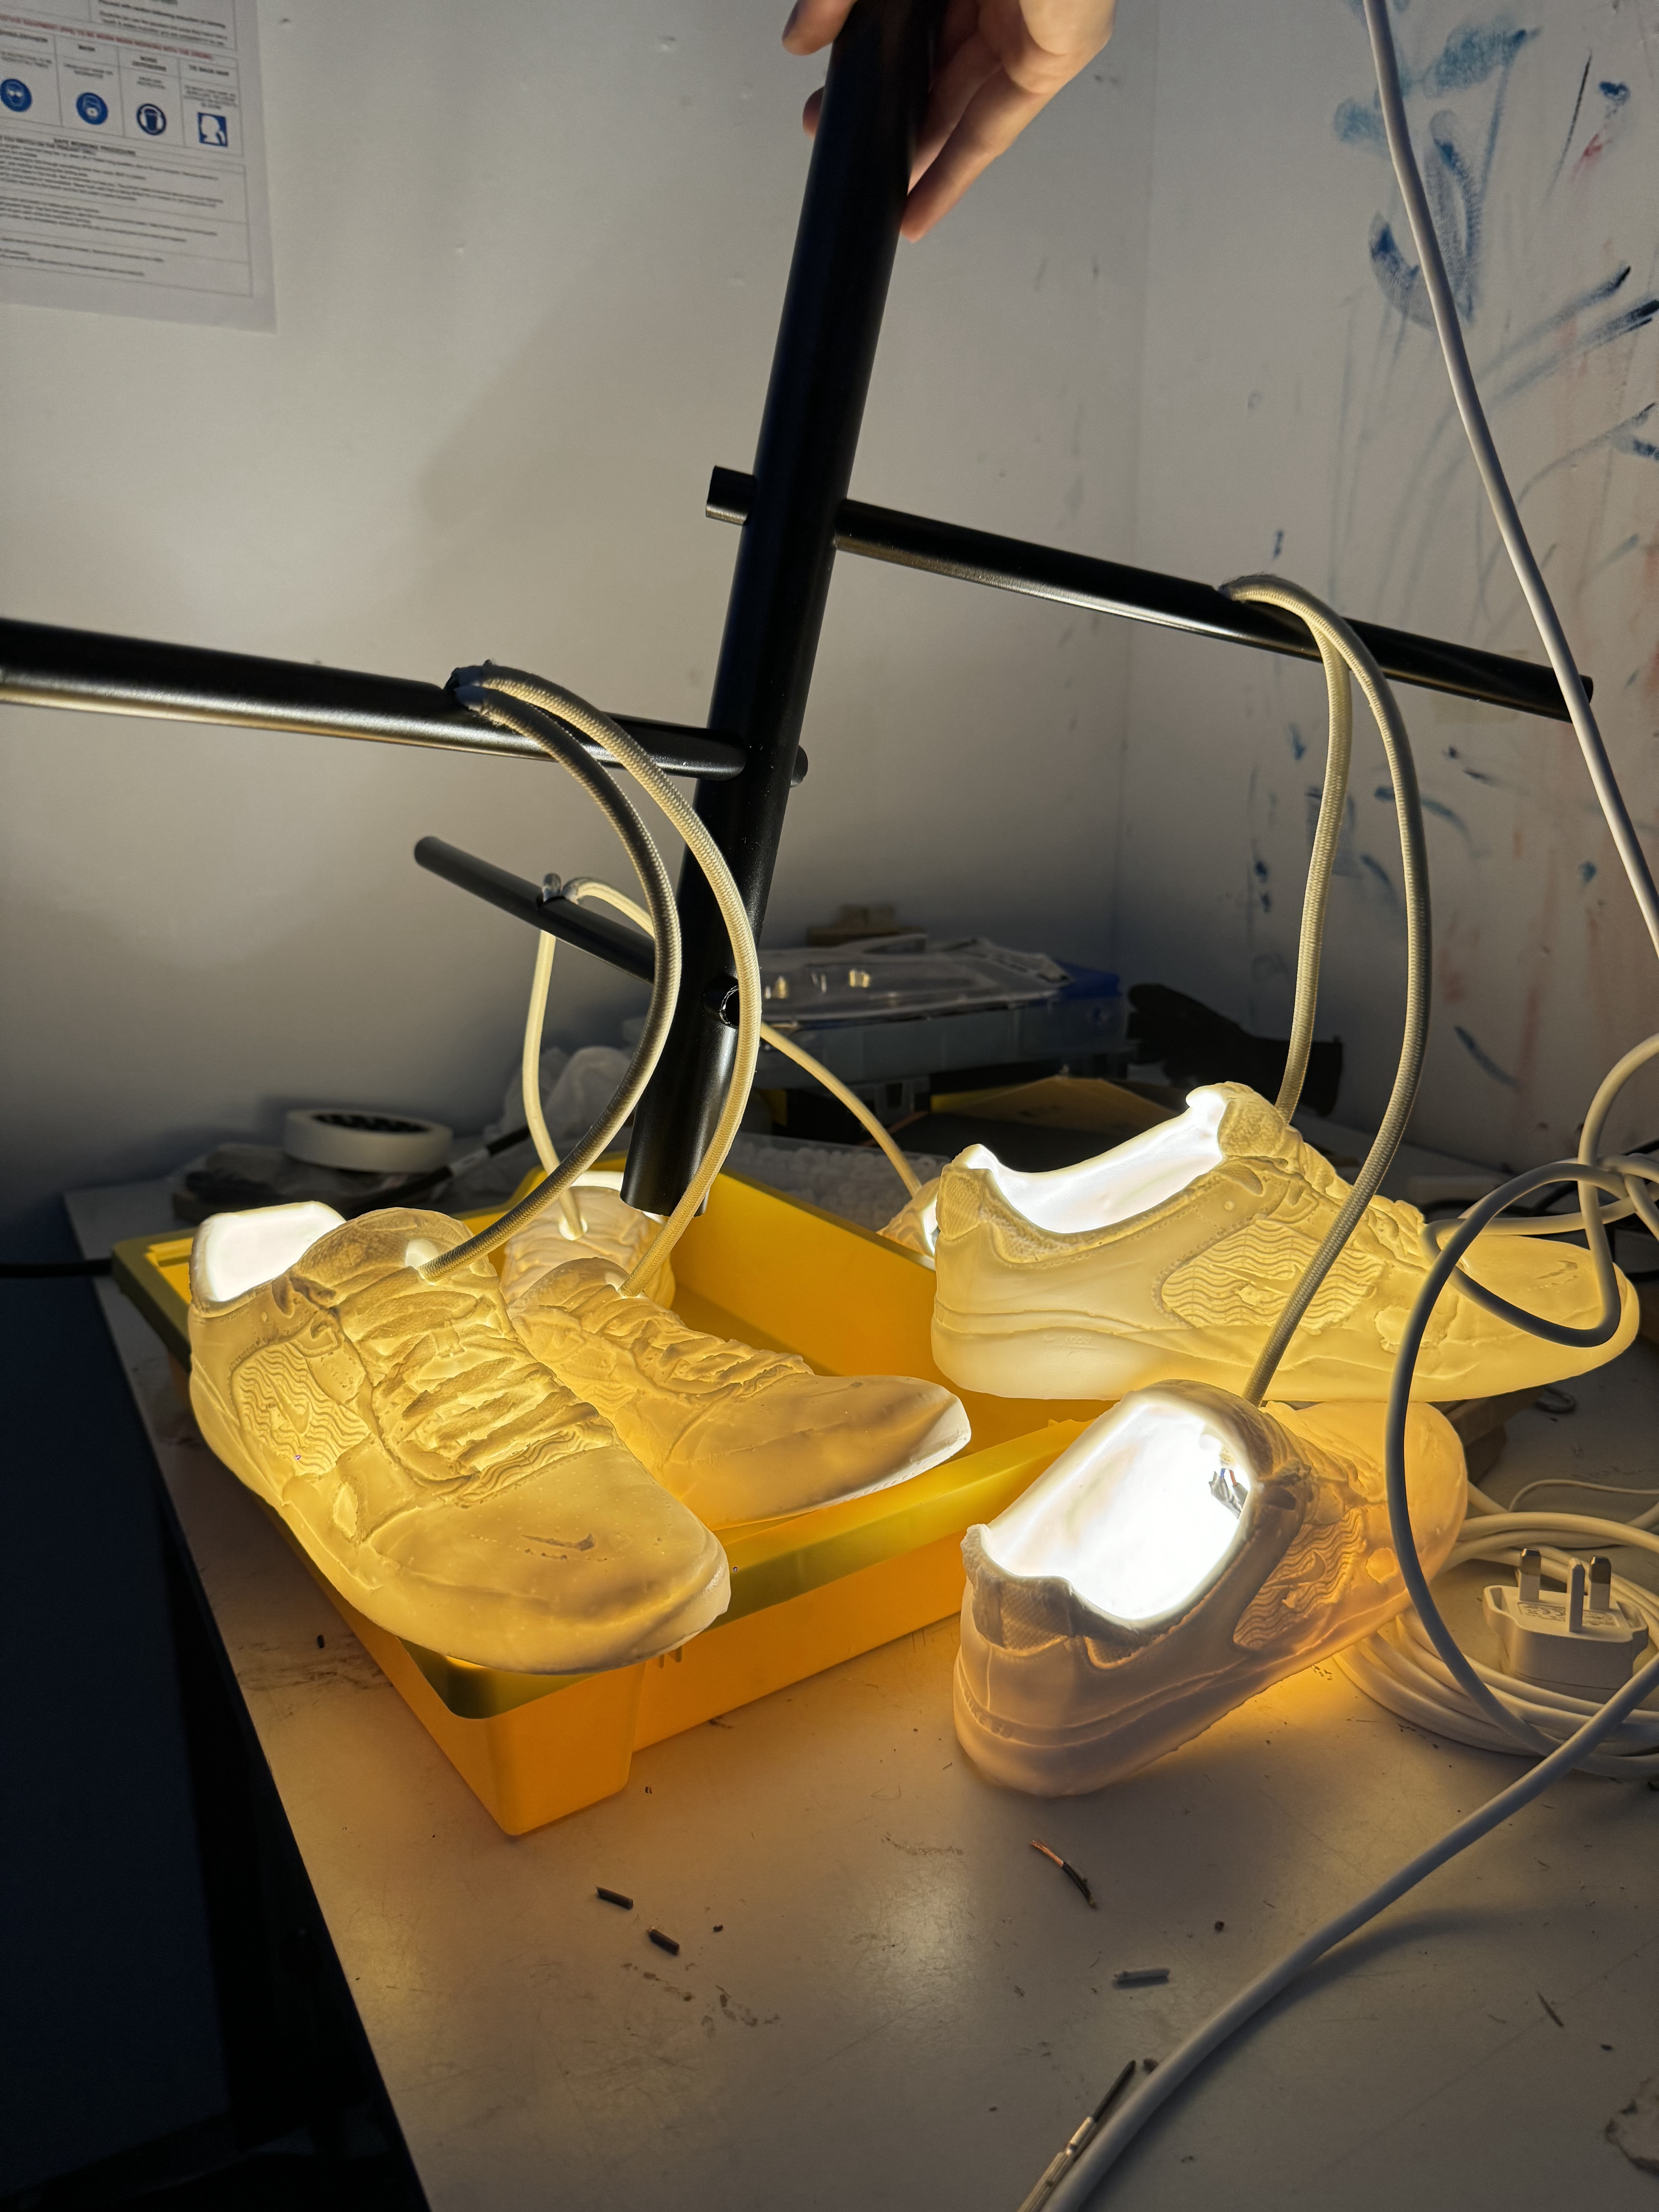
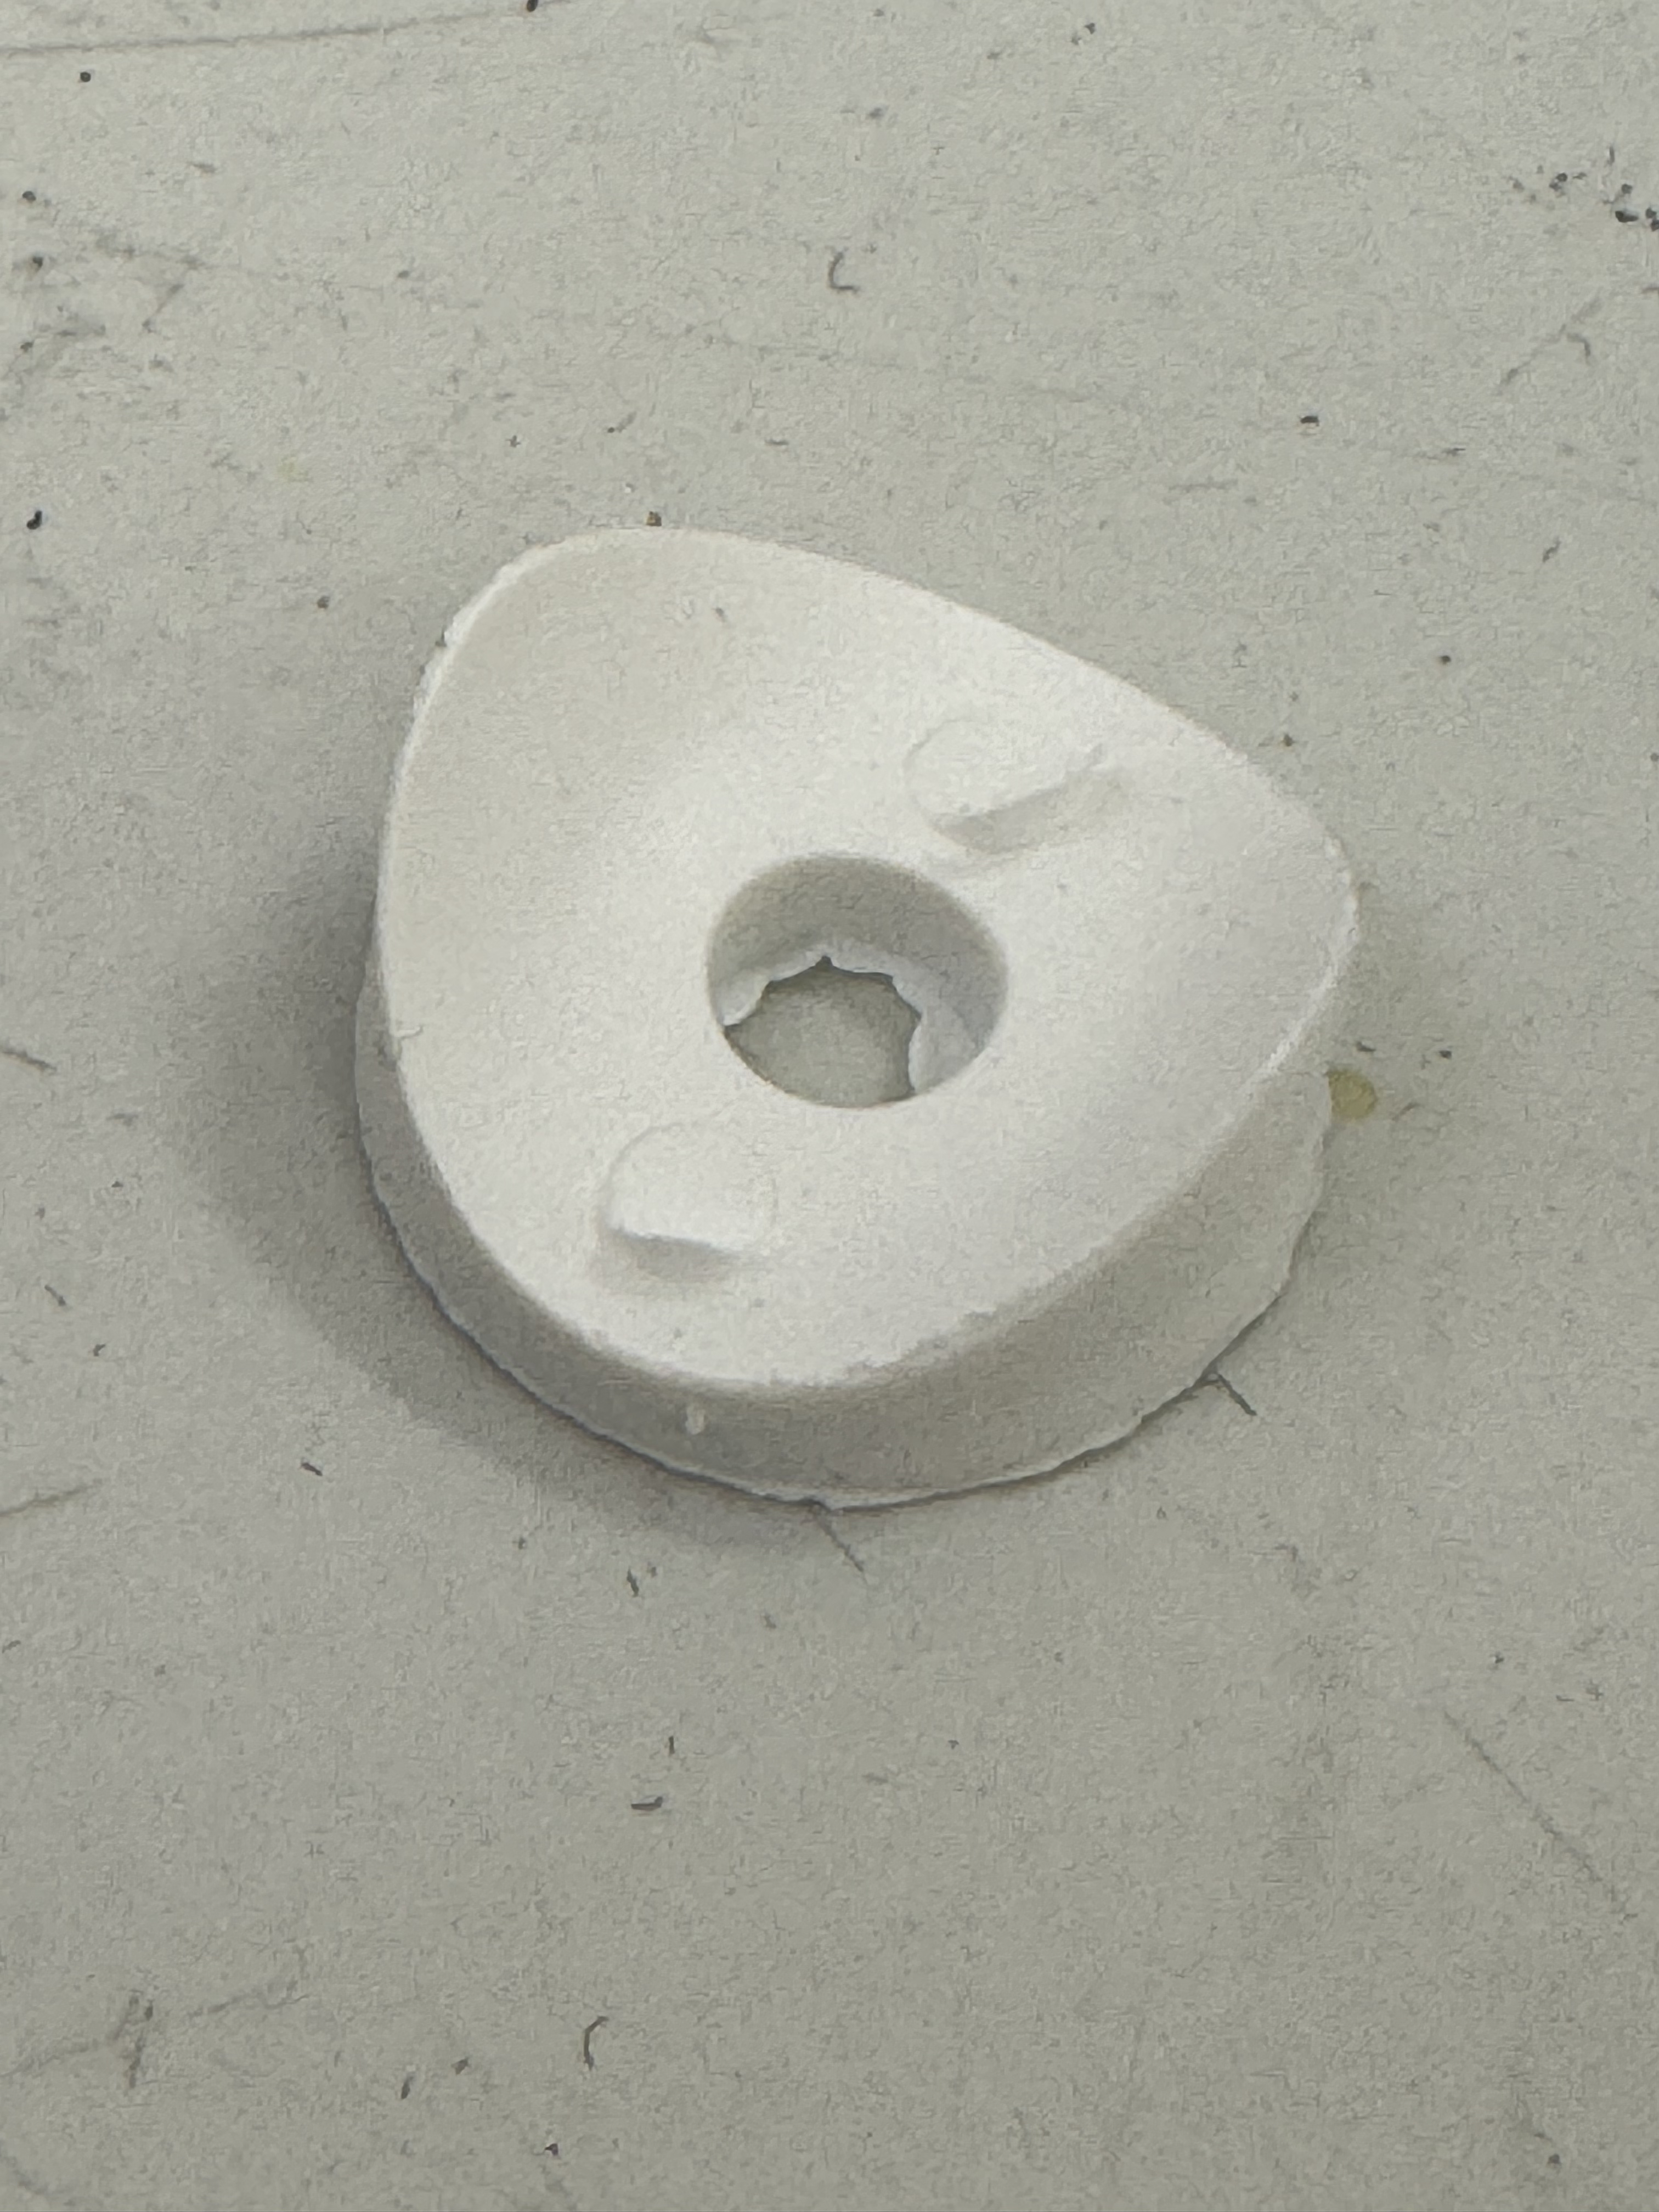
Before assembling the lamp, I tried three different ways to fix the wires and the lampshade. The first was to use a rubber ring, the second was an LED metal holder, and the third was plastic round washers. The rubber ring was not suitable because the hole thickness was larger than the gap of the rubber ring, and the thickness was uneven due to the surface texture. The LED metal holder was the most ideal, but because I bought the wrong size, the most ideal size is 8mm, but the delivery time of 8mm was too late, so I had to use the third method. And ceramics are hard and very difficult to grind, so processing on accessories is much faster than processing on ceramics. Before assembling the entire set of lamps, I also tested whether the accessories could bear the weight.
If I had more time, I would use an 8mm LED holder and solder the wires to make the connections shorter. This method is also closer to the feeling of having metal heads at the end of some shoelaces.
After assembly I discovered that the two wires were being pulled away from the tube by gravity. I should have made sure they were secured inside during assembly.
I also didn't do a good job with the top three wire connections. If I could reduce the thickness of them, it would make it easier for the hooks to get in and hook onto the bar.